Design Question/Problem
The last presidential election only brought in around 60% of the eligible voting population.
The chart bellow shows voter turn out in presidential elections since 1824. Voter turn out is markedly lower in the 20th century compared to the 19th century. Why?
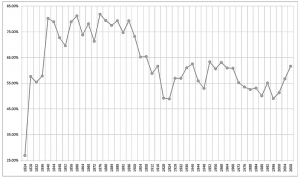
How can voter turnout be increased to %100? What ways can people be engaged in voting? What sort of new interactions can be created to help boost voter interest and intern increase voting interaction?
The concept
In the beginning I was split between two ideas. Both were ongoing projects. Of the two: a voting system or haptic vest, I chose to continue with the voting system.
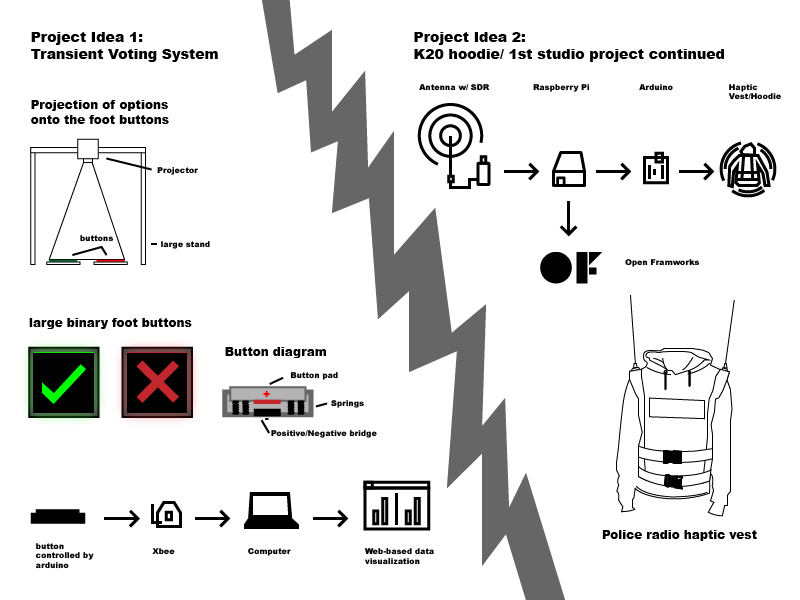
Originally I wanted to create some sort of deployable voting rig which polled people as they are in transit from one point to the next. I would need to build a button that expands the length of a sidewalk in order to capture the vote of every single person who needs to reach the opposite side of the pathway. There were a number of problems with this first idea.
- buttons on the floor might be a hazard to pedestrians
- How would I effectively project or display the things being voted on?
- People might not even care about whats being voted on and decide to walk past, thus counting a meaningless vote into the system.
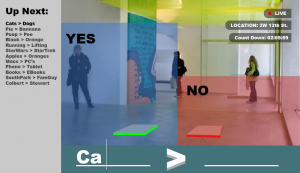
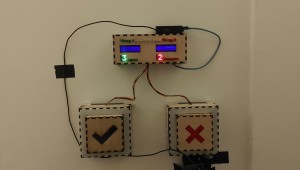
Instead, for the first iteration of this project I decided to scale down the size of the project to something more portable. I decided to make a wall-mountable voting system which is connected to the internet. Rather than having a curated poll of questions, I decided to make it more democratic by giving people the power to submit their own things to be voted upon. Hopefully, by letting people cast their own questions, they feel investment in their interaction and go back to the website or the device to see the results of their poll. It also serves as an alternative platform of ongoing anonymous public interaction.
This solved a number of the problems related to the previous idea. People who are interested in the mechanism might be compelled to go check out what is being polled, and if they feel like casting their vote, they could easily press a yes or no button. While this version might not capture 100% of the votes, I was able to structure the project in a new way. Instead of deploying this in an area of high mobility, I could place it in a transient space where people are waiting. People look for anything to keep themselves entertained and waiting for elevators is pretty boring. Why not give them something to do/play with? The wall mounted configuration required some thought about user experience. How should the system respond when it is acted upon?
Process/Development
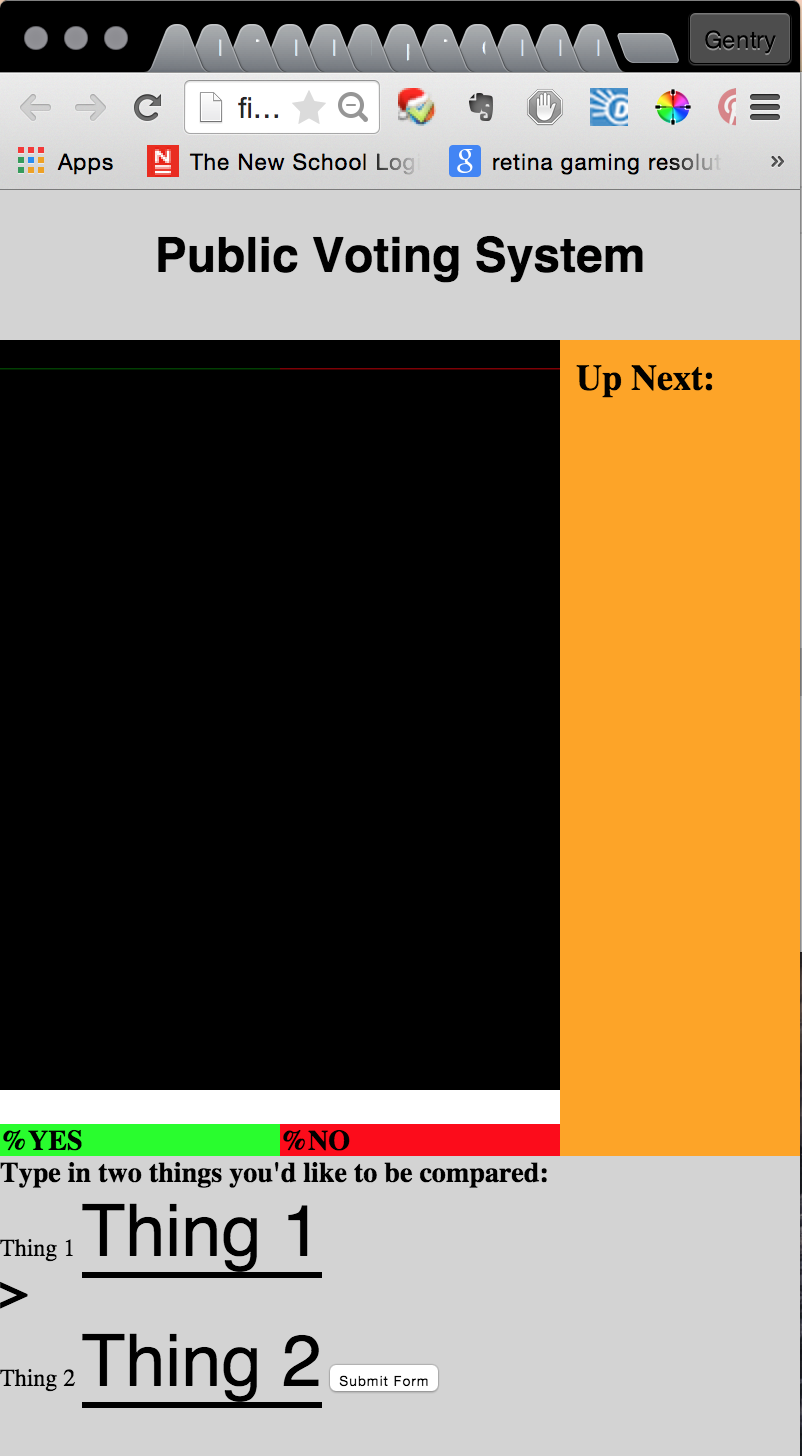
First iteration on website design.
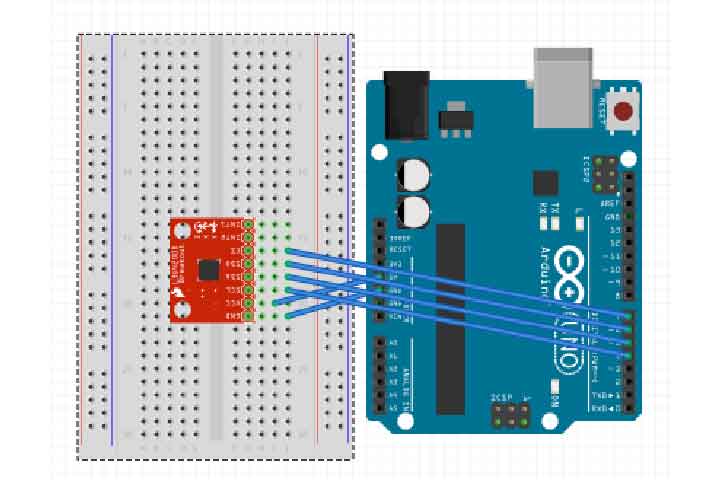
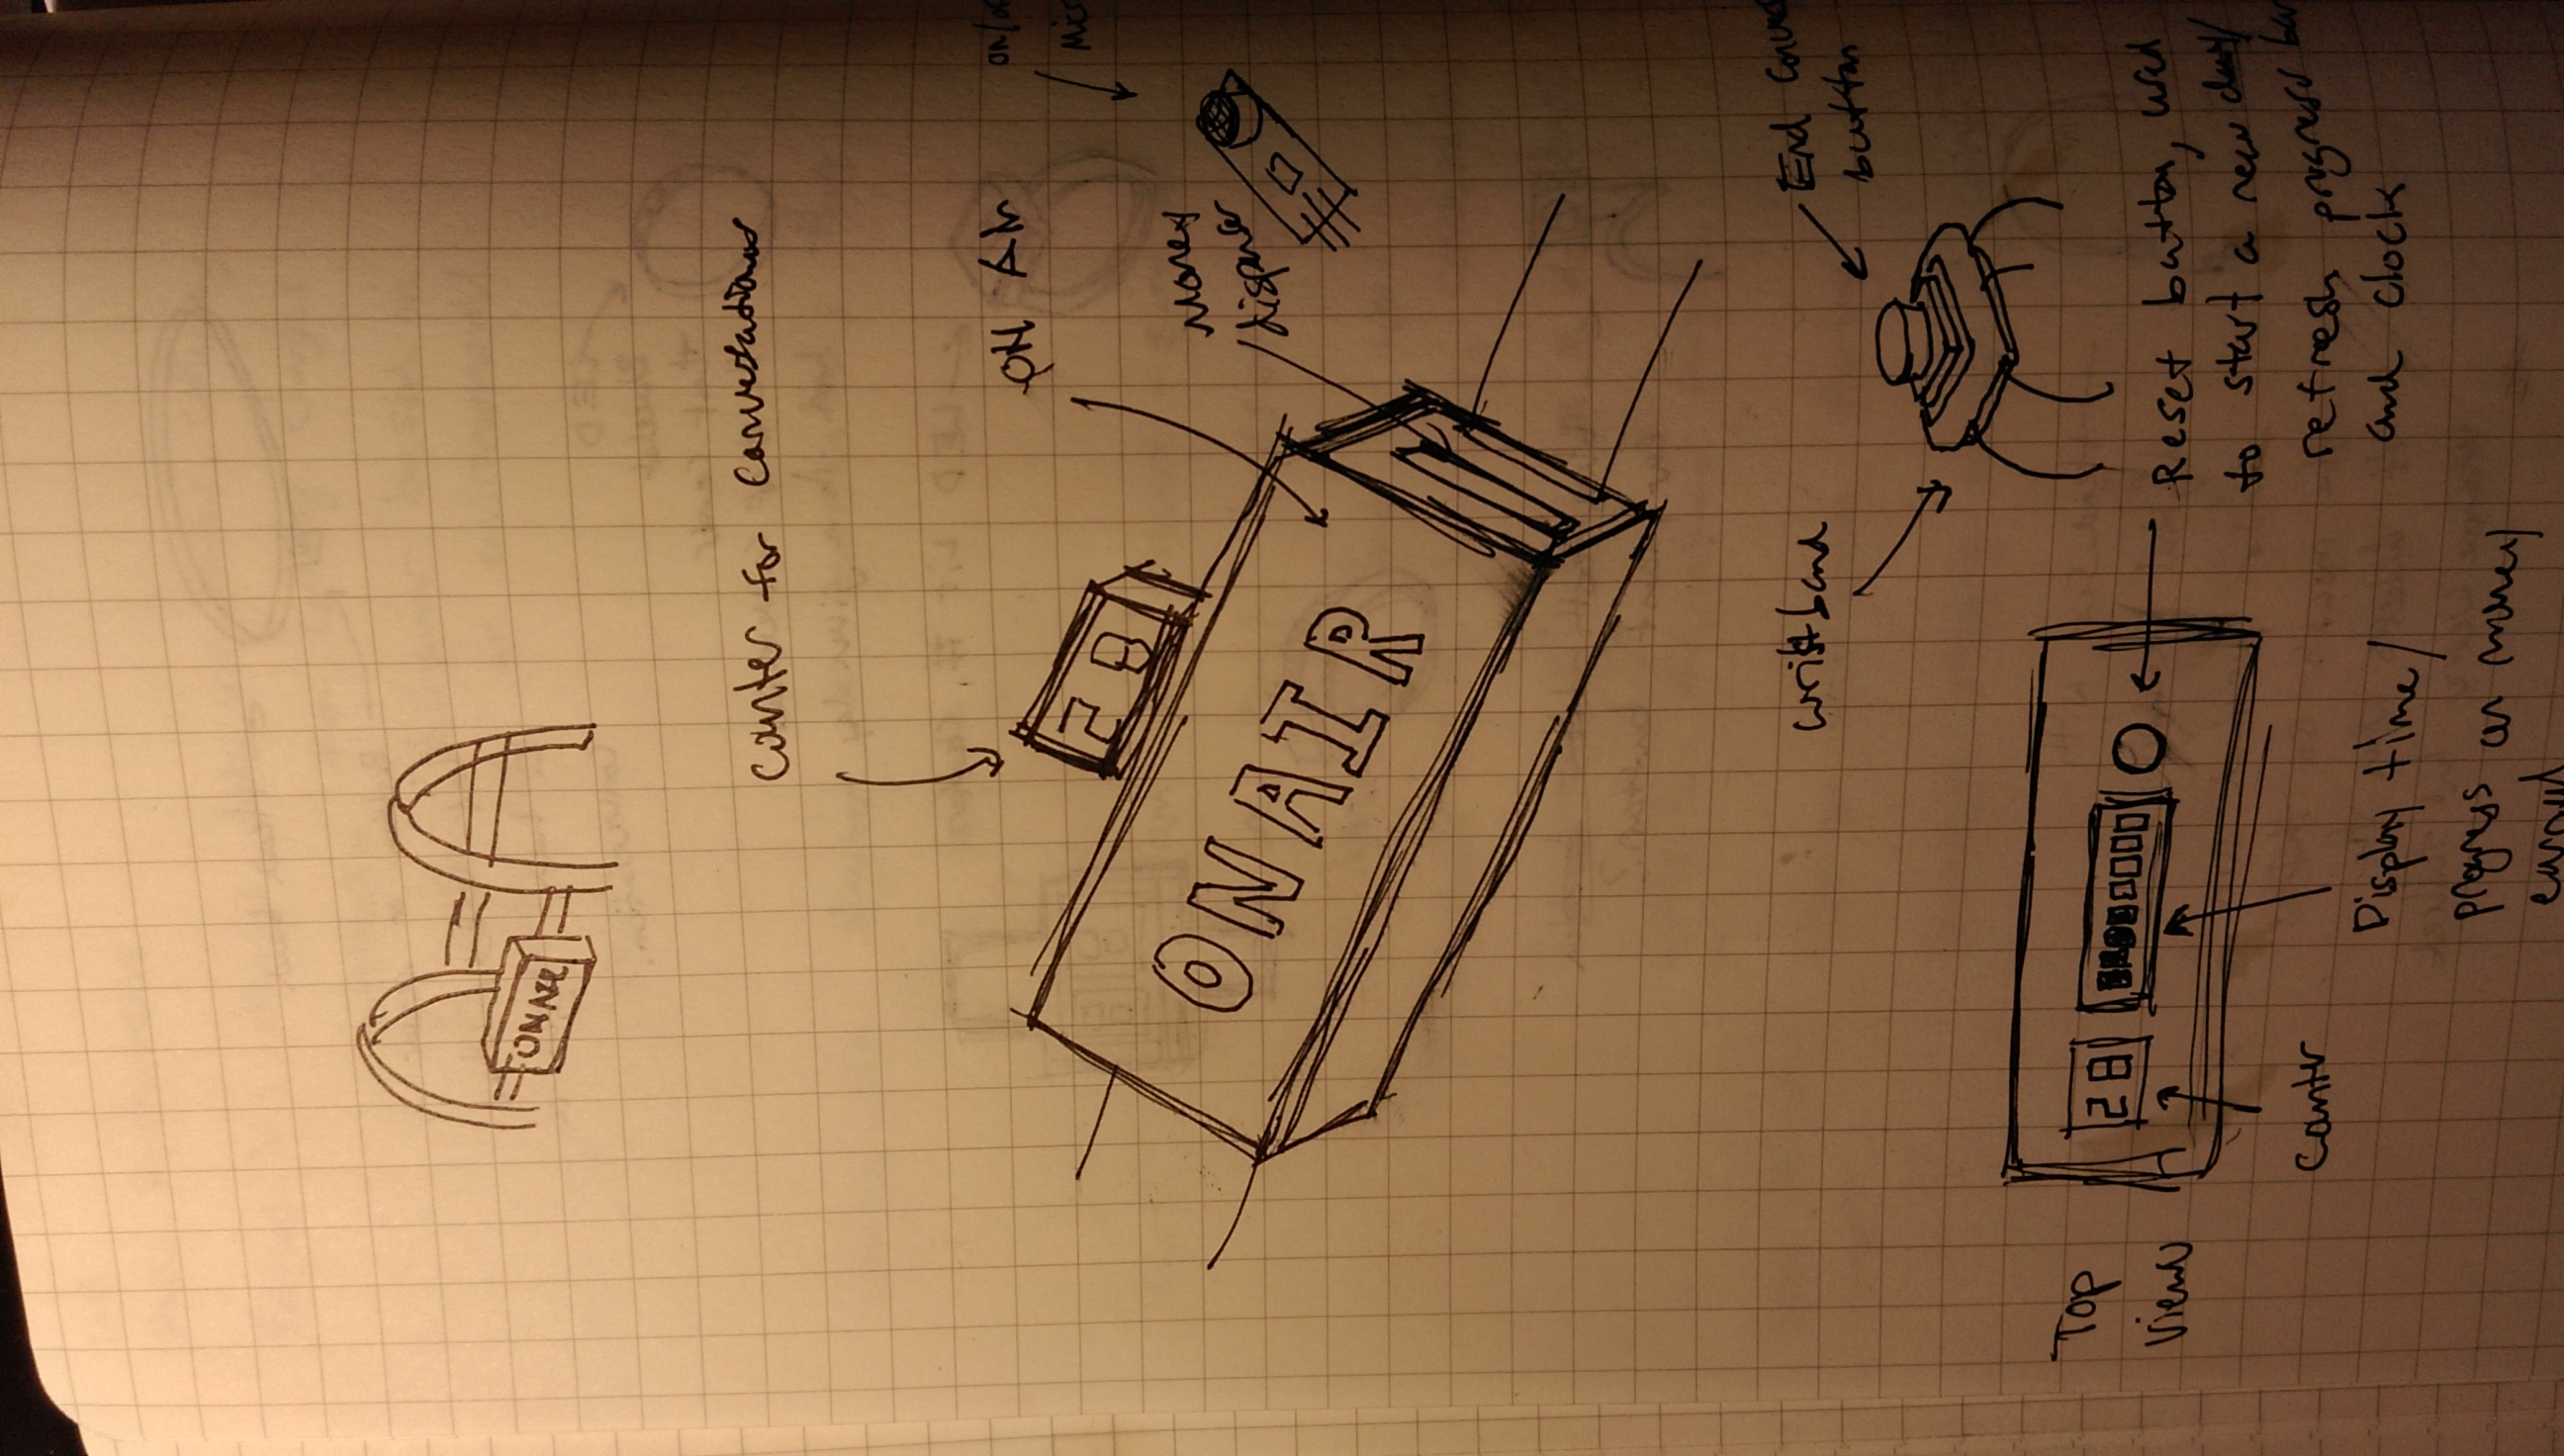
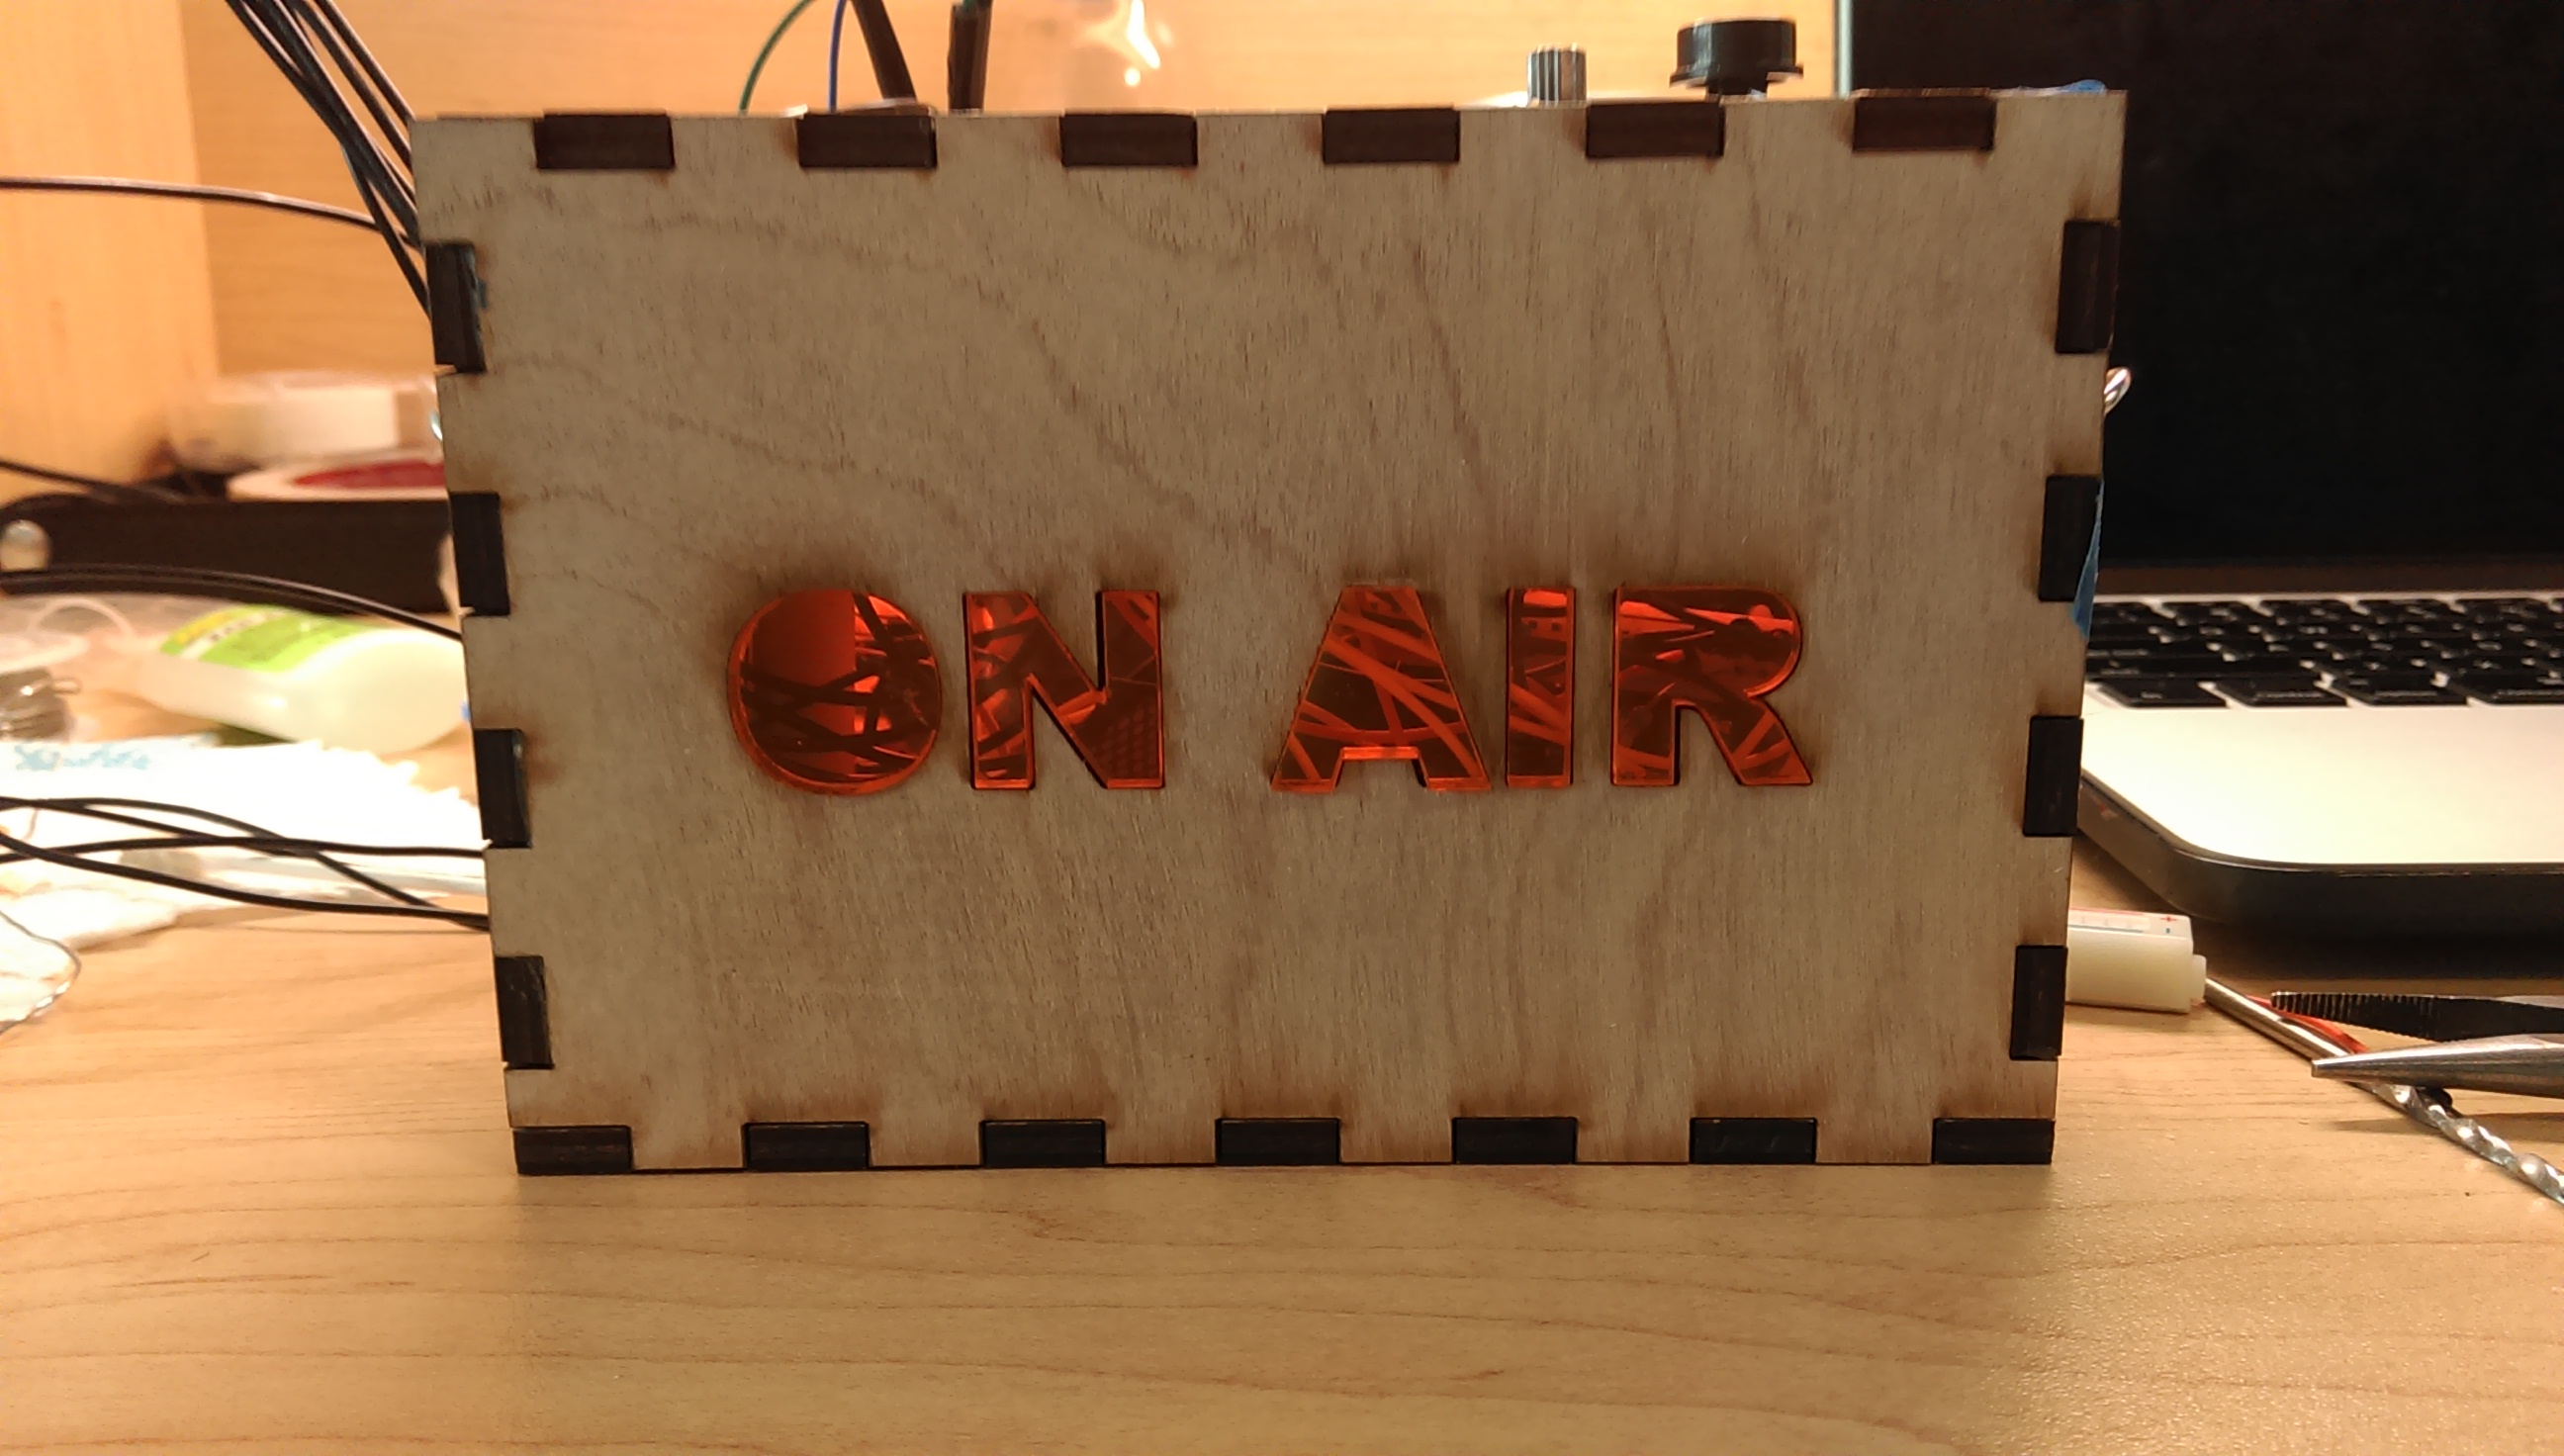
First iteration on the voting mechanism
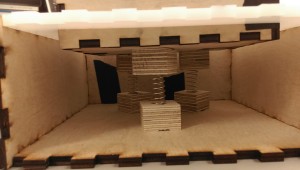
Boxes were designed using boxmaker. used 3/16″ wood, laser cut, sanded, wood glued together. tolerances had to be experimented with in order to fit lcd screen and 8×8 matrices into the front panel. Unfortunately I don’t have the original file where I made the tolerances, but I used calipers and cut several squares/rectangles that decreased in size by about .05″ everytime.
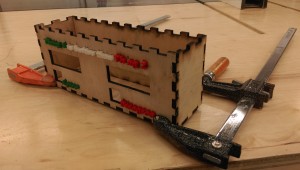
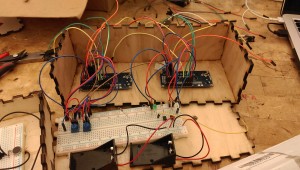
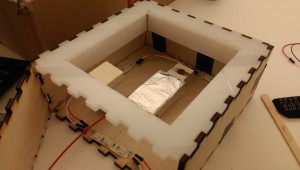
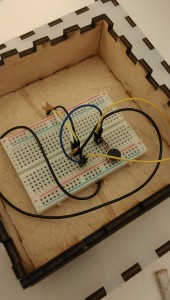
The interior with fitted lcd screens and matrices along with a breadboard, two 9V battery holders to power the LED lights inside of the buttons, and enough space for an Arduino UNO – later I switch to using an Arduino Mega because I ran out of pins.
Below is the first iteration on the button where I test the springs. these are 3/16 x 2″ springs bought from Home Depot. They require maybe 1 – 2 pounds of force to compress, which is perfect for a button.
Here I wrapped a wood block with tinfoil to construct a button. The bottom holds the positively charged block and the underside of the actual button which is pressed contains ground. I also lined the interior with 9 RGB led’s which were snipped from an LED roll and then soldered together with the R
I figured I could utilize the extra space inside the button area to add a haptic motor for added user feedback! Now the button is much more exciting to press. I would like to add sound feedback in later iterations.
I replaced the Arduino Uno with a Mega. I also drilled small holes in the underside of the scoreboard and on the top plate the two buttons to feed wires through to the scoreboard. In a later iteration, it would be nice to use XBee transmitters inside of each button to make it wireless. This would require more batteries, but it would also make the system easier to deploy. Stuffing in all those wires was quite stressful! Luckily the box was just big enough to fit it all in. A lot of tiding up of wires had to happen. I bundled and taped groups of wires together and shortened many of the connections to make this possible.
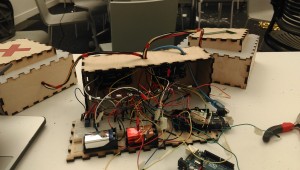
Finally deployed on a wall adjacent to an elevator! Raspberry Pi 2 on top is hosting the voting server. Lots of external wires… Maybe in a future iteration I will power the raspberry pi with a rechargeable battery or solar panels if I ever choose to deploy this outside.
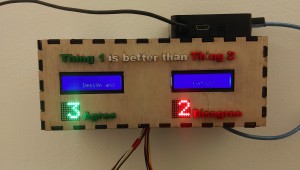
A close up of the score board. The LCD screens use standard Hitachi pinouts. The screens are less than ideal because of low contrast and readability, but they have large community support, which makes them extremely quick and easy to set up.
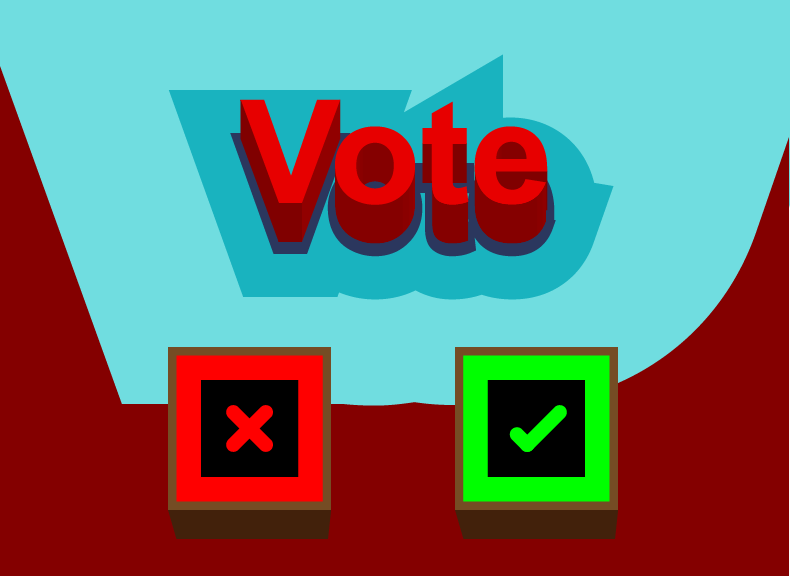
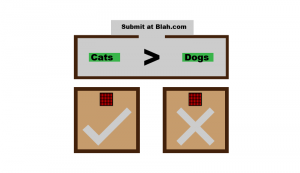
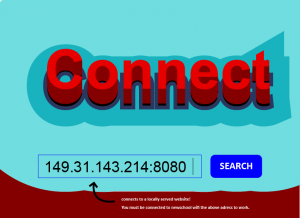
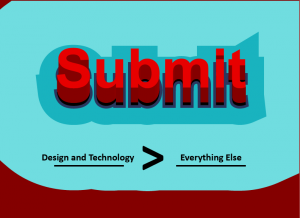
The posters bellow were made as a simple set of instructions to catch peoples attention and guide their interaction with the voting system with 3 basic steps: Connect, Submit, Vote.

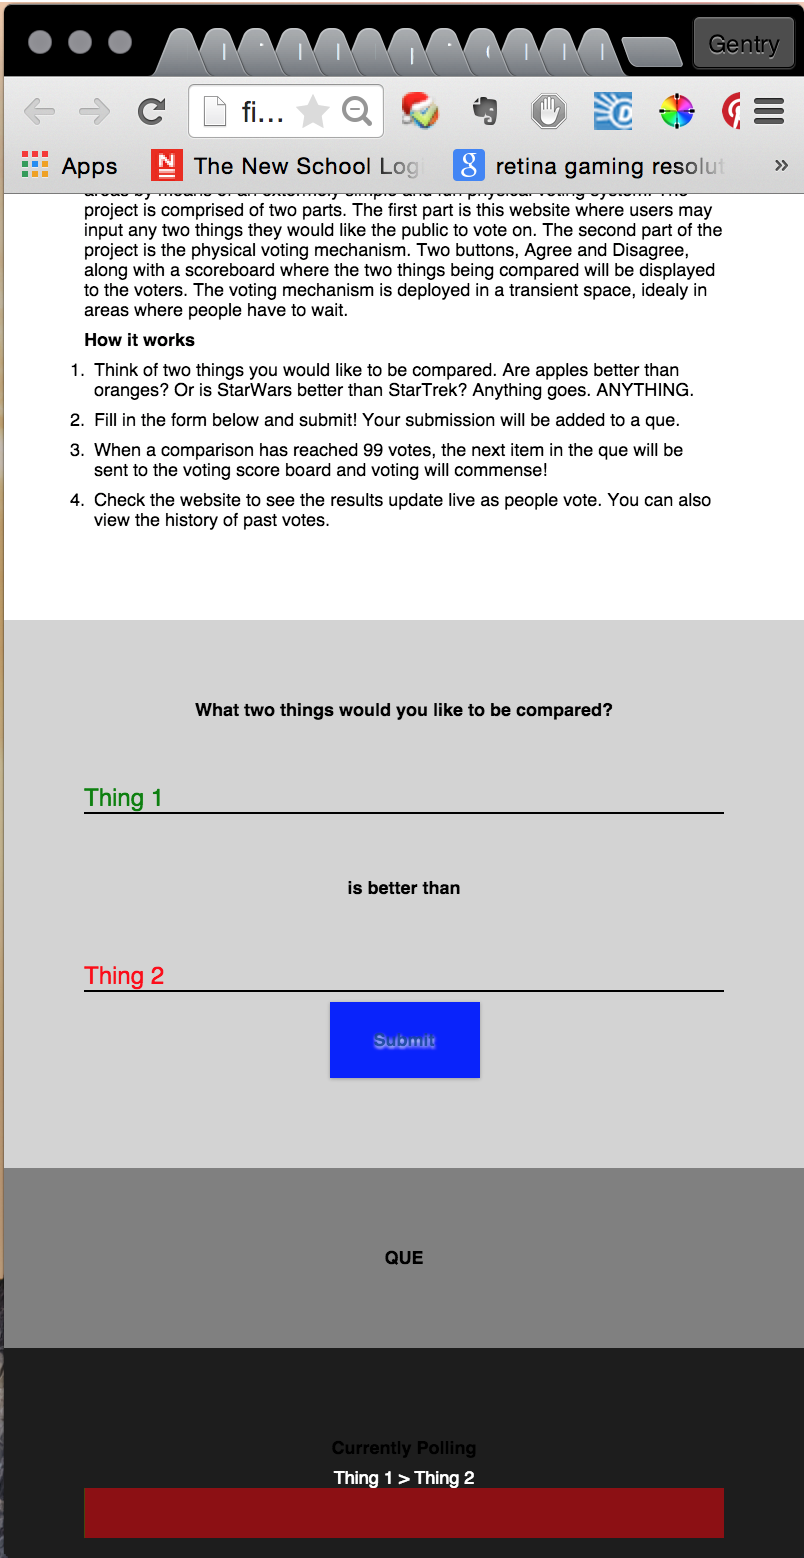
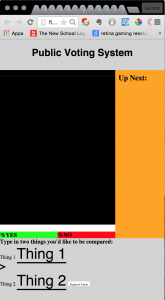
The website went through a number of iterations throughout it’s development. Iteration one featured vertically aligned bars, one bar for agree and another bar for disagree. It also featured an input form as well as a submit button. This was a very early stage version as it was used entirely for testing sending form data.
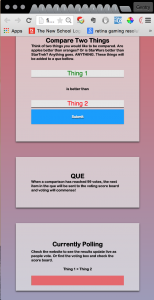
In my second iteration, I compressed the results into a single horizontally aligned bar. This minor change actually made quite a big difference. This bar is easier to see on a mobile device because it is more compact.

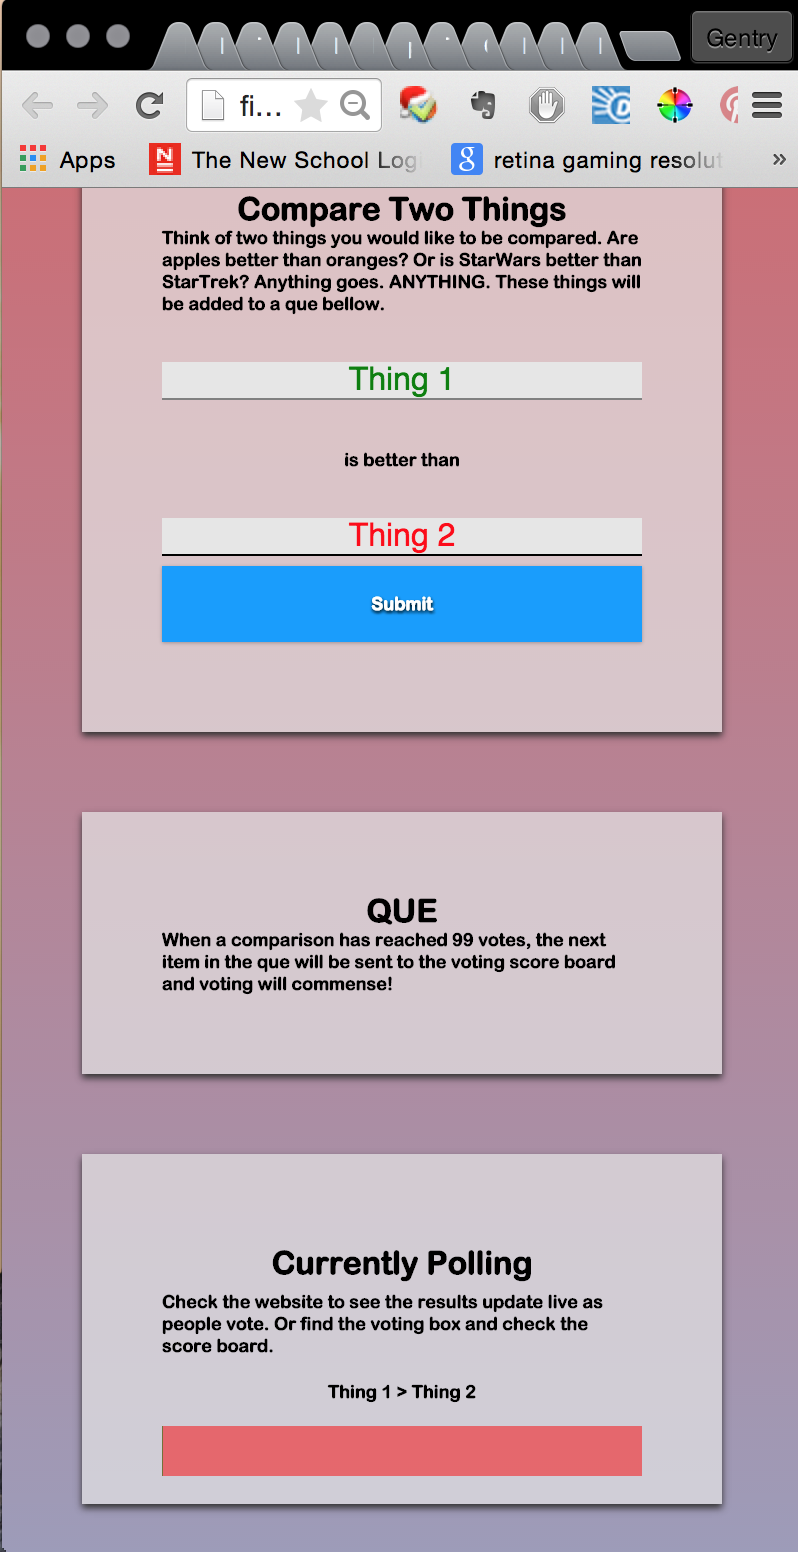
In the most recent iteration, the instructions were moved from the top of the page and evenly distributed through out the sections. Each section now contains its own instructions in order to improve user interaction flow. Rather than scrolling back to the top to read instructions and then back to the respective section, the instructions for each portion of the page is made clear and obvious to the reader. Eventually I would like to eliminate all user scrolling from the website, automating transitions to other sections in a seamless manner. The website needs to efficient and immediately understood by the viewer because the average viewer will only have a short period of time to conduct their interaction before they must move on with their day.
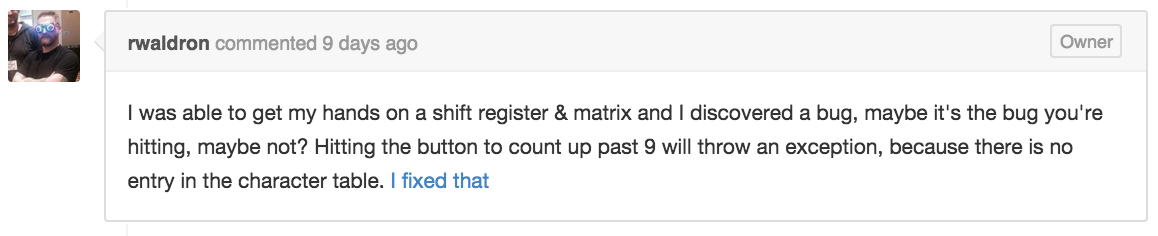
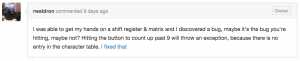
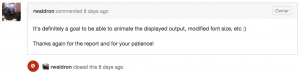
I am using a javascript module called johnny-five which allows me to communicate with the Arduino via the firmata communication protocall. However, Johnny-Five only had support for single digit numbers for Adafruit’s HT16K33 8×8 matrices. I filled a bug on Johnny-Five’s git hub repository issues forum and got a reply from the founder of Johnny-Five, Rwaldron instantly. The community surrounding Johnny-Five is amazing! The full issue thread can be found here: issue #770.


Inspiration
This project is loosely inspired by Steve Lambert’s “Public Forum” in which Steve built a large message board that he carts around town to hold discussions about social issues with the public. I have removed the human curated element and instead made my voting system completely open. Anything can be voted upon. In this sense, many of the things that are voted up might be trivial because it truely depends on the actions of individuals. Everyone has different interests and intentions and may not have politically charged agendas, however there is always a possibility that someone who is politically charged could use this platform to assess public opinion.
This project is also an exploration into the Internet of Things. I wanted to make this a device which was connected to the internet, yet also grounded in the material world. The combination of virtual (a website for submiting comparisons, viewing results, and comparing history) and the physical (LED’s to display words and buttons to cast votes) means that
Technical Implementations
I used an awesome web-based box generator called BoxMaker to create my laser cutter templates for the scoreboard and buttons.
The wood was purchased from the only 24-hour hardware store in Manhattan, Nuthouse.
I used translucent plexiglass bought from Canal Plastics.
I am using a few different libraries/modules to get all of the devices to communicate. I am using Javascript, JQuery, Johnny-Five, Socket.io, Express, Standard Firmata and node.js.
Express is a webserver module used for setting up a quick webserver.
Node.js is what I use to actually run the webserver and is largely responsible for handling communication between my computer and the Arduino.
Johnny-Five is an awesome library that lets you interact with Arduinos and a growing list of sensors and components with javascript.
Socket.io is another amazing library which lets you use web-sockets to easily communicate data between server side and client side.
Finally, Arduino Standard Firmata (needs to be the latest version for Johnny-Five to function) is a standard serial communication protocol that allows Johnny-Five to send and receive data from a connected Arduino or similar micro controller.
The code:
First off, before proceeding at all, the NPM package manager should be installed.
second off is Node.js which can be installed on the global level using NPM.
There are a number of dependencies listed above which need to be installed.
To get Johnny-Five, Socket.io, Express, and Mime to work, a JSON file must be created to install each required dependancy.
{

"name": "publicVote",

"version": "0.0.1",

"description": "final project",

"dependencies": {

 "johnny-five": "^0.8.70",

 "socket.io": "^1.3.5",

 "express": "latest",

 "mime": "latest"

 }

}
Once the JSON file has been saved, you must open a terminal folder in the directory and run: npm install
This will install the necessary dependancies which were listed inside of the JSON packages file into the local directory of the project.
My most recent iteration is up on github.
My project is composed of 4 different files excluding package.JSON. These files are:
index.html
styles.css
main.js
server.js
A 5th component is also necessary for the system to function. Arduino’s Standard Firmata Library which is flashed to the Arduino board.
The Firmata library implements the Firmata protocol for communicating with software on the host computer. This allows you to write custom firmware without having to create your own protocol and objects for the programming environment that you are using.
The express server was instantiated by Aaron hill when I made the very first iteration of this project last semester. The result of this version can be viewed in my other github repository.
I stripped the server from that project and adapted it to this project. The one line of code I changed inside of the express sever was the filepath name to the index.html page being served.
However, every other line of code was written by me. Of course, the use of the Socket.io library drastically simplified communication between server and client side.
Socket has two great functions which can be used to send and receive data in any direction.
On server side:
var data = 'Hello World';

socket.emit('votes2', data);
On client side:
socket.on('votes2', function(data){

 console.log(data);

});
using these I was able to send and receive voting data and form inputs.
In order to communicate with the Arduino I used a few different functions provided by the Johnny-Five library.
Patrick Catanzariti provided a great introductory video on using Johnny-Five with Node.js and Javascript.
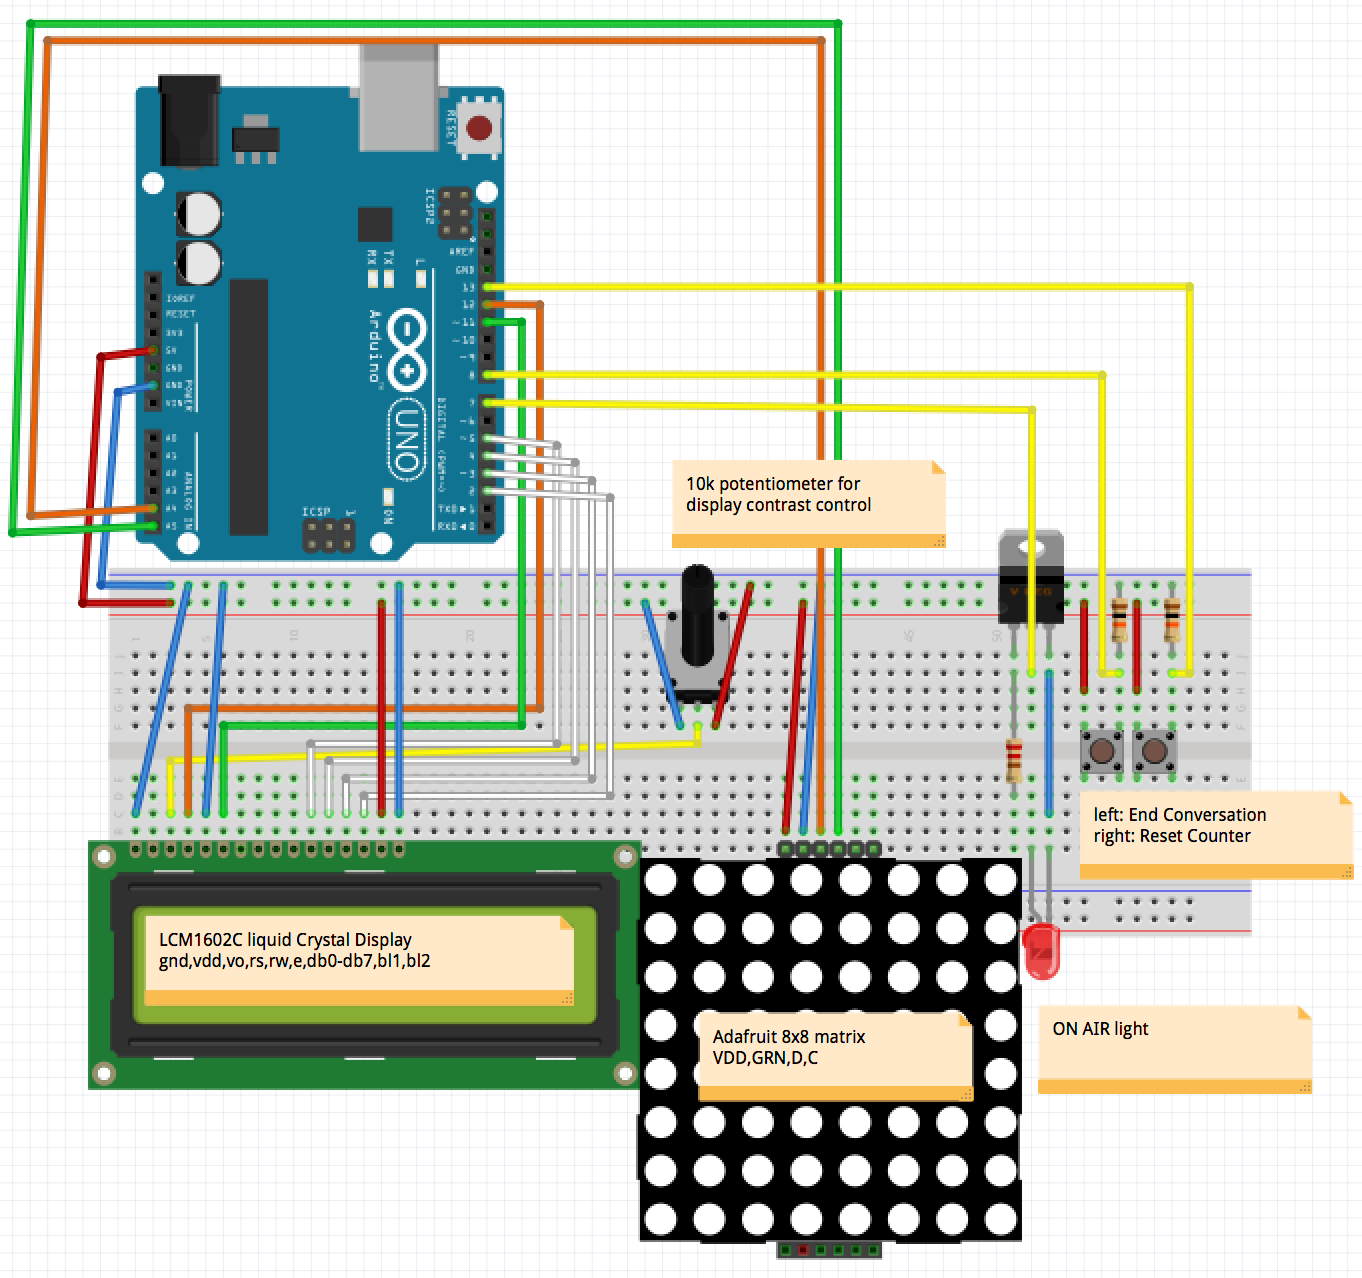
I used Johnny-Five to control Adafruit’s HT16K33 8×8 matrices, LCD’s and the two buttons.
a sample button.
var five = require("johnny-five"), bumper1, votes1, votesTotal;

board.on("ready", function() {

 bumper1 = new five.button(7);
bumper1.on("hit", function() {
votes1 +=1;
votesTotal = votes1 + votes2;
console.log("button 1 pressed!");
}
}
My website contains a section where the history of past votes are stored and can be viewed. To accomplish this I had to make a function which appends the most recent voting data to a javascript object.
my function looks like this and uses the JSON data structure:
function addToHistory() {

    barWidthStorage.push(barWidth1);

    oldVote = {

      categoryA: thing1,

      categoryB: thing2,

      barWidth: barWidthStorage

    };

    console.log('oldVote barWidth = : ' + oldVote.barWidth);

  };
Additionally, in order to display the history on the front end I created another function called addToHistory which uses the data pulled from the JSON object to manipulate each new instantiation of a bar graph with the associated vote:
function addToHistory() {

	var historyContainer = document.querySelector('#history');
var xmlns = 'http://www.w3.org/2000/svg';
var boxWidth = barWidth[i];
var title = categoryA[i-1] + ' > ' + categoryB[i-1];
var boxHeight = 200;
var createNewTitle = document.createElement('p');
createNewTitle.className = "title";
createNewTitle.innerHTML = title;
//SVG
var svgElement = document.createElementNS(xmlns, 'svg');
svgElement.setAttributeNS(null, 'viewBox', '0 0 ' + '100% ' + '100%');
svgElement.setAttributeNS(null, 'width', '100%');
svgElement.setAttributeNS(null, 'height', '200');
// svgElement.setAttributeNS(null, 'xml:space', 'preserve');
svgElement.setAttribute('id', 'svgInner');
historyContainer.appendChild(createNewTitle);
historyContainer.appendChild(svgElement);
//SVG red bar
var redBar = document.createElementNS(xmlns, 'rect');
redBar.setAttributeNS(null, 'x', '0');
redBar.setAttributeNS(null, 'y', '0');
redBar.setAttributeNS(null, 'width', '100%');
redBar.setAttributeNS(null, 'height', '100');
redBar.setAttributeNS(null, 'fill', 'red');
redBar.setAttributeNS(null, 'fill-opacity', '0.5');
redBar.setAttribute('id', 'voteDisplay2');
svgElement.appendChild(redBar);
var greenBar = document.createElementNS(xmlns, 'rect');
greenBar.setAttributeNS(null, 'x', '0');
greenBar.setAttributeNS(null, 'y', '0');
greenBar.setAttributeNS(null, 'width', barWidth[i-1]);
greenBar.setAttributeNS(null, 'height', '100');
greenBar.setAttributeNS(null, 'fill', '#00ff00');
greenBar.setAttribute('id', 'voteDisplay1');
svgElement.appendChild(greenBar);
title = '';
}
I had to write another function for the progress bars which display the current status of the vote. The bars are horizontally aligned and overlapping, thus they compete for space. If 30% of people vote yes, then 30% of the total width of the bar should be occupied by green and the remaining 70% occupied by red space. Because the bars are constrained to the width defined by the containing div I needed to capture that width whenever the screen is loaded and whenever it is resized so that I could use it to calculate the width of the bar relative to the full length of the progess bar. I needed to know a few things.
I needed:
total number of votes cast
number of “yes” votes
width of the containing div
my function looks like this:
function barWidth() {

  percent1 = votes1/voteTotal;

  barWidth1 = (width*percent1) | 0;

}
Because the bar width cannot be a floating point, it is converted to an integer with | 0.
Below is my function which captures the width of the bar graph’s containing div
window.onload = function() {

	width = $('.main').width();

	width = width | 0;

	console.log(width);

	socket.emit('width', width);

}
Result
Video Documentation Coming Soon . . .
Reflection
- I would like to add sound as an additional feedback experience and as another way to capture peoples attention.
- Maybe dispense jelly beans or another item in exchange for people’s data/interaction with the buttons and as a thank your for their participation?
- The system is not 100% functional. One major bug is that all data is lost upon refreshing the page. The data is not stored into a database and thus you will only recieve the updates being made live while you are accessing the page. I could probably store voting information inside of a JSON object which is stored on the host computer.
- The case could be made with alternative materials to make it more resistant to abuse. Perhaps metal?
- The machine could be contained within two buttons, removing the scoreboard part entirely in order to make the interaction as clear as possible.
- It doesn’t capture 100% of peoples votes, but it does spark interest and does provide an interactive experience that interrupts peoples passage through transient space.
- The mechanism is primarily used for trivial comparisons because people can easily abuse their voting power.
- A biproduct of anonymous voting is that people can vote on a question as many times as they like. This leads to skewed data, but if the point of the system is purely conversational, this may not be a problem. However if I wanted to eliminate this bi product I could step through the que list every time a vote is cast, therefore eliminating continuos and meaningless button smashing. Each new press presents the user with a new comparison for which they must make a new decision. This would keep interaction fresh and would hopefully engage voters for longer because they would face more content. This also distributes data evenly thoughout the que list, giving every user who submits a comparison equal amounts of feedback.
Moving Forward
Re-contextualize the project. What might the application for this project be beyond the Parsons ecosystem? Could the inherent locality of this voting mechanism be used to poll local populations about local problems or issues? The only way to cast your vote is by physically pressing one of the buttons. There is no voting online and you vote in a public environment, but anonymously. The current form of this machine is purely functional and meant to be for anyone to use. Perhaps if this were deployed to specific locations it could be designed in a way that reflects the environment it occupies or the issue which are being polled. The locality of the machine might also make it ideal for voting upon specific locations or thing. For instance, if there is a vote about bus fare, why not place this machine right where the people who care about the vote will see it front and center: at a bus stop? there are quite a few routes which this project might take. Right now, it is a basic framework for installing a public voting system.