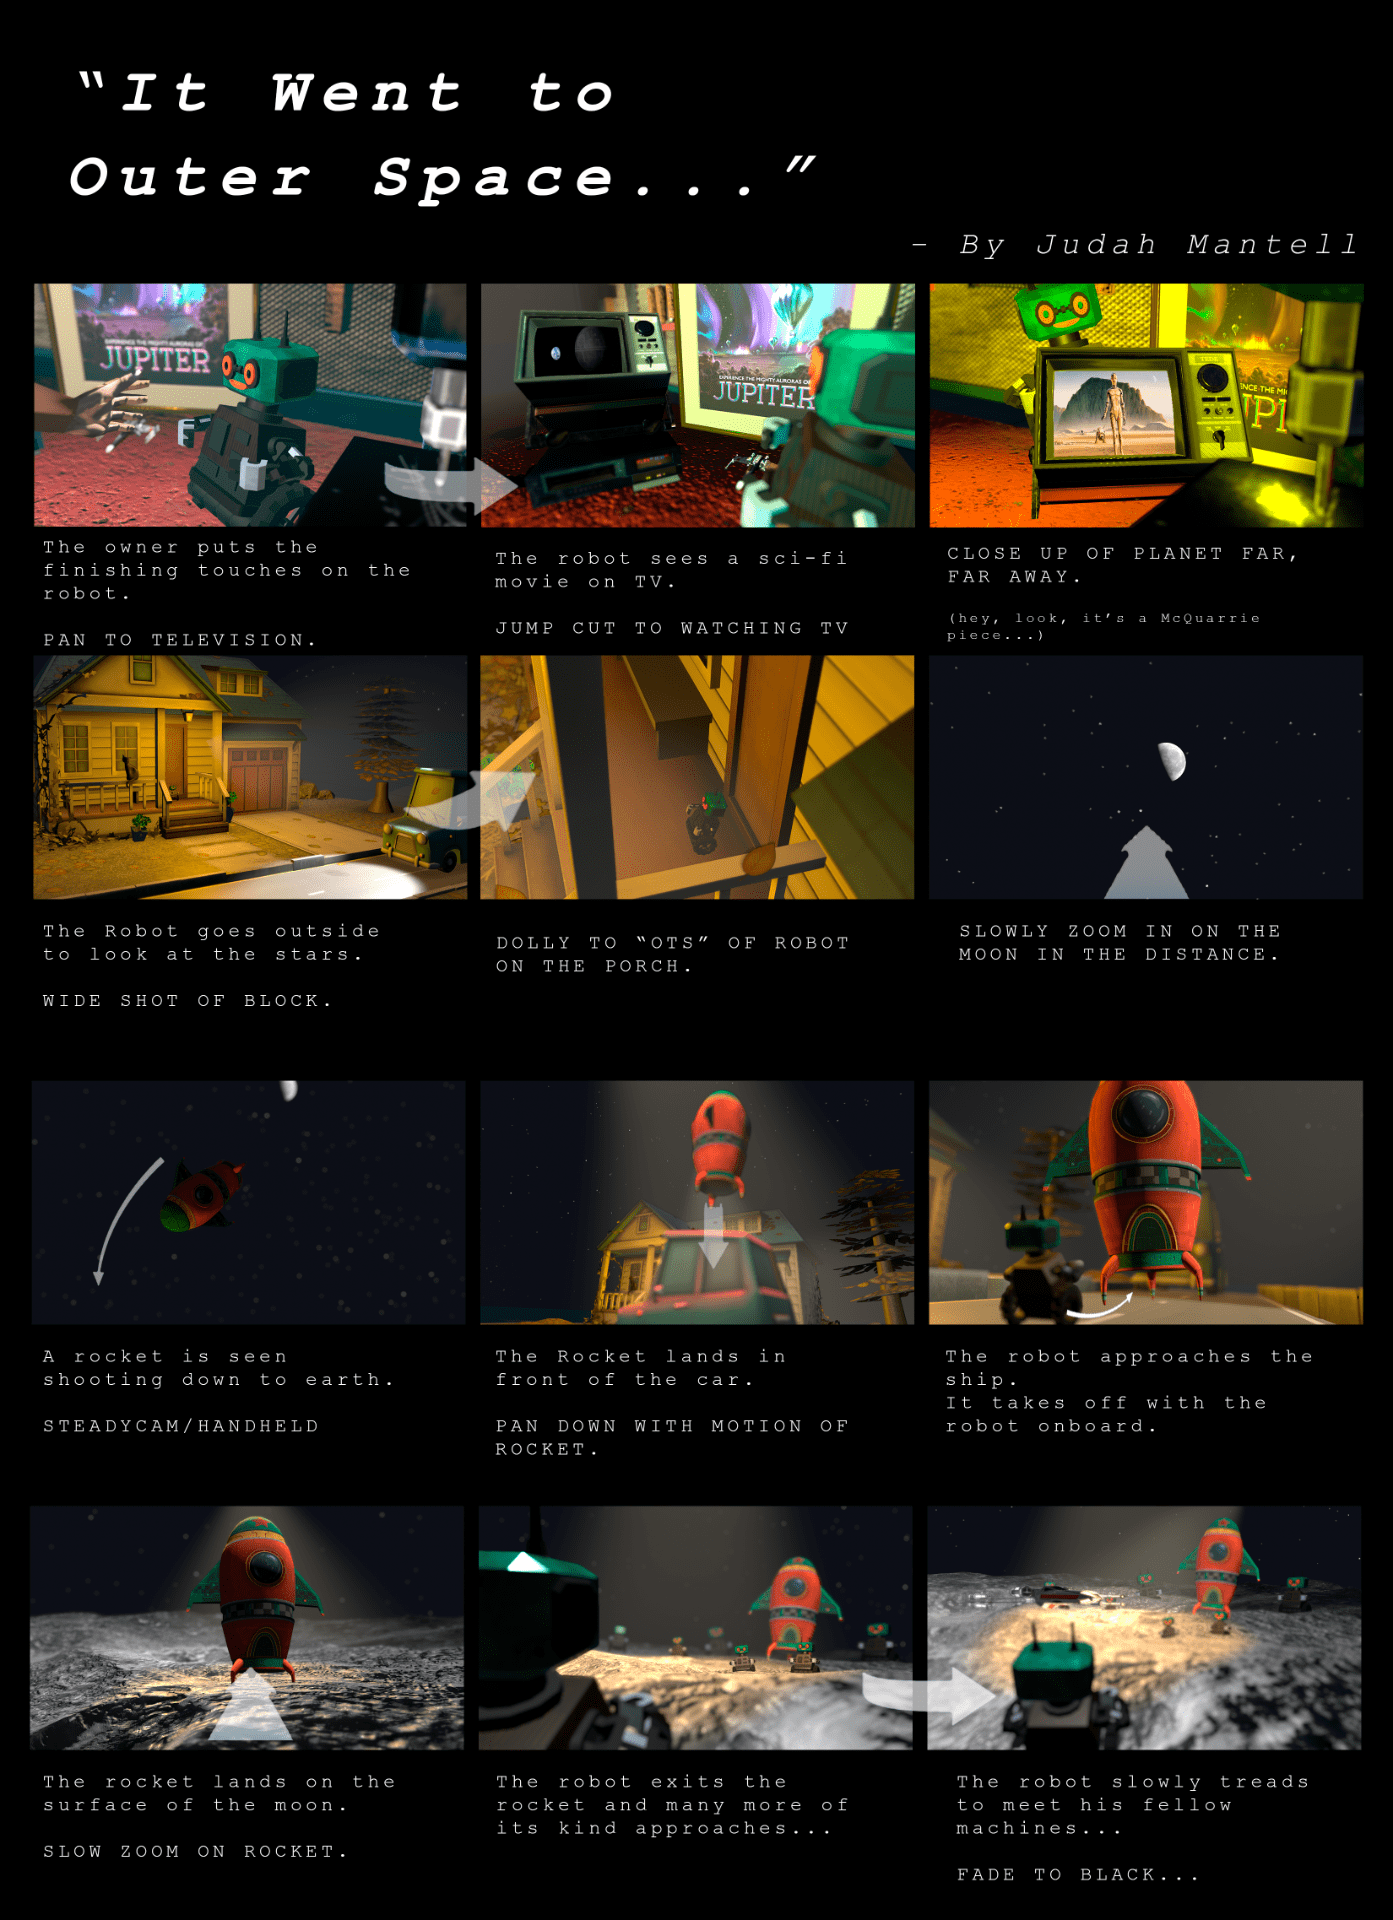
For my bridge 5 Project, I compiled the still photos I took of my virtual set for bridge 4, into an industry-standard film storyboard, complete with scene descriptions, and shot annotations.
I realize this isn’t a “self-portrait” in the traditional sense, but I feel that this piece captures who I am now, and showcases what I have accomplished over the past few years. I’ve always been obsessed with the world of film production, storyboarding, etc, and being able to create this professional-looking and functioning image using my own tools is mind blowing. I know that if I could go back in time and show this to my younger self, he would be in disbelief.
I mentioned in class a few times that my end goal was to animate the story. Unfortunately, this didn’t pan out (no pun intended!) simply because I couldn’t implement the animation functionality in time (it’s still a long ways off). So I opted for the storyboard instead. It is not my intention to be submitting an incomplete project–I sincerely do feel that the storyboard stands on its own as a great piece–but with more time, I know this story could be an incredible short film… When I am able to animate it fully, I’ll be sure to send it your way 😀
The image can be seen below; you can either scroll through, or click on it to enlarge in a new tab.
My process for creating this is relatively simple. I took a ton of images (more than what was shown in Bridge 4, obviously) and narrowed it down to 12 that displayed interesting shots and compositions. I then put them into Photoshop and created the storyboard with text and outlined boxes. I originally laid it out in SceneForge using the built in storyboard creator, but it just proved not useful enough in its current state, so I opted for Photoshop instead. After going through this process, I now know what tools would be useful for creators using SceneForge, which was extremely helpful.


