–Phase 1–
Communities have existed for as long a human civilization was first established. Beginning with Mesopotamia in 3100BC, groups of humans began to establish communities on the basis of wealth, power status, trade, family, and religion. Though things are much different now, the types of communities that exist today haven’t changed from their groundings thousands of years ago. Most if not all communities still circle around wealth, power, trade, family, and religion. Additionally, communities may form on the understanding of a collective struggle such as a disease or societal abnormality.
I find my sense of community in my school, my job, the city I inhabit, and my church.
Thinking of a wearable piece that resonates with a community, I’m immediately drawn to the idea of a headpiece that reflects the mood of its wearer for people who struggle to communicate verbally. In other words, it can instill fear, desire, intimidation, etc to whoever is around. Sharp geometric forms, in particular, have such a simplistic way of conveying power and protection so I’m imagining a headpiece with sharp pyramids emanating from the wearer’s head. In nature, we see this in porcupines, sea urchins, and fruits like pineapples. All of these natural objects use sharp, pointed shapes to deter people from disturbing or killing them. I think the juxtaposition between this harsh form and delicacy fabric is something I hope to explore in my final design. Wire, Chiffon, and clear acrylic are all materials I’m interested in using for the final implementation of this project.

–Phase 2–
Once it was time to develop quick sketches, I immediately began to think of sharp geometric forms juxtaposed against the curved contours of the human body. With that said, most of my ideas take an aggressive, architectural form.

Quick sketches for a headpiece

More quick sketches

Pyramid sketch

My favorite idea further expanded with details and added perspectives
For my first 3D sketch model, I used Bristol to cut out triangles of different shapes and sizes to roughly indicate where each pyramid will be placed on the headpiece.
3D model
Afterward, I made a pyramid to test how the organza would form around a wire skeleton.

Bottom view of pyramid

Front view of pyramid
Then, I made a model with full 3D pyramids.

My second 3D model

Second 3D model–View 2
I cut Chiffon to drape around the Pyramids to experiment with another implementation of the fabric.
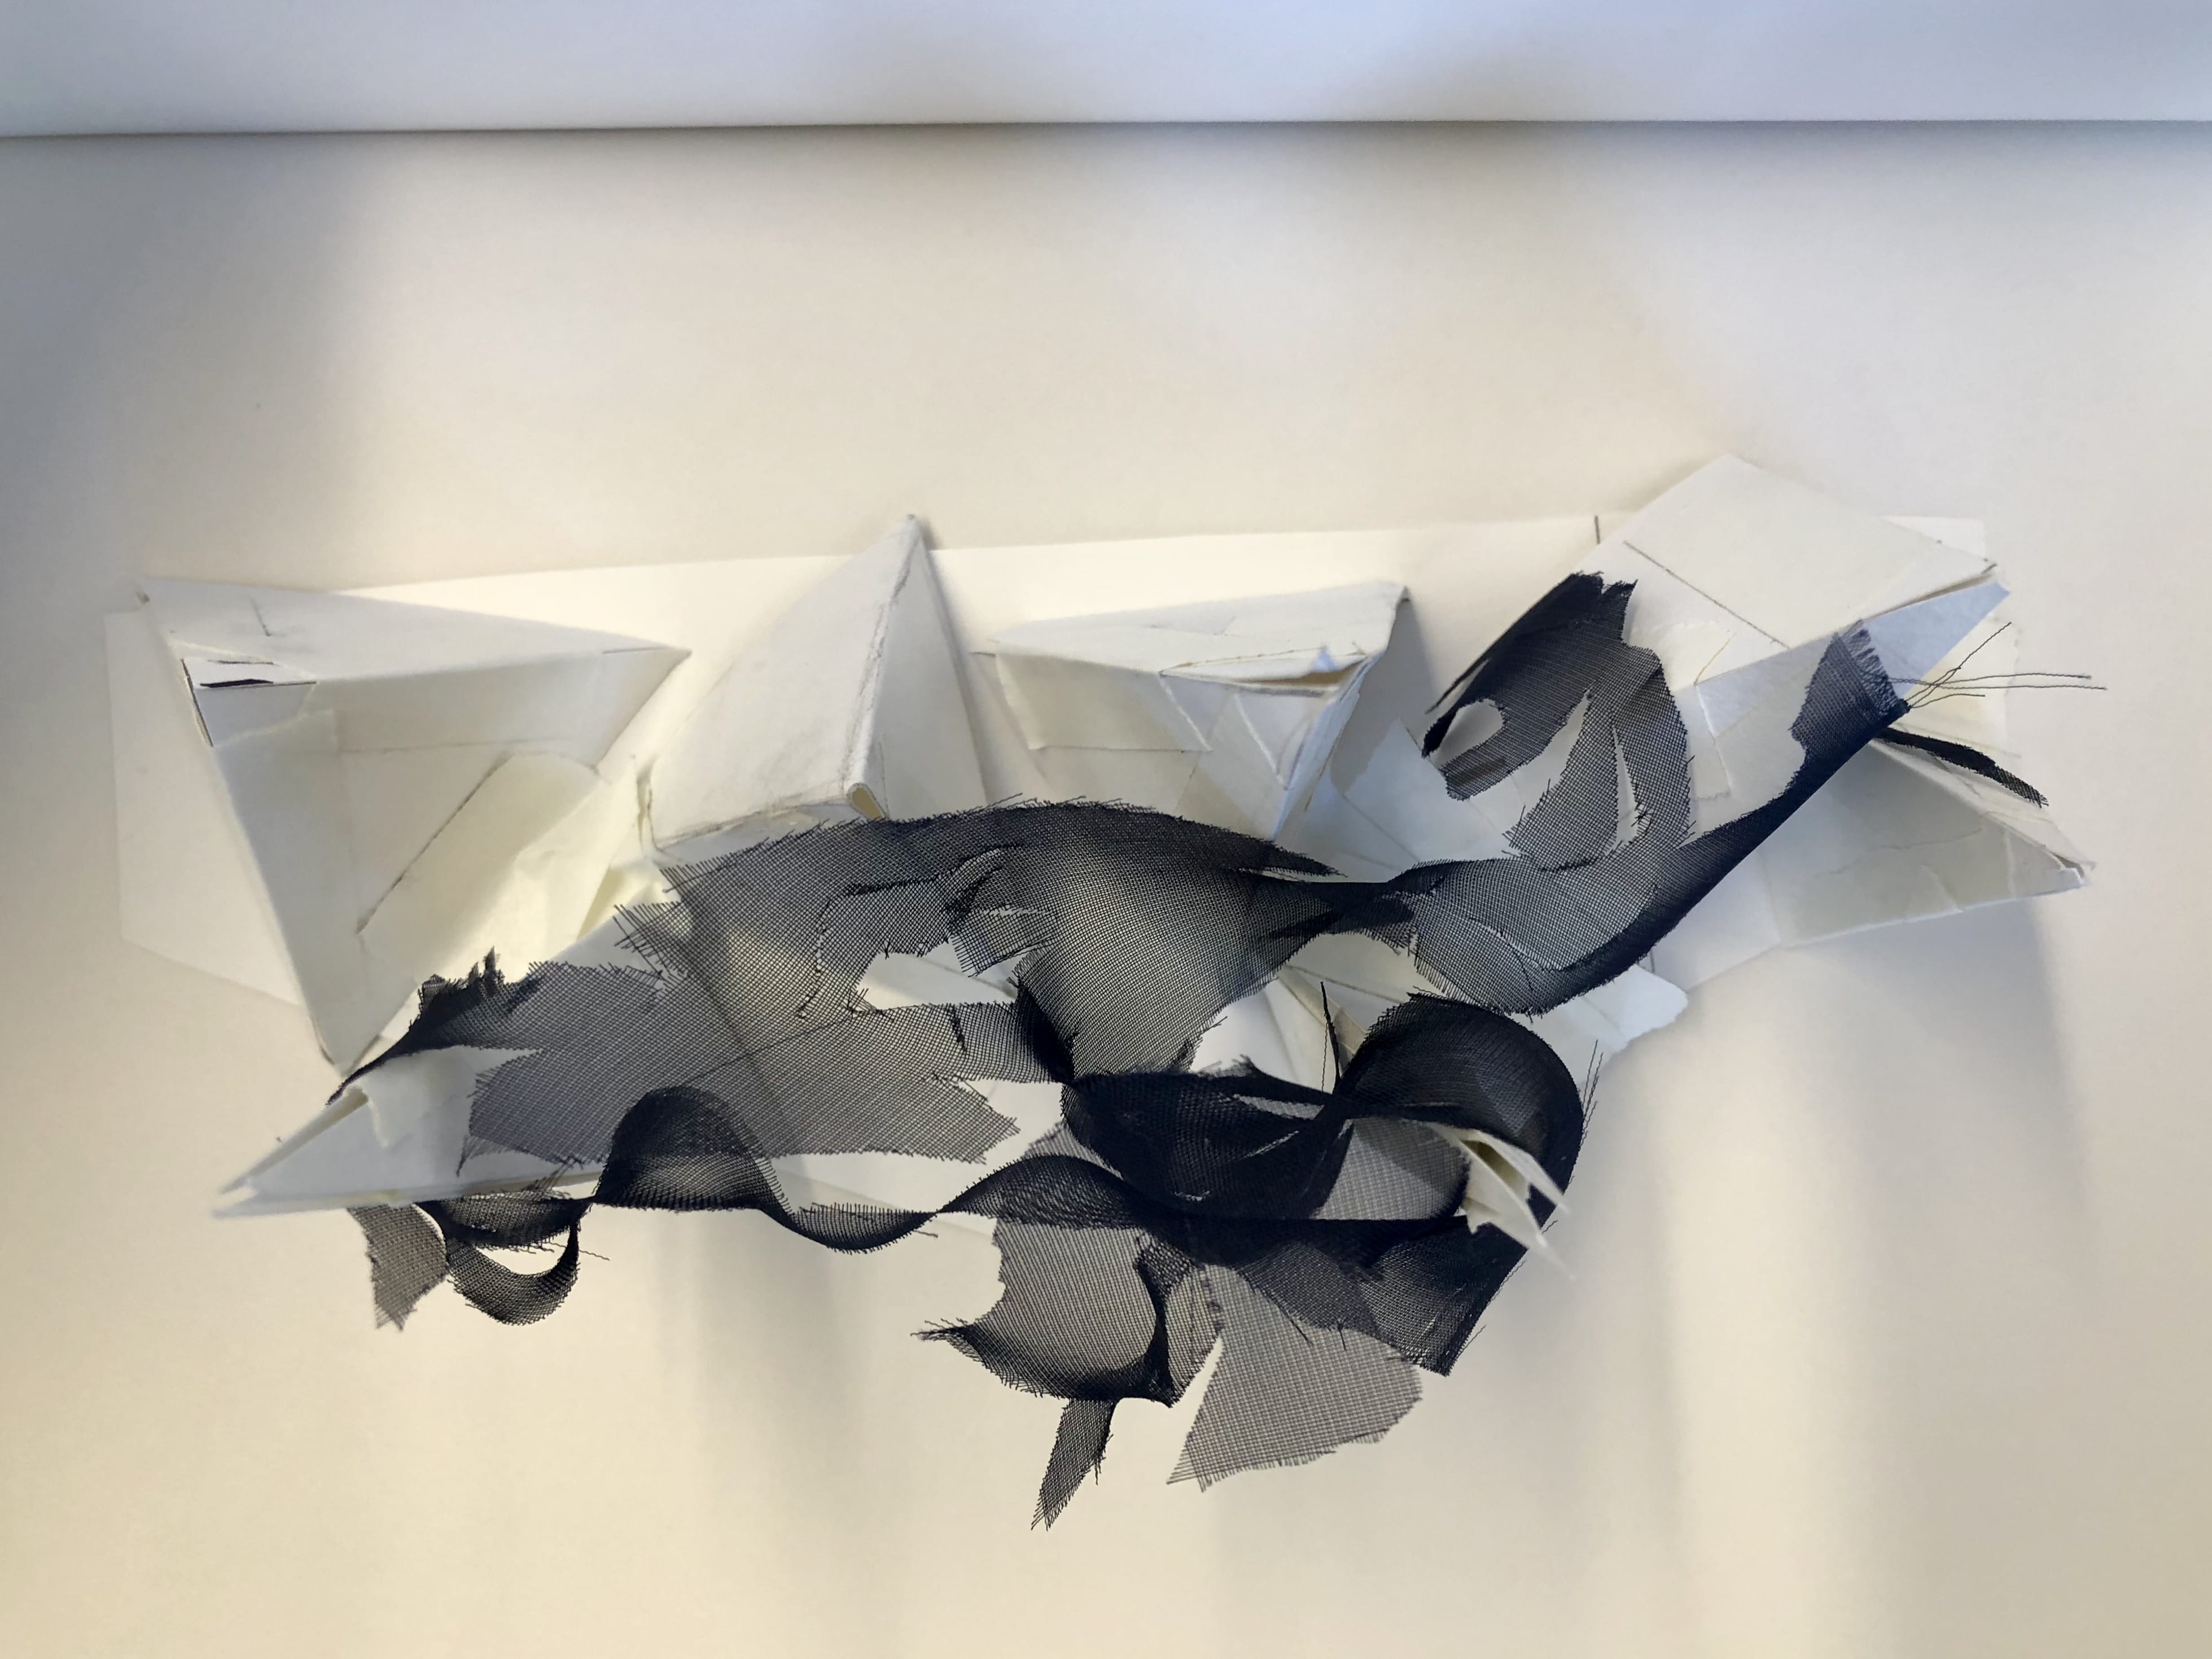
Model with draped chiffon

Model–detail view
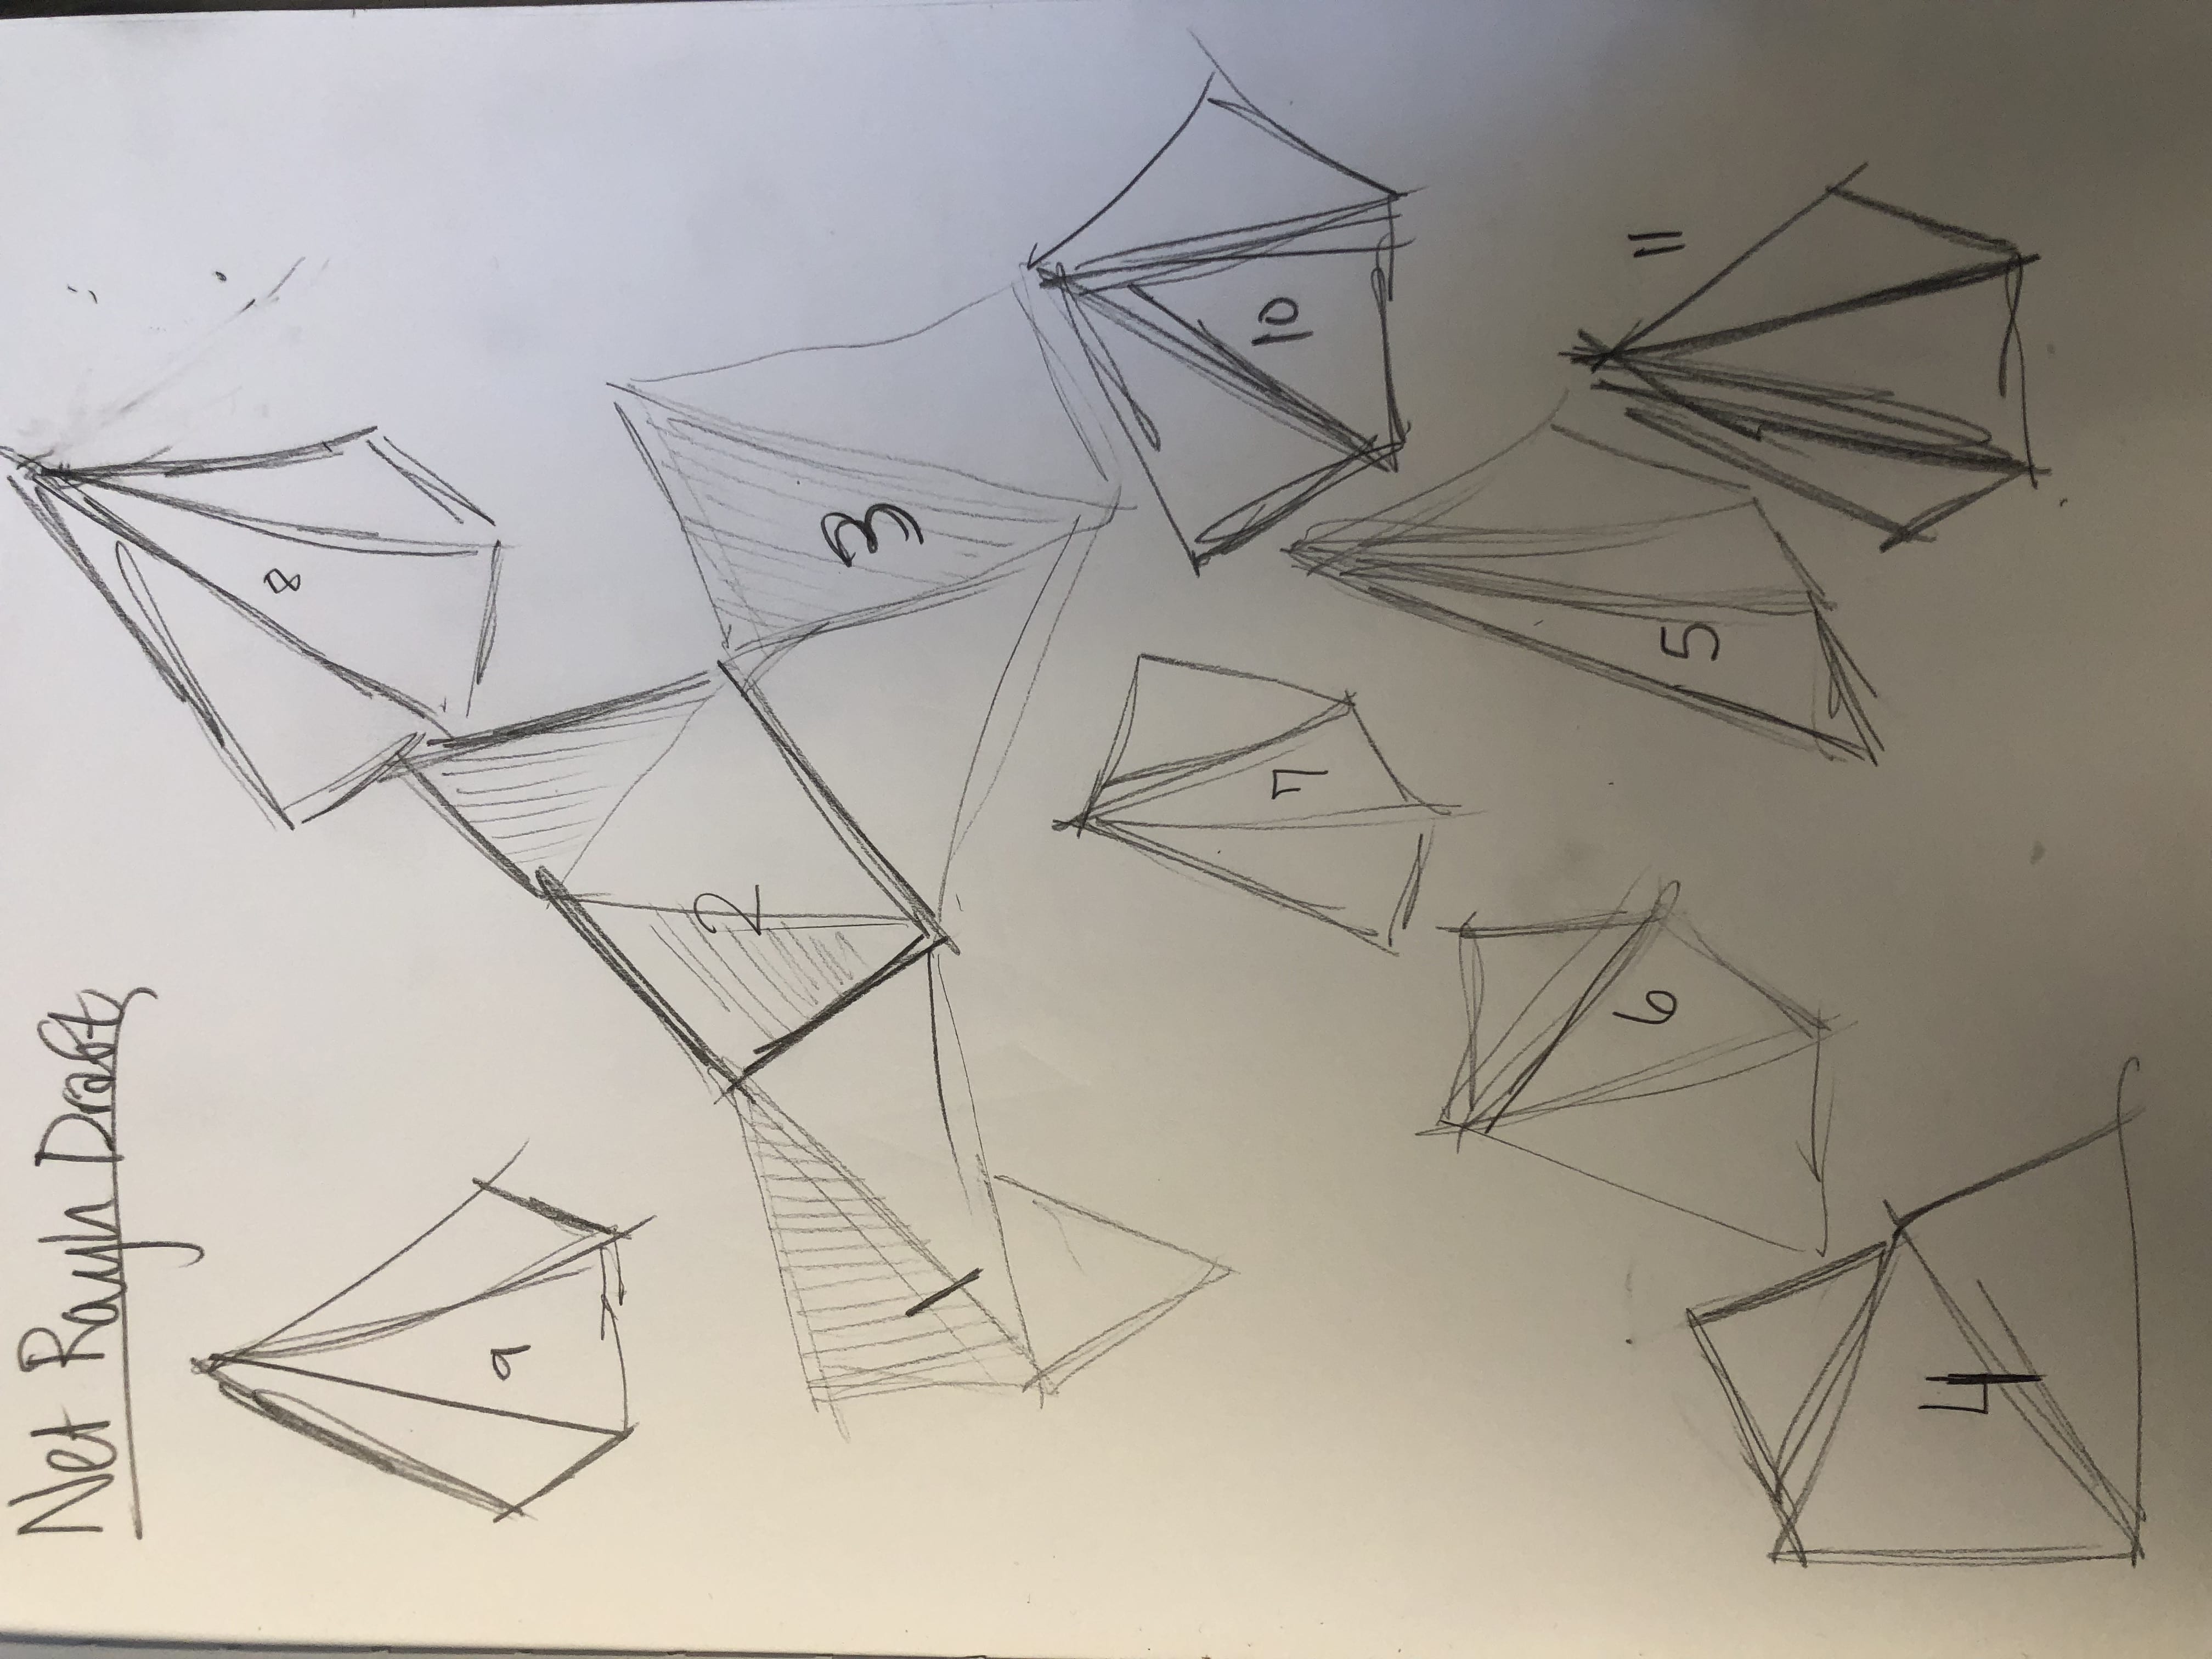
Before I began the final project, I made one last model all created by interconnecting triangle nets.

Final 3D Model
After I understood the general design idea, I prepared an Illustrator file to cut with the laser. I decided to make the triangles hollow and of the same ratio so that they could fit within each other and reduce material waste.

Laser file
Then I began my orthographic drawings.

Front
Net view
I created my final orthographic drawing on Illustrator with the same shapes and real-life proportions I created in the laser file. The laser file gives the exact dimensions, and the orthographic drawing shows the placement of each pyramid.
Flat, to-scale, rendering for measurements
–Phase 3–
With my orthographic drawing complete, I began work on the final piece. The first thing I did was cut the acrylic with the laser machine. The acrylic took 6 times to cut—ammounting to nearly 12 hours in the laser lab problem shooting and calibrating.

Acrylic with first round of laser cut

Acrylic with second round of laser cut
Once the acrylic was cut, I used thin wire to connect each of the triangles into pyramids.

Wire connected corner

Connecting the pyramids to form the headpiece
Once I completed the pyramids, I began joining them at corners to construct the headpiece. I decided after experimenting with the chiffon against the acrylic that I preferred the fabric to drape over the entire piece loosely as oppose covering each side of each pyramid.
With that decision in mind, I sewed the chiffon around strategic pyramid points to maintain the draping I liked. Lastly, I cut the edges fabric to give it a clean, complete look.
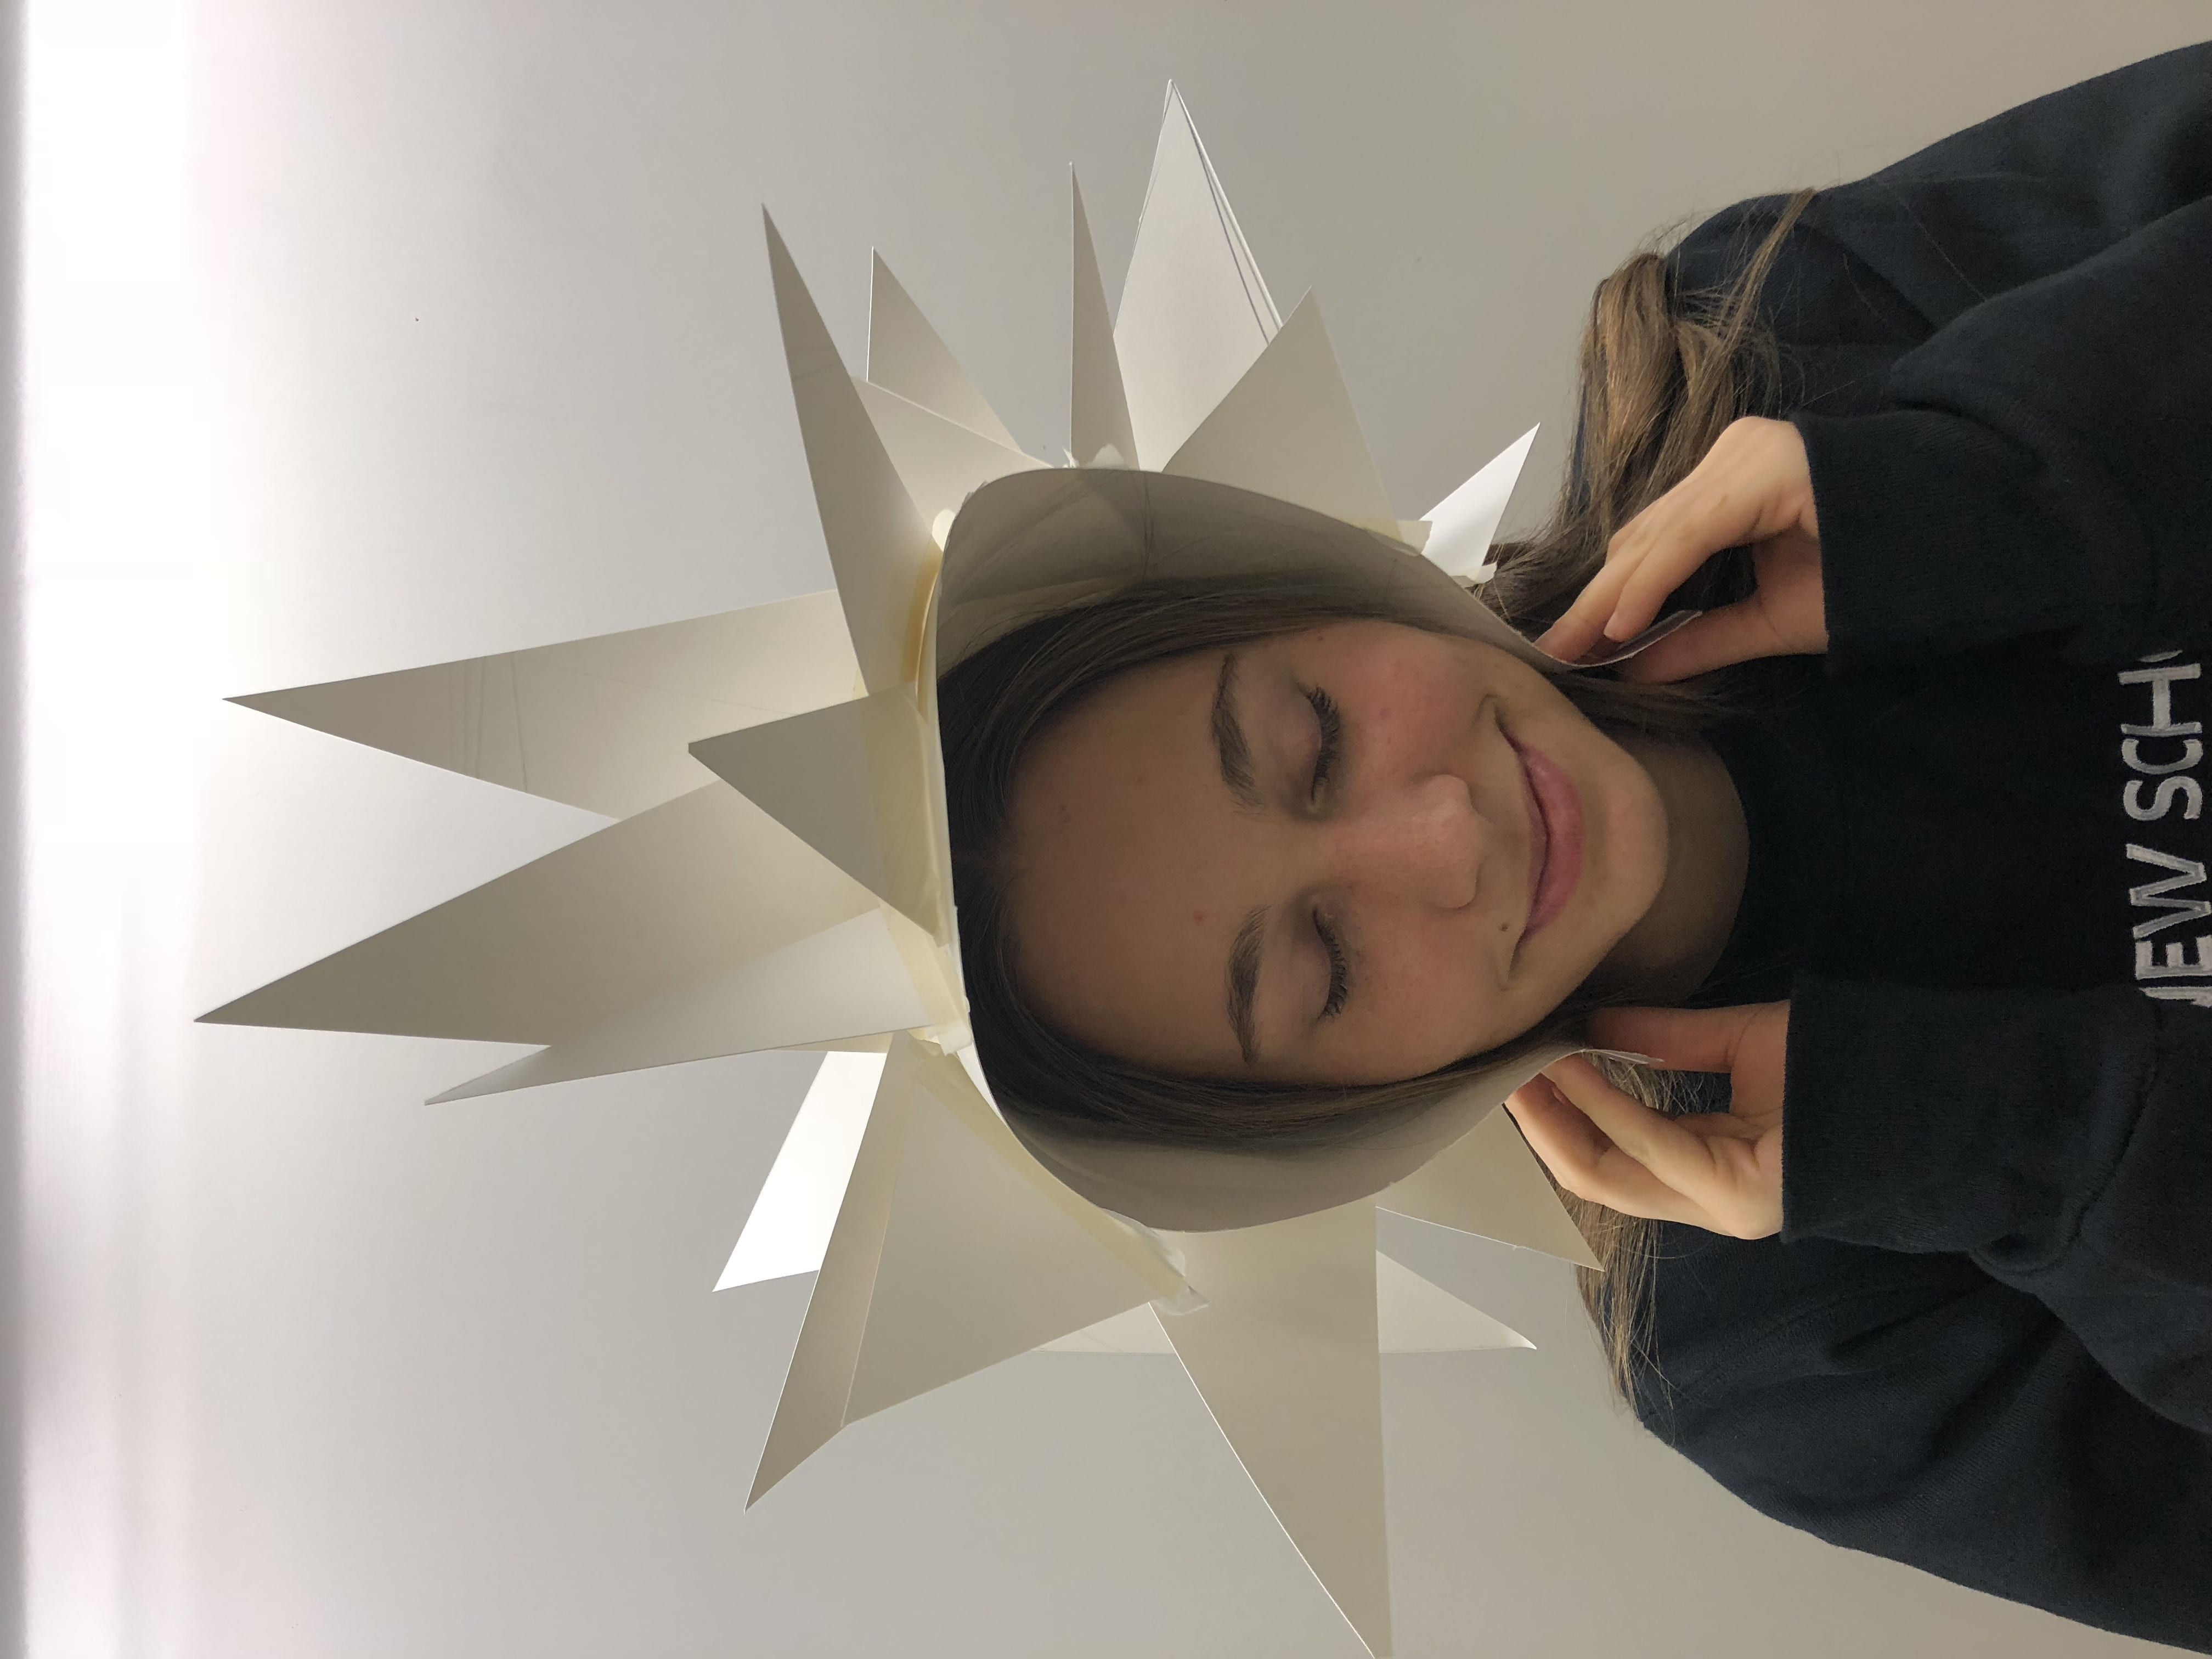
Below is the finished result.
Modeling Photo–Front

Modeling Photo–Side

Styling Photos–Street
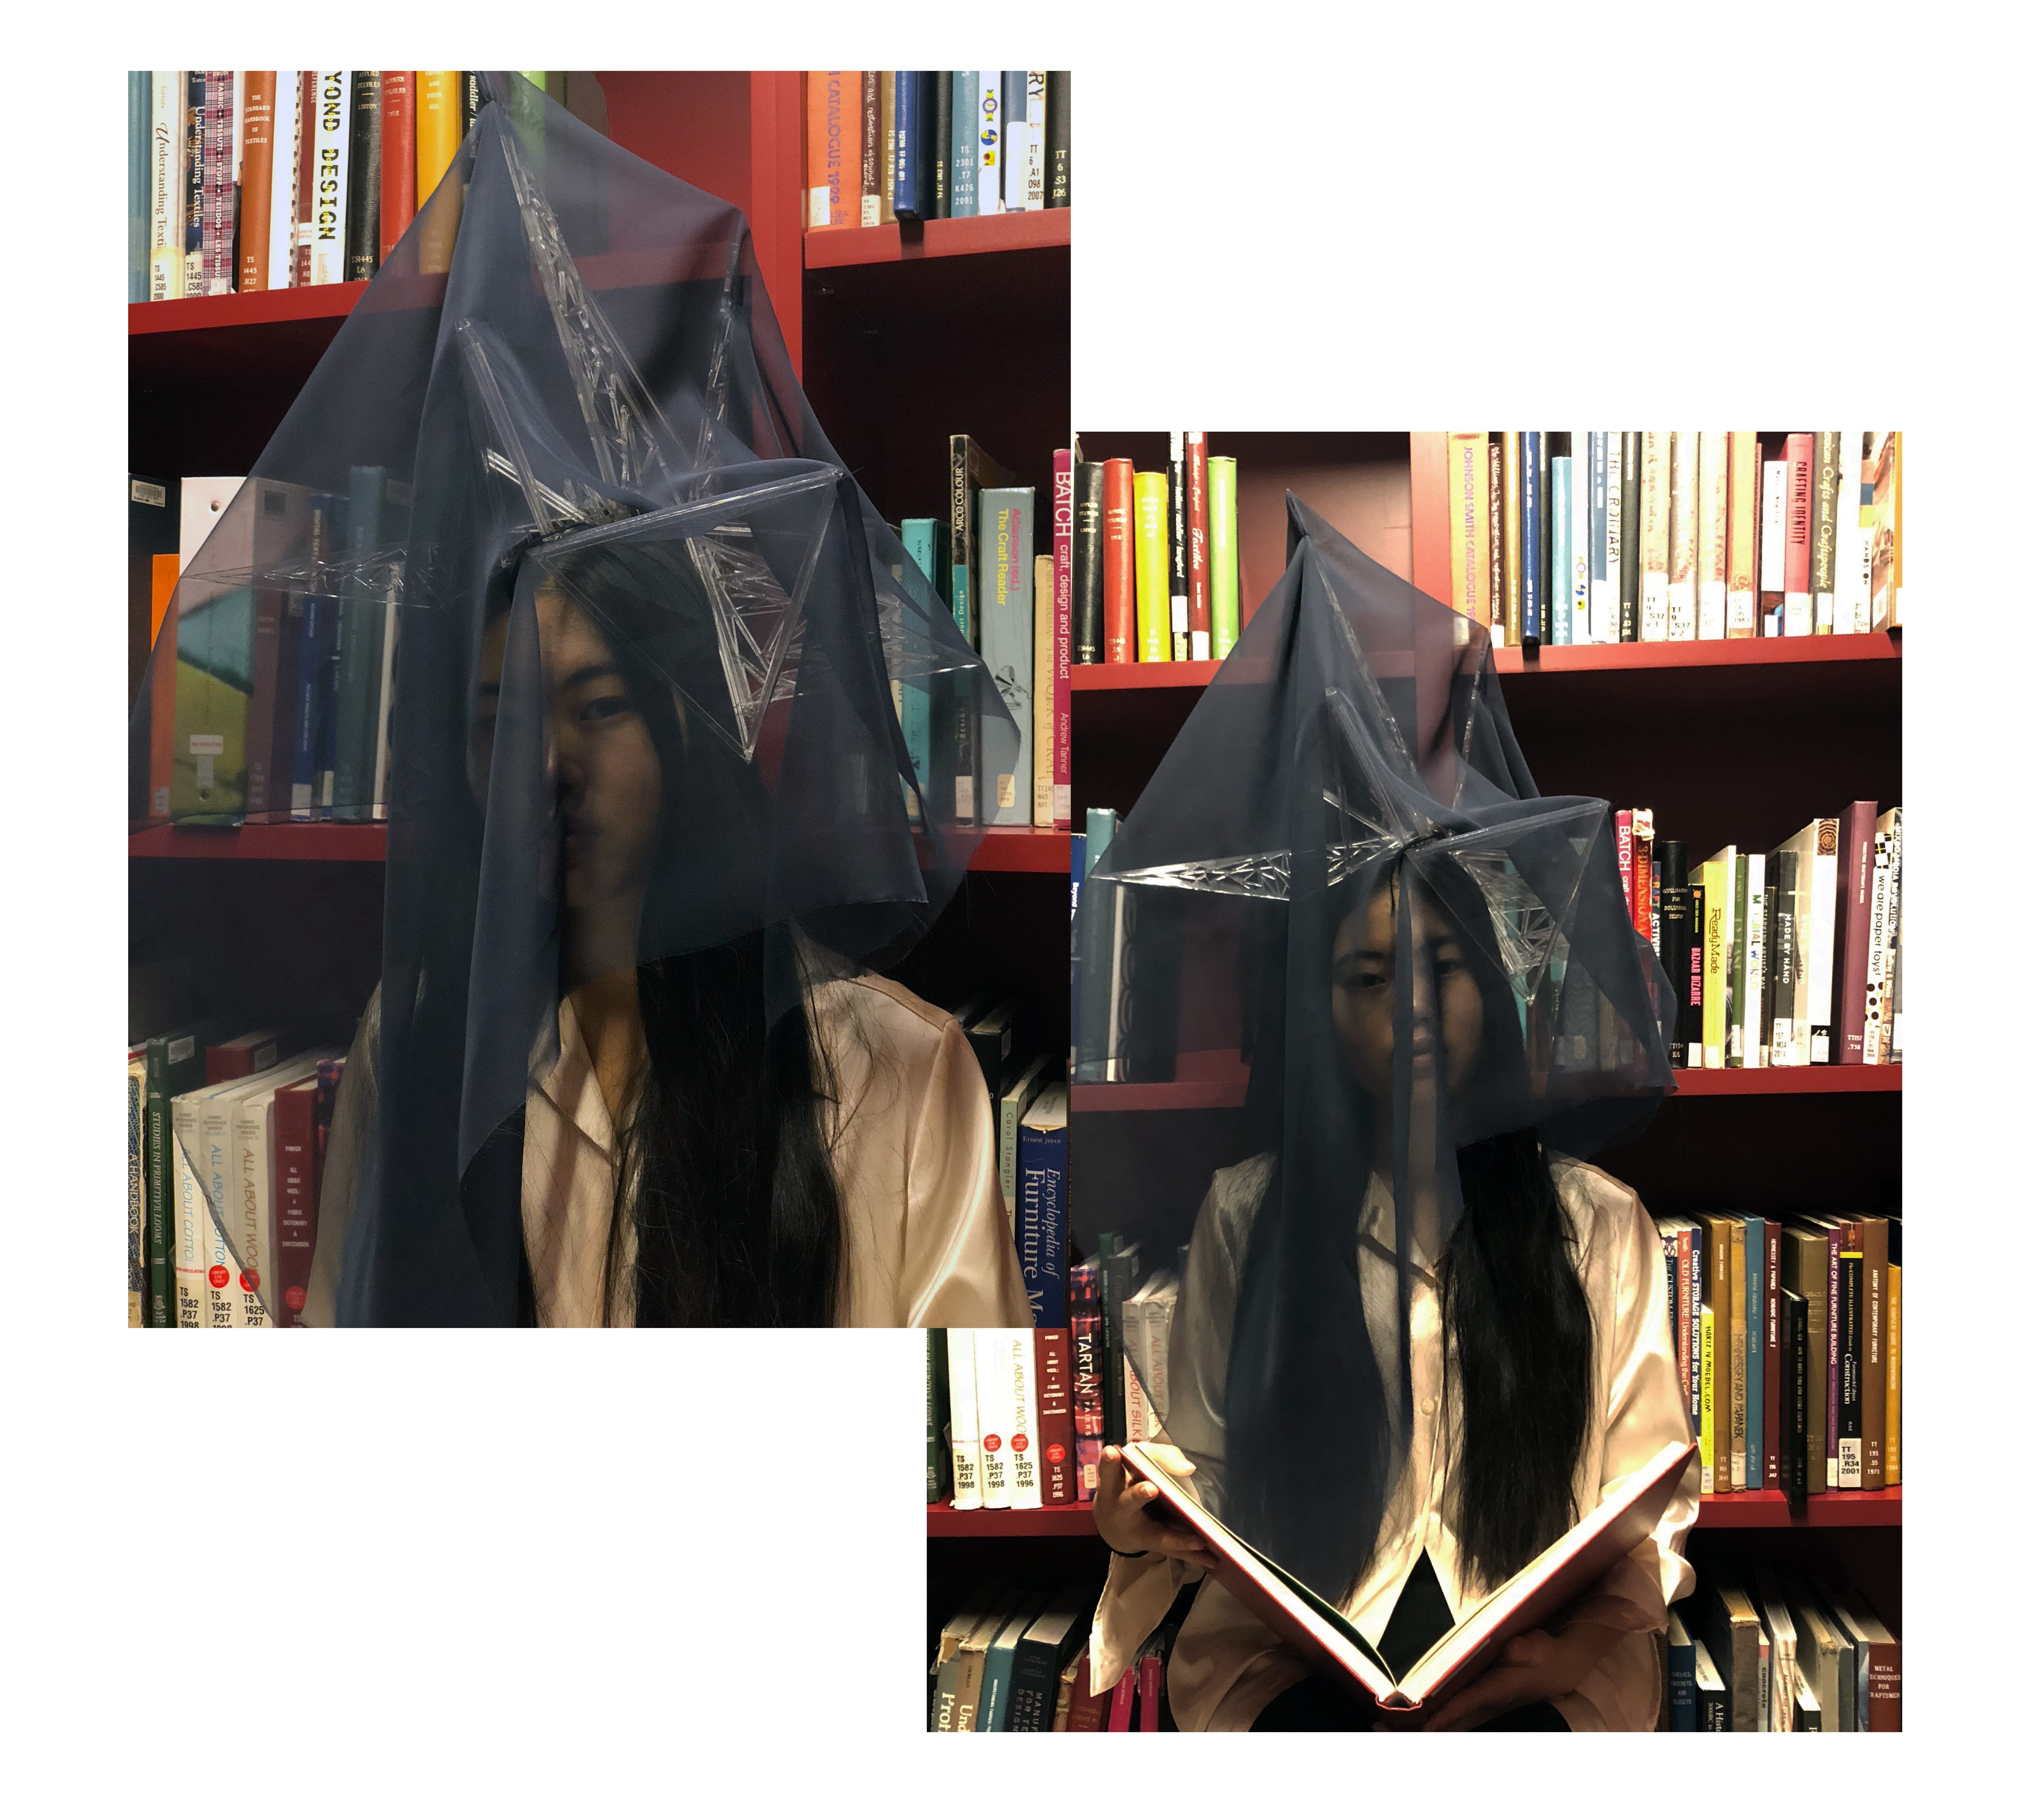
Styling Photos–Library

Styling Photos–Architecture
–Reflection–
After finishing this project, I have a heightened sense of how shapes and constructed forms can help translate or execute ideas, emotions, or tasks that our plain bodies otherwise couldn’t. I went through so many design proposals in my head trying to figure out how to actually execute the headpiece, and what I learned along the way was how triangles can interact and fold to form 3 dimensional spaces.
Using the laser lab to cut my acrylic, I also learned how to problem solve with the laser machines when they aren’t working, and even though I ended up spending 12 hours in the lab over the course of 3 days, I now understand (thoroughly) how to operate the machines and problem solve on my own.
All of my mechanical connectors worked well. The wire and thread are not very visible and contribute to a clean look.
The chiffon fabric was probably the biggest difficulty, as I don’t know how to sew, and I didn’t realize while purchasing the fabric how difficult it is to cut and use. I ended up finding a means to make it work, but I do wish I had a way to execute my original vision with the fabric covering each face of the pyramids.
Overall, I’m proud of my finished product and want to experiment more with geometric body garments. I learned a lot through this process and can appreciate all the learning that came about from some of the difficulties along the way. After hearing what the class had to say about my project, I can also now see the benefit of a more sheer/light fabric that would allow all of my acrylic work to show through better. However, there’s something equally as mysifying with the darker chiffon.
Research Link:
http://www.historyworld.net/wrldhis/PlainTextHistories.asp?historyid=ab25