
In this post you will learn how to hack a USB keyboard to create a wearable drum kit.

Step 1: Materials Needed
- Regular Fabric
- Neoprene
- Felt
- Conductive Fabric
- Paper
- Pen
- Soldering Iron
- Solder
- Pins
- Wire
- USB Keyboard
- Scissors
- Screwdriver
- Needle
- Thread
- Conductive Thread
- Wire Cutters
- Wire End Trimmers
- Sandpaper


Step 2: Preparing the Keyboard
Using a screwdriver remove all the screws from the back of the keyboard. Once this is done open the case up and take out the circuit board. Once the circuit board is out of the keyboard case, use sand paper to sand off the black pigment that is over the silver pins.
After you have finished sanding you can now plug the USB into your computer. Open a word program such as Pages or TextEdit and using a wire test out the function of each pin. You do this by placing one end of the wire on top of one of the pin on the left hand side and then place the other end of the wire on top of one of the pins on the right hand side. Repeat this process till you have tried all the different combinations of pins.


Step 3: Preparing the Apron
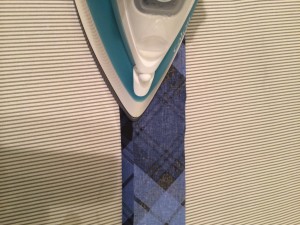
You can design your own size and shape apron. I used a waistband 4 cm wide on the fold and 200 cm long, the apron was 52cm wide and 37 cm long. Make your paper template and then cut it out in any fabric of your choosing. Once you have cut out your apron and waistband, position the apron in the centre of your waistband, pin it into place and sew it with a 1cm seam allowance. After you have sewn the waist band and apron together take it to the iron board and iron the seam allowance.
Now you are ready to finish the waistband. Along each side of the waistband iron down the 1cm seam allowance. Next fold the waistband in half so that the ironed down seam allowance meets on top of one another. Now iron flat and pin together to make sure everything stays in place. Now top stitch along the top of the waistband about 0.5cm from the edge.


Step 3: Preparing the Buttons
Once you have made your apron you can now go on to create the buttons. Like the apron you can create your own shape buttons. I made a hexagon, triangle, square and circle shaped buttons that will each fit into a 4cm by 4cm box.
Each button needs 3 different sizes of the same shape. The biggest shape (the 4cm by 4cm) needs to be cut out 2 times in neoprene. The medium size shape (3cm by 3cm) with a small hole in the middle needs to be cut out once in felt. Finally the smallest size (2cm by 2cm) needs to be cut out of conductive fabric 2 times.


Step 4: Organisation of the Buttons
Once you have cut out all your buttons take the neoprene buttons and organise them on top of your apron with the circuit board. Ensurre that your wires are long enough to reach all the different placements of your buttons from the circuit board. Once you are happy with the placement of your buttons mark them onto your apron using pins around the shape.


Step 5: Soldering
By this stage you should have decided what pins you need to solder wires onto, to perform the function that you want them to. I used the Garage Band app on my Mac, I picked the Rock Drum Kit however you could choose any of the musical instruments you want. I used the keys A = pin 2/9, K =6/7, O = 5/8 and ‘ = 3/10. Each key A,K,O and ‘ make four different drum noises, a drum, pedal and two different symbols.
After you have decided on your keys you need to prepare the 8 wires that you need to solder onto the circuit board. All the wires need to be stripped on both ends, about a quarter of an inch and should be the same length as the distance of your buttons from the circuit board. Now you are ready to solder your wires onto the circuit board, for this you need to secure the circuit board and wires together using the crocodile clip helping hand. Once you have everything securely join now you can solder on the wires using the soldering iron and solder. When using the soldering iron you want to give it time to heat up before using it straight away, also you should dampen a sponge so that you can clean the soldering iron before and whilst you are using it. Once the soldering iron is hot you should hold the iron onto the wire pressing it down onto the circuit board and hold it there for 7 seconds, after 7 seconds you can add the solder onto the wire by pressing into the iron allowing the solder to melt onto the wire securing it to the pin.
Before you attach the circuit board to the apron test that the soldering has worked and your keys are working. For example join the 2 ends of wire 6 and 7 together, if it makes a noise then you know your soldering has worked.


Step 6: Attaching the circuit board to the Apron
Now you have soldered all your wires onto the circuit board you can sew the circuit board onto the apron. Sew it onto the apron on the wrong side of the fabric where you marked it earlier, use an invisible stitch looping it through the circles in the circuit board 2 times.


Step 7: Make your buttons and Attach them onto the Apron
You make each of your buttons in the same way so you should repeat this process 4 times.
You take one layer of the neoprene and use an invisible running stitch to sew on a layer of the conductive fabric. Then you take the second layer of the conductive fabric and sew it onto the felt with a running stitch. Next you need to make a hole in the apron at the bottom(the side nearest to the circuit board) of where you marked the button on the apron. You should push the wires through the hole so that they are visible on the front of the apron (the correct side of the fabric). Now you are ready to attach the buttons to the wires. Using conductive thread you need to sew one wire to the felt and conductive fabric and sew the other wire to the conductive fabric and neoprene, you should use about 5 or 6 invisible stitches to ensure that the wires are securely fastened to the conductive thread.
Next you should attach your button to the apron, you want to make sure the conductive fabric with the felt is under the conductive fabric with neoprene. It is important to note that the two conductive fabrics don’t touch, the felt has to separate them. Pin them into to place. Next take up the last piece of neoprene and place on the back of the apron, make sure the back and front neoprene are in the same place. Pin them all together and sew them with a sewing machine using the zig zag stitch making sure to leave one of the sides unstitched where the wires are coming out, as you don’t want to sew over the wires.
Once you have done is process for all the buttons you are ready to plug your USB into your computer and create a tune.