Step 1:
Choose an origami shape to make. Be sure that the origami piece that you choose moves and can be pinched together in an elegant way. This butterfly was made from an online tutorial, which can be found here:
http://www.pragmaticmom.com/2013/08/butterfly-books-for-kids/
Step 2: make a practice piece in a cheap paper:
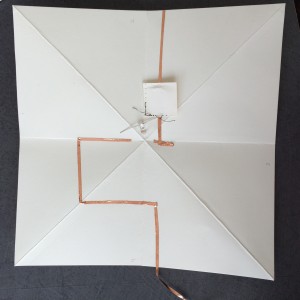
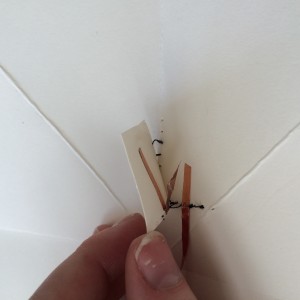
Step 3: Once you have your practice piece made, mark the point where two of its sides pinch together. This is where you will be completing the circuit you will make. Choose the point where you want your LED light to be and mark it, as well as an inconspicuous place for your battery to live. Mark that too.
Step 4: Unfold your origami piece. Draw a line connecting your two marked connection ends, your battery, and your LED light. Cut a paper square that will serve as a pocket for your battery. Transfer all of these markings discretely to your final paper.
Step 5: Use conductive tape to trace the path you drew between connection ends, LED, and battery. Cut away the conductive tape where your LED and battery will live. Apply conductive tape to the inside of the square pocket you cut for your battery, leaving a tail extended to one side. Solder that tail to one side of the path you drew with the conductive tape. Be sure that the tape on the under side of the pocket in no way touches the other side of the tape’s path.
Step 6: Solder your LED to your conductive tape, and attach your pocket to your paper (I used an industrial sewing machine). Insert your battery and test your circuit with alligator clips attached to a wire.
Step 7: Refold your origami piece, and test it. Admire.
https://www.dropbox.com/s/yi6mbeh0n00zgrq/Video%2030-09-2014%2013%2055%2033.mov?dl=0


