Experiments + thoughts on natural dyeing, felting
Dyeing
step-by-step process
I looked at the recipes provided in the packet we received during the class demo, and immediately looked at what made the most beautiful sounding color. Always drawn to pinks and purples, I saw using red cabbage as the most obvious option for achieving such hues.

I bought an entire cabbage for one dollar. The first step was to chop up what looked like enough to fill a pot, also considering the water needed (enough to submerge the cabbage). I ended up using 2/3 of the whole thing.
Here’s the chopped cabbage boiling. I let it boil for 2 hours – first on a low heat, slowly bringing it to a simmer.

Then the cabbage was strained and the ‘dye bath’ was drained into a stainless steel bowl.

The dye was evenly divided into three bowls.
In the first bowl, iron was added. This didn’t change the color too much, although it did appear more vivid or ‘bright’.

In the second bowl, alum was added, which ‘saddened’ the color so much it turned completely blue!


In the last bowl, soda ash was added, which led to the most surprising results as I was expecting it to simply ‘lighten’ the color. Instead, the color turned from purple to green! Later, we discovered that the overall intensity of the color weakened…

(All measurements are approximate because 1) I don’t have measuring spoons, 2) WOF was unknown! but, a teaspoon of each powder and a handful of wool in each pot is what was aimed for.)
The next step was to soak the wool in the dye, which was cleaned and separated into 3 equal clumps prior. The wool was made sure to be completely submerged in the dye, and was put on simmering heat for 45 minutes.
After 45 minutes, I slowly decreased the heat until the pots all cooled.

Each pot’s contents were transferred to a tupperware, where they would be left overnight (~12-15 hrs).

The wool kept floating up, so we put forks and spoons inside to weigh it down so it could stay evenly submerged in the dye throughout the night.

The next day the wool was drained and patted dry, but still retained a lot of wetness. They were left by the windowsill so they could be dried by the sun for the rest of the week.

The wool became a little dryer than damp in 2 days of sun.
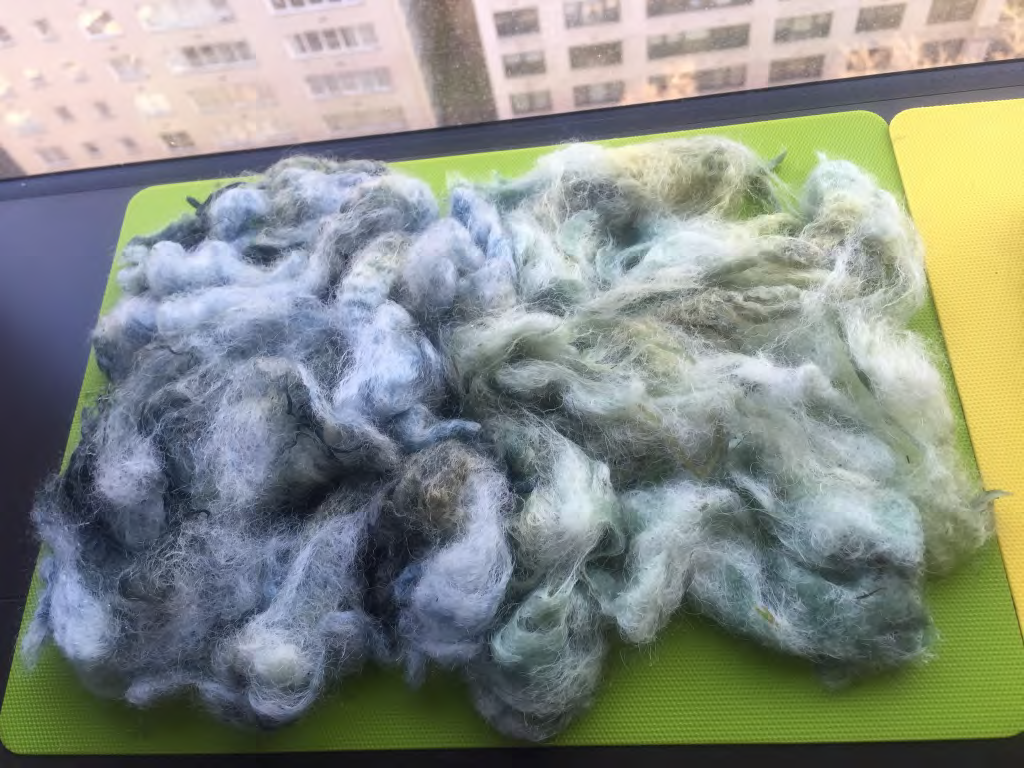
On the yellow mat: wool+iron.
On the green mat (left to right): wool+alum, wool+soda ash.

recipe: dye-worksheet
Felting
Initially, my objective here was to make a small case or pouch. In this case I knew that a short rectangle would work best for my base ‘resist’ shape.
As for color, I was interested in the idea of starting with one color for the inside, and slowly fading into a different color for the outside. I tried experimenting with creating layers that would be consistent yet leave room to show a bit of whatever color that was underneath.
My colors went from the soda ash green -> iron purple -> alum blue -> soft grey pulled wool. In between colors I used bits of the undyed wool to create a more even fade. I don’t think this was all very apparent toward the end of the process…
step-by-step process
I tried to carefully follow this provided blog post, adjusting when needed for my rectangular pouch differences.
Once the resist was cut into a rectangle, I laid stretched bits of the wool fiber evenly in a single layer on top of it. I repeated this layering again, then warm water is sprinkled, and the mesh layer goes down…

and you start rubbing carefully in circles to create a small lather.

Then you take the mesh off without getting any wool bits stuck. The layer should be matted and solid enough to turn over and fold the edges over with more warm water and soap. This should bring you back to a rectangle, and you then add another one or two layers of wool.


This process repeats 3-4 times, continuing to flip the rectangle and blend in another couple of layers.


Once the wool has a good thickness, it should be pretty damp and piece-y. To officially combine the wool and dry out excess water, we roll it in bubble wrap.

Twenty-thirty times, rotating the wool and starting over again.

I would always lose count of the rolls, but a lot of water escapes and you should be left with a much lighter and cohesive wool rectangle.

The resist is still inside! I cut the pouch on one of the long sides, very carefully with sharp scissors – so everything would stay together. Although the wool is entangled, it is still quite damp and fragile.

This edge exposes all of the layers, and can be mended / smoothed by folding the frayed edges inside with warm water and soap.

The inside is cohesive and held together well!

Here is it drying upside down. – The final product.
