using generator-core + johnny five
Photoshop + node
I have a project that requires a server connection, so naturally I began googling ‘____ + node.js’ .
I knew Adobe CC has scripting capabilities, so I typed in ‘Photoshop + node.js’ … and stuff actually came up!
There is a video of a guy Andy Hall, who works for Adobe Japan, testing out Generator. The video is here, but I don’t recommend you watch it because he does some voice-command demos that fail miserably. A majority of his presentation is him repeating “OK PHOTOSHOP” with absolutely no success. Painful stuff to watch.
Anyway, brief intro to ‘Generator’ :
Well Photoshop, like most of the other Adobe apps, is built on ExtendScript and KVLR.
ExtendScript is a virtual machine you can use to build and access extensions in Photoshop, among other Adobe applications.
Kevlar (KVLR) is a socket-based interface, an API, that connects to Adobe servers (or something… not much documentation about it).
Generator is a javascript interpreter that is built on top of both of these – based on Node.js.
From Generator is generator-core, where you can run Node.js apps as Photoshop plug ins.
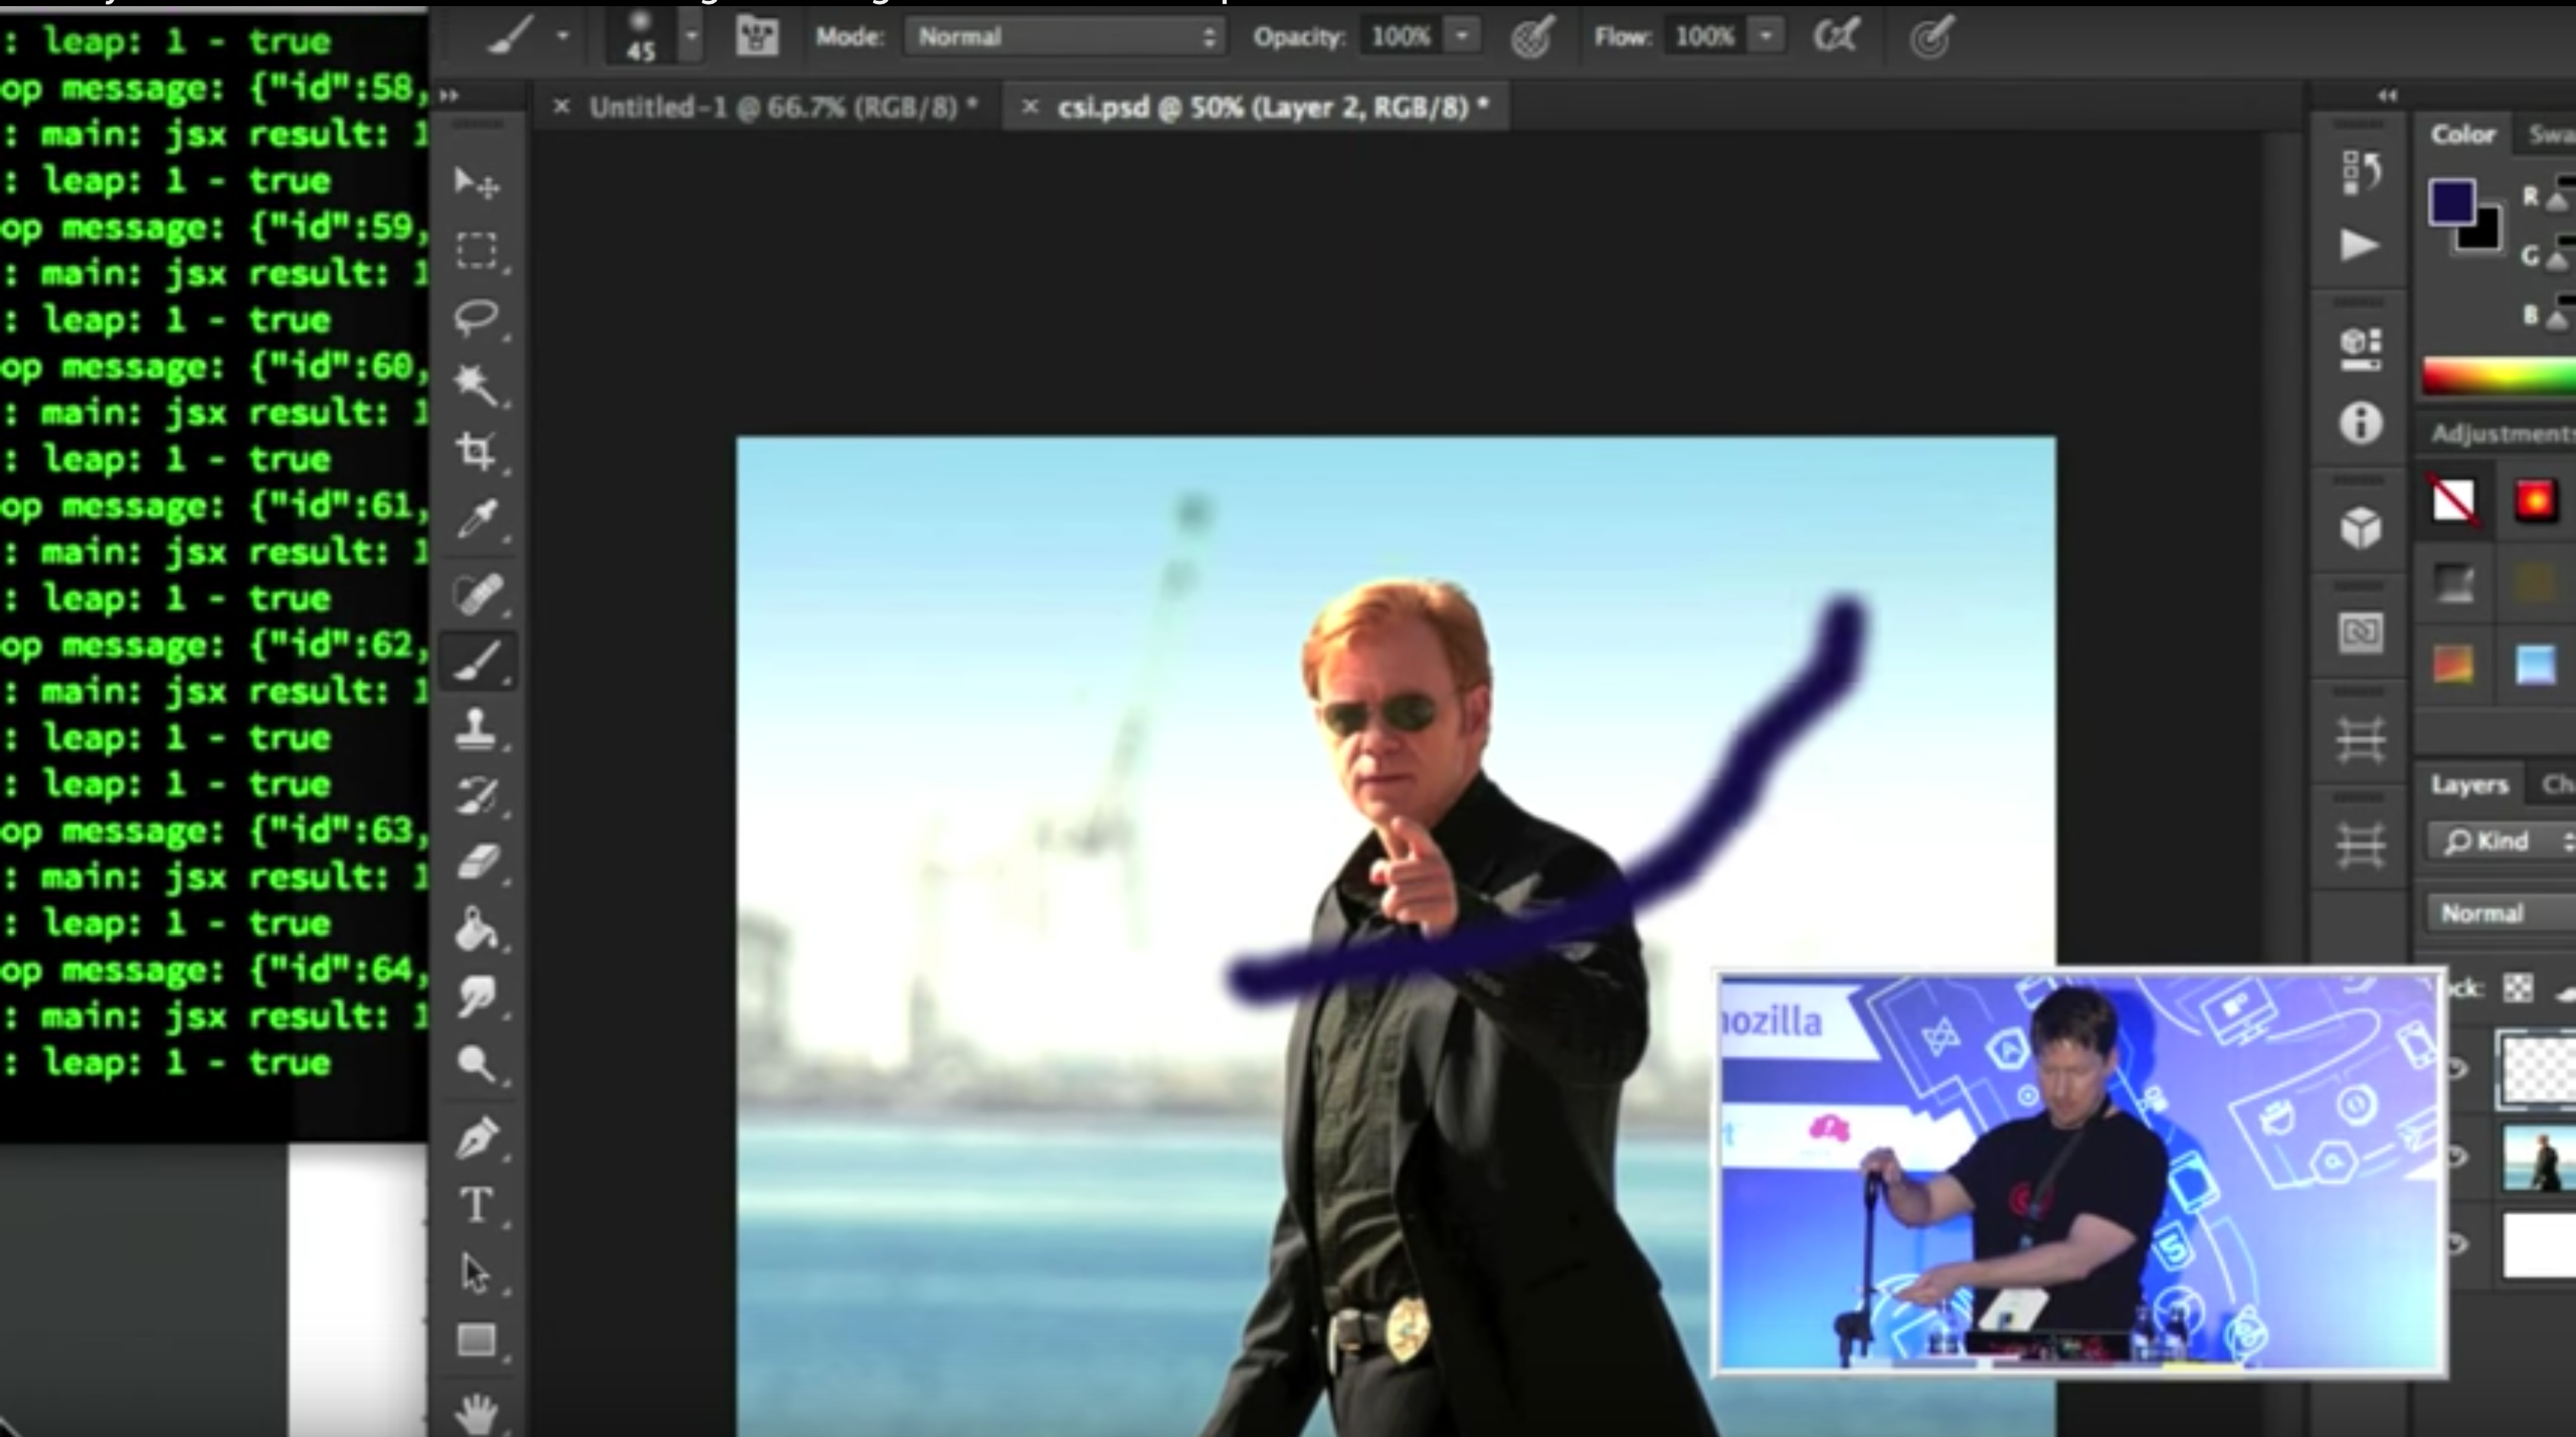
Andy did a demo where he connected Leap, some IoT input device, to Photoshop. He waved his hand along a z-axis in the air, and was able to paint with a photoshop brush:
His code is available, and I’m thinking it could be easy to modify by replacing Leap with a different input control, specifically using Arduino. Ideally it would be a simple potentiometer that could modify the brush radius as you draw.
Before I jump into this code, I want to learn more about how Generator works, and test out some stuff with simply combining Node + Arduino.
Among my googling, I stumbled upon an npm package that allows you to control Photoshop using node.js, just as you would with ExtendScript. Could not get this to work right off the bat.
Things I’m learning from this tutorial on setting up the Generator core and a sample plug-in called Image Assets:
- You start plug-ins that use the Generator by navigating to the generator-core directory, and use this command:
node app.js -v -f ../plugins
Then you open Photoshop > File > Generate > then you see all the plugins!
- You must keep this command running in the terminal, or else it will stop, and not be available to use in Photoshop. Generator will also stop whenever the Photoshop application exits. If you restart Photoshop, you’ll also have to restart Generator using that same node command ^.
- For debugging, there is ‘node-inspector’ that works locally within the browser. Similar to Google Dev Tools but for node.js. You must start it in a new tab, then restart the Generator using the debug version of the app:
node --debug app.js -v -f ../plugins
This doesn’t work for me, even after trying to pause my ad blockers, and upgrading/downgrading versions of node. 🙁 Guess I am on my own with console logging in the terminal.
- The sample plug-in was very helpful to set up and figure out! I can see messages being logged into the console as it does different stuff. For example, once loaded it creates a Base directory to store the future image assets. How e x c i t i n g
It is unclear in the Adobe Scripting documentation where to locate the width of a stroke. I have a new and (possibly simpler) idea – to use the potentiometer to rotate the canvas, using the function rotateCanvas(), mapping the potentiometer value to degrees.

The Rotate View tool ![]() is exactly what I want. It moves the canvas WITH the image. But it’s tricky – I can’t find any clues as to how this was done, other than it using OpenGL for the strange red-white compass markers.
is exactly what I want. It moves the canvas WITH the image. But it’s tricky – I can’t find any clues as to how this was done, other than it using OpenGL for the strange red-white compass markers.
Arduino + node
I had no trouble wiring the potentiometer, and connecting its values to the serial port. The trouble is that this is all still withi n the Arduino IDE. I have done communications over the serial port, so my guess is that I am headed in that direction with node.
Well – I could not be more wrong. My potentiometer ended up not being a good idea because it did not spin all the way around. My new plug-in, once checked, will activate the servo, therefore no need for an additional controller.
After trying noduino with no luck (hadn’t been updated in 4 yrs), I found Johnny Five, which had great documentation and plenty of examples. I installed the node module and cloned the repo to mine. Here is the initial example provided for a continuous servo: up/down arrows control direction and speed. Press space to stop:
Time to connect the Photoshop and Arduino scripts together… !