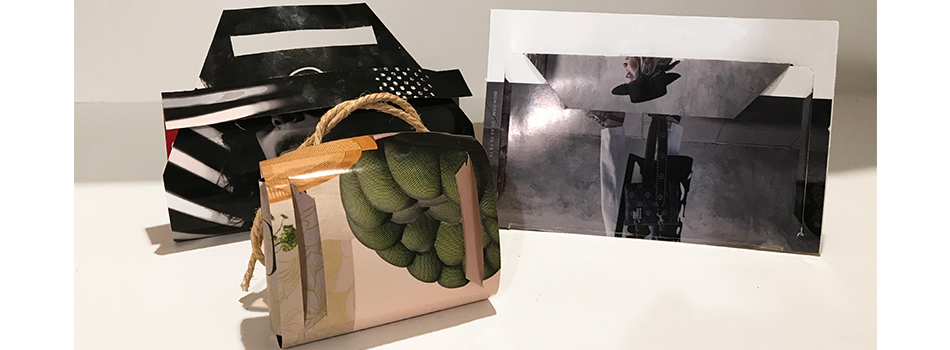
The Pags is a collection of 3 bags and 1 pinnacle holder, that are designed to be open sourced and therefore available to everyone.
They are made magazine paper, but can be applied to any kind of paper.
I – The Belt -Bag
First trial
Lazer cutting pattern & instructions
The Belt-Bag Instructions
- Crease the blue line and pass the top of the page through the cut at the bottom.
- Pass what is left from the top part through the cut at the back of the page.
- Pass both sides of the page first, through the cut closer to the edge of the paper, and second, through the cut closer to the middle.
- Attach your Pag to your belt through the cuts on the back.
- Done !
II – The Wallet
First trial
Lazer cutting pattern & instructions
The Wallet Instructions
- Fold the top blue crease as you slide the top of the page into the cut at the very bottom
- Pass through the second cut at the page of the back what is left from top.
- Fold the side blue lines as you pass them both on first, the cut at the edge of the paper, and second, into the one closer to the middle.
- Done !
III – The Holder
First trial
Lazer cutting pattern & instructions
The Holder Instructions
- Crease the blue line without completely folding it.
- Pass the top of the page into the bottom cut.
- The the top of the page out of the cute until it cannot go through anymore.
- Done !
IV – The Pinned Holder
First trials
Lazer cutting pattern & instructions
( same design as the belt bag, but without the cuts for the belt and the folding)
The Pinned Holder Instructions
- Crease the blue line and pass the top of the page through the cut at the bottom.
- Pass what is left from the top part through the cut at the back of the page.
- Pass both sides of the page first, through the cut closer to the edge of the paper, and second, through the cut closer to the middle.
- Done !


