It all started at the farm. For our field study, Cass, Christa, and I headed to Brooklyn Grange to volunteer, picking vegetables for a few hours, then learning how to wash them and bunch them for sales. One of the vegetables we picked was radishes and when you pick them in bulk, a fair amount of them turn out to be bad or split. We gathered all of the bad radishes and decided to dye our wool with them instead of buying new vegetables at the greenmarket.

Straight from the source! This is a photo of a radish I picked and put in the basket to take home and dye with.

After picking our dyeing materials, we began the dyeing process which started with soaking the wool in warm water. This is extremely important because wool soaks up dye better when it’s already wet.

Christa and I with the turnips just before putting them in water to become dye! We measured out around three cups of turnips, filling this bowl to the top.

Pouring the radishes into boiling water to make dye.

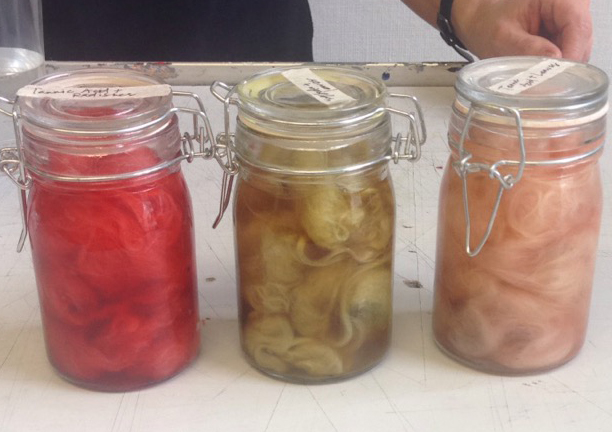
The finished dyed wool! For this project we reused the little glass jars that I used for my picnic project to hold the food. They made the perfect containers for our wool. For the darkest red, we added tannic acid to the radishes. For the light pink, we added tannic acid to the radish leaves. And for the green yellow, we added baking soda to the radish leaves.

A closer look at the vibrant colors we achieved. Unfortunately, when we removed the actual wool from the dye and washed it, the colors faded quite a bit but we were still left with a light yellow green and two shades of light pink.

Next, I began felting. This photo is from one of the early stages. It’s hard to tell what’s going on in this photo because of all the soap suds. I used an old plastic lid cut into the shape that I wanted as my resist and started by felting plain white wool around the resist, adding water, and rubbing soap into the wool through a fine mesh net to make the felt fluffs merge together.

This is the next step. After making the center nice and soapy, the edges should still be a little wispy. I folded them into the center and used some water to make them stick and flatten. Then I repeated this process four times on each side to build up a thick layer of felted wool so that I could form my shape at the end more easily.

Cutting a hole in the felted wool and trying to get the resist out was perhaps the hardest part. Since I used a plastic lid, it was little thicker than most resists are supposed to be and I had a difficult time trying to bend it and get it out of the small hole I cut. The top in this picture looks overstretched, but I fixed it with soapy water and some gentle pulling to get it to the shape I wanted.

To set the shape of my felted wool bowl, I ran it under cold water and set it on this bowl to dry overnight.
The shape of my little bowl is exactly how I wanted it, I wanted a smaller more round bowl so that I can later use it to hold rings and other jewelry. Since my dyed wool turned out a lot lighter than I had hoped and expected, the color of my felted bowl was also very light. I alternated between white, light pink, and light yellow but it’s hard to tell that there are different colors. If I were to do this project over, I would soak my wool in the dye longer and experiment with different fruits and vegetables for a more vibrant color.