[PUPD 2020] PROCESS DRAWING AND DIGITAL PRESENTATION-Multi-view Drawings
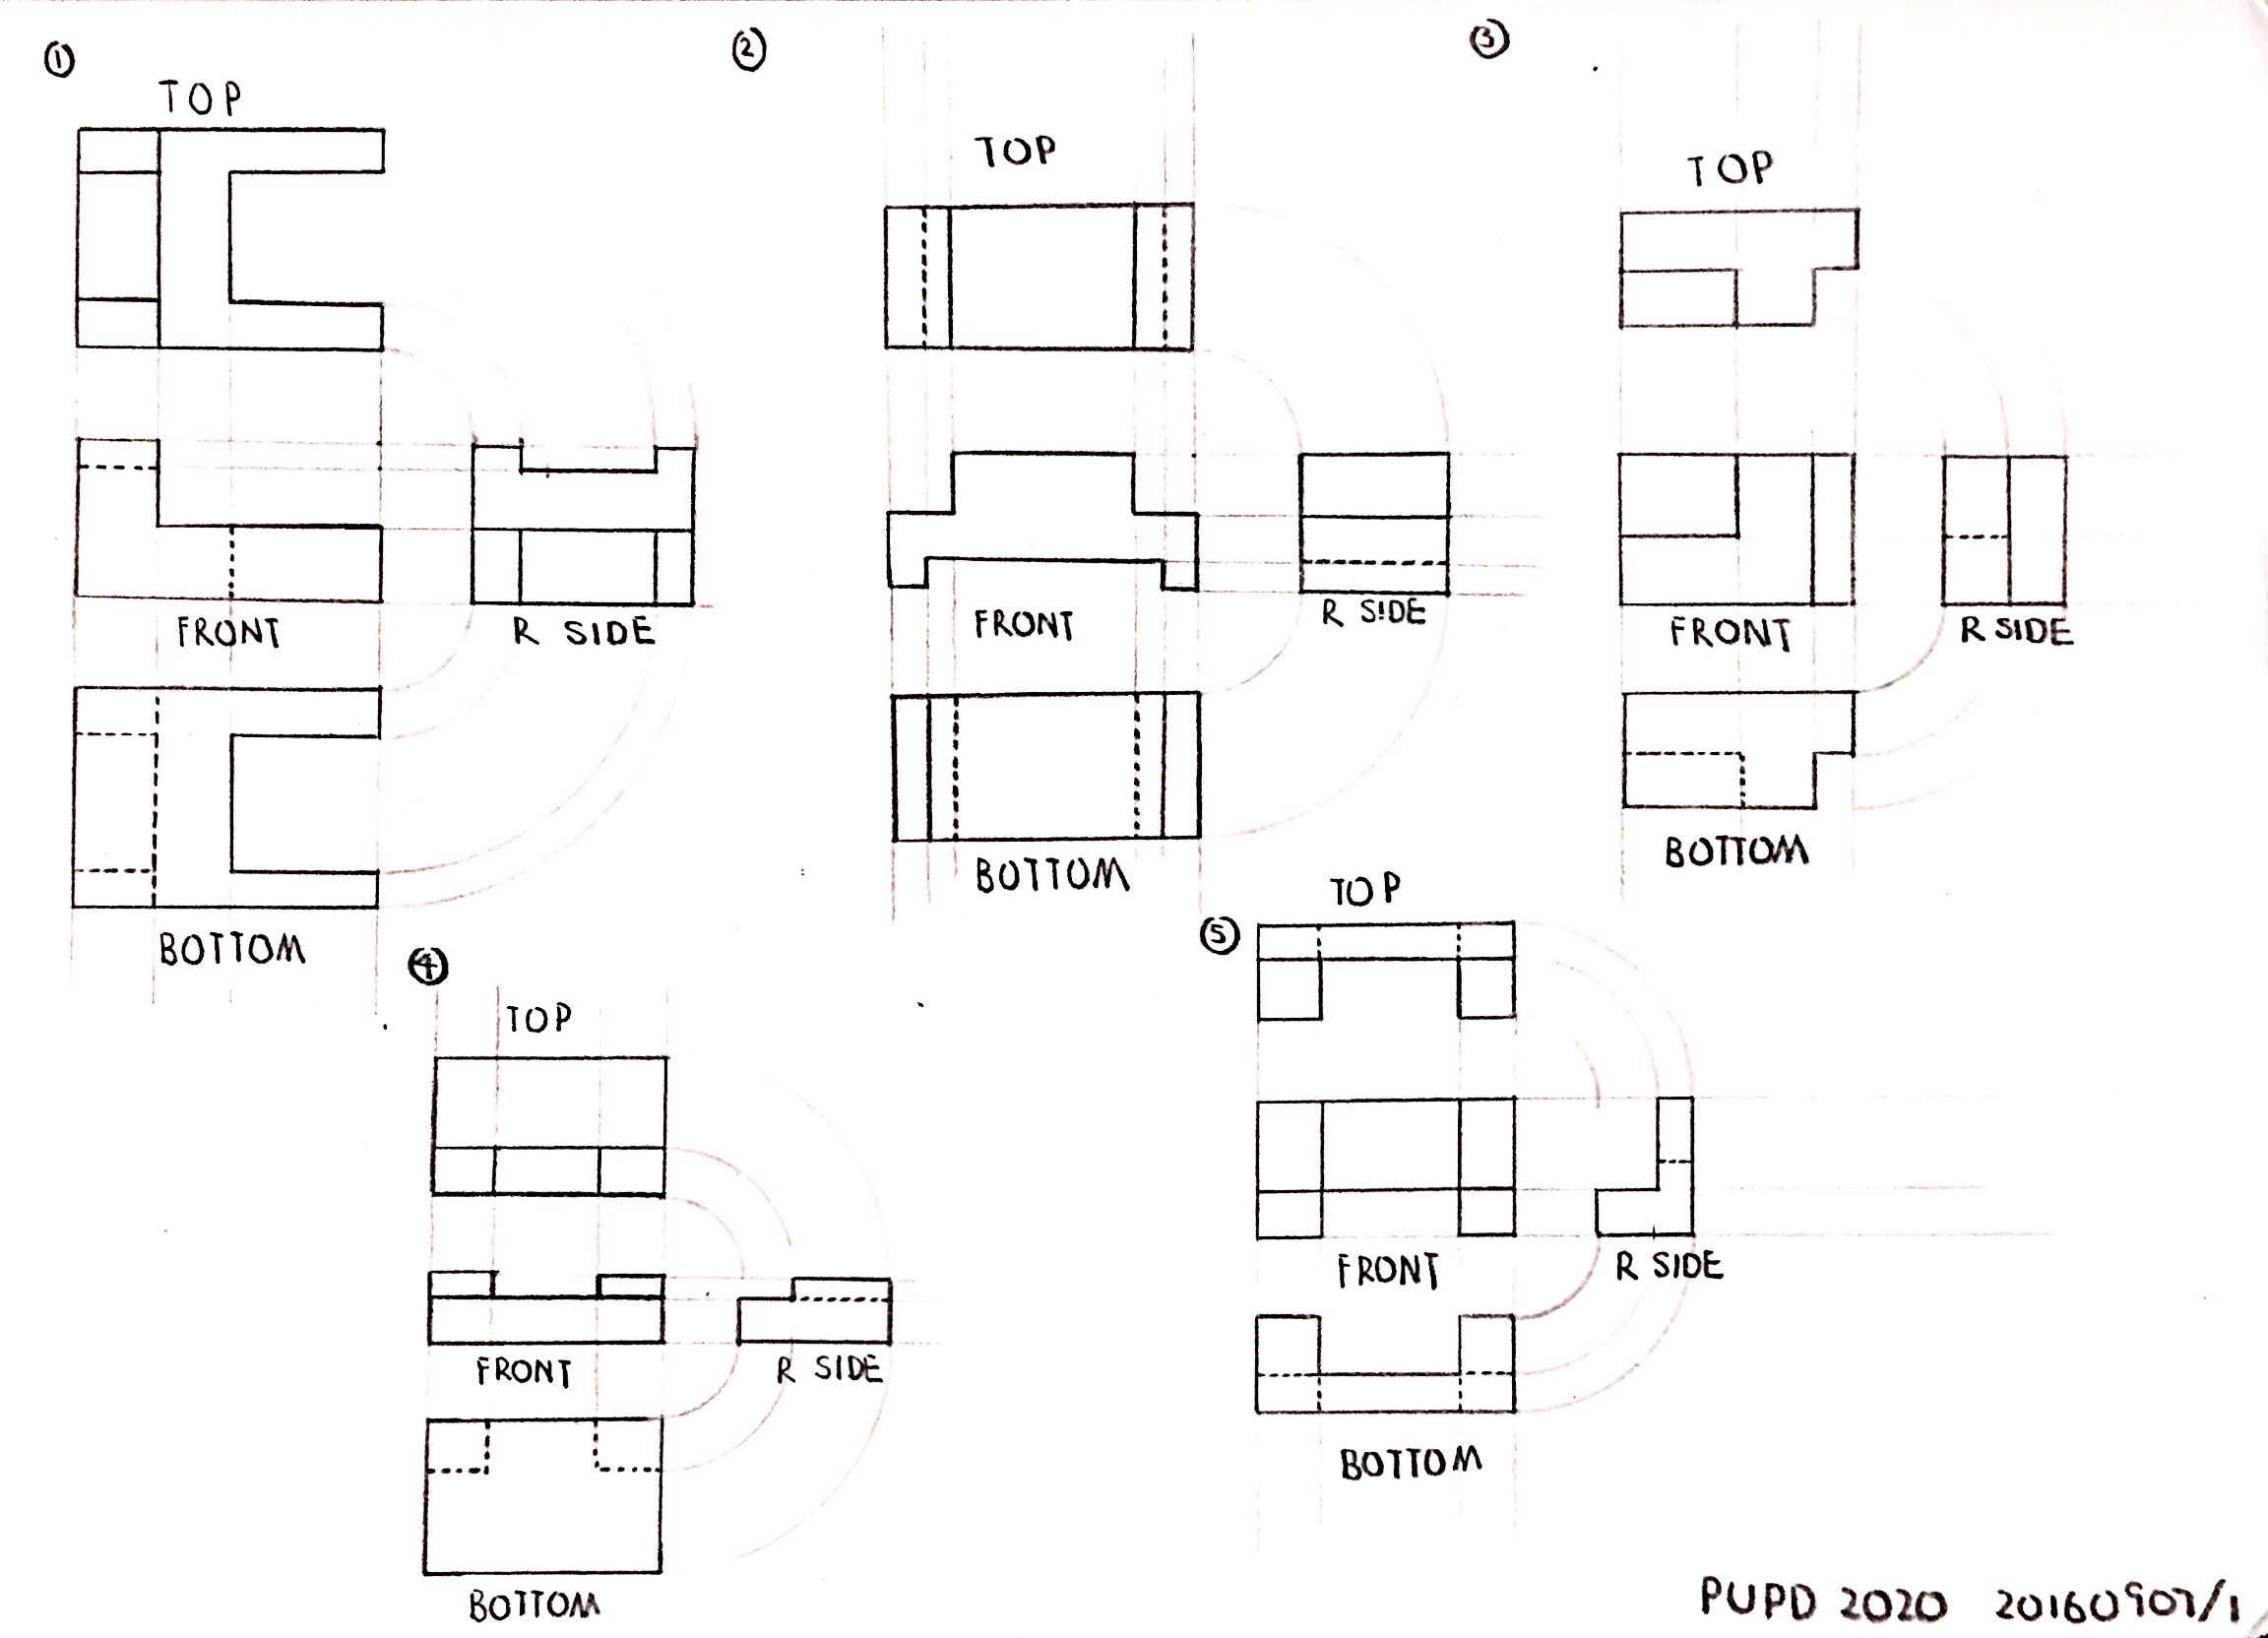
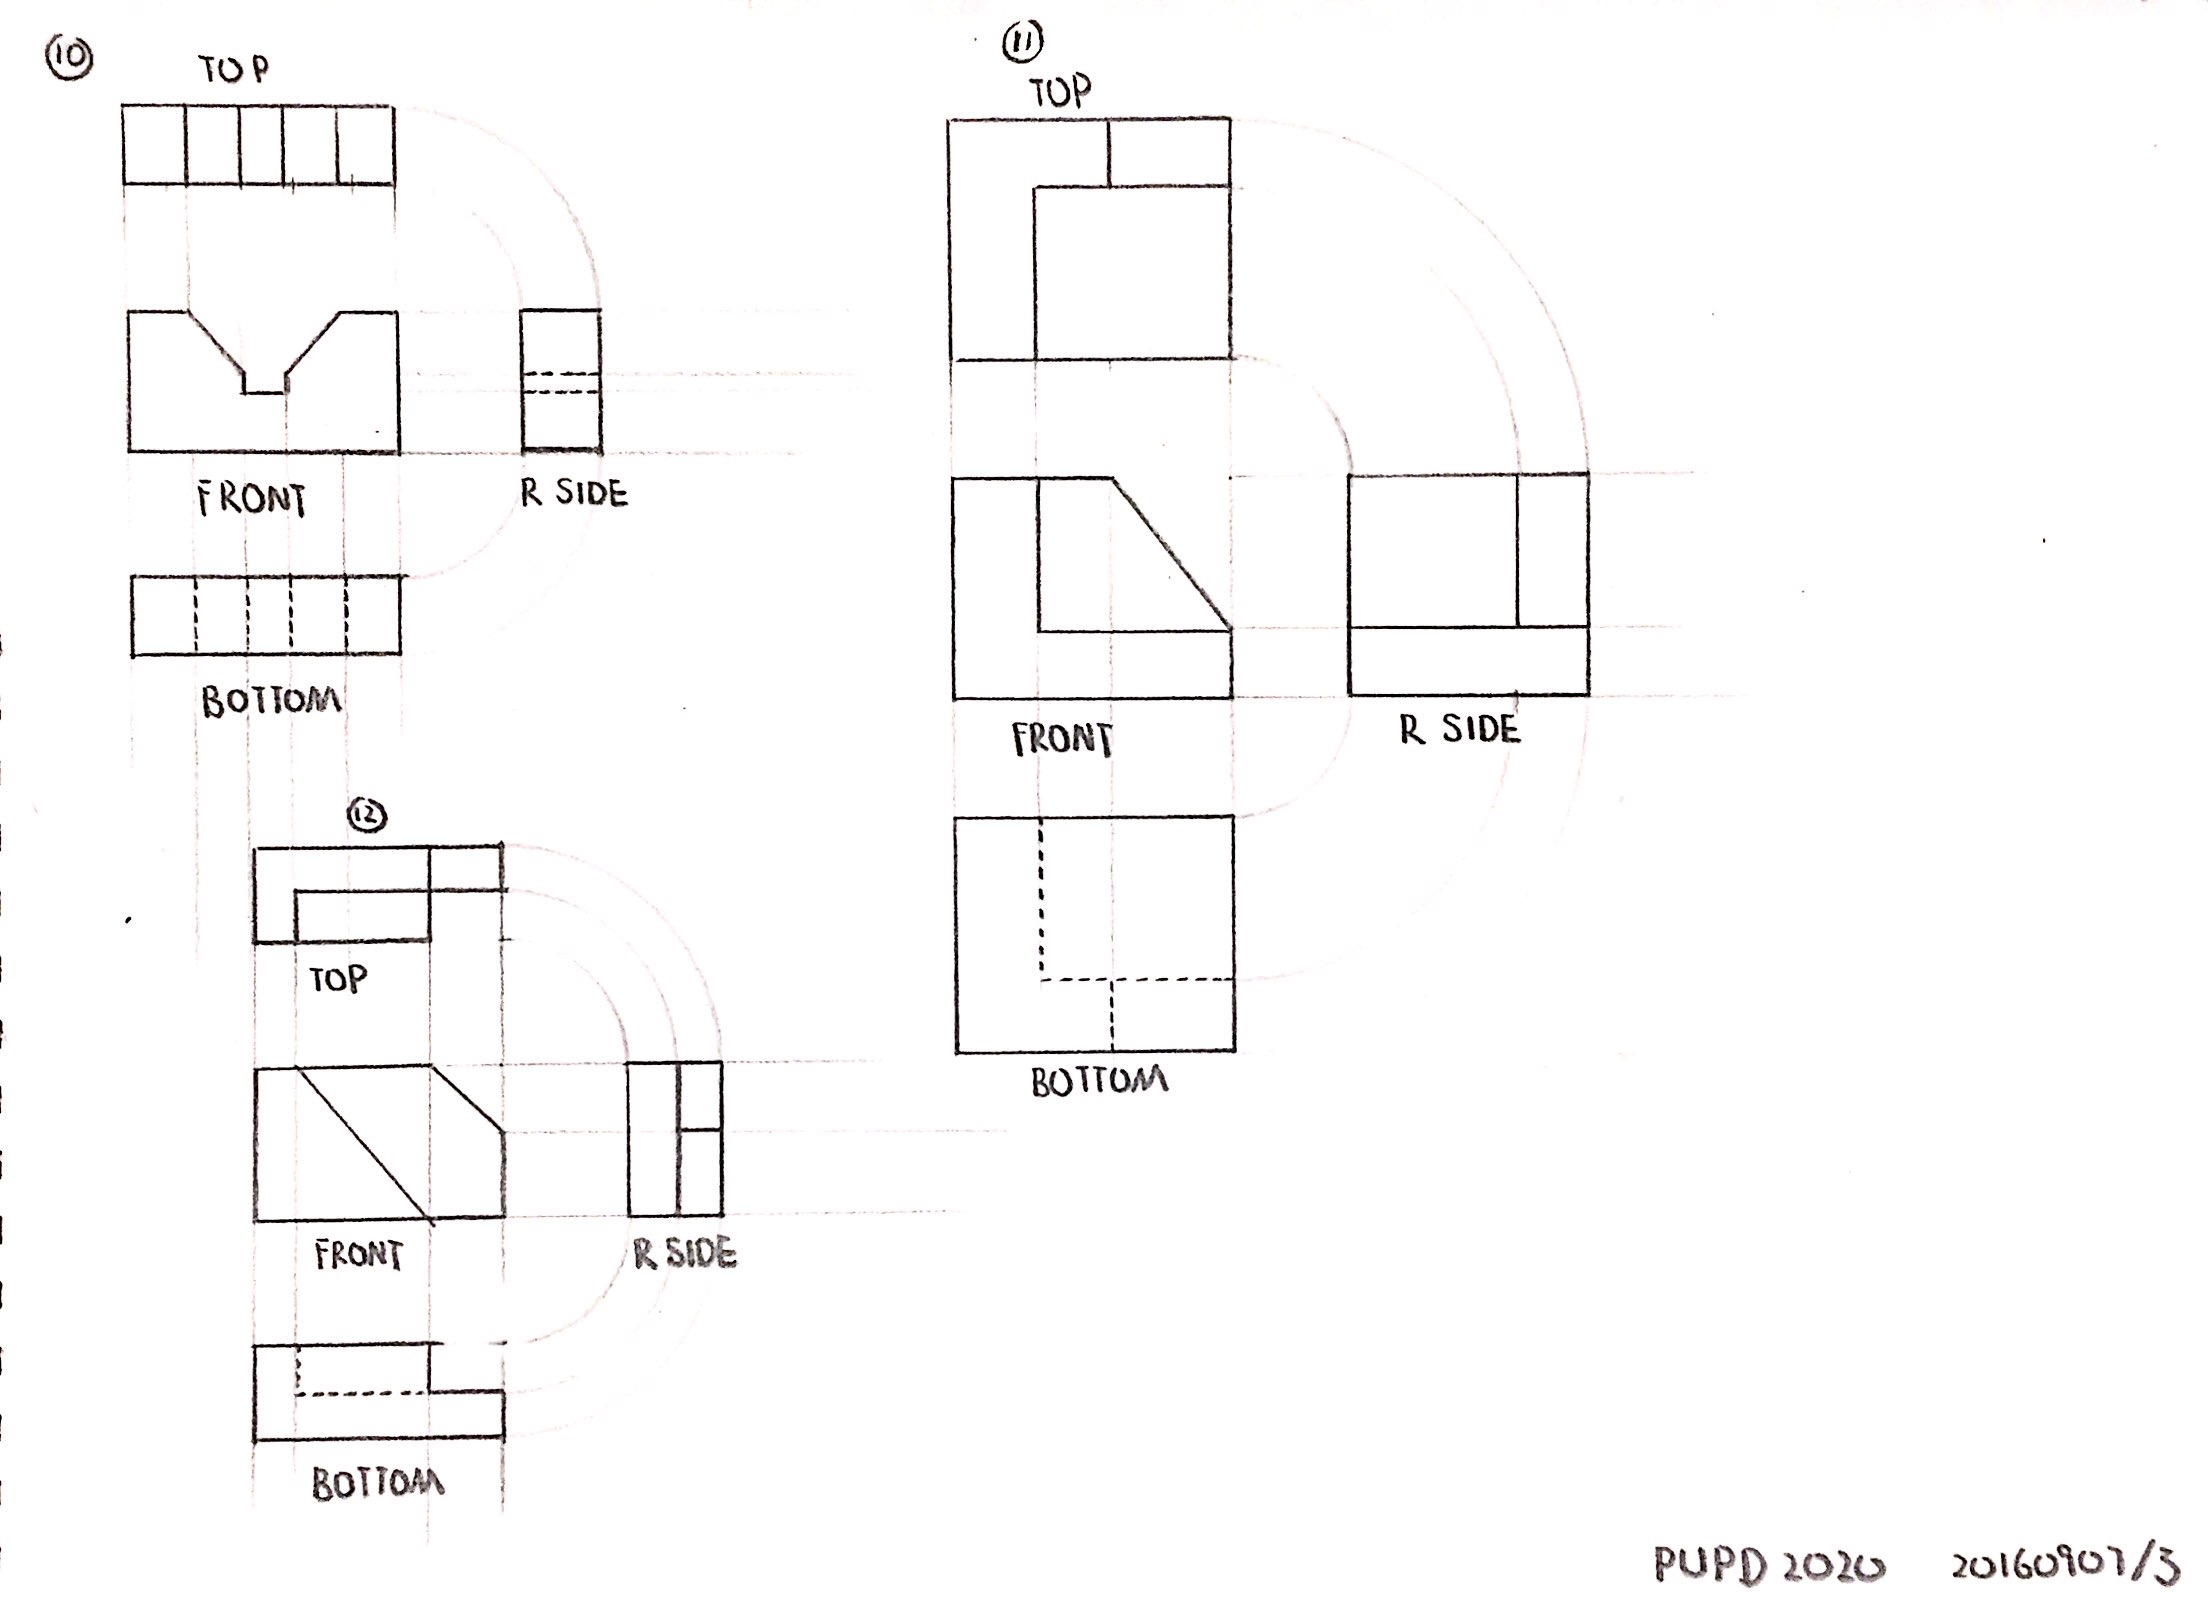
The practice of using T-Square, 4H-2B Leads and compasses to draw multi views. The drawing is done on the sketchbook paper (Without grids) for total of 12 objetcs.
Multi-view 1
The multi-views depict four sides of the objects, the top view, front view, right side view and the bottom view. To get the scale at accurate as possible, auxiliary lines were done by the T-Square and compasses.
Multi-view 2
The dotted line in the multi-views are the edges that cover by each side. They cannot be seen in those individual views but still need to be drawn (For viewers to get a complete idea about what the objects look like in three dimensions).
Multi-view 3
![[PUPD 2020] PROCESS DRAWING AND DIGITAL PRESENTATION-Multi-view Drawings (Eric Cheng)](http://portfolio.newschool.edu/lx1952/files/2016/10/三视图3-1r5orhd.jpg)


