![]() More often than not you are working with BIG images, but the fact is, when they are online, they don’t need to be that big. Digital cameras these days shoot images that are REALLY big, not only in terms of the number of pixels, but also the size they take up on a hard drive.
More often than not you are working with BIG images, but the fact is, when they are online, they don’t need to be that big. Digital cameras these days shoot images that are REALLY big, not only in terms of the number of pixels, but also the size they take up on a hard drive.
Often online platforms have size restrictions. The Learning Portfolio for example has a 500mb size limit. So you should be aware of the size of the files you are uploading. When it comes down to it, your images don’t NEED to be that big, The resolution on my monitor for example, is 1440 pixels wide. I wouldn’t need a picture on my Learning Portfolio to be any bigger than that.
Here’s a way to create a simple automated folder where you can drop images in and it will immediately resize them for you so you can upload them. You’ll use a program on the Mac called Automator.
Here’s how
- Go to your APPLICATIONS folder and open the Automator application
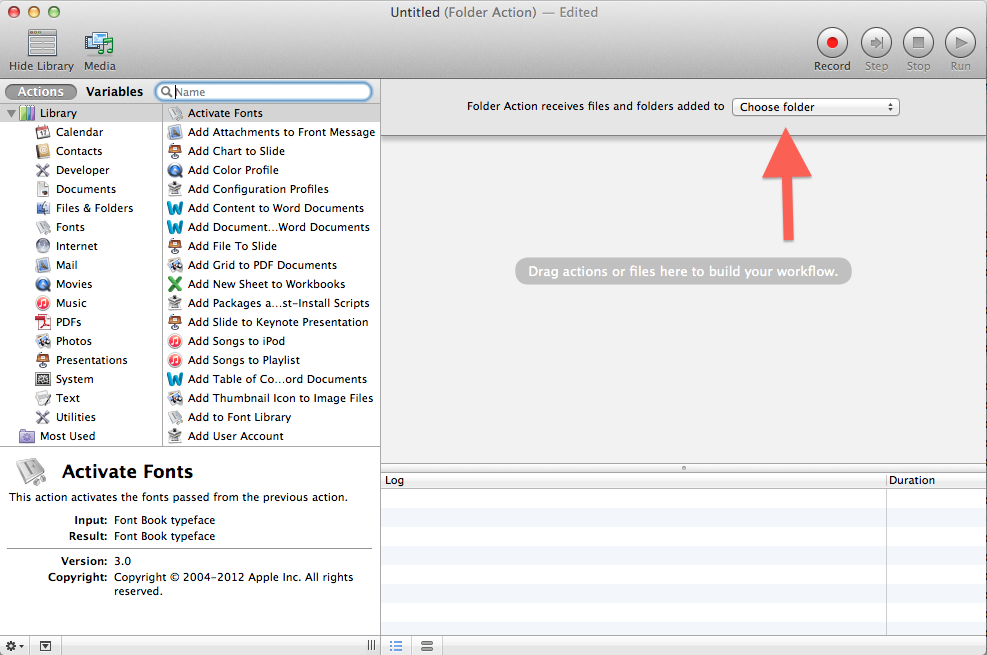
- This window will open.
Click on Folder Action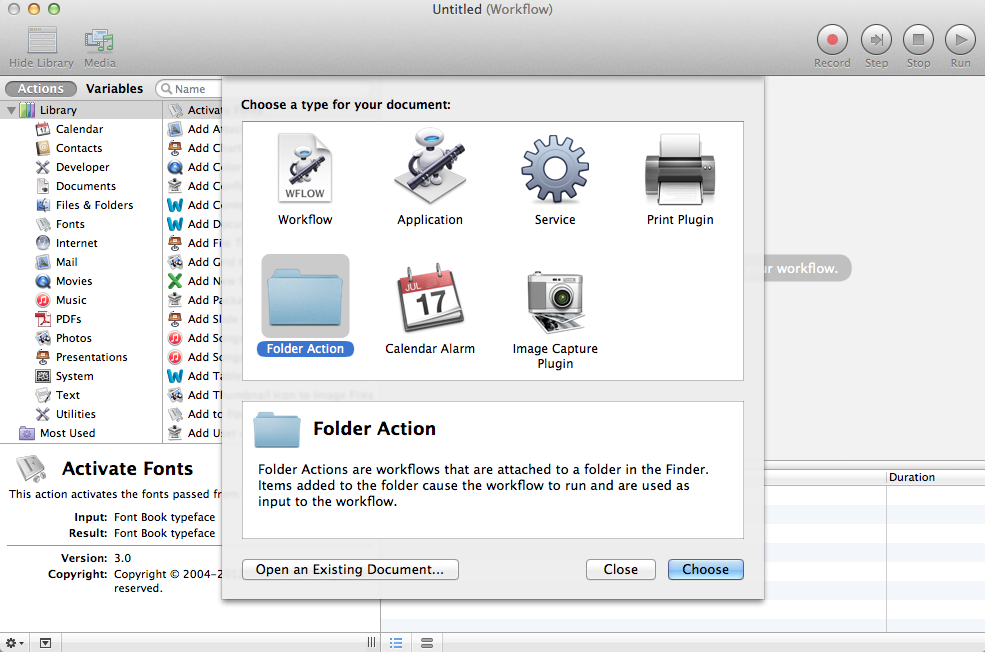
- Chooseafoldertobecomeyourresizer folder.
- Create your Automated Action!
- Select Photos from the list of options on the left.
- Select Scale Images from the list of options on the right.
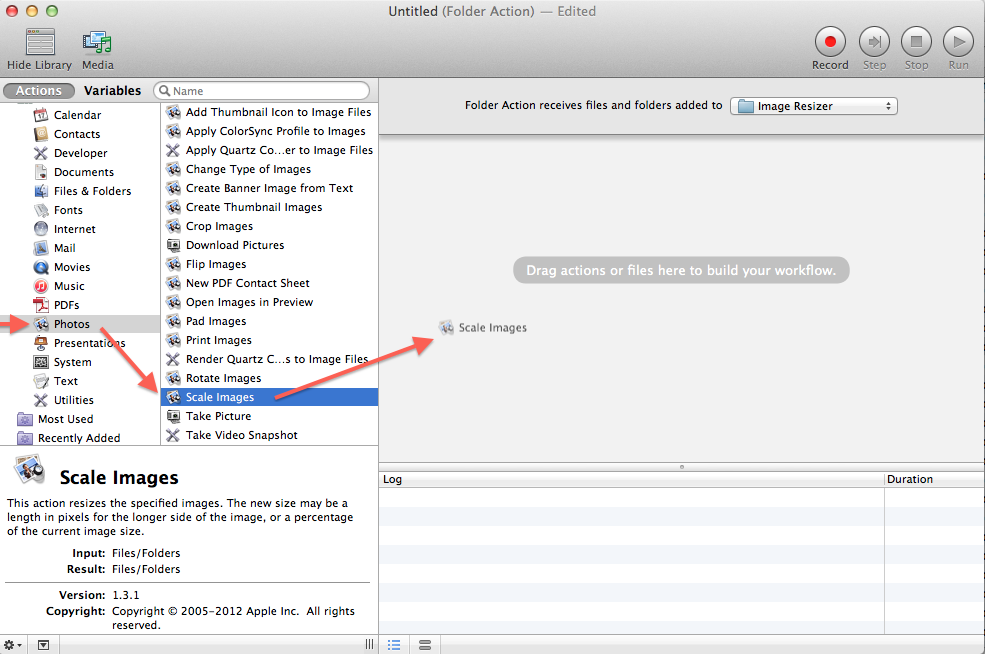
- When you add this action to the window you’ll get this message:
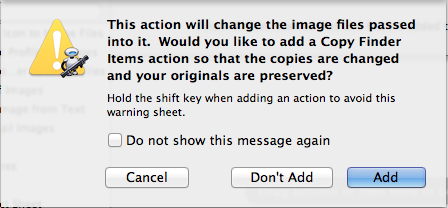
The idea is that when you drop your image into the folder it ALSO makes a duplicate which is the original size.
If this works for you, choose ADD.
I personally like to just duplicate my images as I drag them into the folder (Option-Drag) The advantage is that it leaves the original in the folder where you found it.
- Choose the size that you want the images to be.
1000 pixels works fine.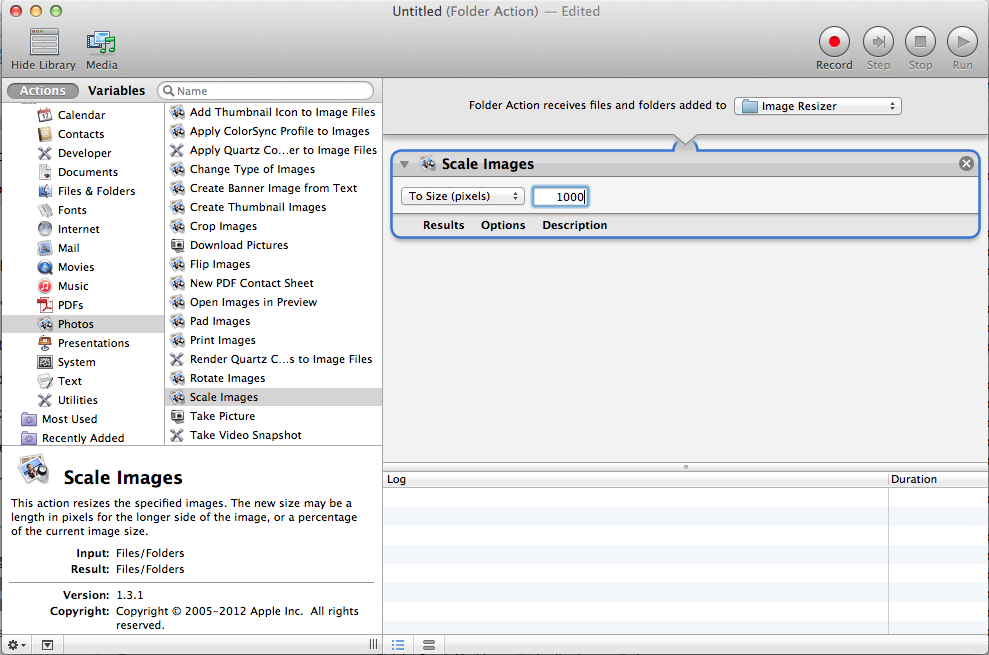
- Save your project.
Command-S or File Menu > Save - Test your folder!
Option-Drag an image that’s larger that 100o pixels into the folder.See what happens! Here’s a video of the folder in action.

