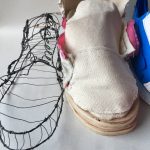
- We started off by making our orthographic drawing and I never thought we would be making a 2-Dimensional piece into 3-D. We commenced our wire shoe short after and went onto the paper model and then our final. We used a variety of materials and tools throughout this process. We measured and drew the shoe out and made sure it was accurate. The different views gave us a sense of the different perspectives.
- The paper shoe allowed me to see the difference of materials and the material’s limitations. The paper shoe was more difficult to make a realistic shape out of than the wire shoe.
- Title: “It’s a Trap”
I titled it this because I was inspired by the Venus Fly Trap. The shoe closes at the opening when you pull on the twisted wire and when you release it it opens back up. I was just going to have the shoe flaps open and close but the movement did not capture that of a venus fly trap.
Repurposed Canvas Totes
Plaster
Clay
Thread
Wire
Nails
Screws
Wood Scraps
Needle
Drill
Hammer
Bandsaw
Sander
Sewing Machine
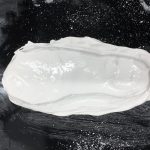
- I started off by creating a clay mold out of my shoe bottom and made a plaster mold. This was not successful therefore I ditched the idea and had to think of something else.
- I ended up using a wooden bottom for my sole and I did this by cutting it with the Bandsaw and making it smooth with the different sanders.
- I then sewed it the canvas cut out pieces with the sewing machine.
- I created the venus fly trap opening by sowing 2 pairs of semi- circles together with wire going through it. I connected the wire by twisting it together so both pieces are now attach and it moves when you pull and release.
- I switched everything together and attached my fabric part tothe wooden part using nails and screws.

-

- Process: It Didnt Work