Our objective for this project was to create a seating device out of polyhedrons. Our first mini assignment was to create a variety of polyhedrons using the paper tab techniques we learned before. For my project, I decided on creating a truncated tetrahedron (middle) with an opening to allow the user to rest inside.


In order to fit a human body, I decided to elongate the hexagons. However, I would then have to adjust for each angle.
For our in progress, we created life-size blueprints for our scaled down chair. I somehow spent about 15$ in printing credits at this time. 
With the creation of the cardboard model, I realized that the seat I would be creating would be too big for my budget. However, I was able to see where I wanted overlaps in the object and where I did not need them.
When preparing for the final output, I struggled with finding the angles of the truncated tetrahedron. There were too many complications regarding the geometry as the thickness of the wood added an extra variable I was not prepared for. The angle I needed was too extreme for the band saw as well, and so I restarted on my project, making changes to the original idea.
In the end, I used the same shapes, but in different ways.

I planned on making a hexagon that would stand on 6 different triangular legs. However, There would be issues with the edges overlapping. I streamlined the idea into a three legged chair that would stand with hinges and be able to sit flatly when closed.
Through experimentation in the wood shop, I found that I could not get the triangles to fully sit if I wanted to use a hinge. I decided on cutting part way and to reduce the number of feet to three per hexagon.

Triangles experimentation with different angles and wood types.
The final chair was a simple hexagon with three triangles attached with hinges. The triangles were placed on alternating sides. An issue I that did not occur to me was the fact that the hinges were extremely loose and the chair had little stability. As I planned the chair to be able to stack on top of another, this was an issue. By flipping over the hexagon, the triangle would stop at the point where it hit it, which is what I eventually used.
The small screws on the hinge had to be filed down to allow the triangles to sit flat. One of the holes was too big for the screw to fit comfortably, and so I filled it in with glue and re-drilled. In a mistake of spilling the glue, I found that it made the hinge stronger as I desired.
My final object is the two chairs that combine to create one. In my experimentation I found that the two pieces could lock together comfortably without the other falling.

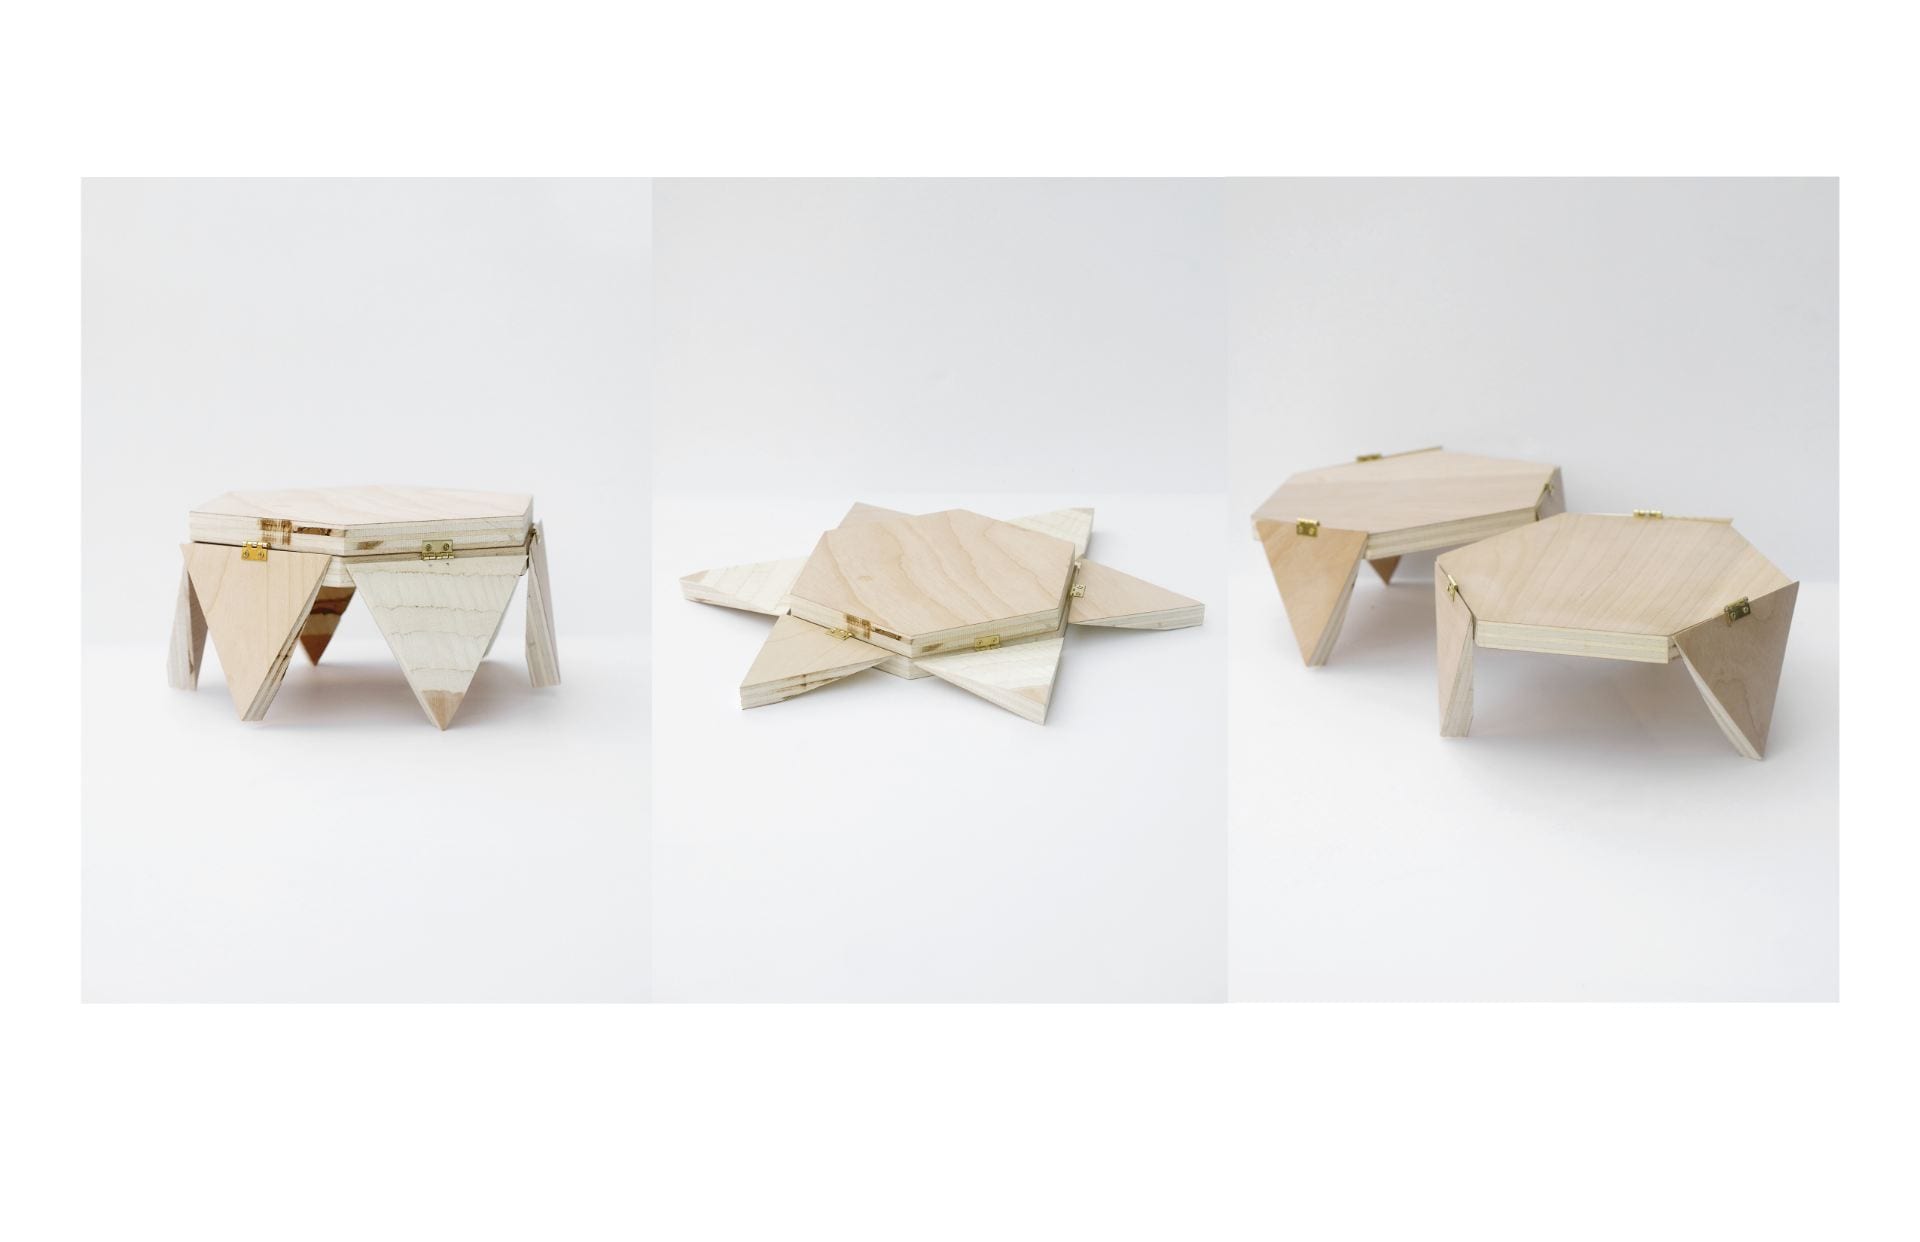
Documentation photos. Side, flat, and separated
 Conceptual photo as a kid’s sized stool