We began this project by doing a series of axonometric drawings of a cube made of 27 smaller cubes, just like a Rubik’s cube. The first drawing was a full cube, the second drawing was the same cube, only rotated and with three of the smaller modules removed, and in the third drawing three more cubes were subtracted. We followed this same pattern twice more, rotating the cubes while subtracting smaller cubes from the larger object until we were left with only three smaller cubes left. We used color to help describe what was happening visually. This exercise was very tricky, because it relied on your ability to visualize a complex 3D object and translate it onto paper using precise measurements and angles. I had trouble imagining the cube without having a physical model to go off of.

The next part of the project involved designing three compositions of nine smaller cubes each, that came back together into a complete cube. We made axonometric drawings of these individual shapes, as well as a drawing of how they would fit together into a cube.


We then moved from drawing to 3D and made chipboard models of each of our three shapes. At this point in the project, I designed three new shapes to proceed with instead of the original three I had drawn. The models were very time-consuming and relatively challenging to make. I took the approach of making flat nets that I then folded into the final shapes…this took a lot of planning and translating which was very tedious.


We were then told that one of these shapes was going to be casted in plaster, one was going to be made out of plywood, and was going to made out of our material of choice.
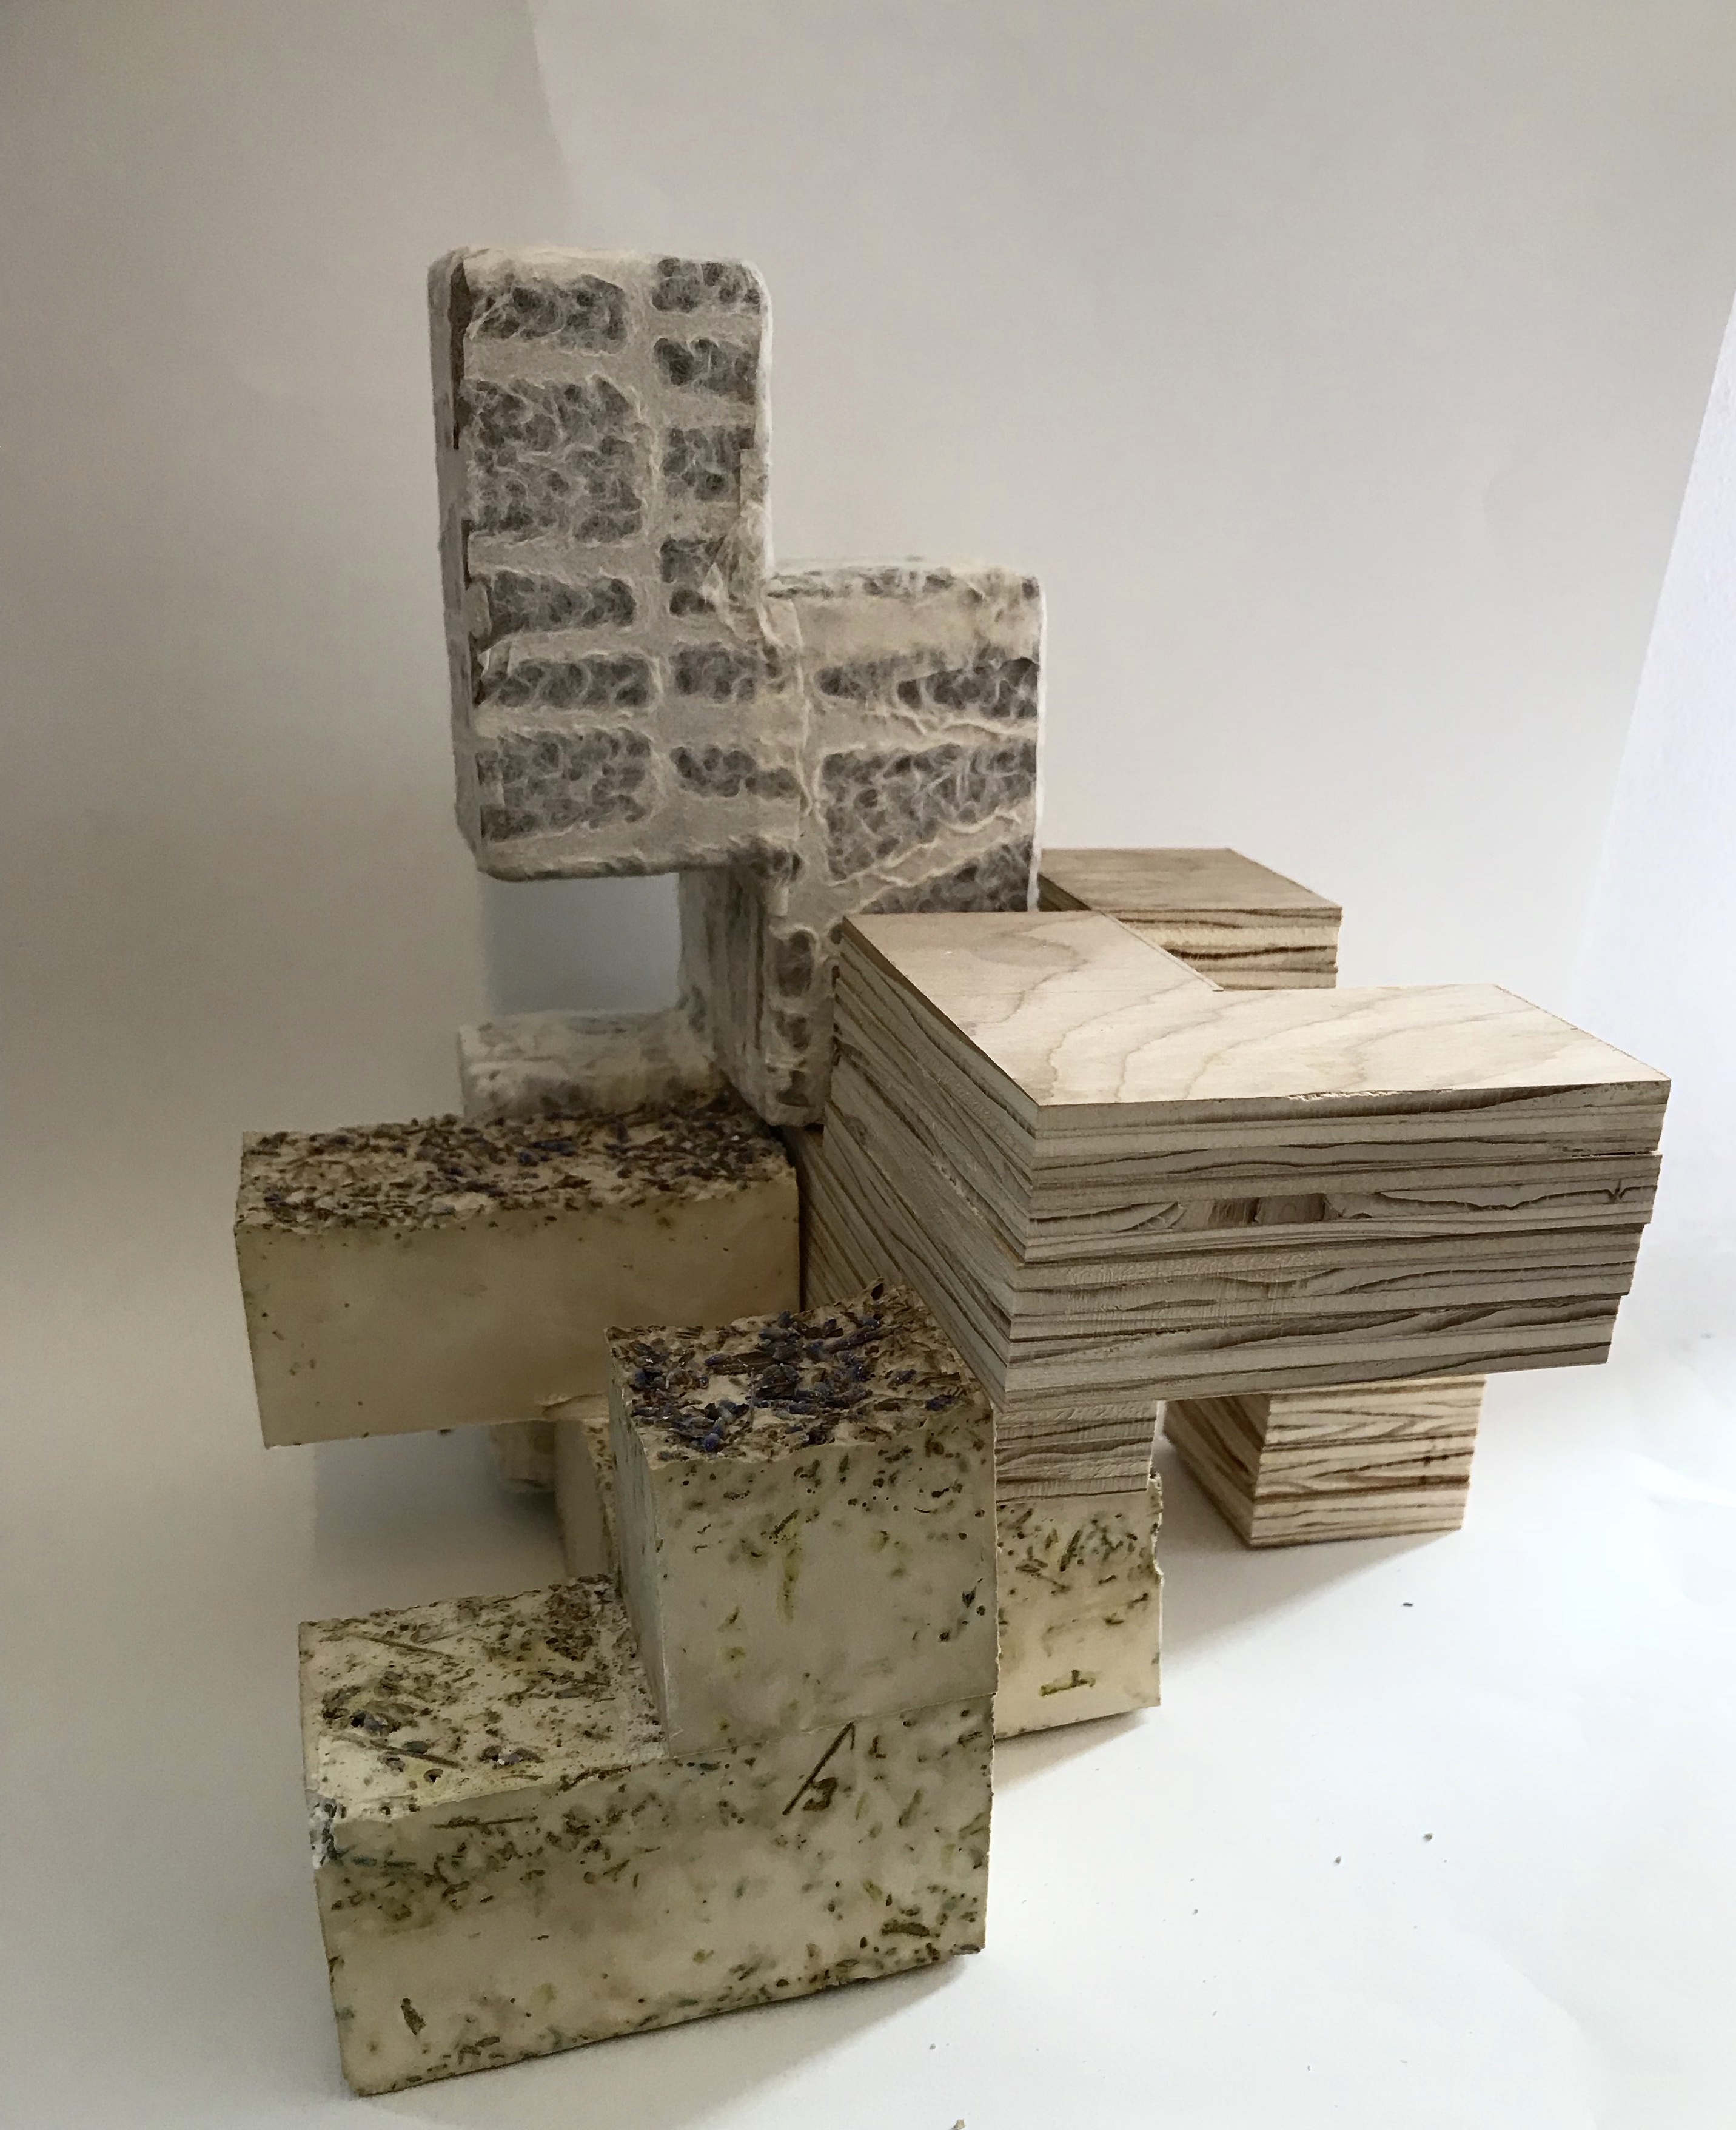
The plaster sculpture was definitely the most time-consuming. We started by making a foam core mold that encased the dimensions of our model. The sculptures were made out of 2″X 2″ cubes. We used sewing pins and tap to hold the molds together, making sure there were no gaps where plaster cold slip through, leaving the top open so that plaster could be poured in. I decided that I wanted to experiment with the texture of my plaster by adding dried lavender to my plaster mixture before pouring it into the mold. Once I have poured my plaster lavender mixture, I realized that a few things were happening. Plaster was leaking out of my mold and my mixture was taking much longer to dry than others. I figured out that my ratio of water to plaster was too high from the beginning, and I had added a bit too much lavender, throwing the consistency off even more. I decided to leave my plaster drying overnight to see if it would solidify fully. When I went back in the morning, the plaster was dry but very brittle. I was pleased with the finished piece, which almost reminded me of a bar of natural soap. The lavender created an interesting color and texture, giving the piece a very organic and natural feel. I also loved how the scent of the lavender became part of the sculpture, creating a dialogue with different sense .


I was worried about the wood sculpture, simply because i don’t have any experience in the wood shop and was quiet nervous about using the heavy machinery. Once I started however, the process was really quick a straight forward. Starting a the bottom and working my way to the top, I divided the shape into 1/2 inch layers. I cut the layers out of plywood on the band saw, and then laminated them together with wood glue. I then finished the piece by sanding some of the uneven edges. I was pleased with the finished product, and also very excited to get some experience in the wood shop.

I thought that the look of the untreated plywood also referenced nature like the lavender, so for my third sculpture, I wanted to stay with the organic visual theme. I wanted to use a material that was going to look soft and that would be easy to work with. I choose to use florist foam as the base. This was a good choice because, instead of building the shape like the two previous materials required, I could simply carve the foam down into the shape I wanted. I then covered the foam indelicate handmade paper. I think this object turned out to be my favorite. I like the slightly round quality the foam created, and I loved the process of carving away to reveal a complex shape.

I think the finished three all together create a nice harmony, using material to reference nature and softness while taking on a rigid geometric form.