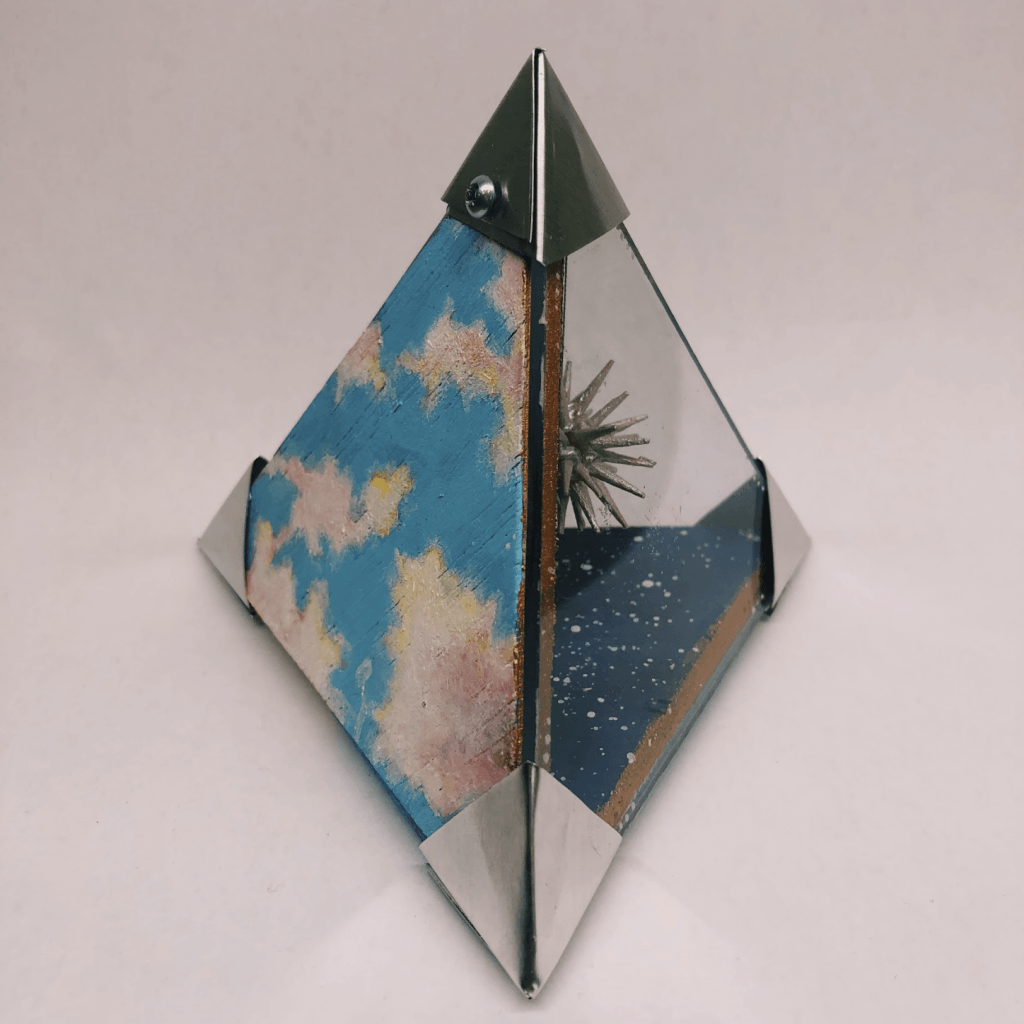
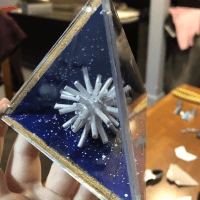
Id like to start off by saying how much I enjoyed this project. It was the first time I got to work in the shop in the making center and it was so incredibly cool. To make my tetrahedron, I chose wood and a type of plexiglass. I knew I wanted to work with wood because theres a lot you can do with it as a planar material, its sturdy, and can be used with all the tools in the shop. I chose the plexiglass because I thought it would give a cool transparent element to the tetrahedron. I drew my triangles onto my materials, two wooden ones and two plexiglass ones. I used the smaller band saw and later the sander to cut out and refine my wooden triangles. I used a scoring knife and jewelers saw to cut out the plexiglass ones. Once all four were cut, I realized the wooden ones were too small in comparison to the plexiglass, an error that likely occurred by sanding too much. So I redid them, making sure to cut with the band saw farther from the drawn line and then sand to the line. The wood was relatively thick, only a quarter of an inch, but two thick to simply press up against one another, so I used a file and sanding block to sand angles into one side of each piece of wood. I sanded until they fit together well. Now to decorate the sides. I started with the outside of my wood pieces. Inspired by the ceilings in the New York Public Library, I painted on dreamy skies with clouds. I had these great plexiglass sides, so I knew I wanted to paint the inside of the wood as well, and put something into the tetrahedron. Since the outer sides were the daytime sky, I painted the insides navy blue and splattered white paint to create stars. Now to make the inside piece. I originally was going to make a planet, but then made a star. At first I cut and glued q-tip sticks together to make a star and painted it silver. The q-tip sticks were far too thick, so I repeated the process with toothpicks. It was perfect. I then suspended it on a silver piece of thread, pulled it through the top of the tetrahedron, and attached it to the screw hole underneath the cap (the “cap” will make more sense now as I explain how I connected them). Then came the issue of connecting them. I experimented with wire and it did not work. Given my materials, creating some kind of sheet metal tab would be the most logical solution. However, I did not want thick tabs on each side of my tetrahedron. They would be distracting, and drilling holes into plexiglass is risky. I thought of what other kind of tabs I could make, and came up with making a little cap for each corner of the shape. It would be simple and much more subtle than the tabs on the sides. I cut out triangular caps that folded up into a tetrahedron without the bottom, one flap overlapped. I made sure each overlapping flap was on a wooden side, and drilled a tiny hole into it, then crewed in a small screw. This meant no plexiglass would be drilled into, and there would be one single screw on each corner, keeping it clean and simple. I am so beyond happy with how it came out and am proud of my construction of it and my solution for the connections. It was something new to make and inspiring. I had so much fun with it and am so proud of the result.
process


FINAL


