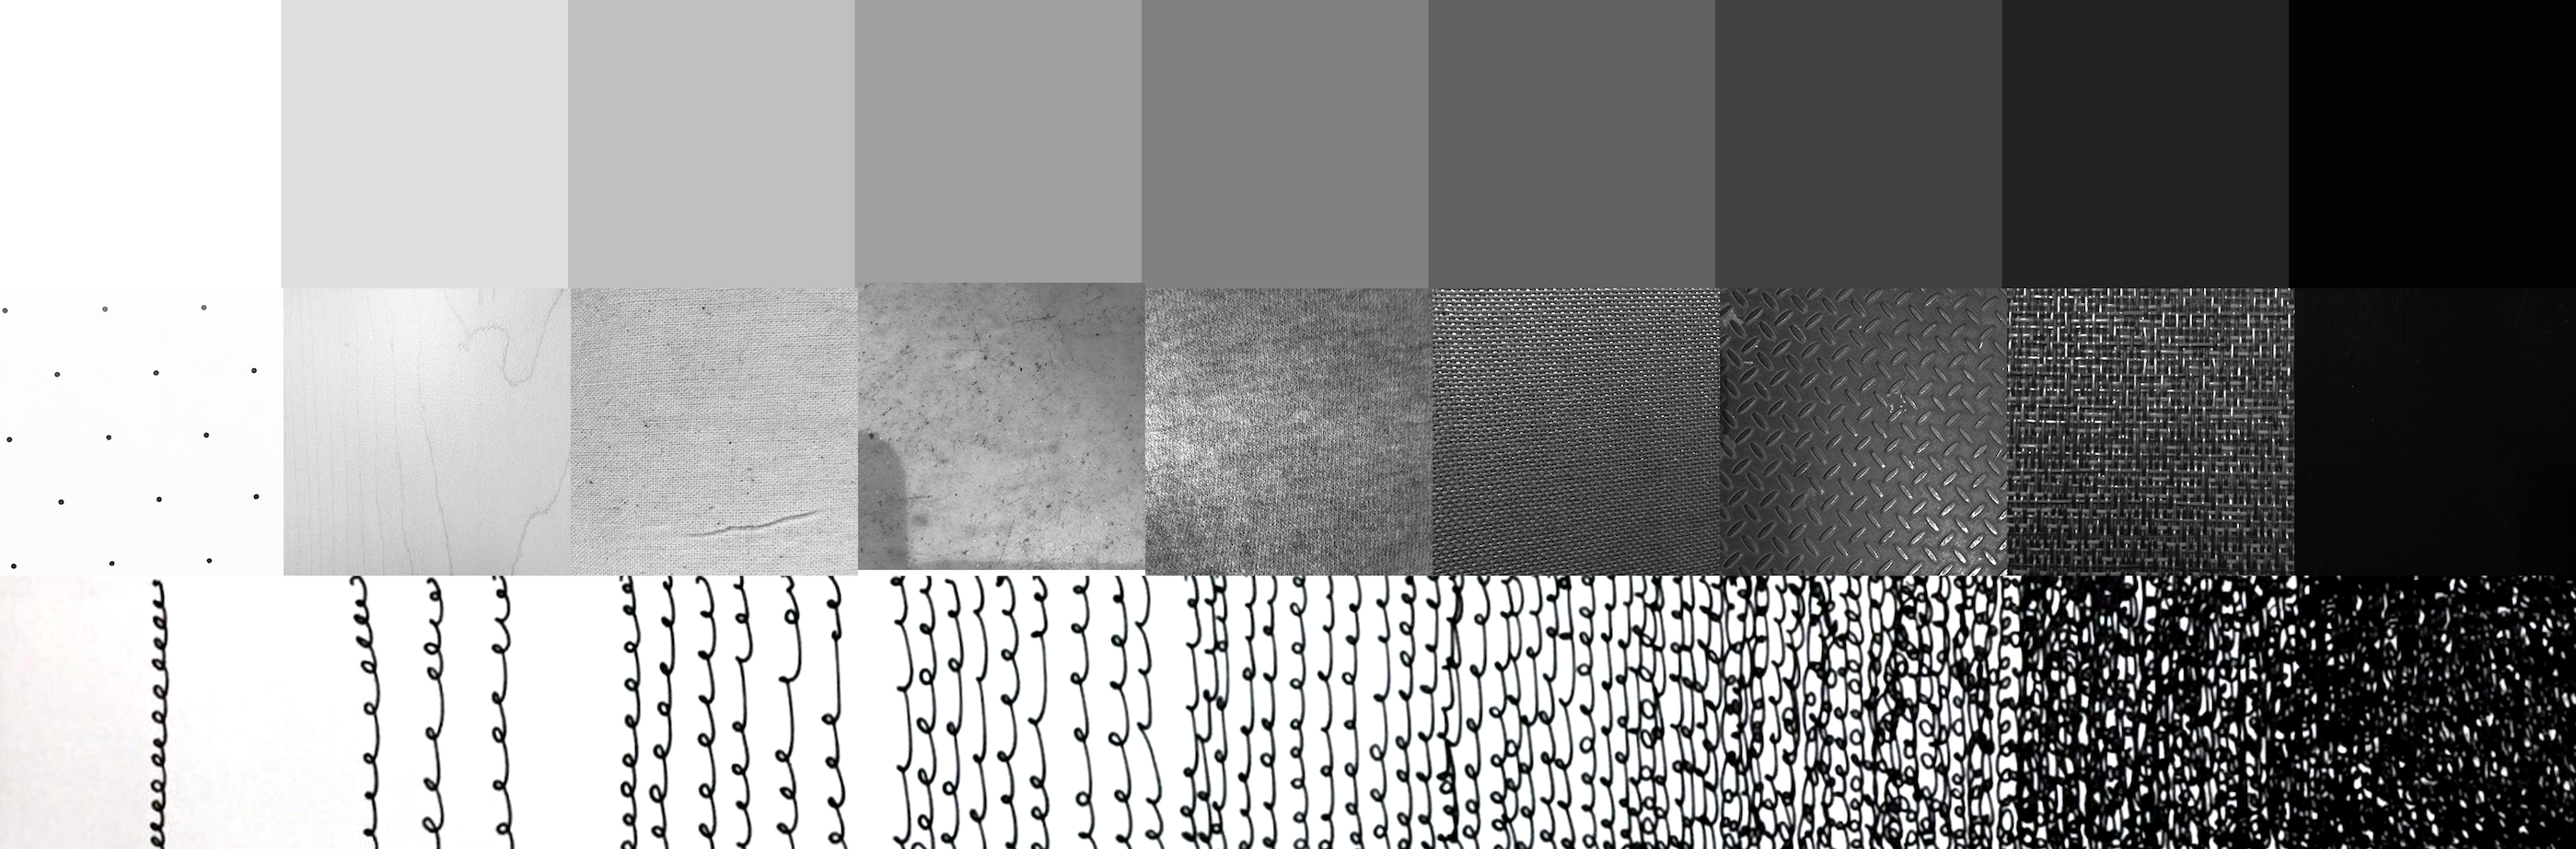
Step 1: We were to make a series of 10 progressing black and white squares that increased in density. Below are just a few out of the 10. We were essentially supposed to make uniform marks on the squares until they progressed in density, as shown below. The mark I initially started off with was a stretched out curly spiral. I then continued this for the rest of the squares.


Step 2: We had also taken photographs of ten textures that would correspond with the ten progressing gradients. We then put these photos in Photoshop to crop and change to Grayscale. We matched our hand drawn scales with photographs of gradients and their matching tones making this grid below.
Step 3: We then took our hand drawn scales and made full 8.5 x 11 patterned sheets out of them using Photoshop and Illustrator

Step 4: After doing this for all of the patterns, we set our drawing as a template. Then, on Photoshop using the lasso tool, we copy and pasted into in the selected area with the corresponding shade.
Reflection: This drawing was truly hand drawn. We drew the shaded drawing ourselves and even using digital software, the drawings were composed of all hand drawings. Again, through this assignment, I learned many basic Photoshop and Illustrator techniques I hadn’t known before. One of them was as simple as learning the “Paste Into” command. This assignment was however difficult for me, because I’m still a novice in drawing and shading is already a bit advanced. My collage wasn’t as accurate because I still need to further develop that eye for drawing.