Inspiration photos


Reference photos


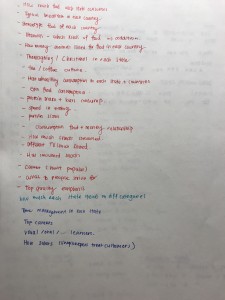
Process
- First I brainstormed potential topics that I was interested in and later on narrowed down to one topic: Natural remedies from around the world. I researched natural remedies and felt like it was too broad, so I decided to focus on remedies for the common cold.
- Information – natural-remedies
- I then roughly sketch out multiple formats to base off of in my sketchbook. Also considering what mediums I could use, I decided on the one to the left, in which the illustrations will be done with watercolor, as well as the size (15×33 inches)
- A more thorough research and narrowed down on the amount of remedies I wanted to include due to limited space and drew out a draft of what each element may look like. Since the illustrations would be both colorful and complex, I decided that the logos should be minimal.
- I drafted multiple icons on illustrator with the pen tool, each symbolizes different things. E.g; health, origin, ingredients, cure and so on. I later on decided to use only 3 icons: the 1st, 5th and the 7th icon representing health such as vitamins, cure and ingredients


![]()
5. I didn’t like the other titles I looked up, because they were all too structural and I was looking for a more organic one, so I drew and created my own font for the title. I took a photo of it with my DSLR and edited it in photoshop.


6. I brainstormed potential colors that are associated with nature and made multiple color palettes


I then drew the outlines of the natural elements and branches with pencil as a guide and painted them with watercolor. I took a photo of it and transferred into photoshop.


7. For the placing of the elements, I took into consideration of the color and the amount of information for each remedy. I didn’t want ones with similar colors too close together and having to cram the facts in. In another document, I matched the illustration to the facts so that it would be easier to transfer them to the work space.


8. I wanted an organic feel to it, so I decided on cursive, script fonts for the sub headings: the origin of the remedies. And used sans serif, boxed fonts for the text body for contrast

9. After rearranging, shifting, resizing and altering the colors, I felt like the background was a bit empty so I added a marble texture and used the branches as the dividers. Knowing that there was a lot of information, I used gray boxes to separate every other remedies. I still felt like it was a little plain, too flat, so I decided to add shadows on the branches and every other remedies to give depth and realism, as if the remedies are actually hanging on the branch. After cramming everything in I realized I didn’t have enough space, so I expanded the width of the working space by one inch.

After the tedious process of shifting all the layers I had, I learned that it is much more beneficial to organize all my layers earlier on than later. I also learned that sometimes having less is more. I have always been naturally steering towards complexity, because I tend to focus on details. I realize in most of my projects, they look overly complicated, with tons of elements and information thrown into the work space. Another thing that I have learned from this project is the power and importance of visuals. Most of time people would rather look at visuals rather than to read words. With that in mind, it is important to experiment and to find the best and most efficient way to convey a message.