The Bean Bag Chair project is significant on a personal level in many ways. On top of being able to pursue what I am passionate about as a designer, this is also my first project to be carried through so thoroughly, while following the procedure and discipline of a formal design project.
Starting with submitting a project proposal and coming up with sketches that would meet the objective of the design, the research portion of this project required a tremendous amount of time. To have a design with good aesthetics and functionality, I looked at many similar designs, took in the strengths of different pieces, and sketched out multiple ideas to slowly approach the so called “good design” in my opinion. Since precision is key in the area of carpentry, whenever I came up with an idea, I needed to do the calculation for measurements of the whole piece. The measurements were not only for me to figure out the relative positions, angles, and sizes of the cuts, but also to see if the design was physically possible under the government of the laws of physics, materiality, and the equipment available to me. For example, I came up with several similar designs with different measurements for the cross-form design, and came to conclusion that it was impossible to enlarge the negative space, where the bean bag was supposed to sit in between the two boards, without drastically increasing the size of the whole chair.
However, merely doing calculations on paper was not enough, not even making a prototype smaller in scale could have compensated the disconnection between an idea and the actual production of something relatively big in scale. When I made a small cardboard prototype for the cross-form design with sixty-degree angle, I failed to identify the problem of having not enough negative space for sitting, due to the lack of reference in size. Thus, it was not until I made a full-size prototype, with poorly manufactured half inch plywood, that I realized that there were problems with sitting space and the strength of the material used. I went back to sketching after realizing the problem, concluded that the cross-form was not an ideal design, and ended up pursuing a new one.
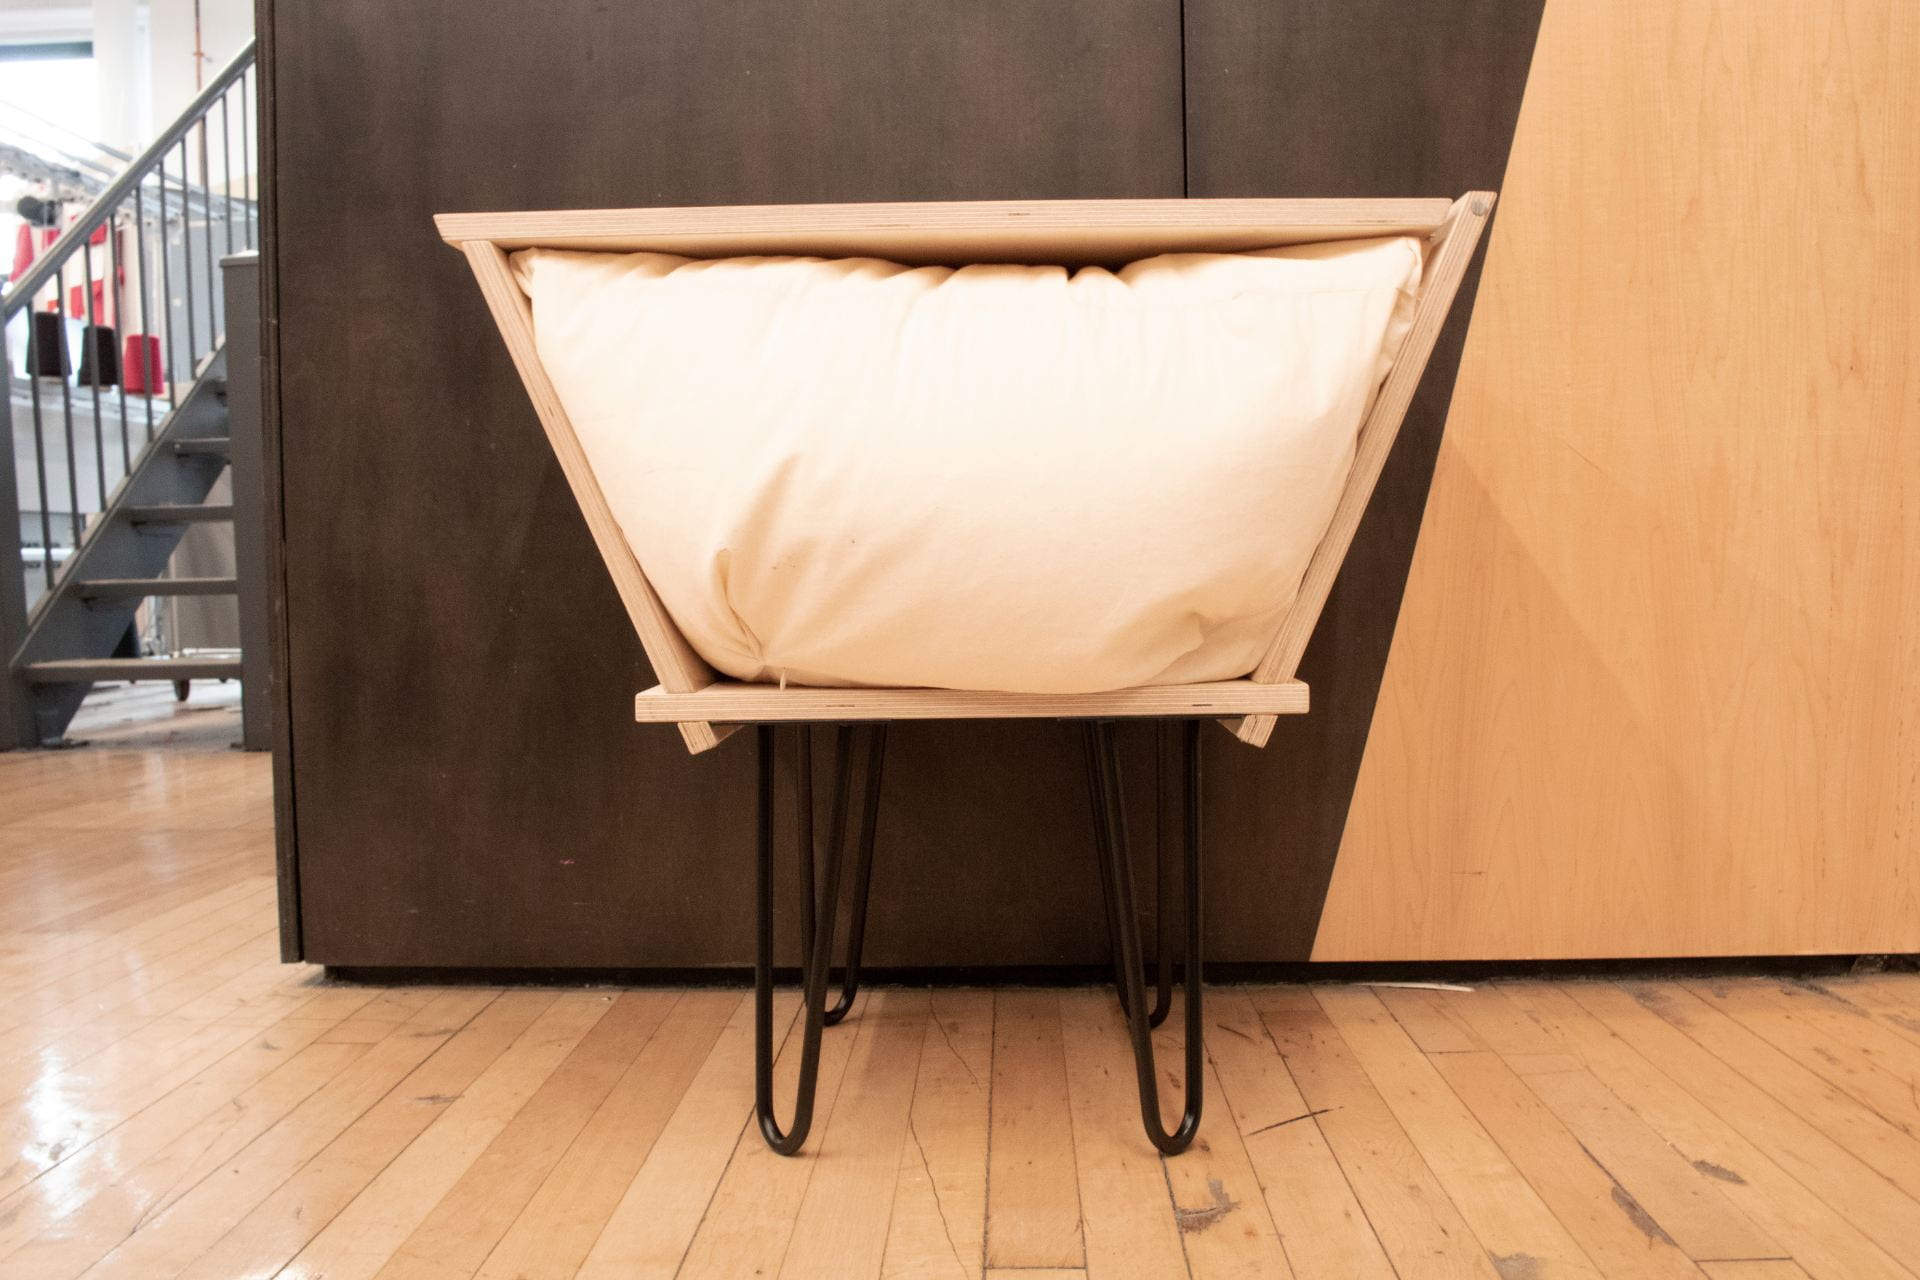
Designing and making calculations for the new and final design was not as much of a lengthy and unguided process, since I learned a lot from the previous experience with the cross-form design and identified all the problems as well as limitations by then. Other than having a new design, the material was replaced with three-quarter inch industrial grade birch plywood to solve the problems observed in the full-size prototype. Although the final design was more complicated in terms of form and thus harder to work out the measurements, the planning process still went smoothly. At this point, I realized how important it is to thoroughly test out an idea by making a full-size prototype with similar materials as the one that will be used in the final product, in order to identify all the problems and make the work well polished.
Thanks to the practice from making prototypes, by the time I started manufacturing the final product, utilizing the tools was not as hard anymore. However, I kept on running into problems despite all the time devoted to planning. For example, in order to minimize the size of the edges coming out of the lap joints between the wooden boards, I constructed the joints as close to the edges as possible. But plywood is not sturdy enough to have only one inch on one side of the lap joint. The thinner side became bendy and had a high chance of breaking while in use. To solve that, I put the minimum amount of dowels through all sides of the joints where two boards overlap, to secure the thin strips in place, and at the same time preventing the boards from detaching. Another problem was the mechanism for the hinges that allows the lid to open as it rotates. It was interesting how the solution that worked in the end was my original design, but I kept switching, from the original single metal rod hinge, to doorframe hinges, and to double hinge system. But doorframe hinge did not work due to its characteristic. It was impossible to rotate the lid for more than a hundred and eighty degrees, when I wanted the lid to rotate enough so the end could rest on the floor, to prevent the chair from falling to the side by minimizing the torque from the weight. And I did not use double hinge system because I did not want the visual aspect of the mechanism to interfere with the simplicity of the design. After trying all the alternative solutions, I revisited the single metal rod hinge with the only possible solution, which was cutting more on the sideboard of the chair to give the lid more room to rotate. At first, I was worried that the huge gap between the lid and sideboard would hinder the aesthetics of the piece, but it did not. I rather like the design with big gap more than the original design. Lastly, I measured the space in the chair, and put together a bean bag that is custom made to fit perfectly with the chair. This process took a whole night because I had little experience in sewing, especially a closed form angular form with edges. I constantly had trouble trying to change the direction of the fabric by making folds and at the same time keeping the seam clean. But if I were to do it again, I am confident of doing a better job with less time.
Although tiring and stressful, I truly enjoyed and fully immersed myself in this project. I was able to learn how to do things I enjoy in a professional way, so it transcended from being passion to a well-polished work. The process of making this Bean Bag Chair has now become a reference and benchmark for the standards and work ethic for my upcoming projects, only for myself to make better work in the future.