Arduino is a software and hardware program that is used for prototyping. It is able to read inputs and turn them into outputs. For example, you can turn on an LED light and even make it blink! This is precisely what we had to do for homework.
Arduino is composed of a bunch of different parts. For this homework assignment, I used:
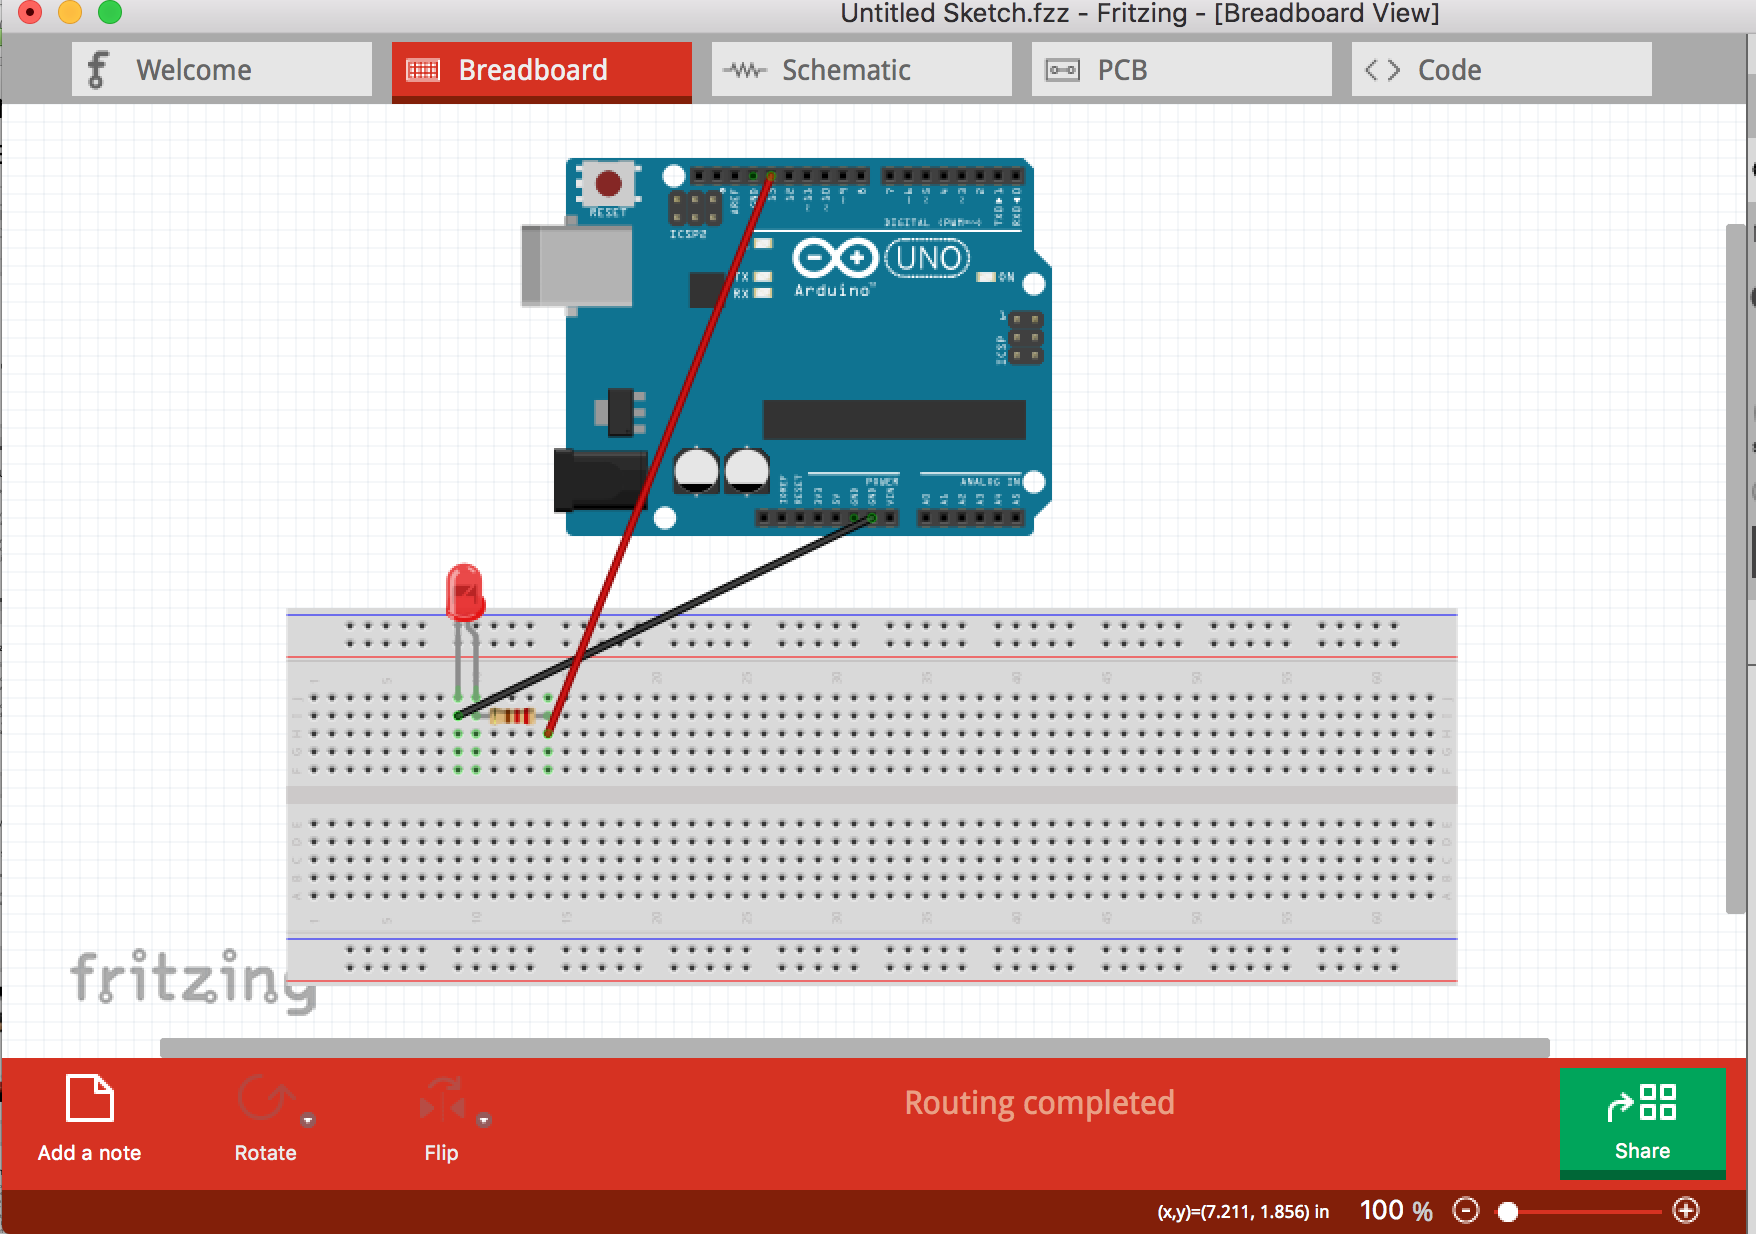
- a breadboard
- an Arduino Uno
- a 330 ohm resistor
- an LED light
- two wires – one black and one red
- a usb that connects from the Arduino Uno to the computer
For this homework, I first put the LED light into the breadboard. After that, I put the resistor in so that it would connect to the positive side of the LED. Then I put the black wire (the negative wire) into the breadboard so that it would connect to the negative side of the LED. Once, I did that, I connected this black wire to GND on the Arduino Uno. Next, I put the red wire (the positive wire) into the breadboard so that it would connect to the opposite end of the resistor (the side farther away from the LED). After this, I connected the red wire to the 13 pin on the Arduino Uno. Lastly, I connected the Arduino Uno to my computer and uploaded/ran the Blink Arduino code. And voilá! The LED blinks!
I ran into a few issues during this homework assignment. The first one was that I couldn’t remember how we had previously made the LED light blink in class. At first, instead of using the many resources that help explain this process, I stubbornly thought that I could remember it on my own. As a result, I spent a few wasted hours trying to get the LED light to blink, which it never did. After this, I went on some websites and googled different videos explaining this process. The only issue that came from this, was that there were so many different ways of making the LED light blink that I ended up getting confused because of the overwhelming possibilities. I realized that though there were so many different ways of making the LED light blink, I wasn’t able to explain in my own words why it was working. After playing around with a few different ways of making it blink, I chose the way that felt a bit more comfortable to me to show for this homework.
Video of my Arduino blinking:
My fritzing schematic:

My embedded github code:
This file contains bidirectional Unicode text that may be interpreted or compiled differently than what appears below. To review, open the file in an editor that reveals hidden Unicode characters.
Learn more about bidirectional Unicode characters
| +// the setup function runs once when you press reset or power the board | |
| +void setup() { | |
| + // initialize digital pin 13 as an output. | |
| + pinMode(13, OUTPUT); | |
| +} | |
| + | |
| +// the loop function runs over and over again forever | |
| +void loop() { | |
| + digitalWrite(13, HIGH); // turn the LED on (HIGH is the voltage level) | |
| + delay(1000); // wait for a second | |
| + digitalWrite(13, LOW); // turn the LED off by making the voltage LOW | |
| + delay(1000); // wait for a second | |
| +} |