For the Wood Joinery, I was able to familiarize myself with the five different joints: butt joint, miter, finger joint, rabbet joint, and mortise and tenon. Since making wood was my first time, this was harder than I thought. I struggled a lot carving and cutting the woods, and for many trials, the male and female parts did not fit perfectly. When I tried to rush, I ended up making more mistakes here and there. As a result, I realized how important it is to be precise in little detail in working with woods; readjusting the edges required great deal of measuring and sawing with a variety of different tools.


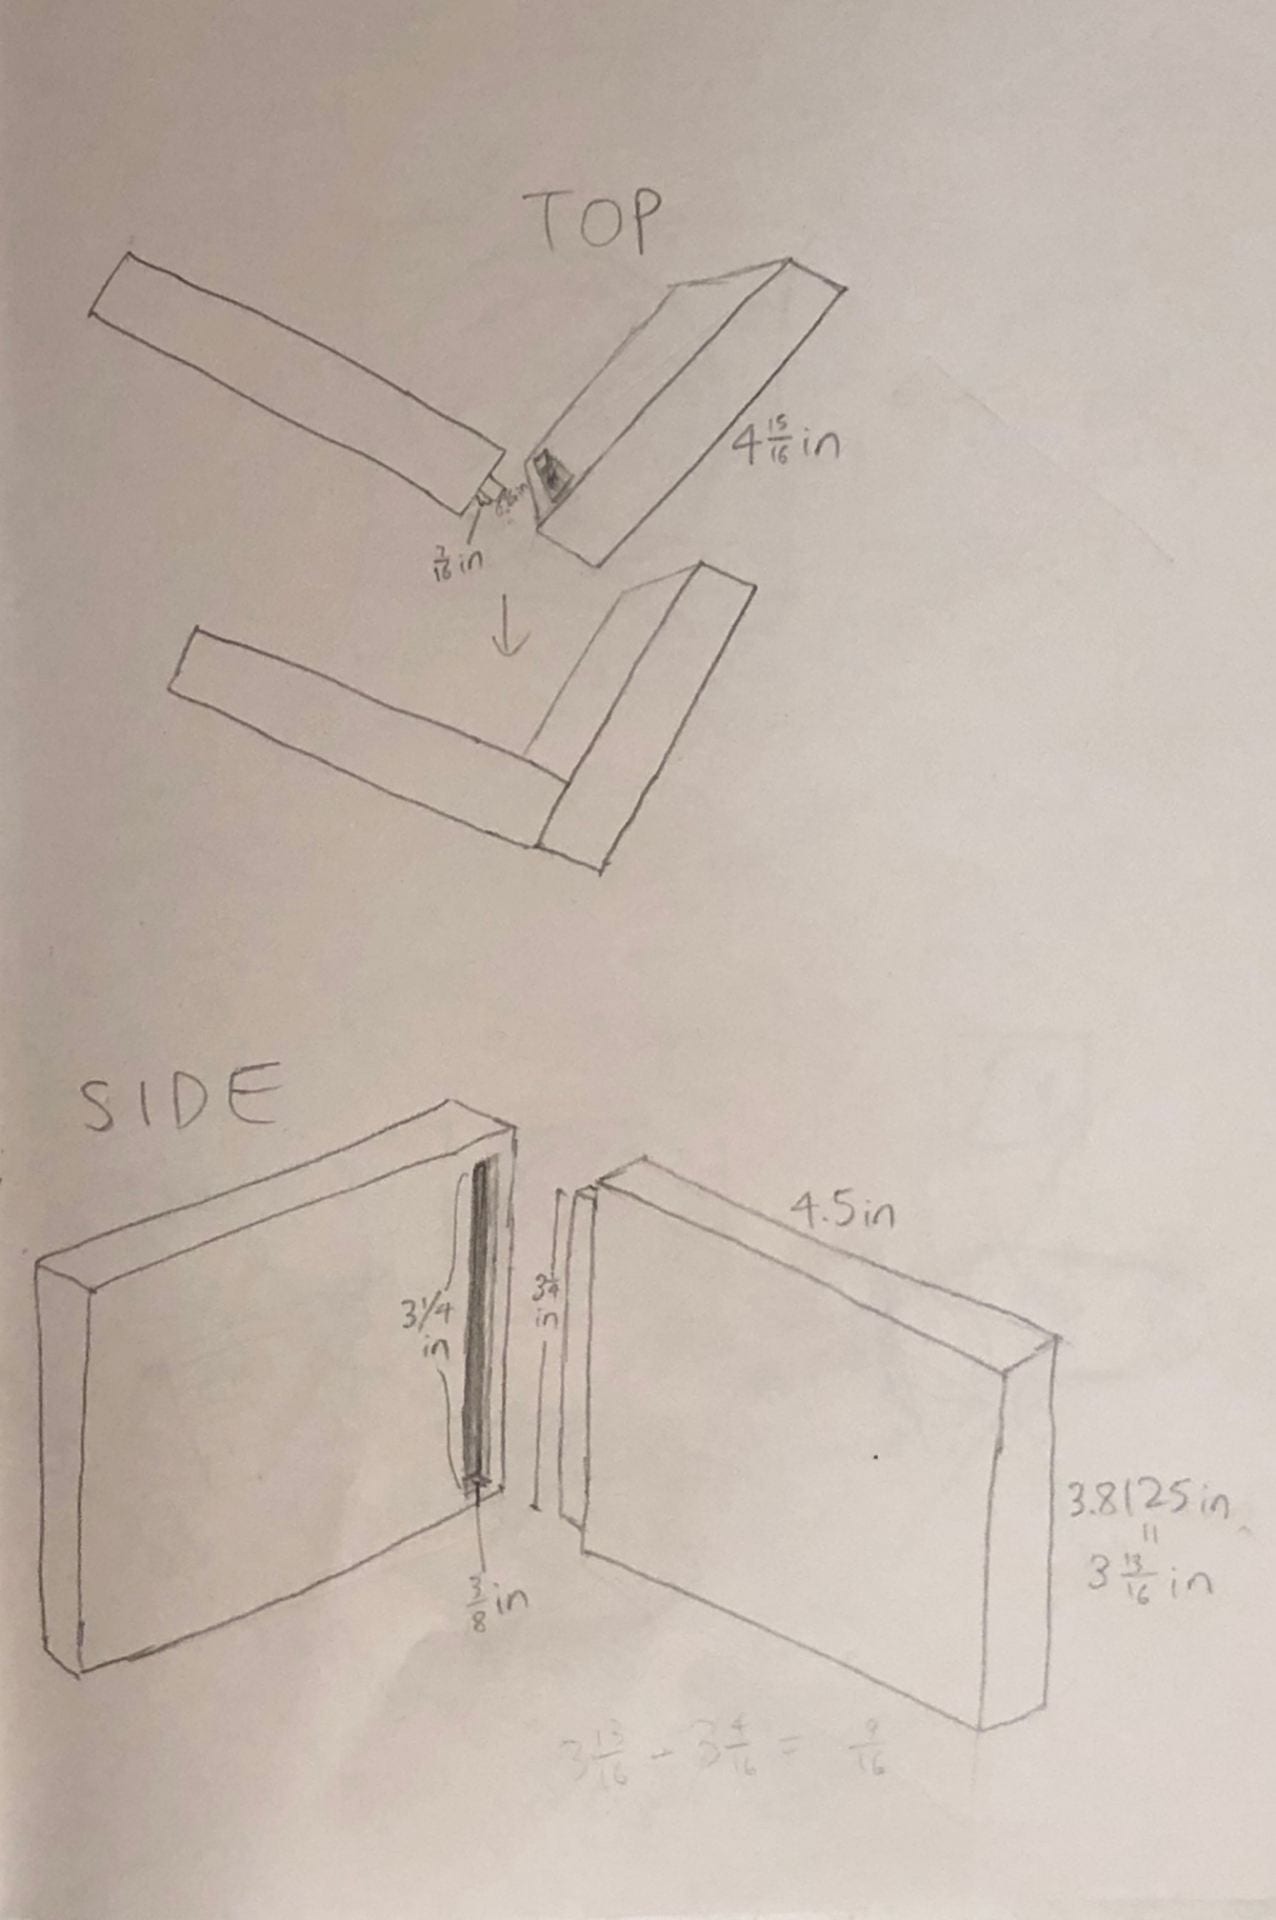
Here are the sketches I made for the five wood joints from top and side views with measurements.
![]()

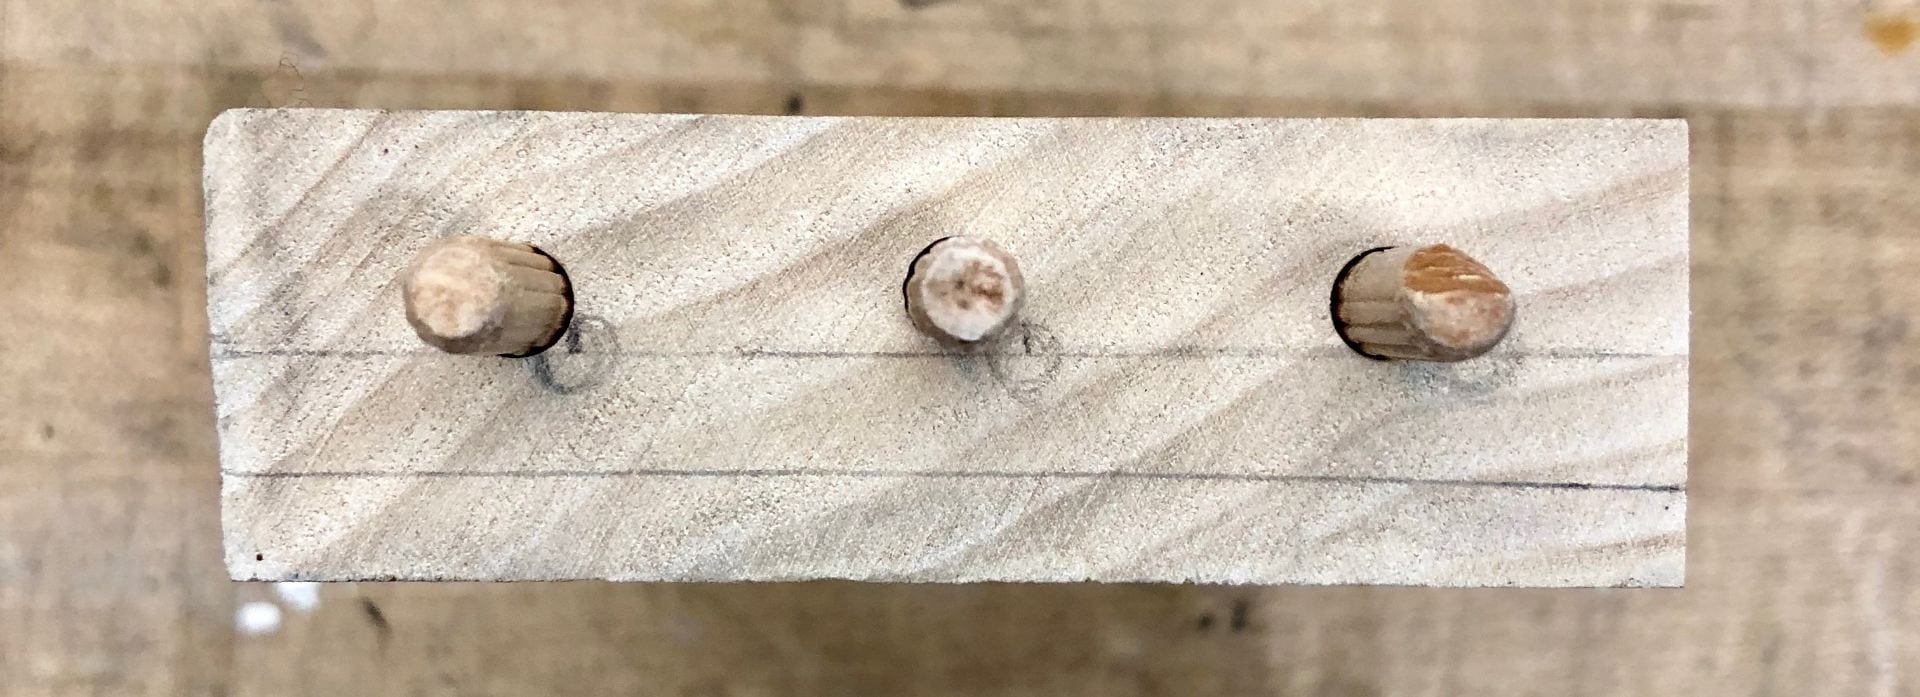

For the butt joint, I measured and marked three points 13/16 inches from each other and 1 inch from 5 inch side on one block. On the other block, I marked three points 13/16 inches from ¾ inch side. I used the drill press to make holes to fit the dowels, which were connected to form the joint.


For the miter joint, I used the band saw to cut the pieces diagonally so that they can form a 90 degree angle. Then, from the perpendicular side of the joint, I marked points with an awl in order to make them to become easier to drill. I drilled through the marks with a drill bit, and then I hammered the nails through the holes.


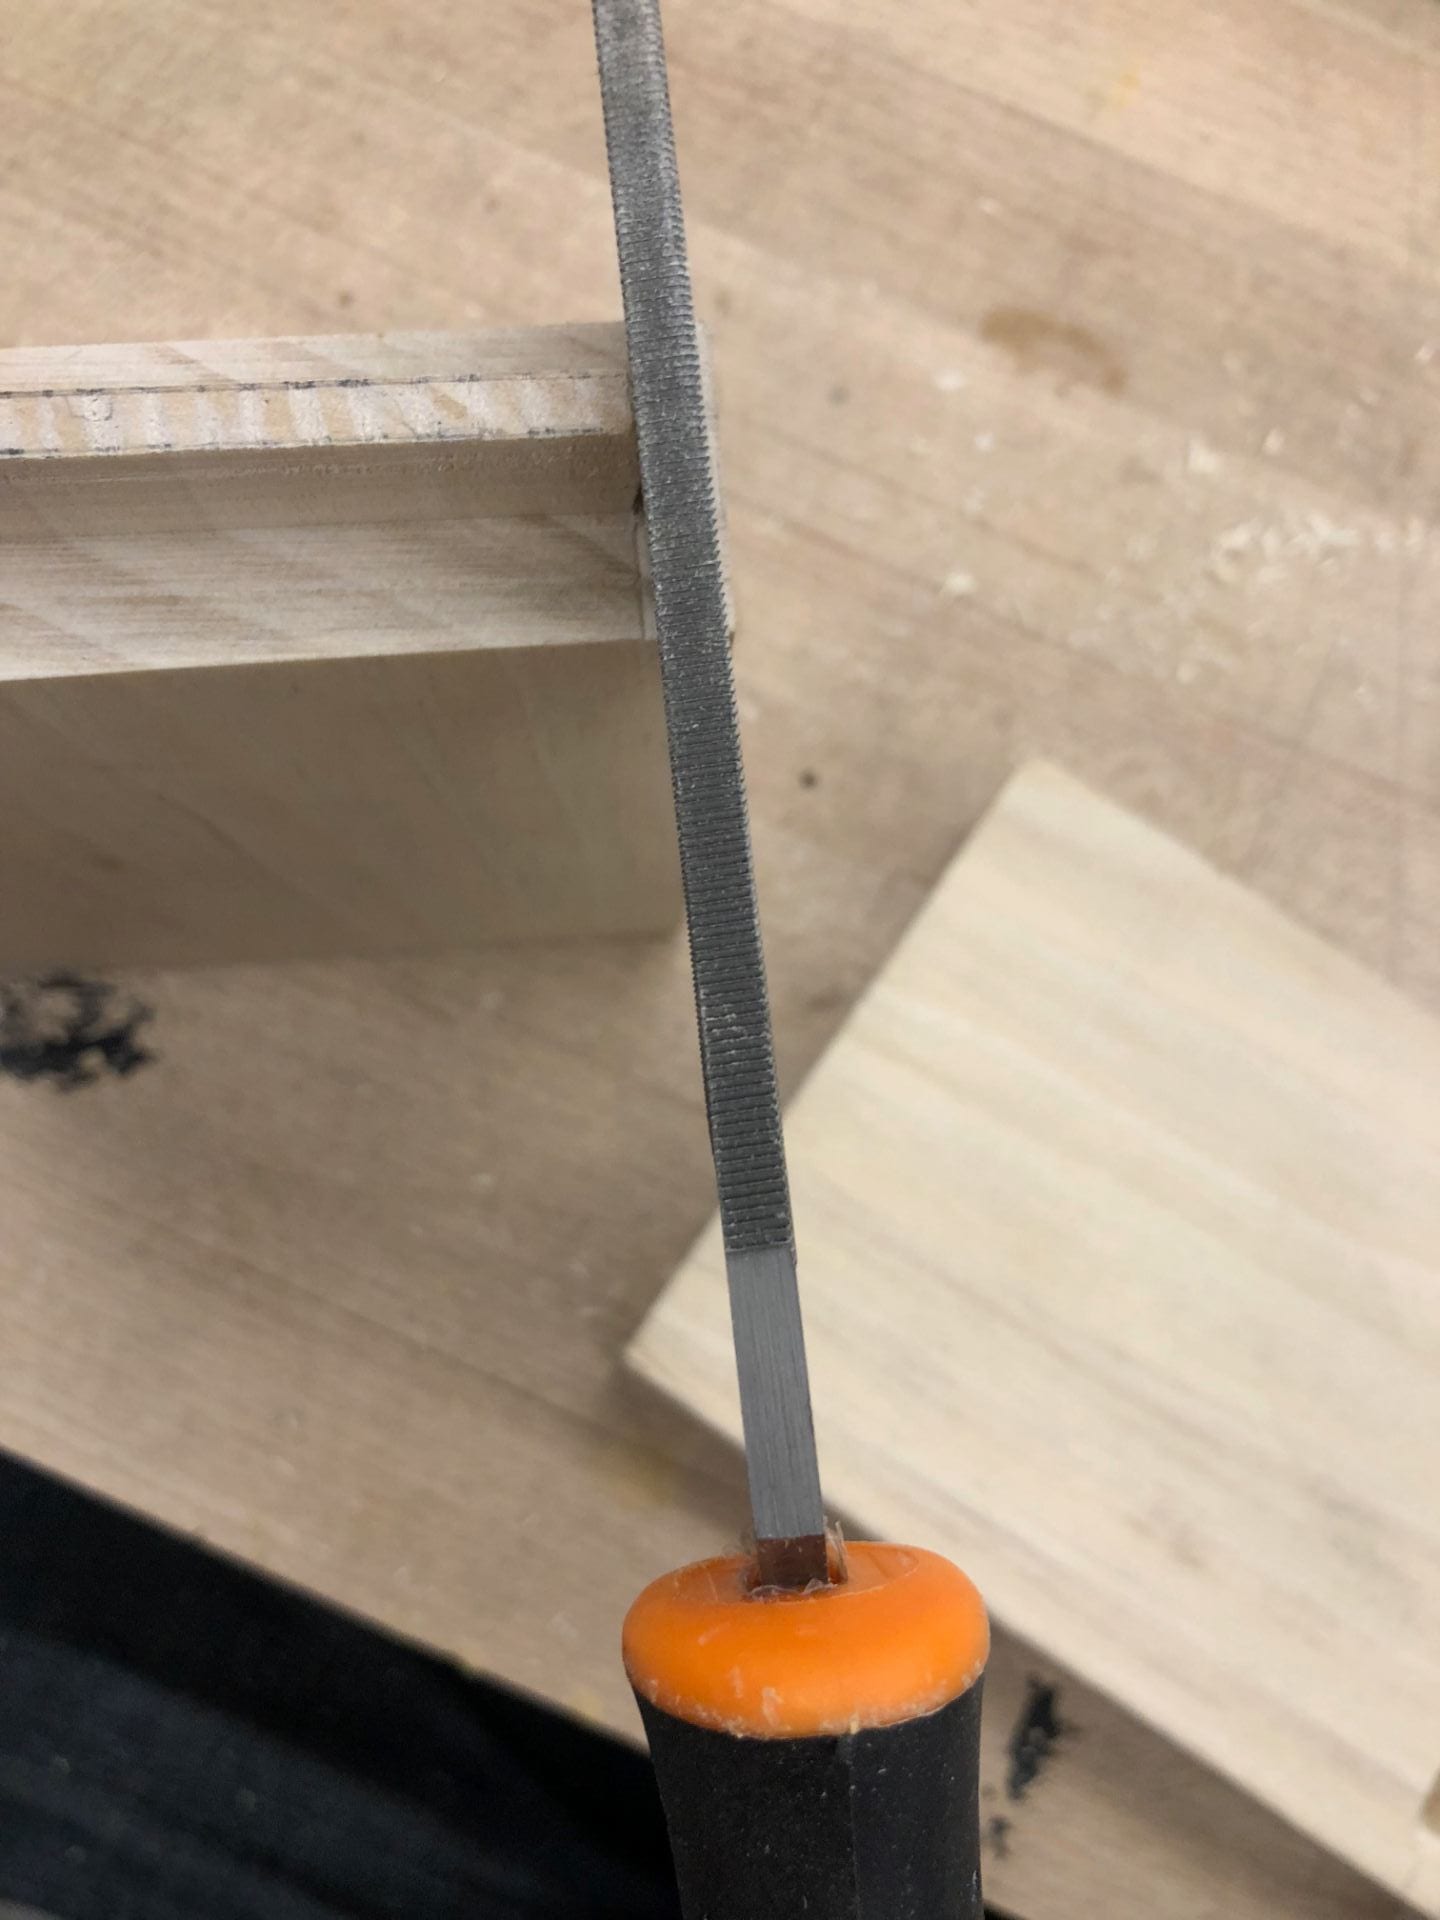
For the finger joint, I tried to cut the wood into squares precisely using the Japanese saw. Since it was little difficult to cut all the way, I additionally used the band saw to form square edges, and then I softened the gaps of the both pieces using the flat file.


For the rabbet joint, I measured and marked ½ inch from the 3 15/16 inches and ½ inch down from 1 inch side. Afterwards, I took both pieces to the shop and cut along the 3 15/16 inch side using a band saw. Then, I drilled right through the marks on the 3 15/16-inch piece with a ¼ drill bit and screwed in the drywall screws using the screw driver.


 .
. 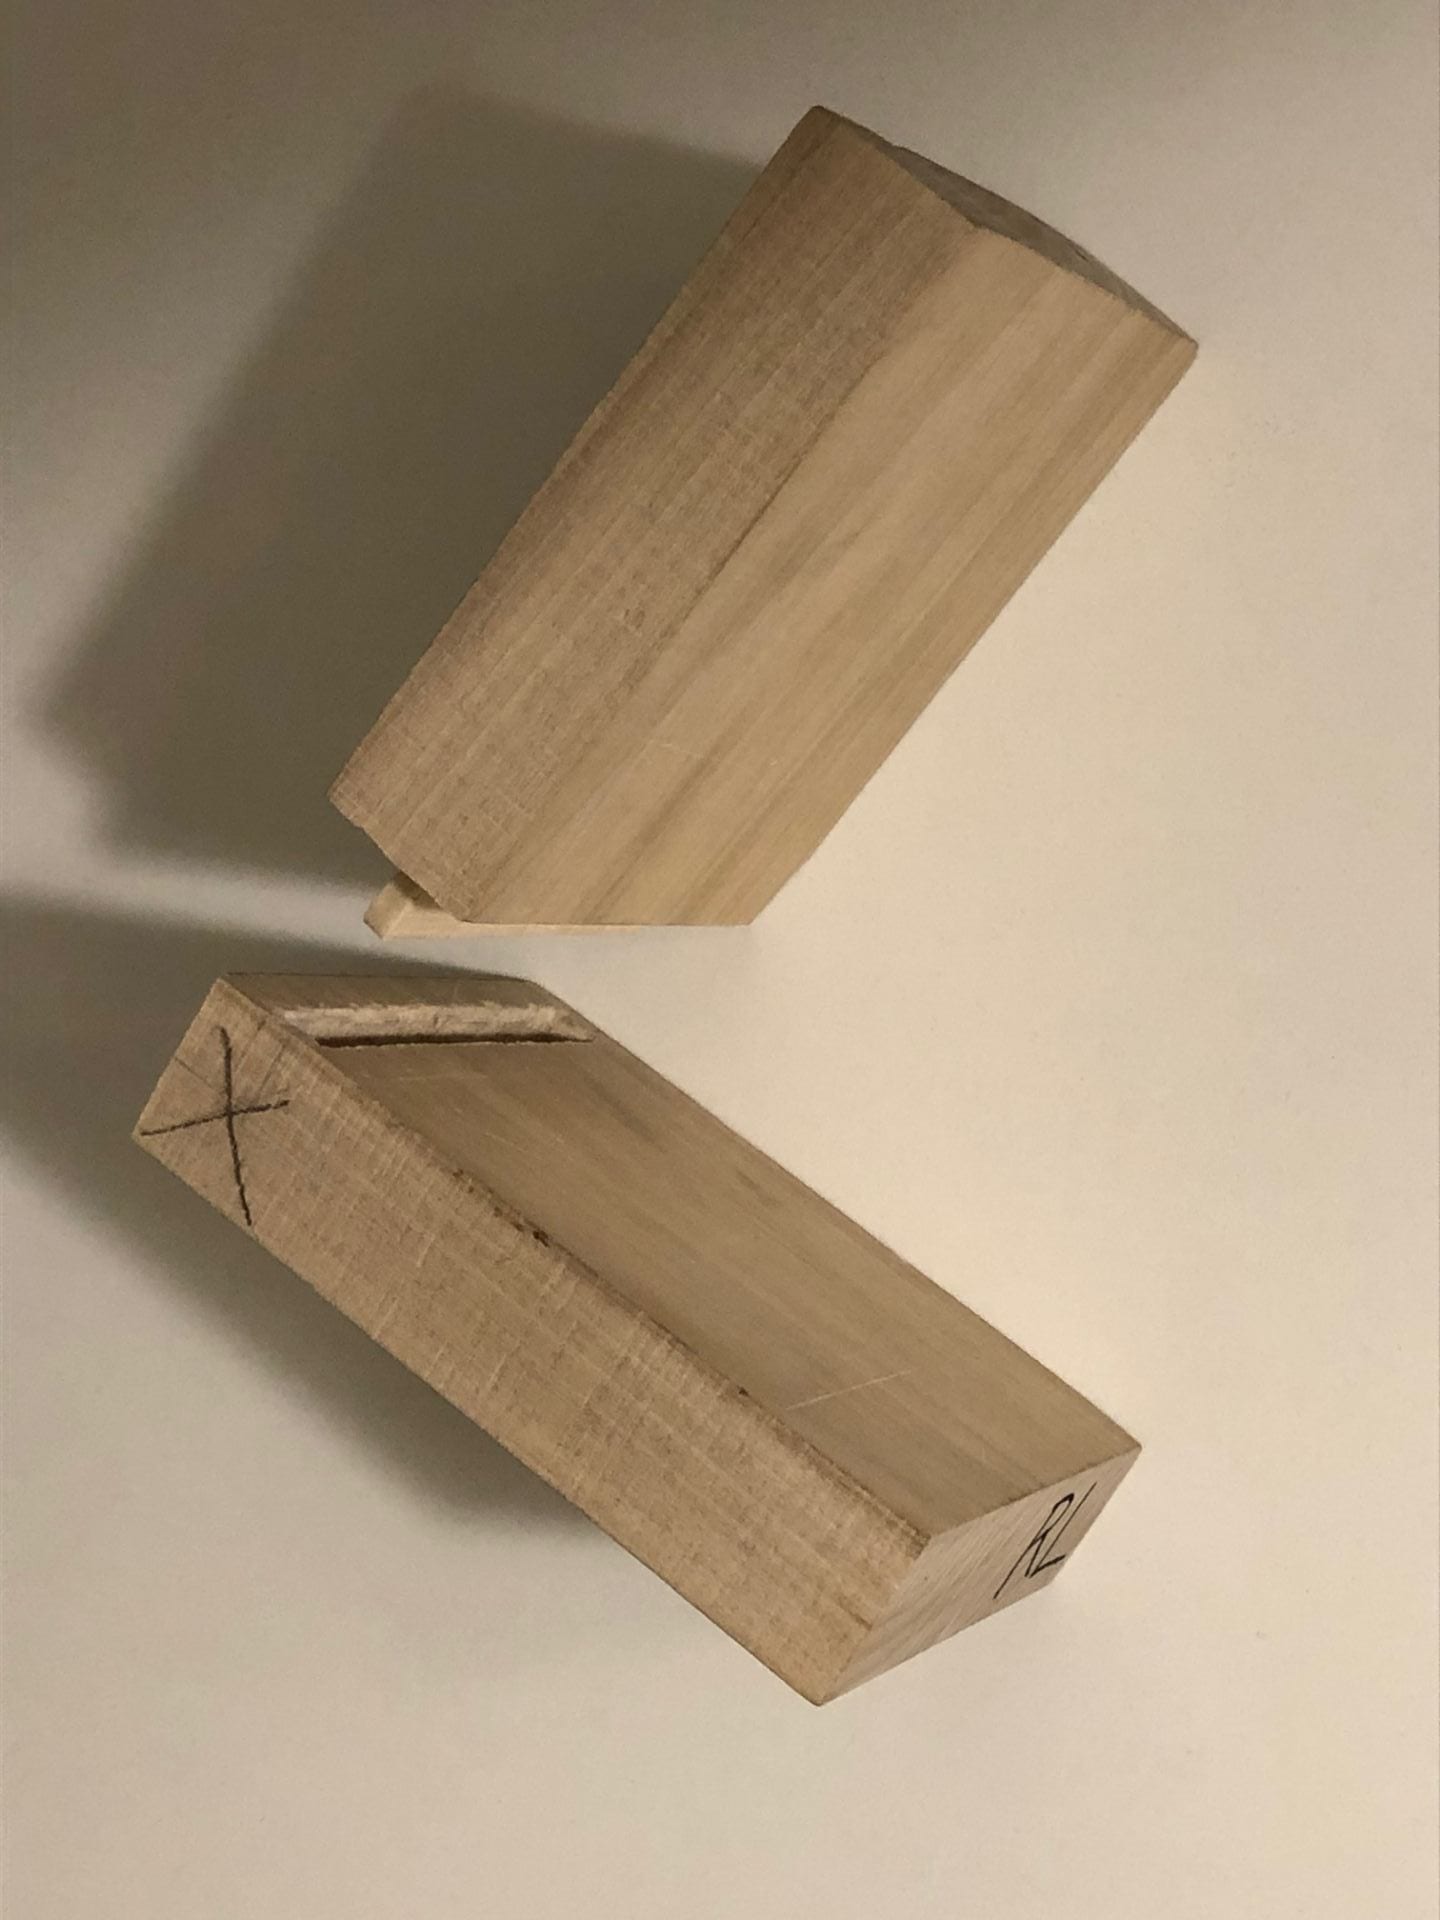
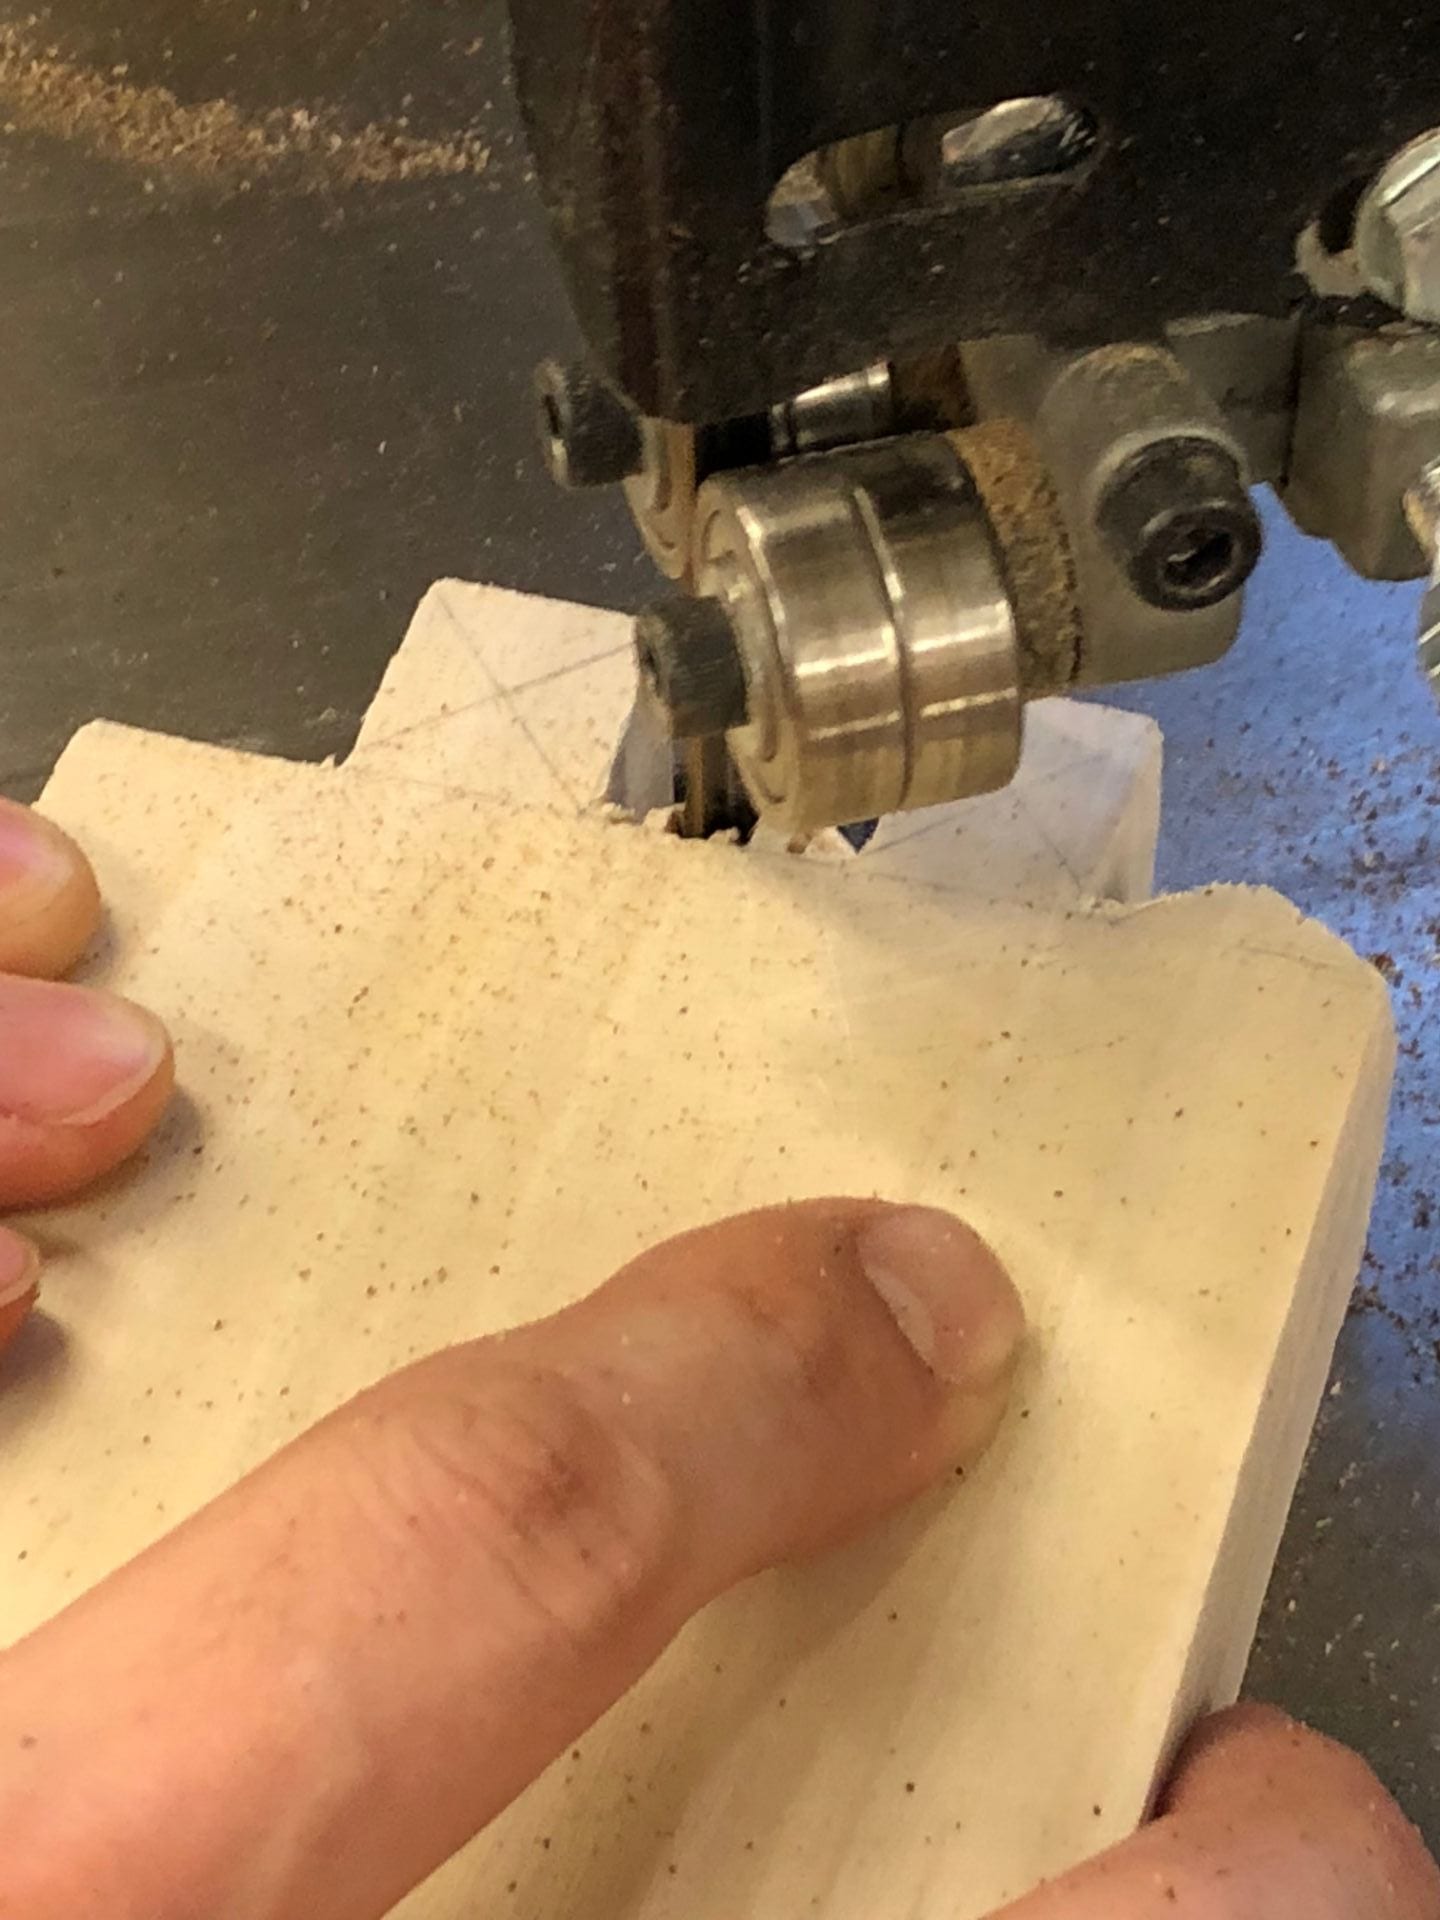
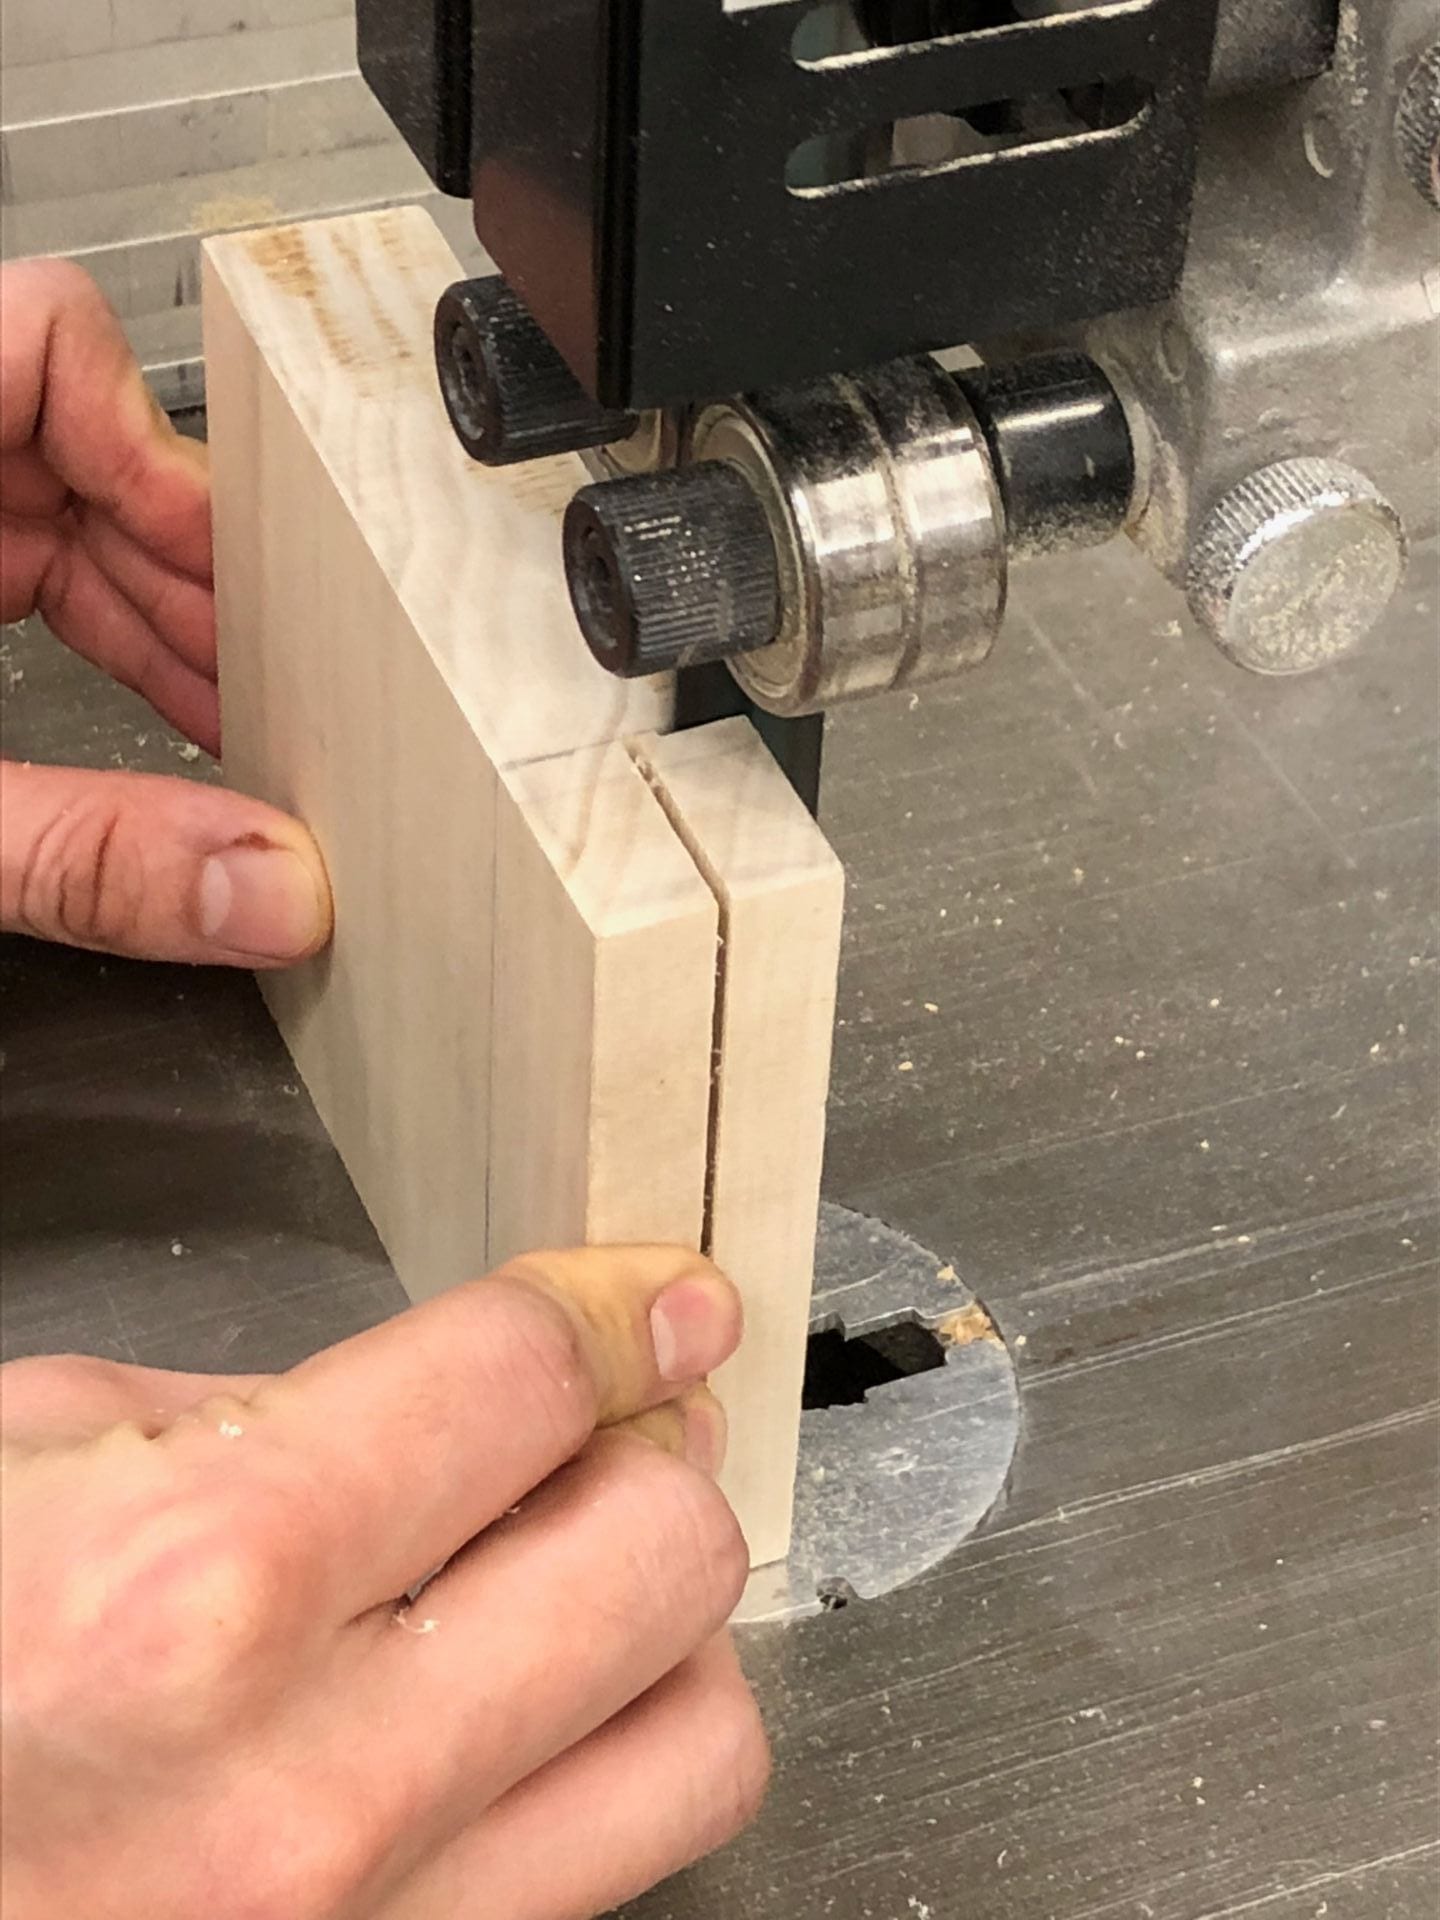
For the Mortise and Tenon, I marked where I would cut to make the tenon tongue on 4 15/16 in one piece. After I cut the marks to create the tongue, I used a ¼ inch chisel to carve out the mortise hole layer by layer. Afterwards, I smoothened the hole and the tongue using a flat file.