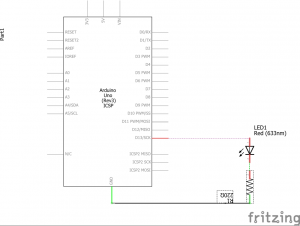
Materials/Parts Needed:
-Arduino Uno
-Resistor (330 Ohms)
-Red LED (5mm)
-USB cable (for coding and to allow the computer to be the power supply)
-Red jumper wire
-Black jumper wire
How it Works:
Starting with the Arduino and breadboard, connect a jumper wire from ground to any negative position on the breadboard. Then connect the resistor to where you connected the jumper wire. The resistor is necessary because without it, the LED has no way of controlling how much power that it is taking in. Then connect the negative side of the LED to the resistor. From there, connect another jumper wire to the output. (In my case, I chose output 13, because that correlates to the first jumper wire). This completes the circut. In order to make the LED blink, a code is required. The code is listed in the basic examples file, however some tweaking of the code is required. Under void setup I had to set the output to 13 in order to correctly work with my circuit. Under void loop, you can alter how fast the delay of light is during the blinking of the LED.
Problems I had:
At first I could not get the code to properly work because I did not change the output to 13.
