Oct
2018
Jackelope Marionette: 3D Studio
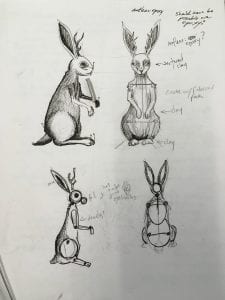
There’s no particular reason that a Jackelope was the first idea to come to mind when given the puppet assignment. I suspect, there were two possible reasons for inspiration: a recent podcast I listened to or an Autumn homesickness from bunny-laden Michigan.
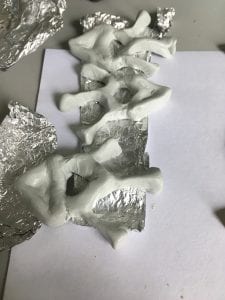
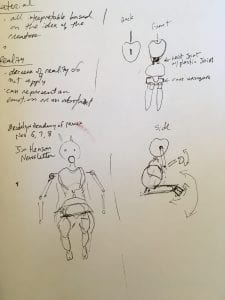
Initially, I wanted to create a skeletal creature which would closely resemble an anatomical rabbit. Creating the vertebrae out of epoxy turned into more of an ordeal than I had thought it would be. Lack of clear reference photos or access to an actual skeleton made it extremely difficult to create anything passably realistic. However, the Sculpey teeth I made were quite nice.

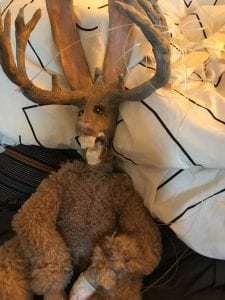
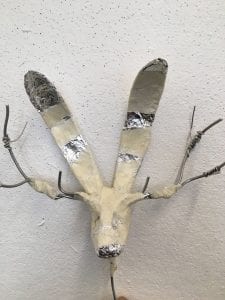
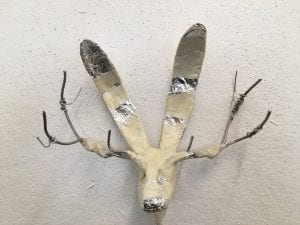
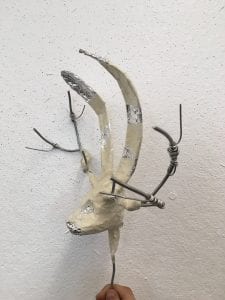
Next was the head. I used foil and masking tape to build the bulk of the head. I then used armature wire and masking tape to build up the antlers and ears. When the basic form was complete, I used an awl to puncture holes in the jaw for teeth, and secure everything in place with epoxy. The ears and antlers were reinforced with epoxy clay as well.
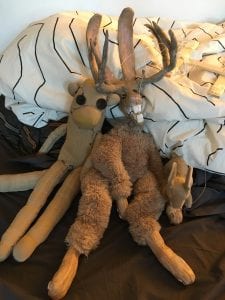
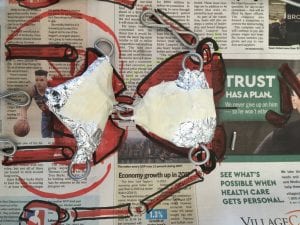
The body was a challenge. I had to compromise between making a form that was more rabbit-like or more human like. I opted for the latter. I wanted the Jackelope to be able to stand on two legs, but with the joint configuration in the hind legs that would allow it to also sit on all fours. Youtube was an invaluable source for figuring out ways to make the joints of the skeleton. I created loops from heavy gauge armature wire to use to latch the joints together. The skeleton frame was then covered in foil and masking tape. I had to pay careful attention to the way the joints would bend. To ensure that the limbs would not move in every direction, I had to build in “stops.” This meant adding layers of foil to ensure that joints only had clearance to move in one direction or the other.

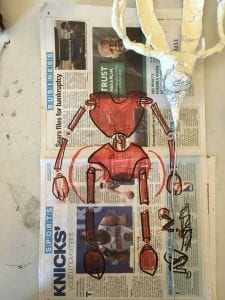
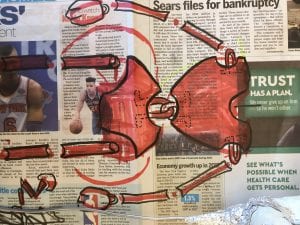

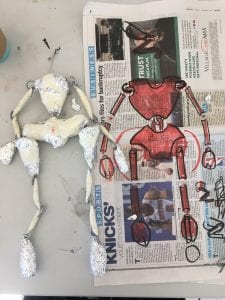
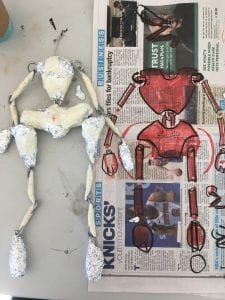
I made the choice to only make the paws and head of the Jackelope detailed, because everything else would be covered with some sort of fabric. I used epoxy clay to cover the surface of the paws, and scored the surface to give the appearance of fur. I used acrylic paint to cover the surfaces that would be visible.
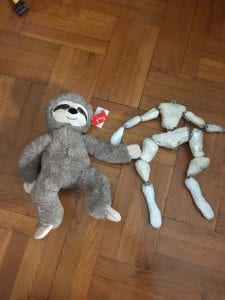
When faced with the problem of covering the frame I quickly remembered that sewing is awful and I hate it. 3 garments were destroyed in the process of experimentation. After collapsing in a pile of frustration and fabric scraps, I decided that gutting a stuffed animal would be the easiest option to maintain some amount of my sanity. The sacrificial stuffed sloth i found was imperfect but usable. The skin and Jackelope frame both required modifications though: the frame was too wide, and the limbs of the skin were too short. I used a hammer to compress the foil layers in the pelvis and thighs. For the skin, I extended both the arms and legs using leftover fabric (and minimal sewing). Fuzzy fabric is very forgiving, and I was able to Frankenstein a suit together, plu8s re-use some of the stuffing to make the Jackelpoe pleasantly squeezable.

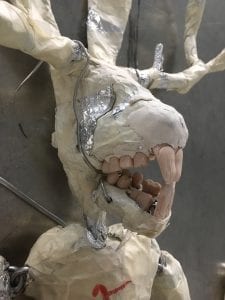


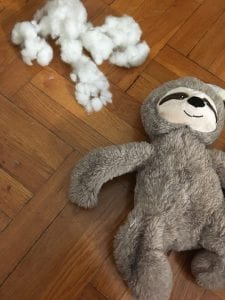
I was unsure what to do for eyes. Again, I was torn between a realistic or an obviously fabricated solution. I thought about using clay, beads, or just leaving the sockets empty, and then decided to repurpose the eyes of the Sloth. I used Epoxy clay to build up the eye sockets a little more and then put the cloth eyes in place.
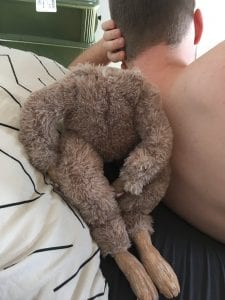
The headless Jackelope was quite fun to play with. I attached some throwaway string to the body, just to see how the puppet would move. Paul Andrejco mentioned during his lecture that puppet creations sort of have a mind of their own. My headless Jackelope was floppy and grotesque like a raw chicken. I loved him.
The last issue was attaching the stings to the controller. The string I was originally using kept tangling or breaking. I ended up getting super thick fishing wire, which once attached, looked like overkill. I’m not sure what professional puppeteers do to keep their strings from tangling, but I definitely see the fishing wire as a temporary solution for now.
I am very happy with how my puppet turned out. My favorite aspect of creating 3D work is how tactile it is, and how it invites the viewer to play and explore. I plan to use more 3d elements in my work in the future, but for now, I have a Jackelope to hang out with.