Hello All,
In this post I am merely reviewing back over this very extensive project; through means of photographs with instructions, inspiration, finished pieces, patterns, process book documentation, research, and lastly, reflections on both the technical shirt and creative shirt I created for this project. Let’s get started!

At first, I was inspired by a textile print I had created on my own using potato stamping and black ink, and noticed the correlation between Yayoi Kusama’s fixation on the repetition of phallic imagery and my own obsessive print of an erotic nature. With that being said, I began to experiment with denim at the laser cutting lab (due to it being one of the few “sturdier,” natural, cruelty-free materials I was permitted to use). I did this by starting out by discarding the potato print and rendering it as a traceable Adobe Illustrator file instead, I played with size, and method of aesthetic amongst others. (Rasterization, laser-cutting, and engraving included). In this plethora of images one can witness: my experiments with Adobe, my failed results at the lab, patterns by Yayoi and I, a photo of Yayoi, and five textile samples to represent the idea of wearing your own body out quite literally.

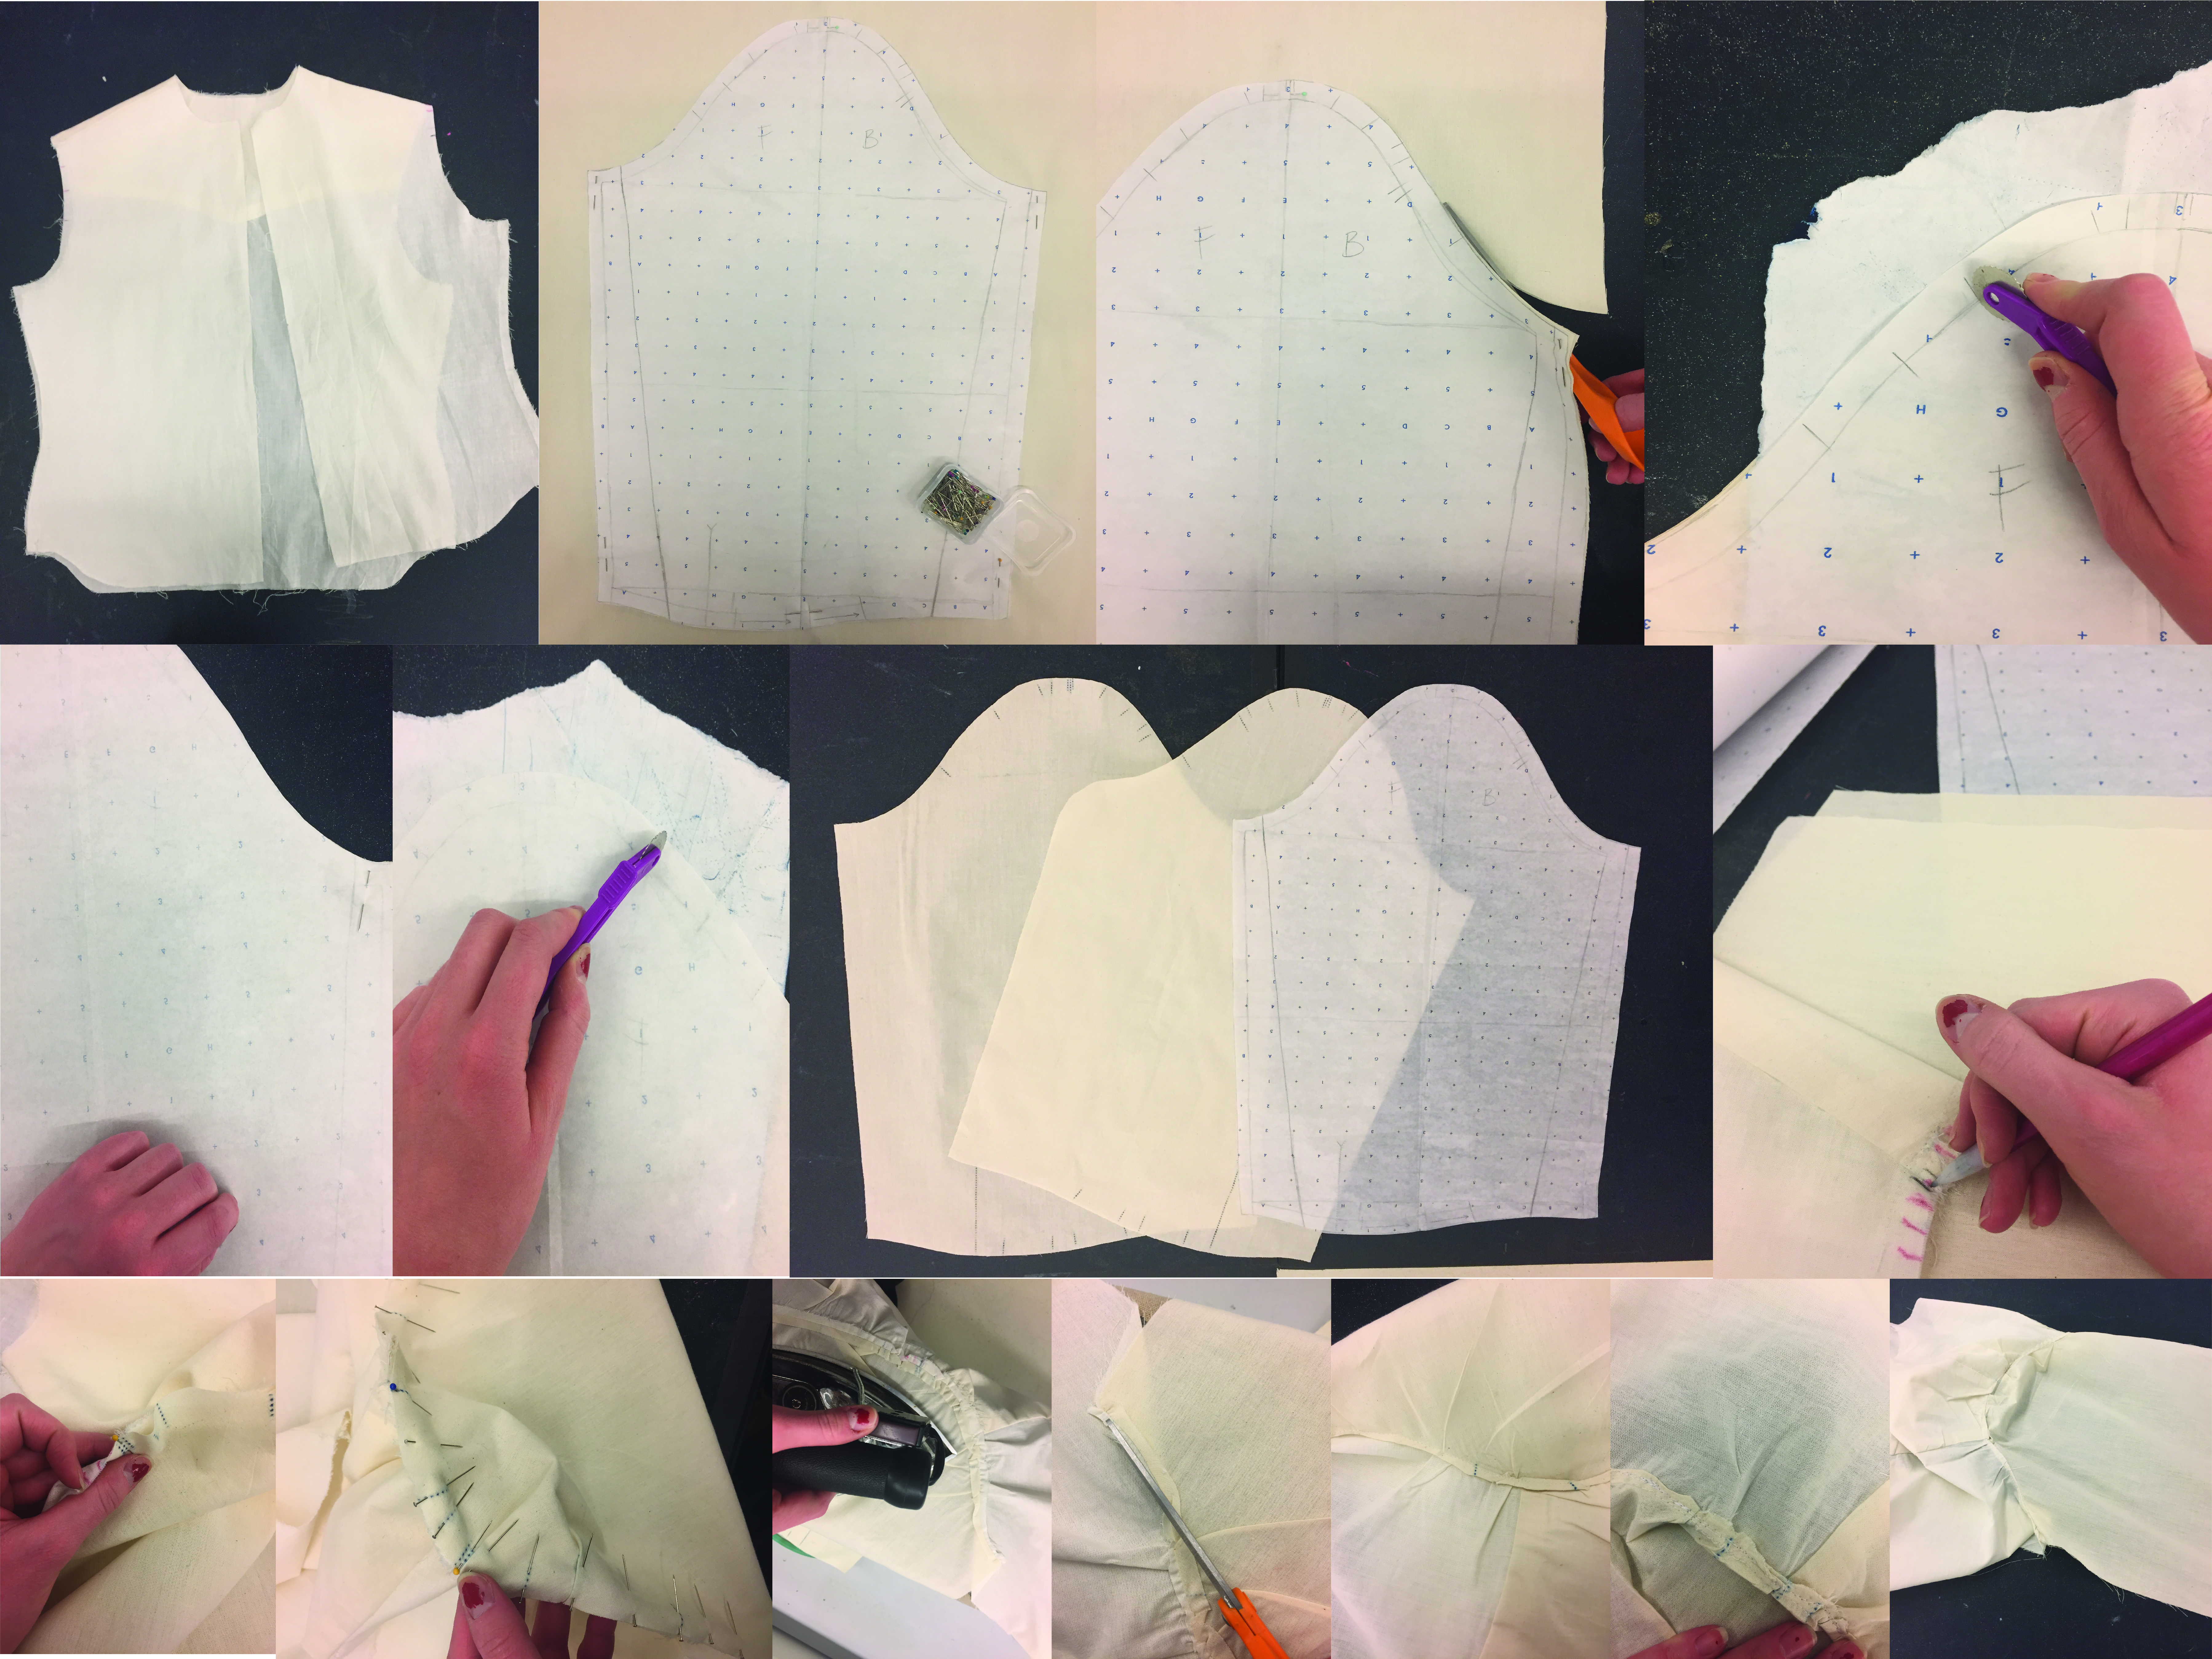
After my mind settled on the idea of this garment, I decided to go forth with imagining it by sketching down a few iterations; I then traced my flat patterns accordingly for my trial run (with the technical shirt requirement out of muslin), by noting with diagrams directions each step of the way; and filed my finished pieces away in my process book for further use.
 Once I had traced out my pattern pieces, and sewn the first two pieces together, (connecting the yoke to the front and back bodices, then flipping around); I then began to trace, make marks for, and cut out my sleeves; after this I matched my markings and notches up the to the armholes of my shirt accordingly; pinned, ironed flat, sewed, pressed again, repeated to the other side; and turned out my sleeves.
 I then turned my attention to the side seams that connect the front and back bodices by pinning, and turning over by ironing flat to make a french seam; sewed this accordingly all down to the wrist of my sleeve, and once that was closed; I began to find my tucks I had marked, pin and sew them down, and slice open the slit for my placket. I then began to pin my placket piece (first the smaller), by rolling over and tucking under, and the larger; by rolling over, tucking over, and up to meet the smaller placket whilst also tucking in the triangle of the cathedral placket…. I then sewed these down as well.
 After all of that, it was time to pin down my cuff pieces that I stabilized with fusible by ironing down. They were pinned right underneath the plackets with the raw edges meeting together on the wrong side to create a hem for the wrist of the sleeve. This was secured twice, once at 1’4″ and once at 1/8″. From there, I clipped any raw edges or threads as usual, and continued to form the pocket for my front bodice. I drafted mine on the left side of the front bodice right on the apex and allowed it to hold four fingers.
 Once it was drafted, I then traced over it again; to make a separate piece, transferred my pattern to muslin, cut and pinned down my flap and pocket to the shirt accordingly; (after ironing flat that is). I then sewed down the pocket, and focused on my collar and collar stand for the neckline. I first sandwiched my fusible in between the back of the collar stand and its front by sewing secure the seam tucked under to meet the raw edge by pinning it to the neckline; (whilst still keeping the top of the collar stand open), I then connected the collar to this; by pinning and sewing down, rolling under raw edges to make seams, and finally ironed down both collar and collar stand to leave my collar with a stiff, sharp shape, whilst melting the fusible.
 I’m pretty sure after all this, it was worthy enough to be deemed “a shirt.” I also decided to prove that despite some areas of questionable precision, I can indeed sew not only a straight french seam but a straight flat-felled seam as well!

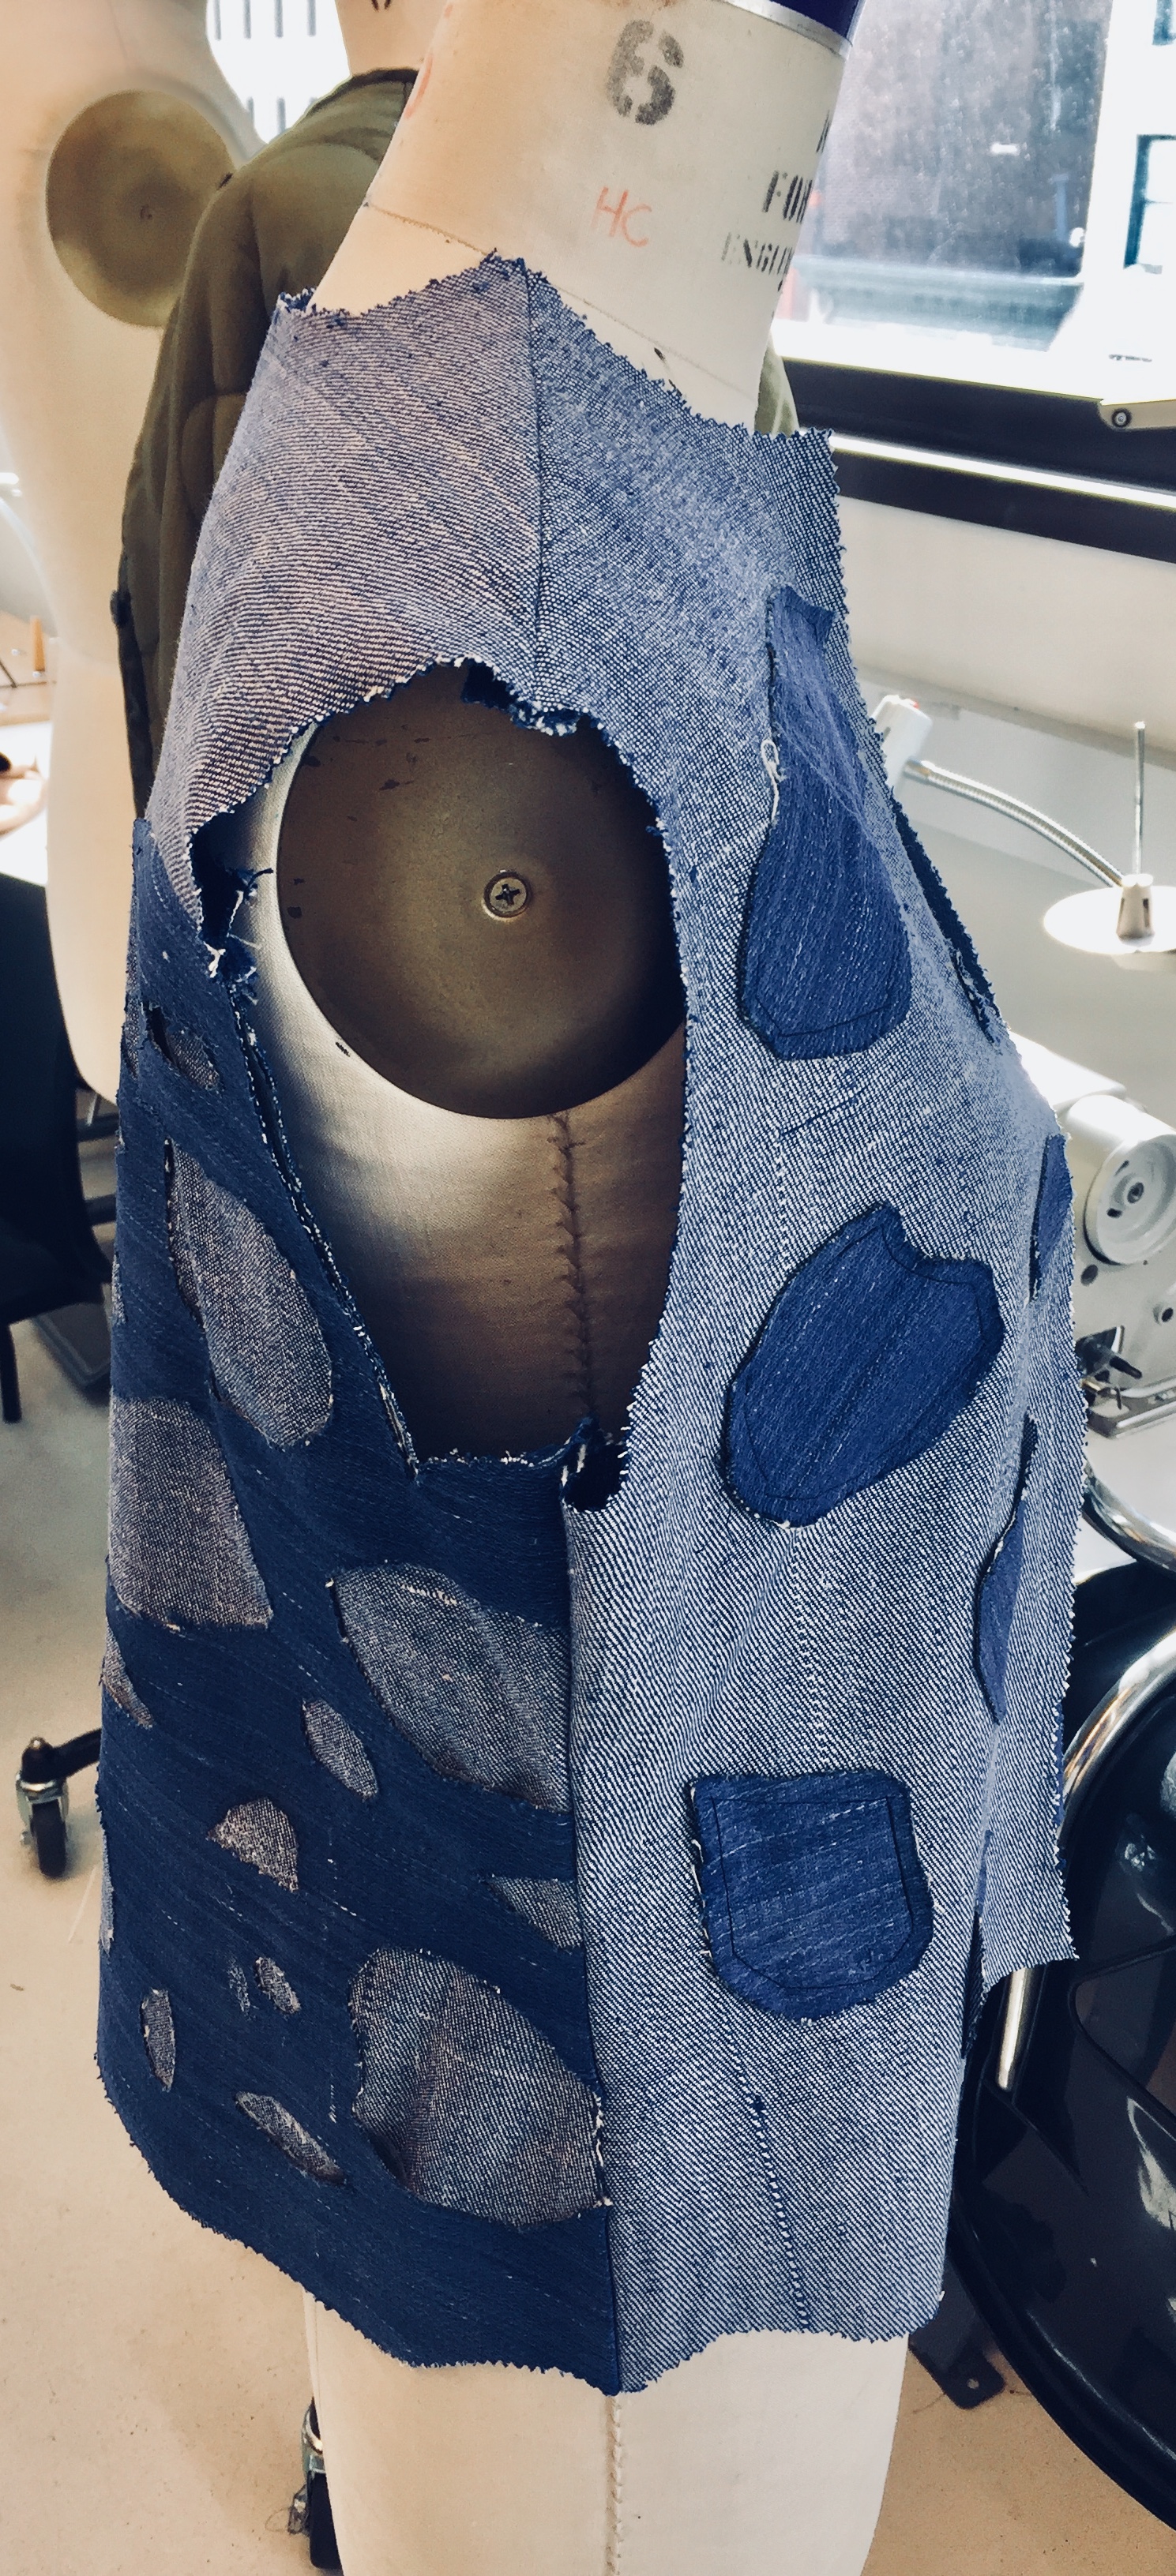
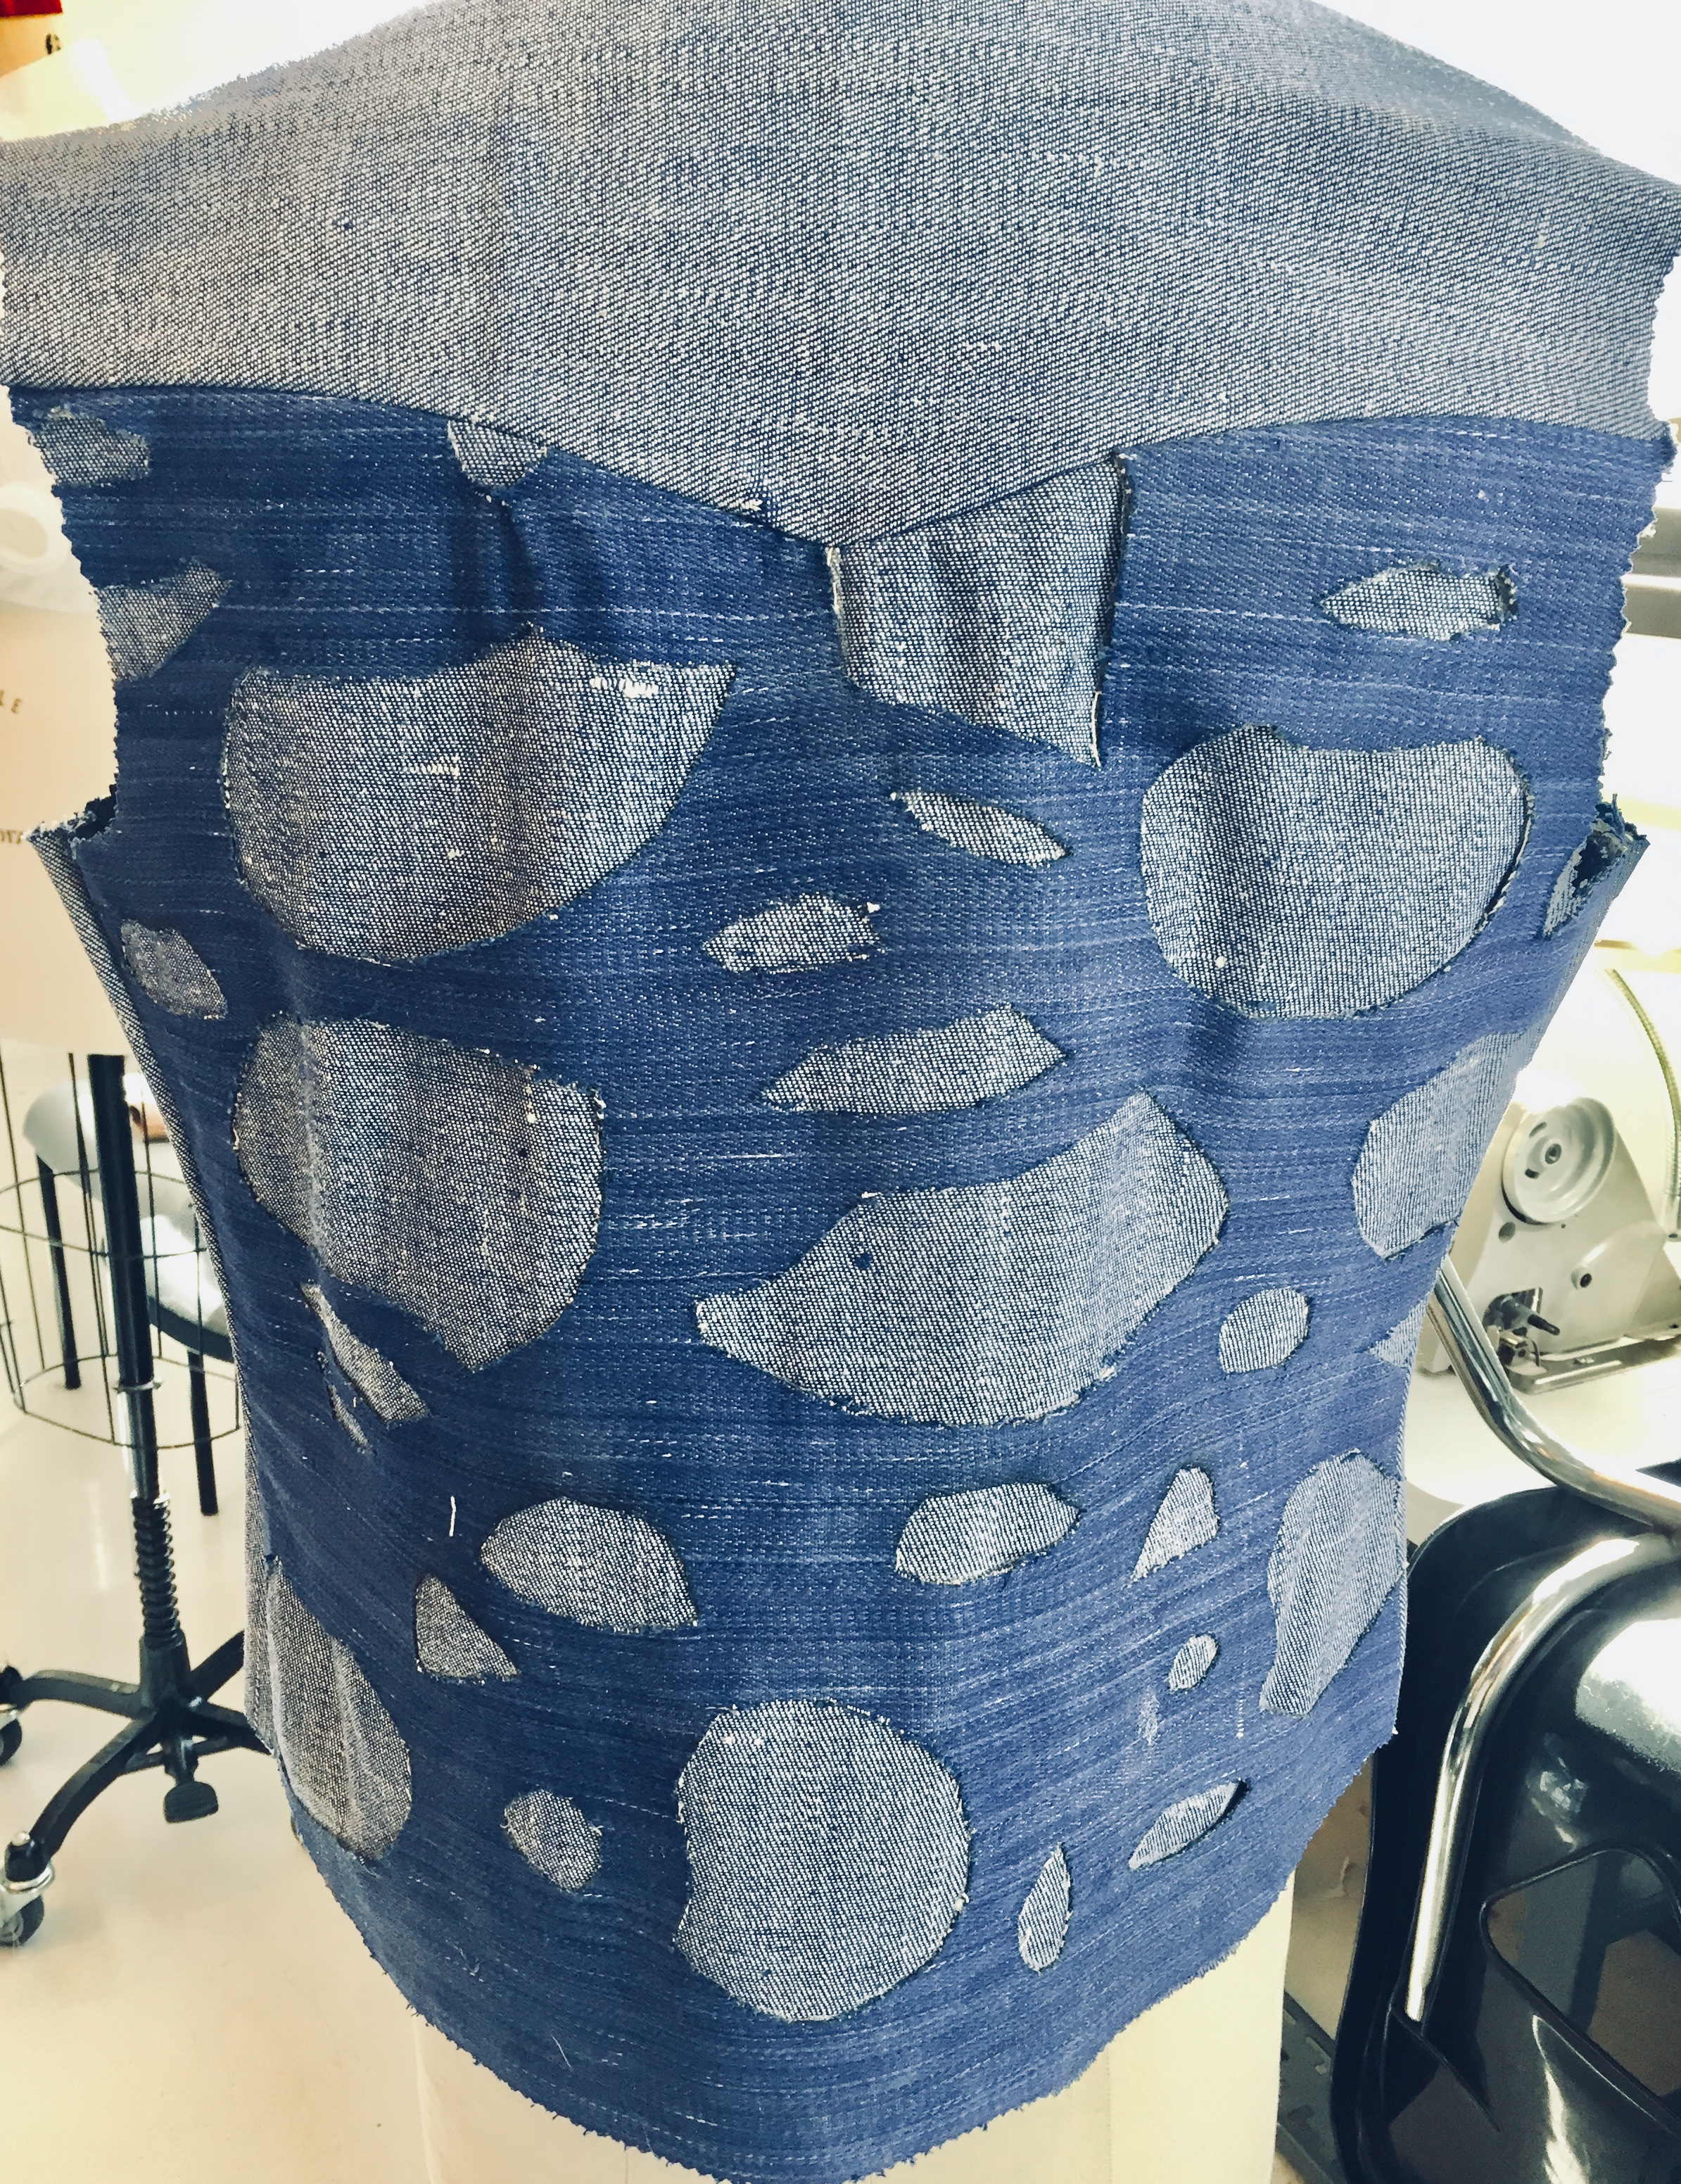


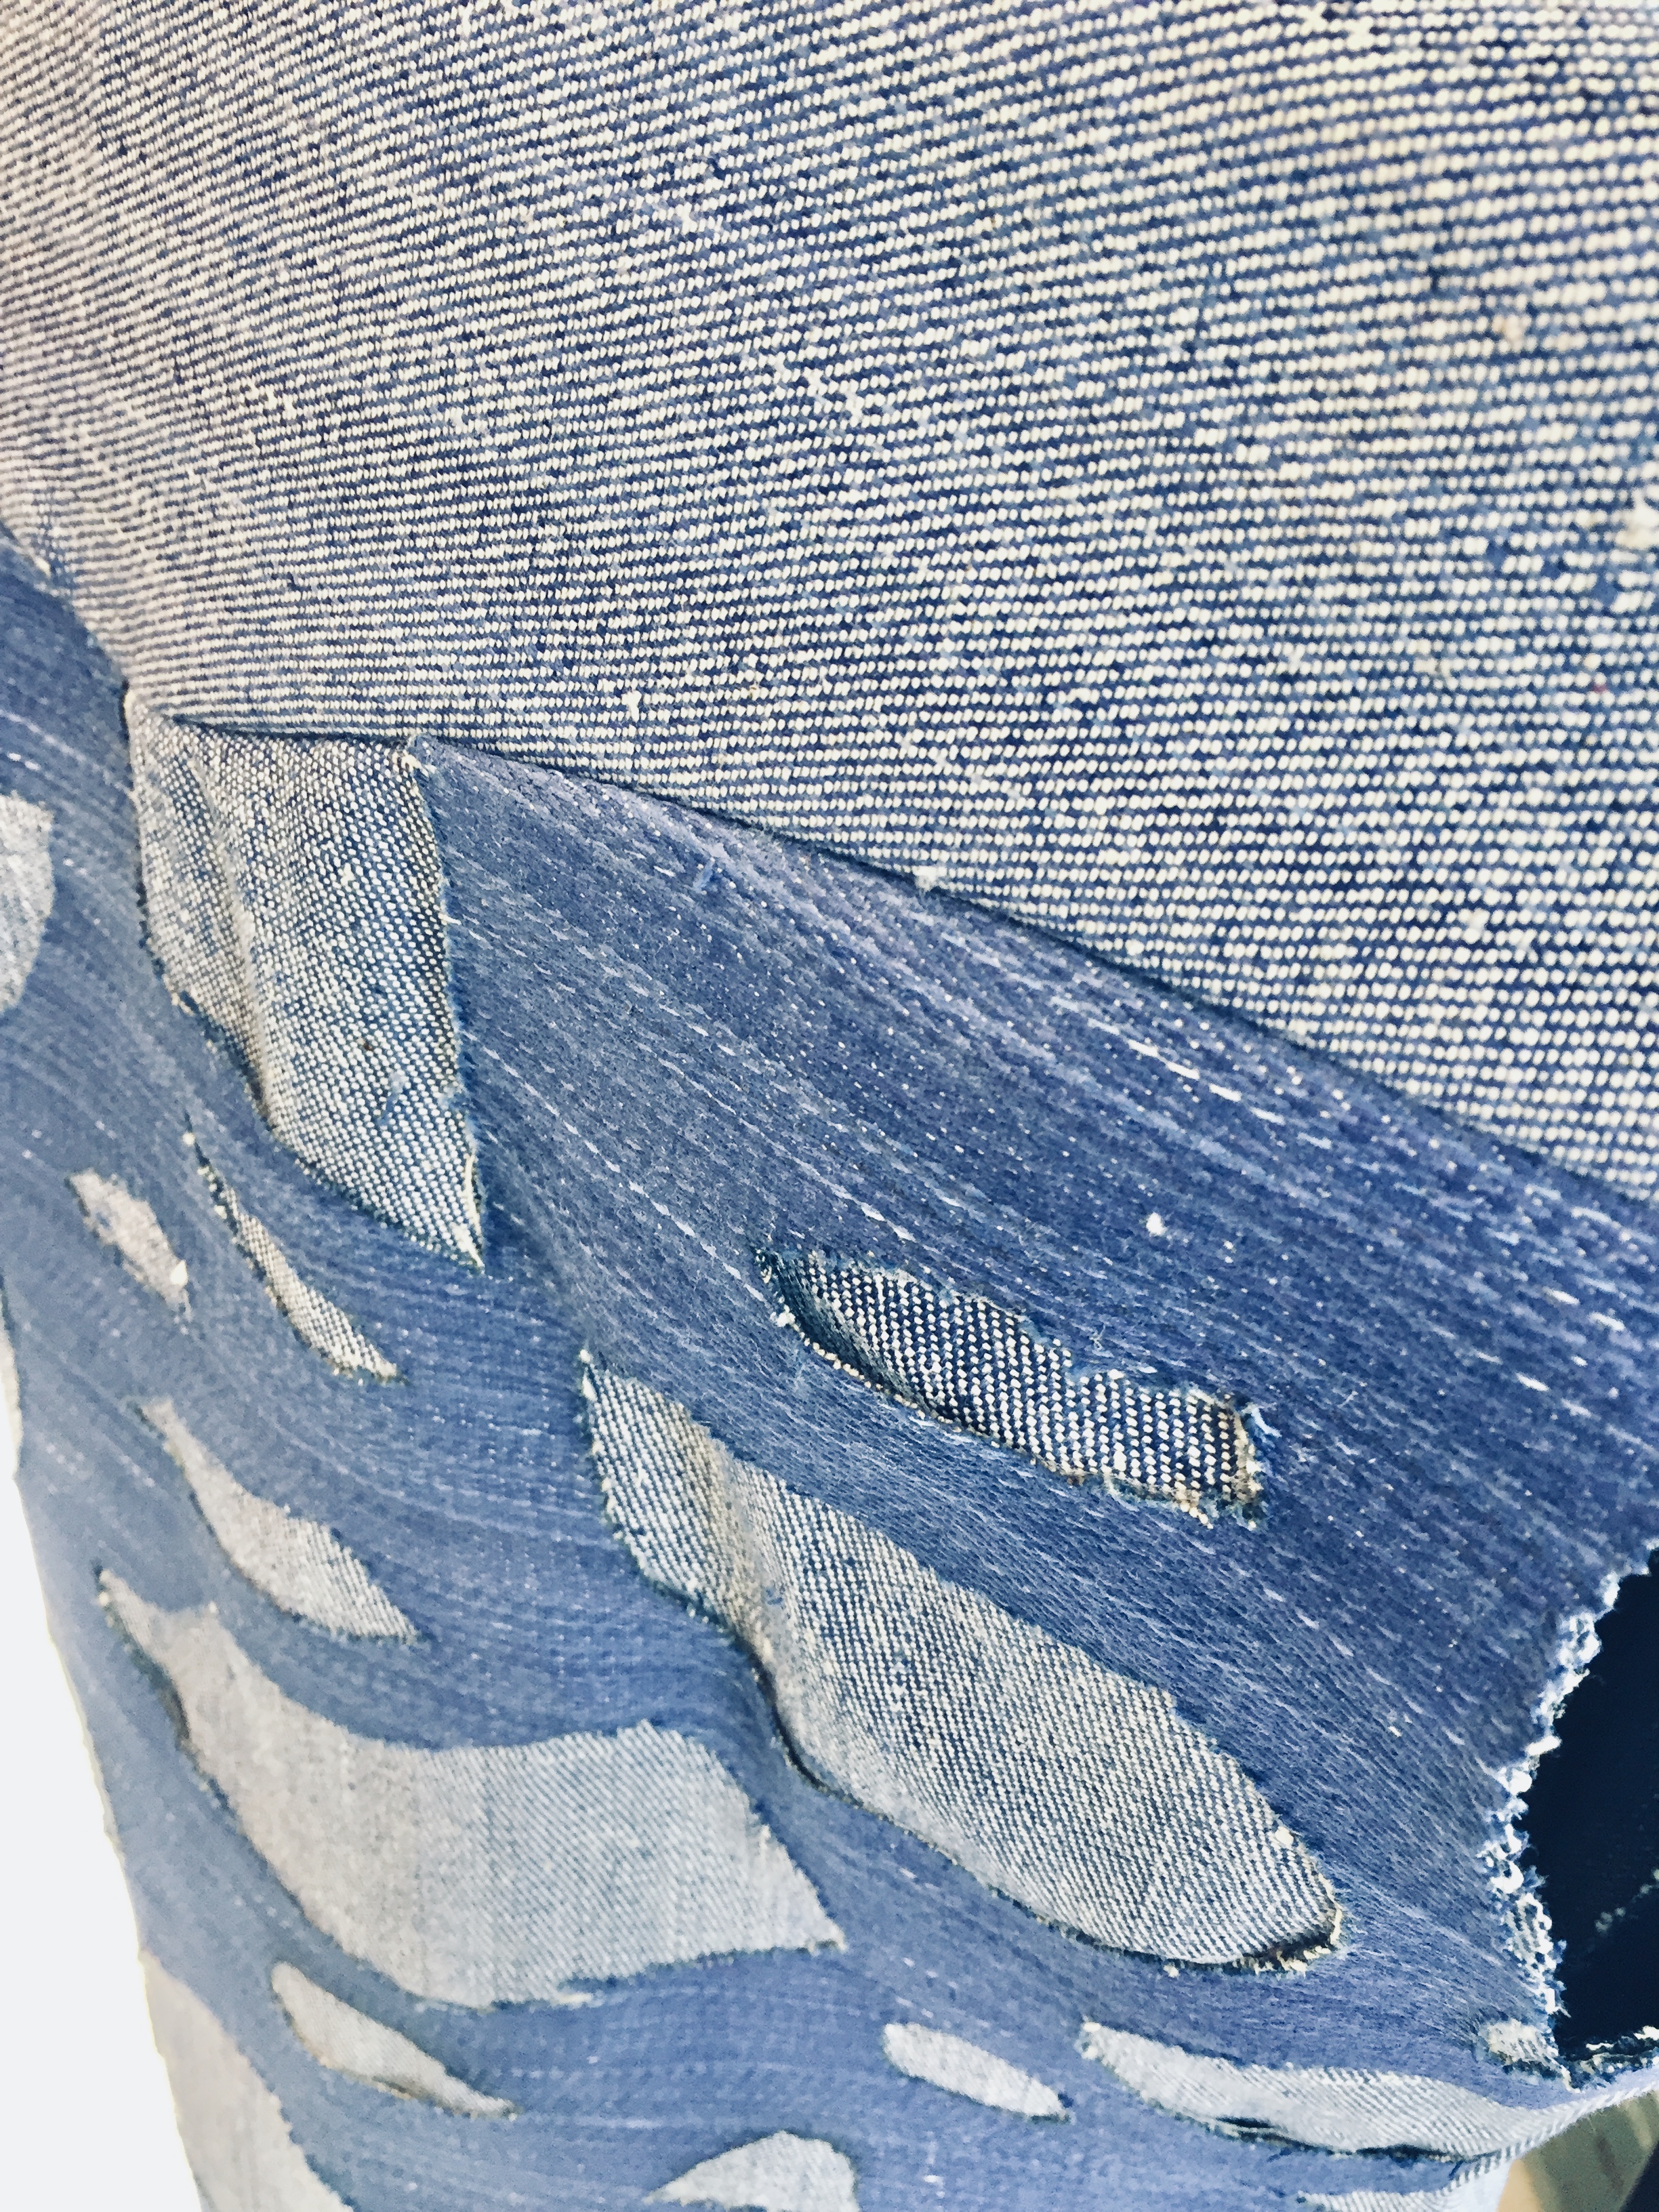 Lastly, for the final shirt; I decided to go with a vest that incorporated the pieces of not only the cut outs from the lab, but the cuts themselves; by layering them through fusible to the back bodice, and employing appliqué techniques to attach my naked geometry. The way I went about sewing this shirt, mimics that of the technical; except the raw edges are pinked for a teeth-like experience.
Reflection for Technical Shirt:
Whilst sewing, I noticed that my muslin shirt began to pucker often during the sewing of hems and seams that were circular in shape. For instance, the armhole, the end of the shirt, the cuffs; etc. Many times when ironing, the irons at the New School would leak so much from wear and tear that it would seep through, and ultimately damage my piece by hardening into an almost canvas texture. Due to this I would often have to re-cut the piece I was working on- whether that be a sleeve or a collar, etc- mostly anything that held shape. To my own embarrassment I was not aware of the difference between the markings on a draft for tucks vs. darts. This probably would have saved me time and frustration if I would have been present for all of the class that day. I noticed that my collar came across as sturdy, however; my shirt was far more lightweight than the collar and collar stand itself- I wonder if I had omitted my double sided fusible and switched it out for a one-sided interfacing this would’ve reduced the issue? I noticed that my pocket turned out smaller than I had originally planned for as well. Nevertheless- the shirt still came to be what appeared to be a shirt at its most basic. However, I find that when working with muslin samples- it is all a learning process anyways. Thankfully, it was. Yet; I still wish I knew how to prevent the puckering in seams that ask for rounded turns.
Reflection for Creative Shirt:
I planned vigorously for this project only to watch it change just as vigorously due to a series of unfortunate events. Three of these were beyond my control: We had a snow day that shut down the only other day I was allowed to come to the laser lab during spring break- (hence my second appointment was cancelled), I had a psychotic suite-mate encounter where the girl poured steamed milk all over my midterm pattern making of this project (time, questioning, bickering, and lots of cleaning taking away well…TIME!), and third on Easter Sunday, Parsons studios were packed and closed early, and to make it even worse I just remembered when I wanted to use 2 West 13th Street for studio space- I was informed of an electrical fire. All of these things definitely imposed some level of chaos. Anyhow, each time I used the laser cutters for my denim textile manipulation; my pattern of erotic imagery at first; fell to a gazillion tiny pieces I had to clean up, so then I did several experiments working with the size, only to find the same problem. From then on, I decided to drastically upscale the size of my pattern, and found a new problem- now my pattern had become massive holes that would not sustain any stability or modesty for a decent garment unless, I layered- (not to mention all the fraying this was having). Lastly I tried to engrave the fabric, and was shocked that it failed to pass decent visibility, and ended up rasterizing- which cinched my threads beneath, disintegrated my fabric- and then I was kicked out and asked to come back… which of course; never happened sadly. Here I was with around three yards of my original five yards of denim I paid ninety dollars for…wasted. What I ended up doing was using my fusible and carving out the shapes I had made in my giant pattern on the laser bed and fused them onto the back of the vest I ended up creating due to lack of material and time. I wanted to repeat the same on the front, but the rest of my fabric that mimicked the large cut outs were fraying at a considerable level by this time. Instead, I went ahead and used the shapes that were cut out, and decided to simply appliqué them on- (since this was all I had to work with which was still salvageable). If I were to redo this project I think it would be wise to create several experiments before buying the first fabric that appeals to me. I would have probably gone for a sturdier material as a result.
