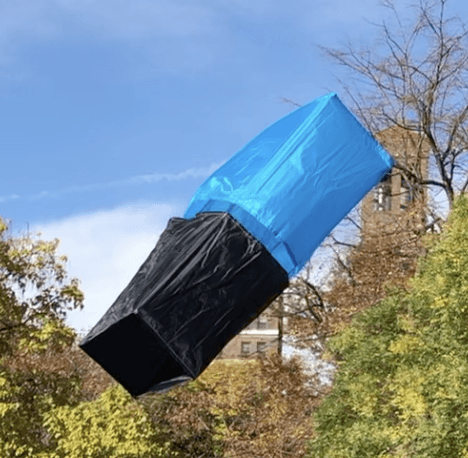
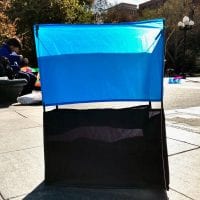
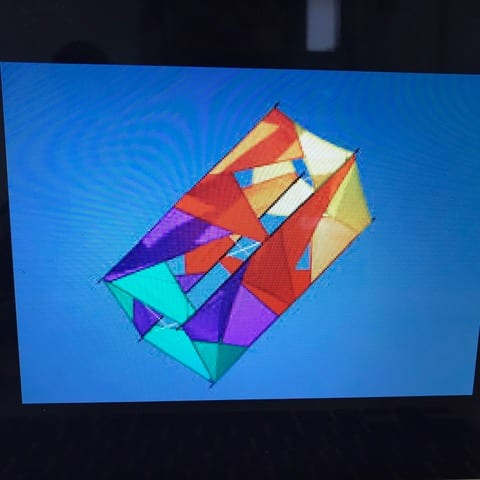
Final images of “Box Rider” – multi-celled box kite
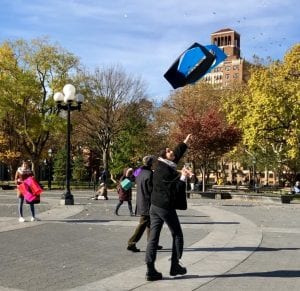
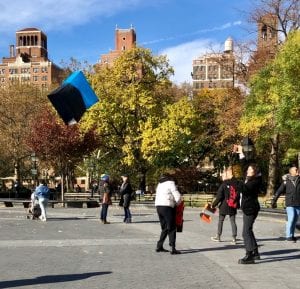
Box rider being flown in Washington Square Park


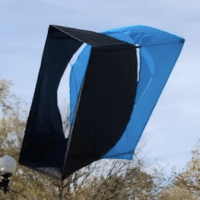
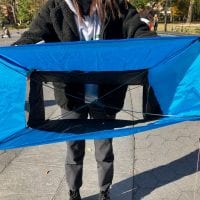
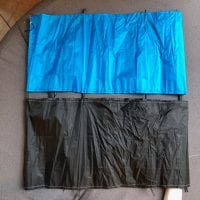
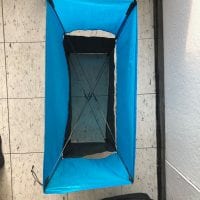
Different Views of Box Rider
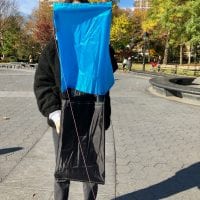
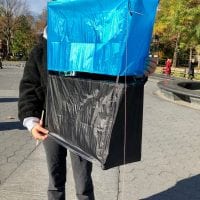
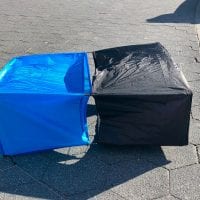
Half-collapsed and Fully collapsed

Kite winder, bag, and instructions manual
-
- kite winder with handle exactly to scale of shoe pattern
-
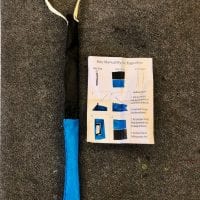
- kite bag with manual
-
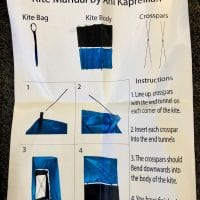
- instructions manual
Reflection and Process
I began the Kite making process by researching box kites that I found interesting and would want to make or revamp. Examples below.

After research, I dove into the kite making process by completing a 12 step drawing to transform my shoe pattern into a kite form. I made a few adjustments and then took to making a model of that kite.  (2). Drawing helped my design process by giving me the foundations to start a kite. I got to create a design based on my shoe pattern and even though it had some flaws that became clear when I made a model, I still got my start from making the drawing.

The model making process was difficult at first, but after learning techniques to make it collapsable I started to better understand the form. I revised my model to fit my new design, as the old one didn’t make sense logistically (uneven wings), and used tissue paper over Bristol for a more realistic version of the kite. I then revised my model again, making it up to scale using my shoe pattern and putting the crossbars in the correct placement so everything is mapped out when I need a reference. I made developments and learned ways to put the model together that would mimic the way the actual kite would be made. (1). Making the kite model helped me understand dimension and designing for my kite because seeing the physical embodiment of the kite made it easy to understand the components. I could physically manipulate the model and change it to make more sense design wise and I could see the flaws in the design much clearer than in a drawing. Making models was so important because to develop my ideas I needed to see them come to life. (3). Over time my design went from being one-celled with wings, to two-celled with wings, and then just to a two-celled box kite. The wings were done in my transformation drawing and they were an uneven strange shape that I decided to abandon. I ended up sticking with a larger simpler body with a lot more membrane.
-
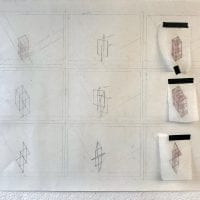
- 12 step transformation drawing creating an initial kite form
-
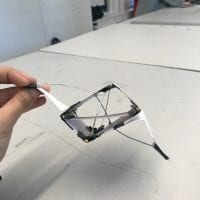
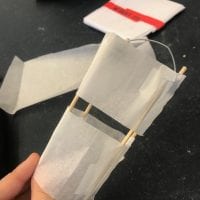
- First model attempt. Collapsable but unrealistic and only one celled
-
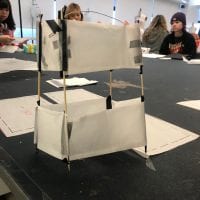
- Second model attempt. Collapsable and multi celled but not to scale
-
- Final model. Collapsable, to scale, removable spars and crosspars using pocket techniques
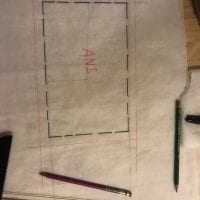
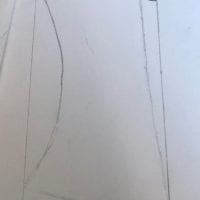
After that, I scaled my small shoe pattern into one large enough to build my kite by triangulating. Once finished I added on a seam allowance and marked it out to easily be pinned and cut on my fabric. I also cut a smaller half size to make up the sides of the rectangle in my kite.
-
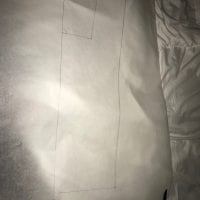
- Initial small shoe pattern inside triangulated larger pattern to be used for construction of the kite
-
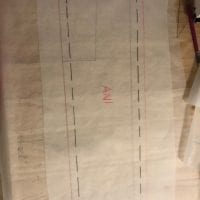
- same as first image but mapped out as a pattern with a seam allowance added on
-
- Half of the large pattern to be used for the sides of the rectangle
-
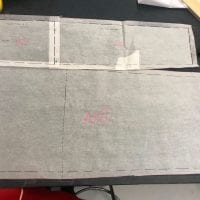
- I took my long pattern and short pattern and attached them together, then flipped it upside down to create a mirrored larger pattern, allowing me to use up the majority of my membrane fabric
After creating my patterns, I pinned them to my fabric and cut them out. Before sewing, I completed multiple sewing samplers on paper and on scrap fabric to test my skills and be confident in the sewing process. I was familiar with hand sewing but was new to the sewing machine, but I learned quickly. I hemmed all of the open edges on the kite and then completed four french seams to connect the edges to create enclosed rectangles. I sewed pockets and tunnels with the ribbon fabric and attached them to the corners, and put tunnels in the middle, connecting the two colors of fabric so the kite stays together when the spars are inserted. (5). I learned a lot about the way different materials work together and what they are useful for. Certain materials are strong and good for holding things together, and some are good for other uses such as flotation and getting lift in the wind.
-

- pinning the edges to prepare to hem
-
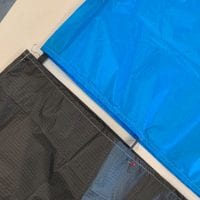
- pinning tunnels in between the two membranes
-
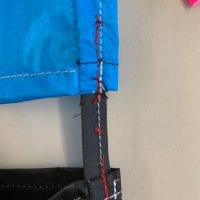
- close up of the tunnels between the membranes
Once my membrane/body was finished, I began mapping out how many spars and crosspars I needed and how long they should be to create enough tension. I measured and remeasured multiple times to make sure everything was accurate before cutting my spars. Since my kite was so large, I used 8 of the long spars instead of the 6 provided to us. I also realized I needed to make tunnels to center and hold my crosspars together for tension. (6). Tension is a force that wants to elongate something and compression is a force that wants to shorten it. They impacted my design in many ways because I had to plan the placement of my pockets and the size to cut my spars based on how much tension it would give off. The kite needs tension to fly so making sure the project had enough was the main goal while creating. I had to make my spars longer and tie them in the middle to gain more tension.
-
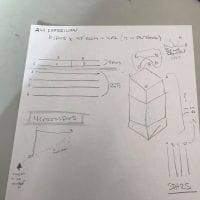
- calculating and planning my spars
-

- cutting crosspars
-
- crosspars with tunnels for added tension
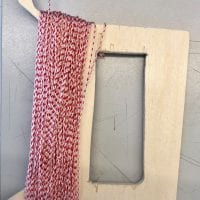
I then made my kite winder, taking into consideration my original shoe pattern. I took my exact original sized shoe pattern and made it into a design for a winder which I then took to the woodshop and created. When I was finished I wrapped my kite line around it.
-
- original shoe pattern
-
- kite winder with handle exactly to scale of shoe pattern
I made my kite instruction manual and sewed my kite bag. The bag is cute and small, the intention was not for it to be small but because my kite was so large I didn't have a lot of material left
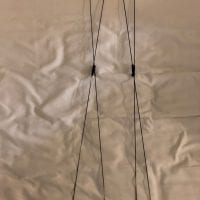
I then needed to add the bridle to the kite so I could attach the kite line. To do that, I picked a sturdy corner, one with a french seam. I poked a hole in it and stuck a grommet through and hammered it shut. After having a sturdy hole, I looped the black bridle string around the spar nearest the grommet and threaded it back through so I had a loop to attach my kite line.
-
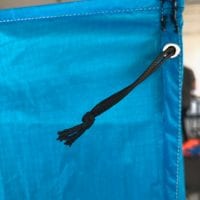
- bridle coming out of grommet
-
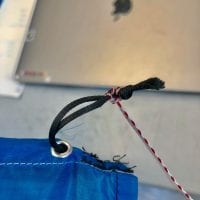
- kite line attached to bridle
My kite was finished, but the tension could be improved, so I decided I needed to sew the end tunnels tighter and maybe add some rubber bands along with my tunnels on my crosspars
-
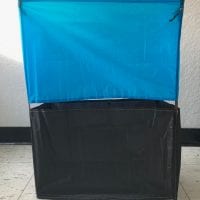
- front view first version
-
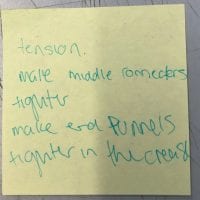
- made note in class on what I needed to do to improve my kite
-
- side view first version
I made necessary adjustments, sewing some tunnels tighter, and adding rubber bands along with my crosspar tunnels and it drastically improved my tension. We took the Kites out to fly and mine flew although the inconsistent wind made it difficult.
(7). The easiest part of this project was making the kite patterns and cutting the fabric. The most enjoyable part of the project was sewing because I find it relaxing and I liked learning a new skill. I also really enjoyed flying the kite because I got to see that all my hard work actually paid off. The most challenging aspect of this project was making a collapsible accurate kite model, as it took me many attempts to get one I was satisfied with. Also getting the kite to have enough tension took a bit of effort, but with minor adjustments it was fixable.

(8). Some things I learned about myself throughout this process: I learned that to get great results I need to put in a lot of effort. I learned that I am capable of solving problems if I don't give up and if I spend hours and hours working. I gained a lot of new skills and I liked learning I could do things I didn't think I could, like using the sewing machines.
Flight Video Playlist
Link to my original progress post: https://portfolio.newschool.edu/anikapreilian/2018/10/21/kite-drawings-models-and-patterns/