
Assignment Description
In this assignment, we were asked to create “wearable” body object to demonstrate or express feelings of connecting to a particular community. Considering how you can use color, shape, form, scale to represent these feeling visually. I chose to create a garment/ armor piece that would encompass the idea of protection and warmth, as well as show how an object benefits in a shared space or a shared object amongst a group of people.
Phase 1
For the common people, the garb was basic and simple element worn in clothing. The outer garments were commonly made of wool with undergarments of linen. Wool garments were hot, heavy and itchy, but fortunately, the linen undergarments made the wool a bit more comfortable. The undergarments were laundered, but it was rare to wash the outer garments. While one might think this would serve to create a rather pungent society, such was not necessarily the case. Though the peasants worked very hard, frequently at manual labor, they also spent a great deal of time around open fires and smoke. The smoke permeated their clothes and acted as a natural deodorant reducing the odors.
Throughout the winter and colder season, garments such as cloaks, mittens and woolen hats were worn as protection from the cold. Shoes were worn, but were often a luxury. It was common for people to go along their day with no shoes. Along with their woolen dresses, women often wore simple caps. In the medieval era, clothes would be made of wool with a next-to-body material generally of linen. Both materials, worn in layers, were a way to keep people warm. Medieval men wore a linen shirt and underclothes, a wool coat with a hood over a coif on the head and also covering the shoulders and upper arms.
Even soaking wet wool provided a layer of warmth. People during the medieval times did not have access to fibers such as polyester, lycra, and etc. Fabrics such as nylon weren’t invented silk was not accessible to the common people because of its expensive value. Wool if clean and maintained was even waterproof to an extent, but would not resist a downpour and often times people would have to seek shelter to keep warm.
Other than fire, one had to rely on animal heat. Even now, animals huddled together can keep a place warm. Medieval common people typically build their house next to where they kept their animals. The animals did not actually share their living space, but they were close enough to keep it from freezing. People also kept themselves warm by huddling to retain body heat.
http://cdalebrittain.blogspot.com/2014/11/keeping-warm-in-middle-ages.html
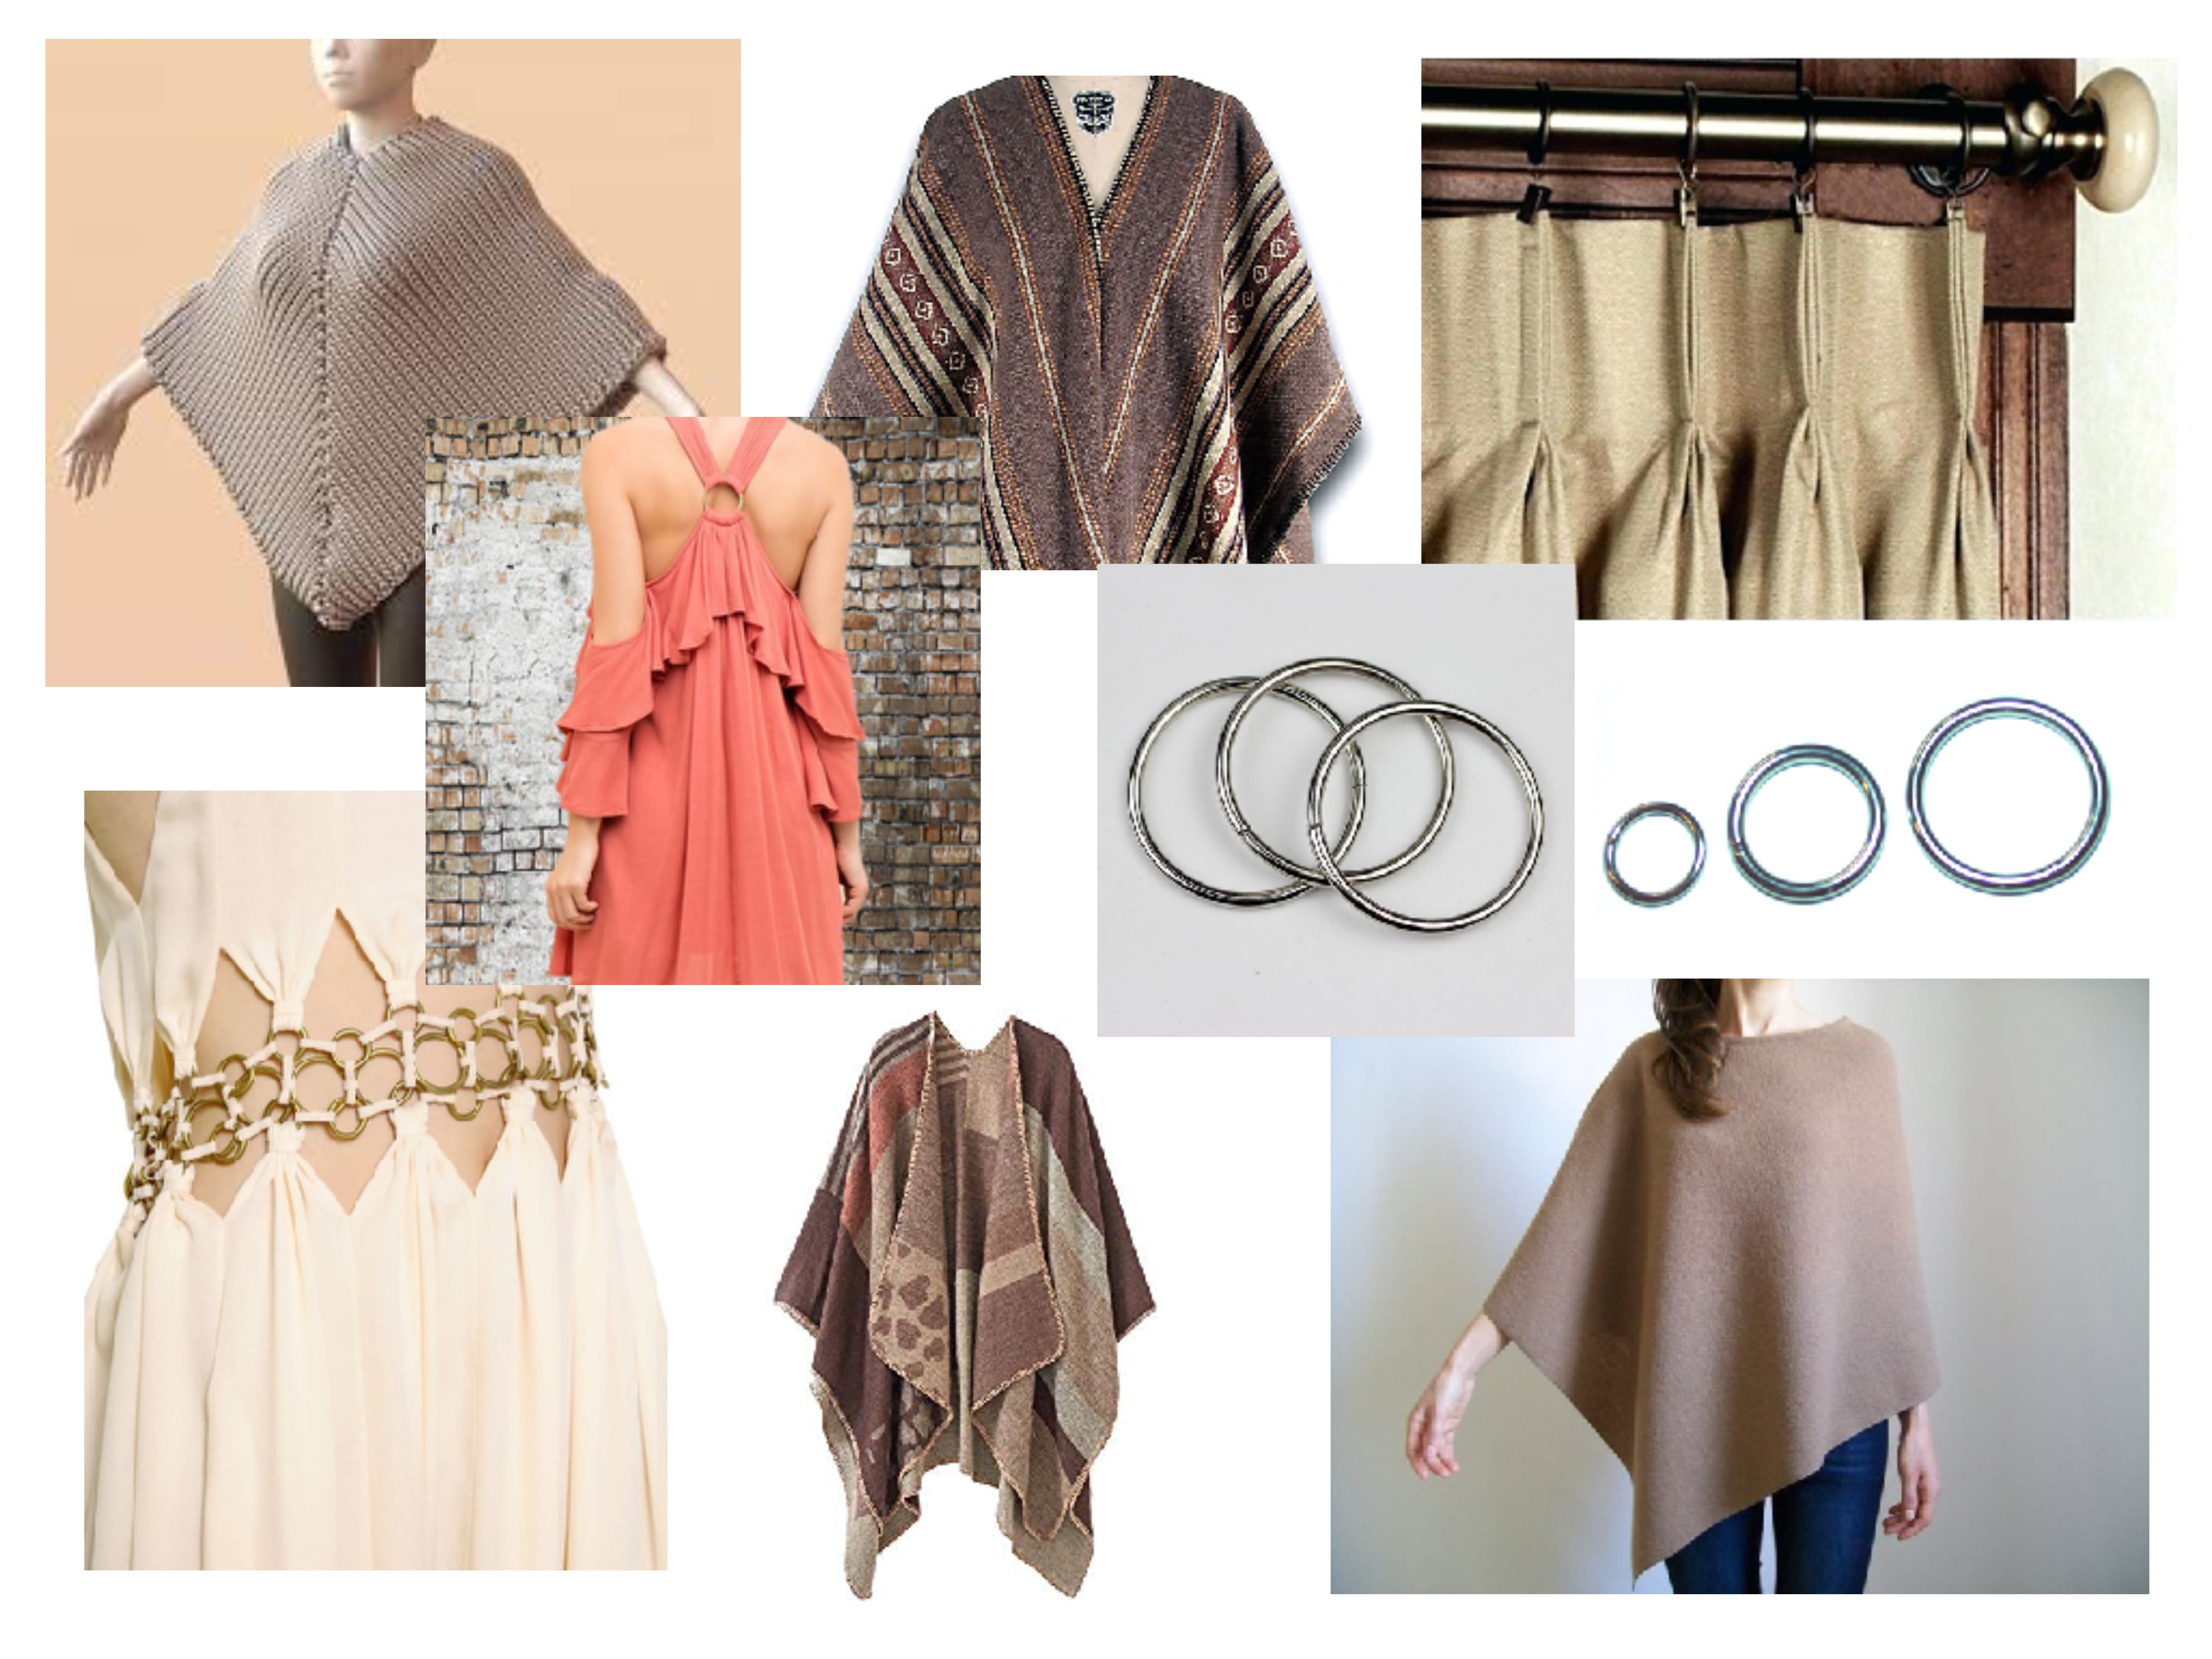
moodboard
Design Proposal
I decided to create a garment piece that would encompass the idea of sharing adding a layer of warmth as well protection onto the human body. I decided to give the garment two separate pieces that can be worn together and separately. I wanted to give the garment interchangeable layers that can be worn together and also shared between more than one person, like sharing a blanket. I was inspired to make this garment piece because it reminded me of this one particular blanket that my friends and I used to share that kept us warm during the winter time when we were in the back of my friend’s car. To me, sharing items amongst friends make me feel more closer and connected with the group of people I am sharing it with. I wanted to focus the idea of warmth and security found in community through a shared object which is what led me to create a garment/armory piece. My goal was to represent it as an example of how a community is connected and works for the benefit within a group of people in a shared space and what a shared object means to me specifically.
Phase 2
Sketches and mock ups
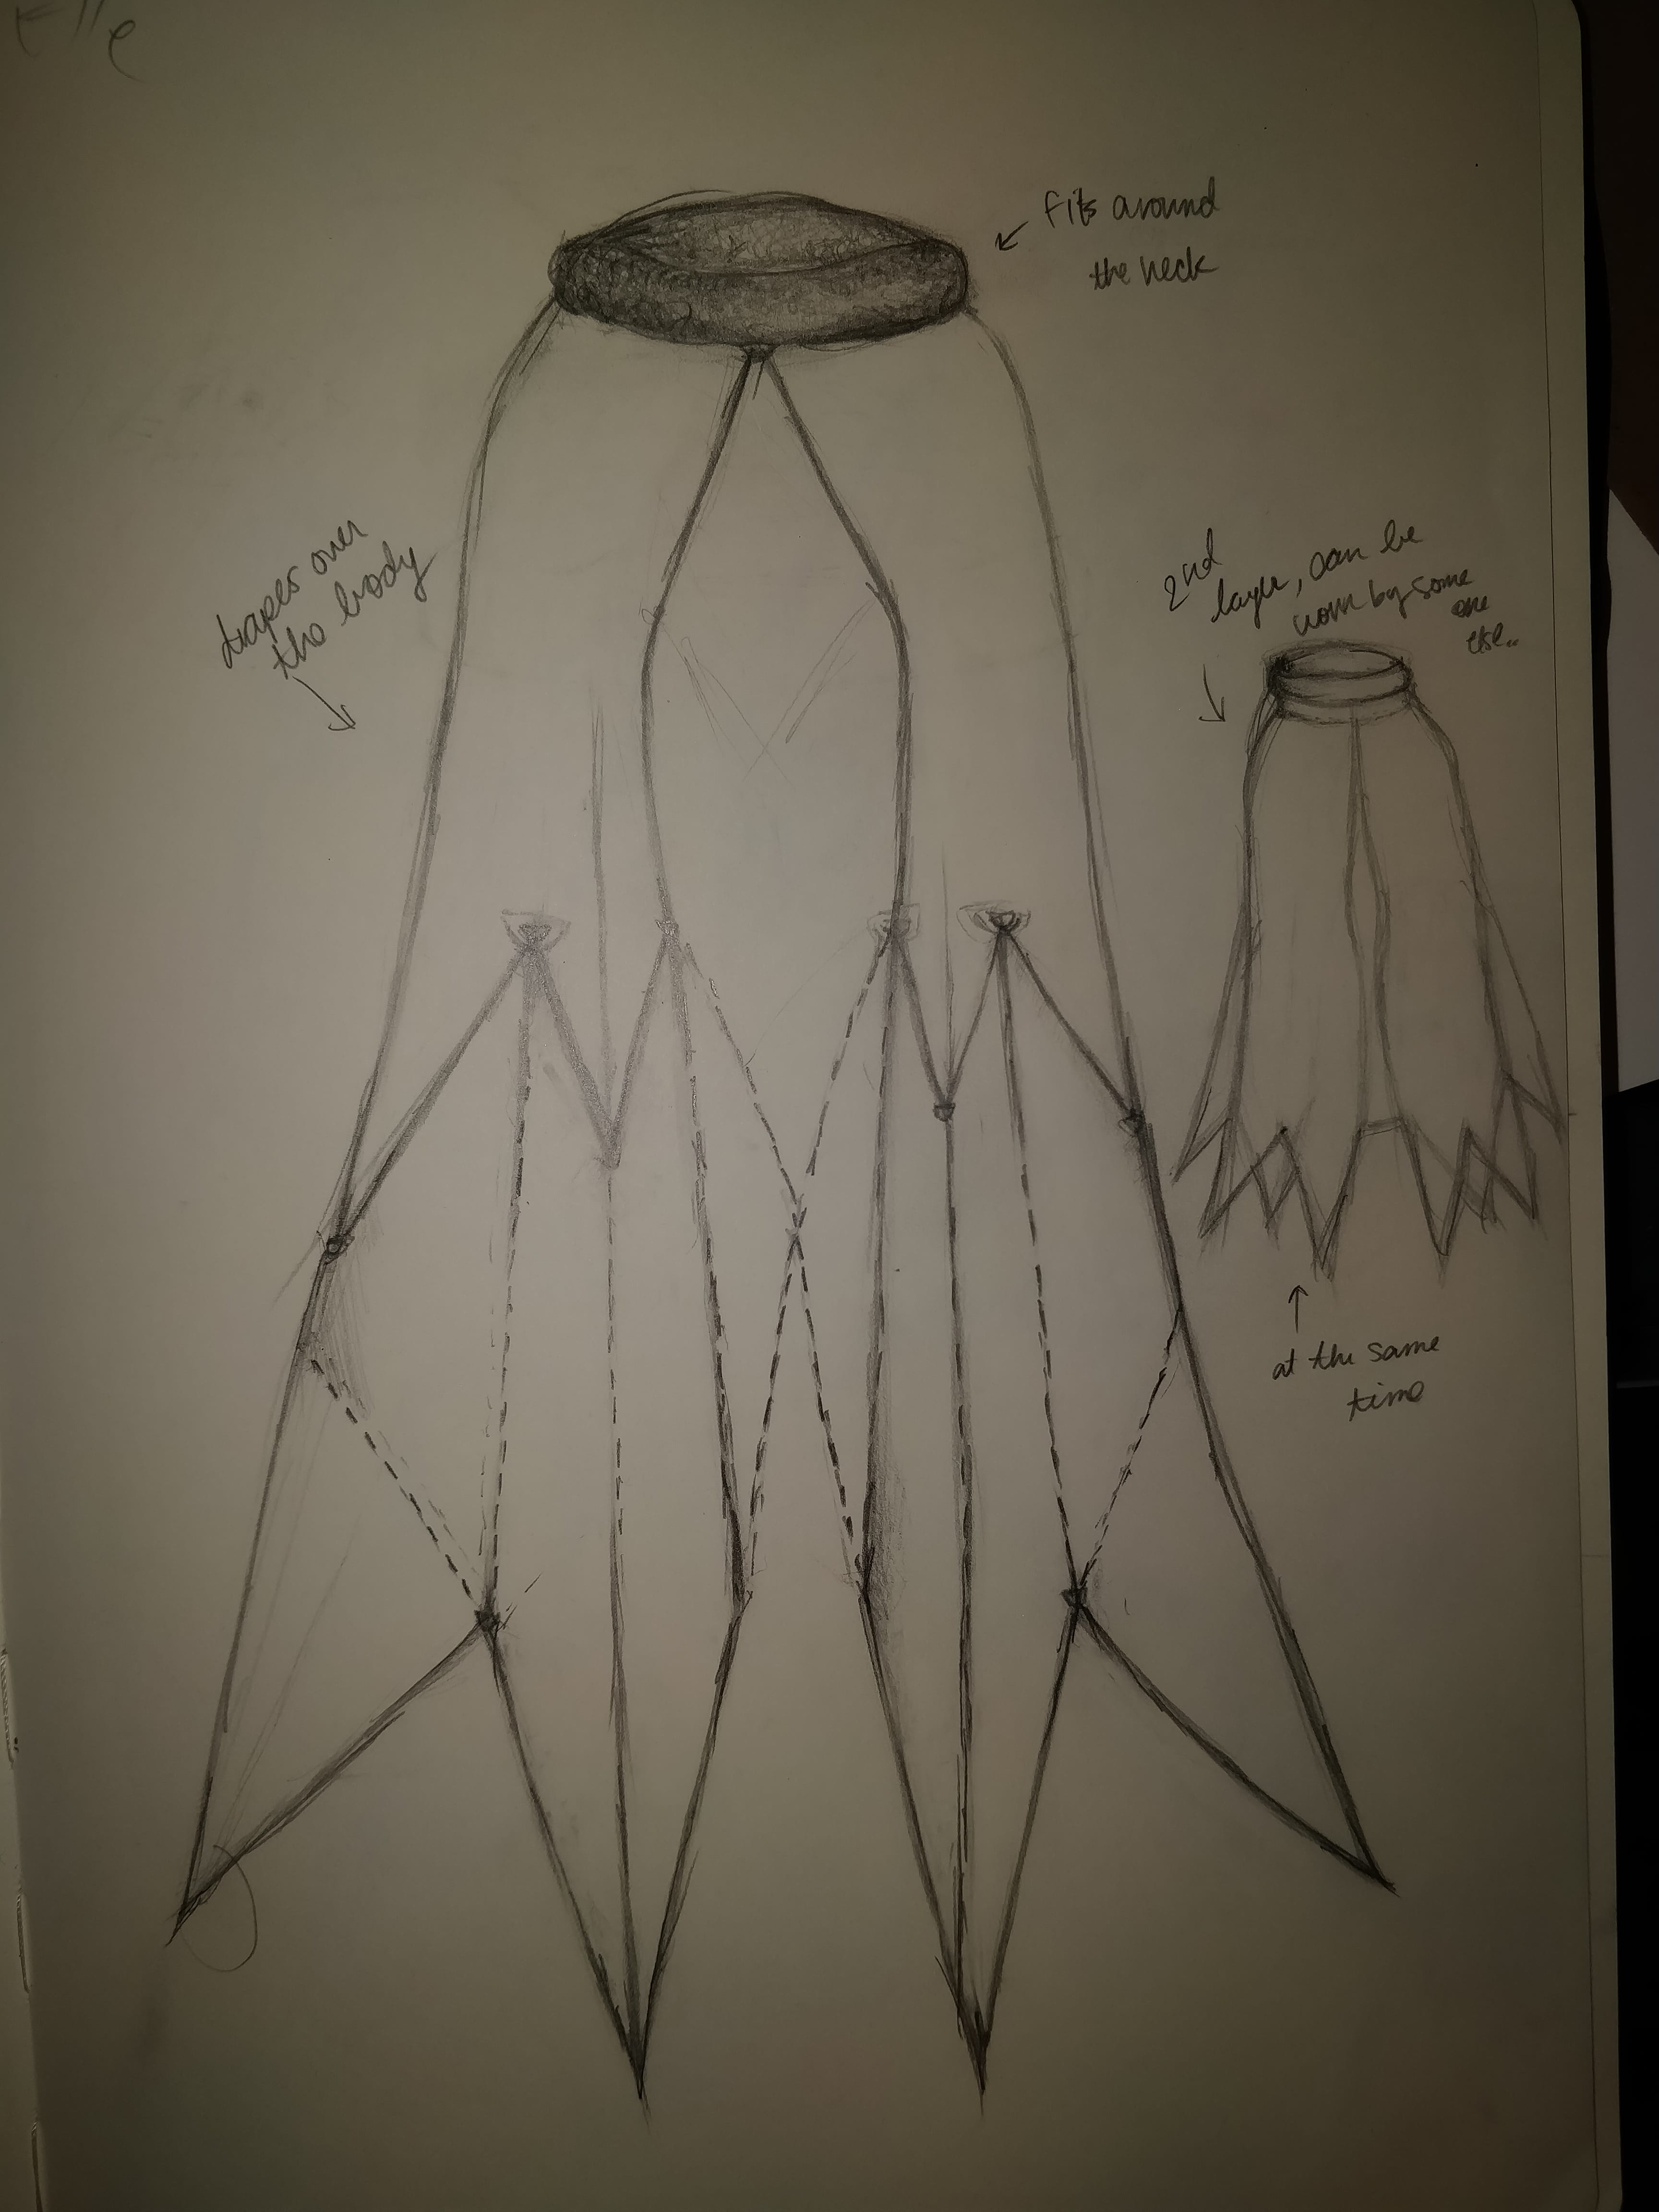
Initially, I wanted to create cape that would wrap around the entire body and drop from the shoulders. Then I wanted to physcially attach the cape with another cape that can be worn separately but at the same time. But I decided that I wanted to make the design asymmetrical so I went along with a more layered and chopped effect to create a spanned appearance. 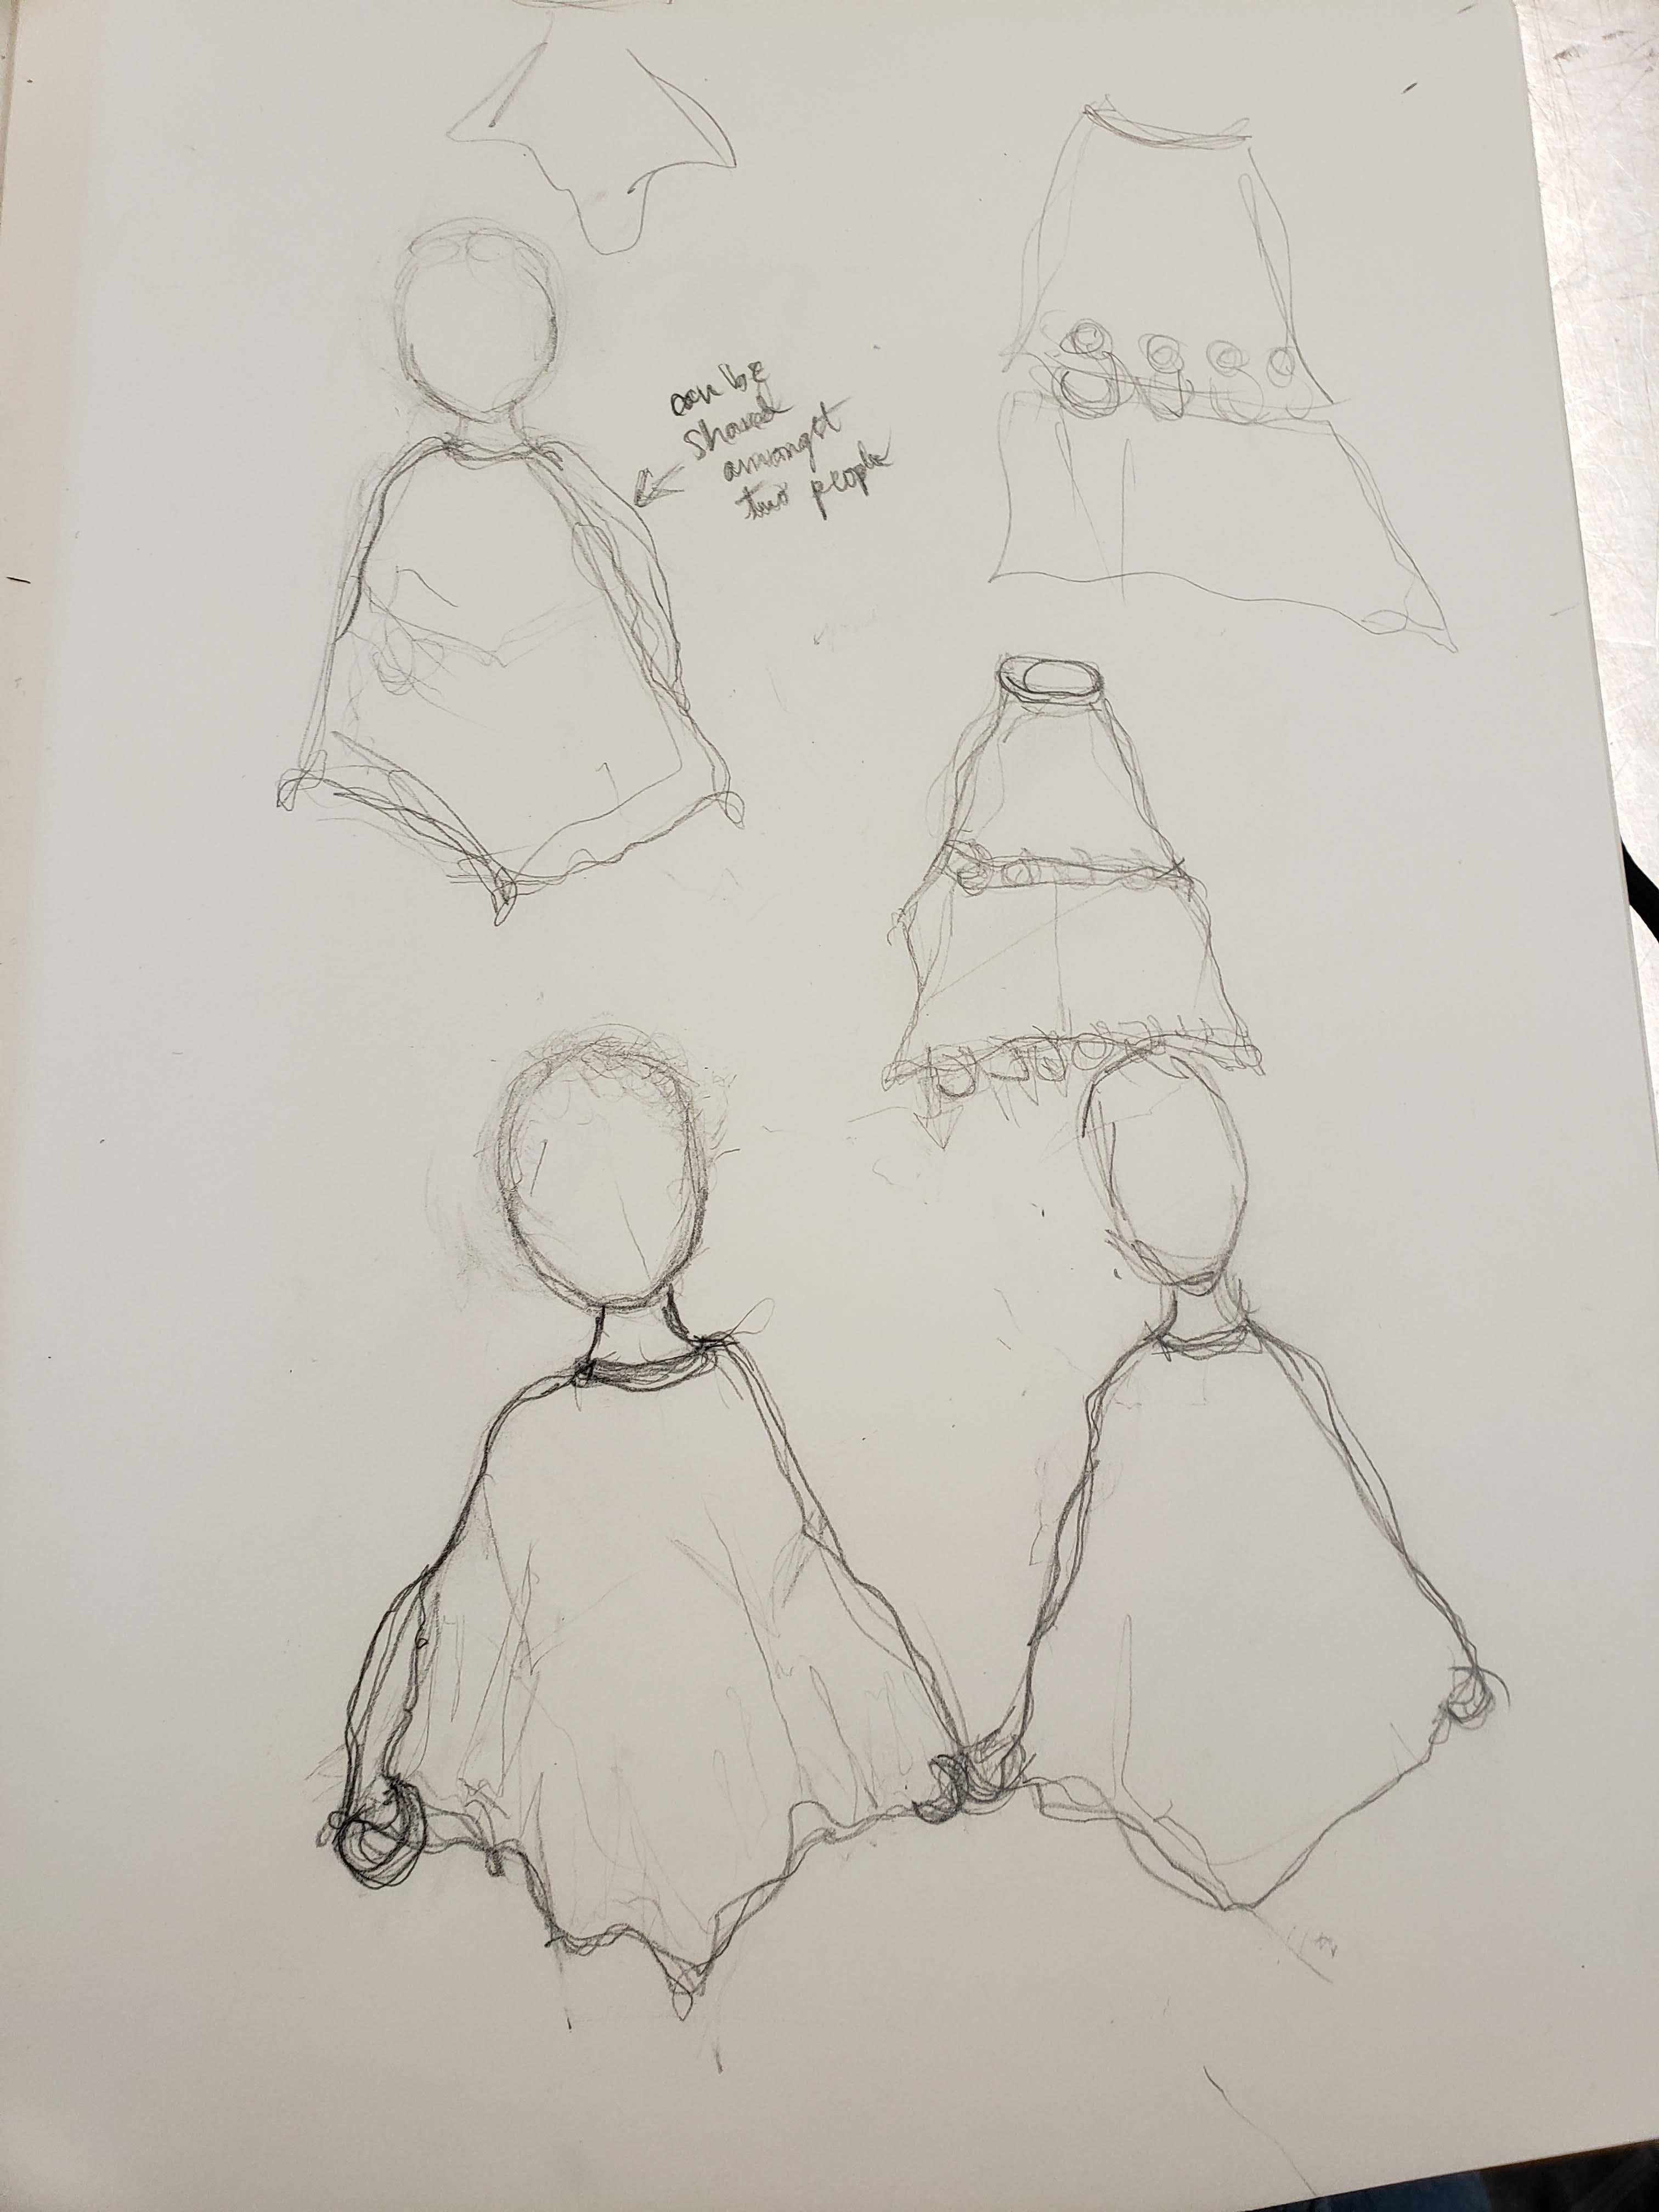
I sketched the design of the garment to be more triangular because I like how the ends of it create a more dramatic layered effect. I think asymmetrical pieces bring more dimension and depth onto a garment since it is more unconventional and unique. Instead of using fabric to create this piece, I wanted to challenge myself using paper with the help of origami techniques to develop my patterns and form the underlying structure.

I decided to make a tank top layer underneath the layers to act as a base for the rest of the shapes and patterns to go on top on more seamlessly.
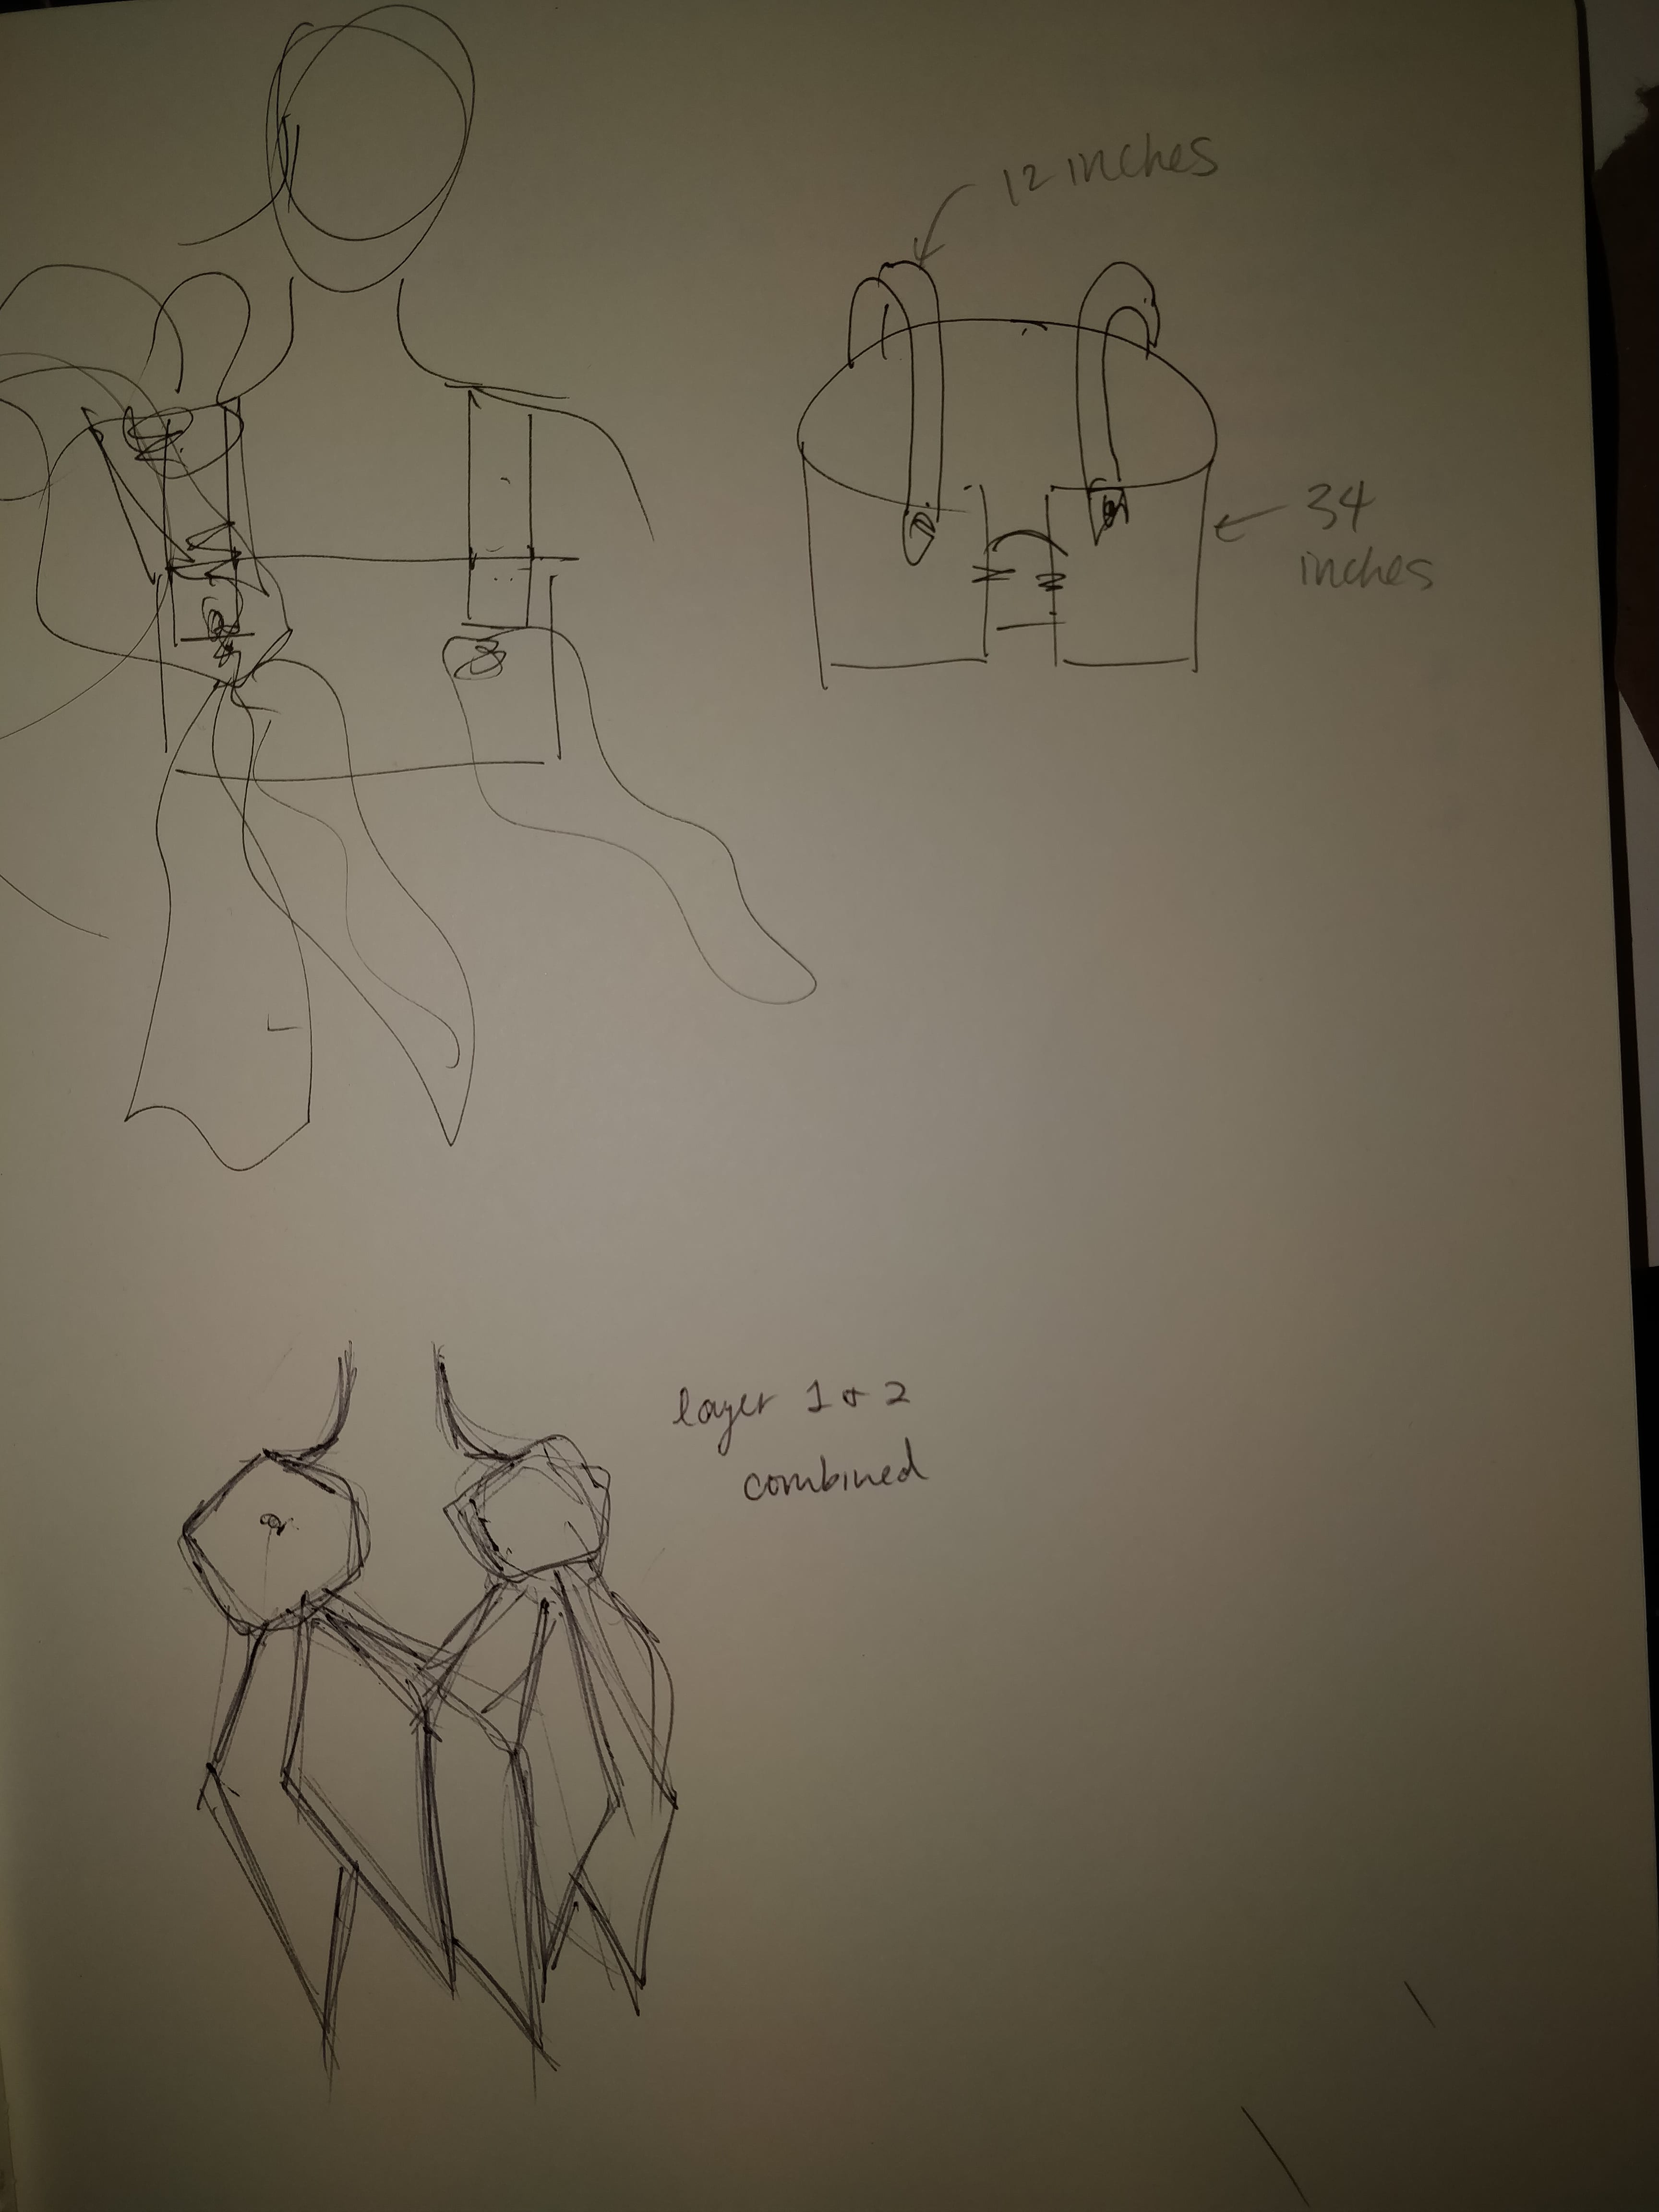
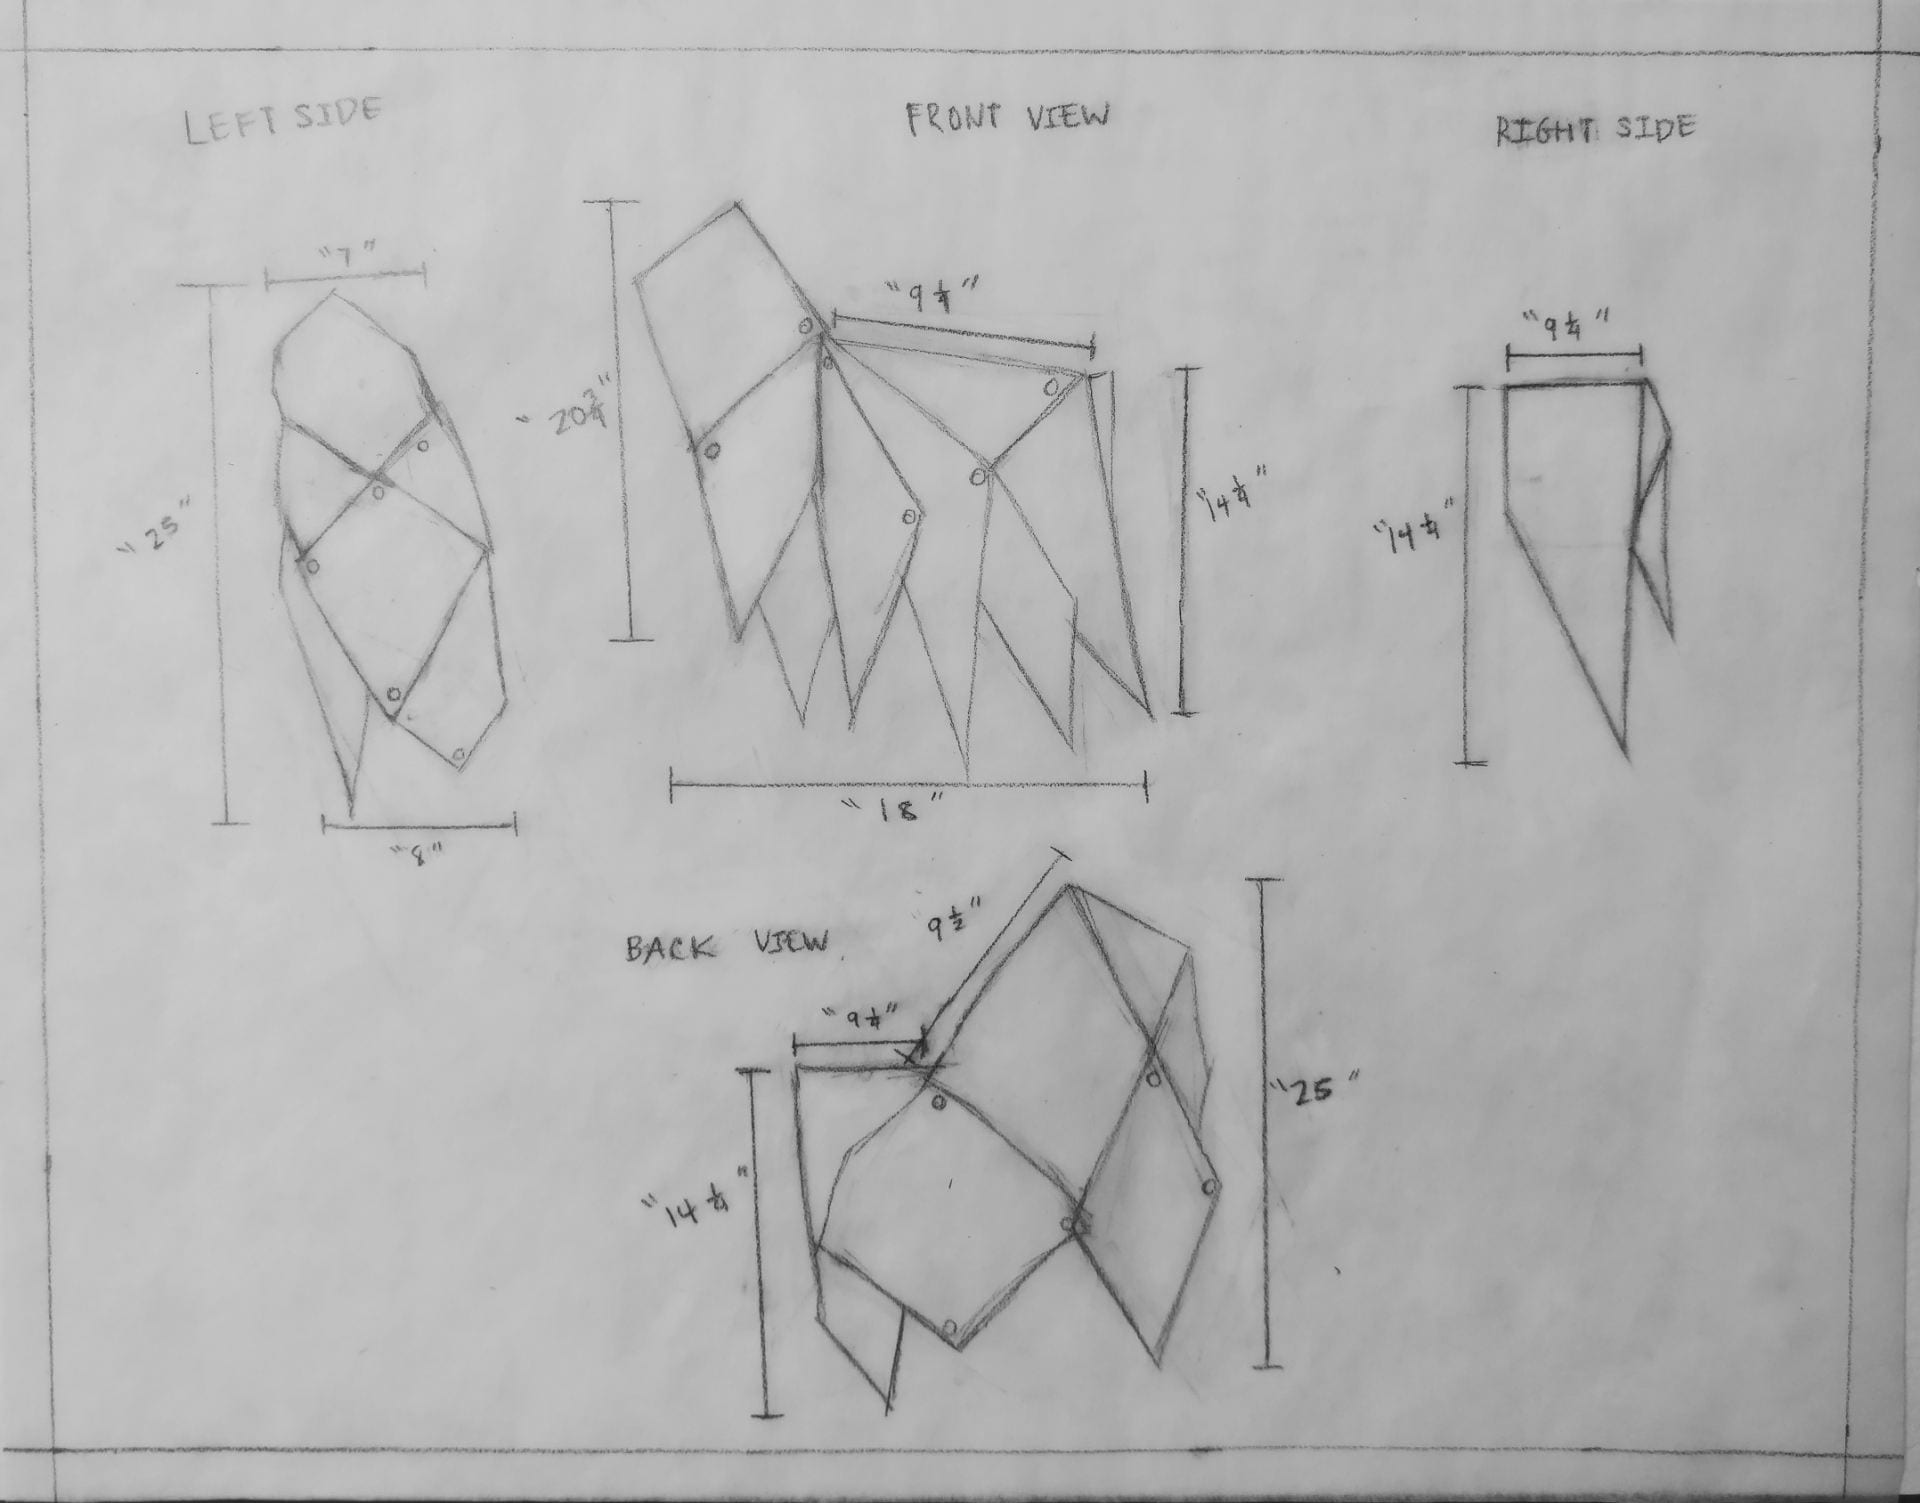
Technical Drawings
Layer 1
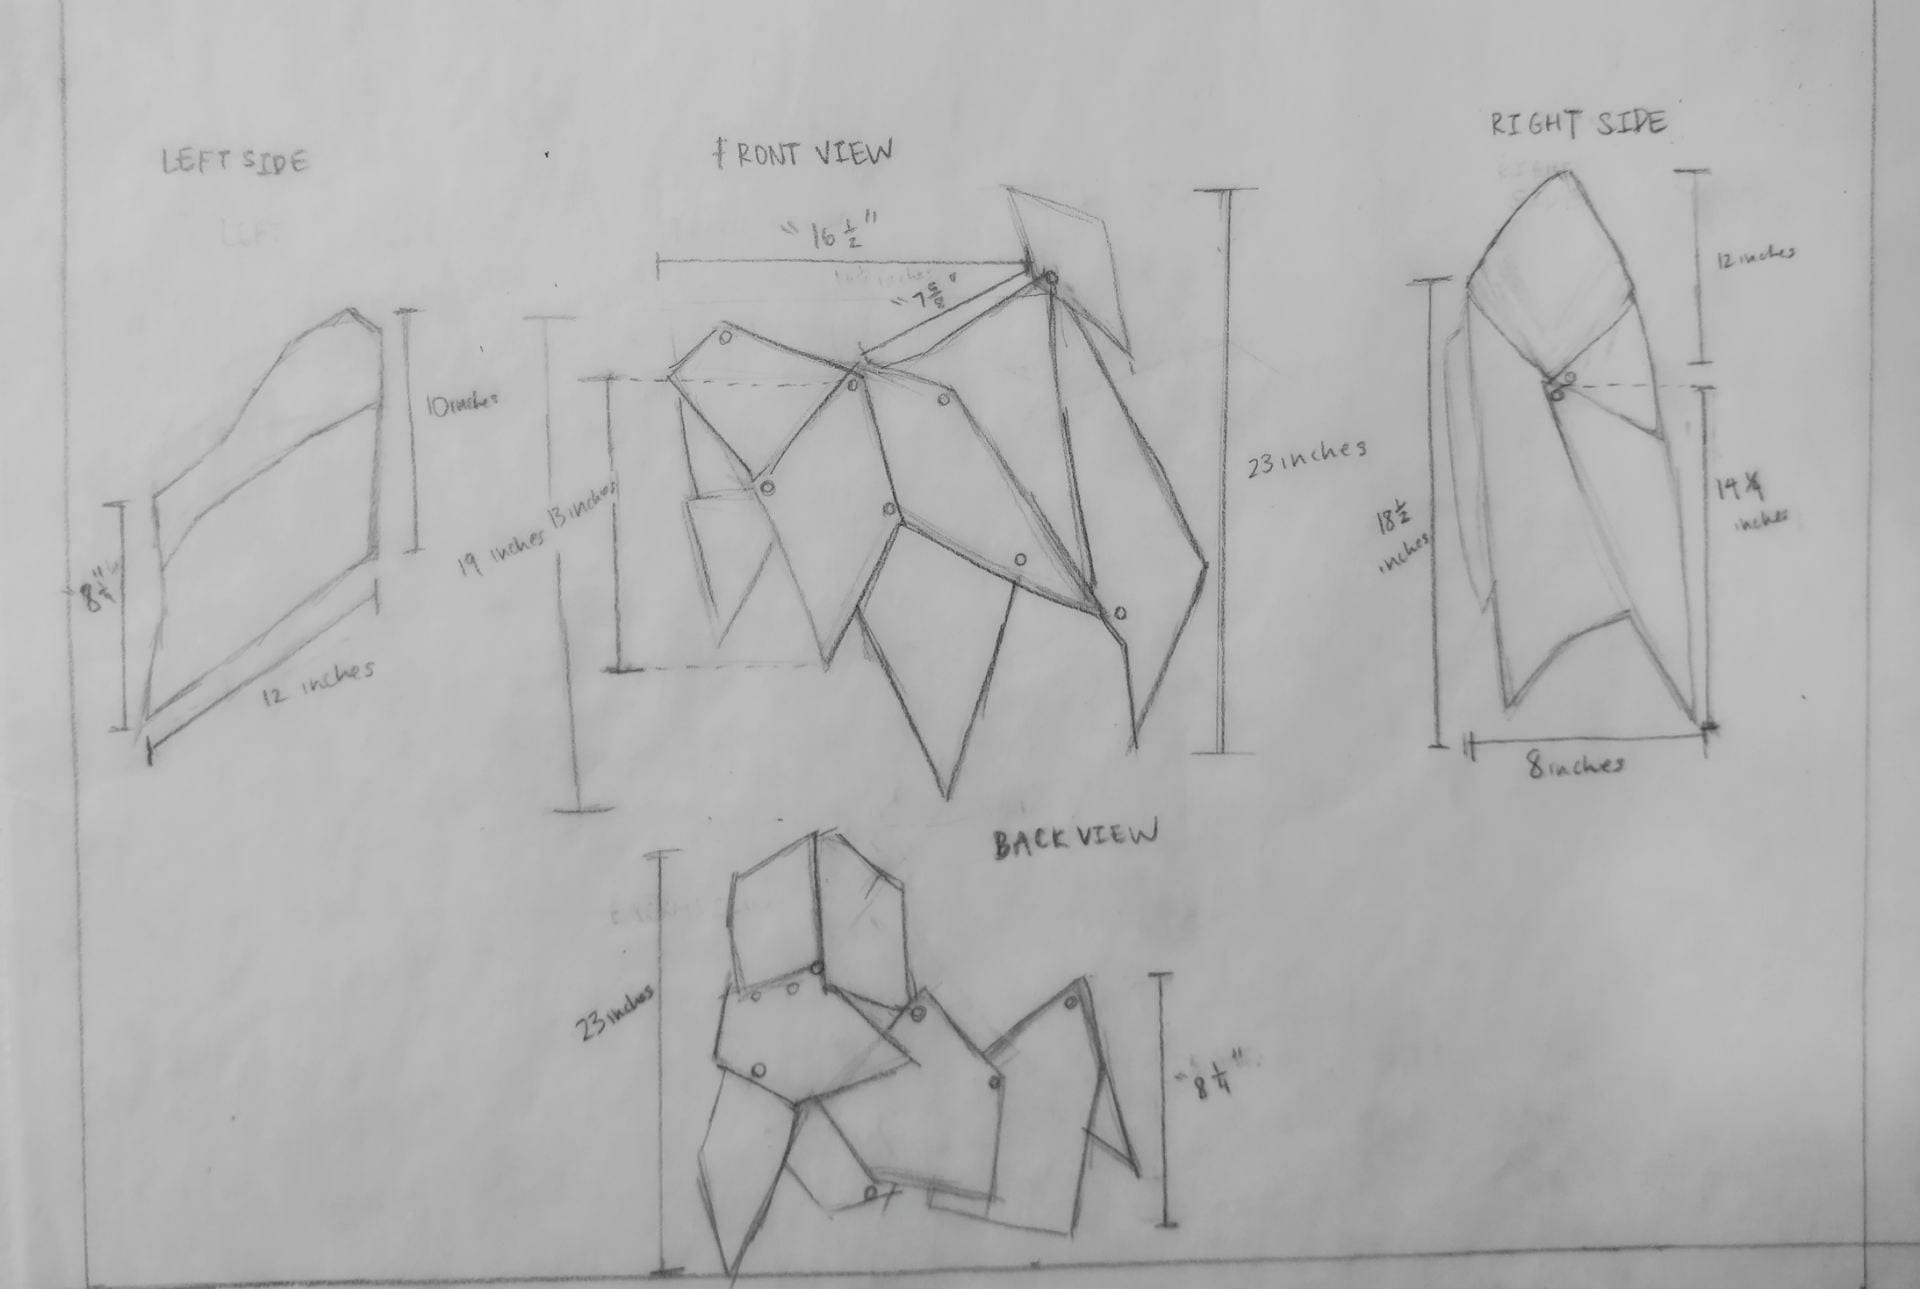
Layer 2
Sketch models

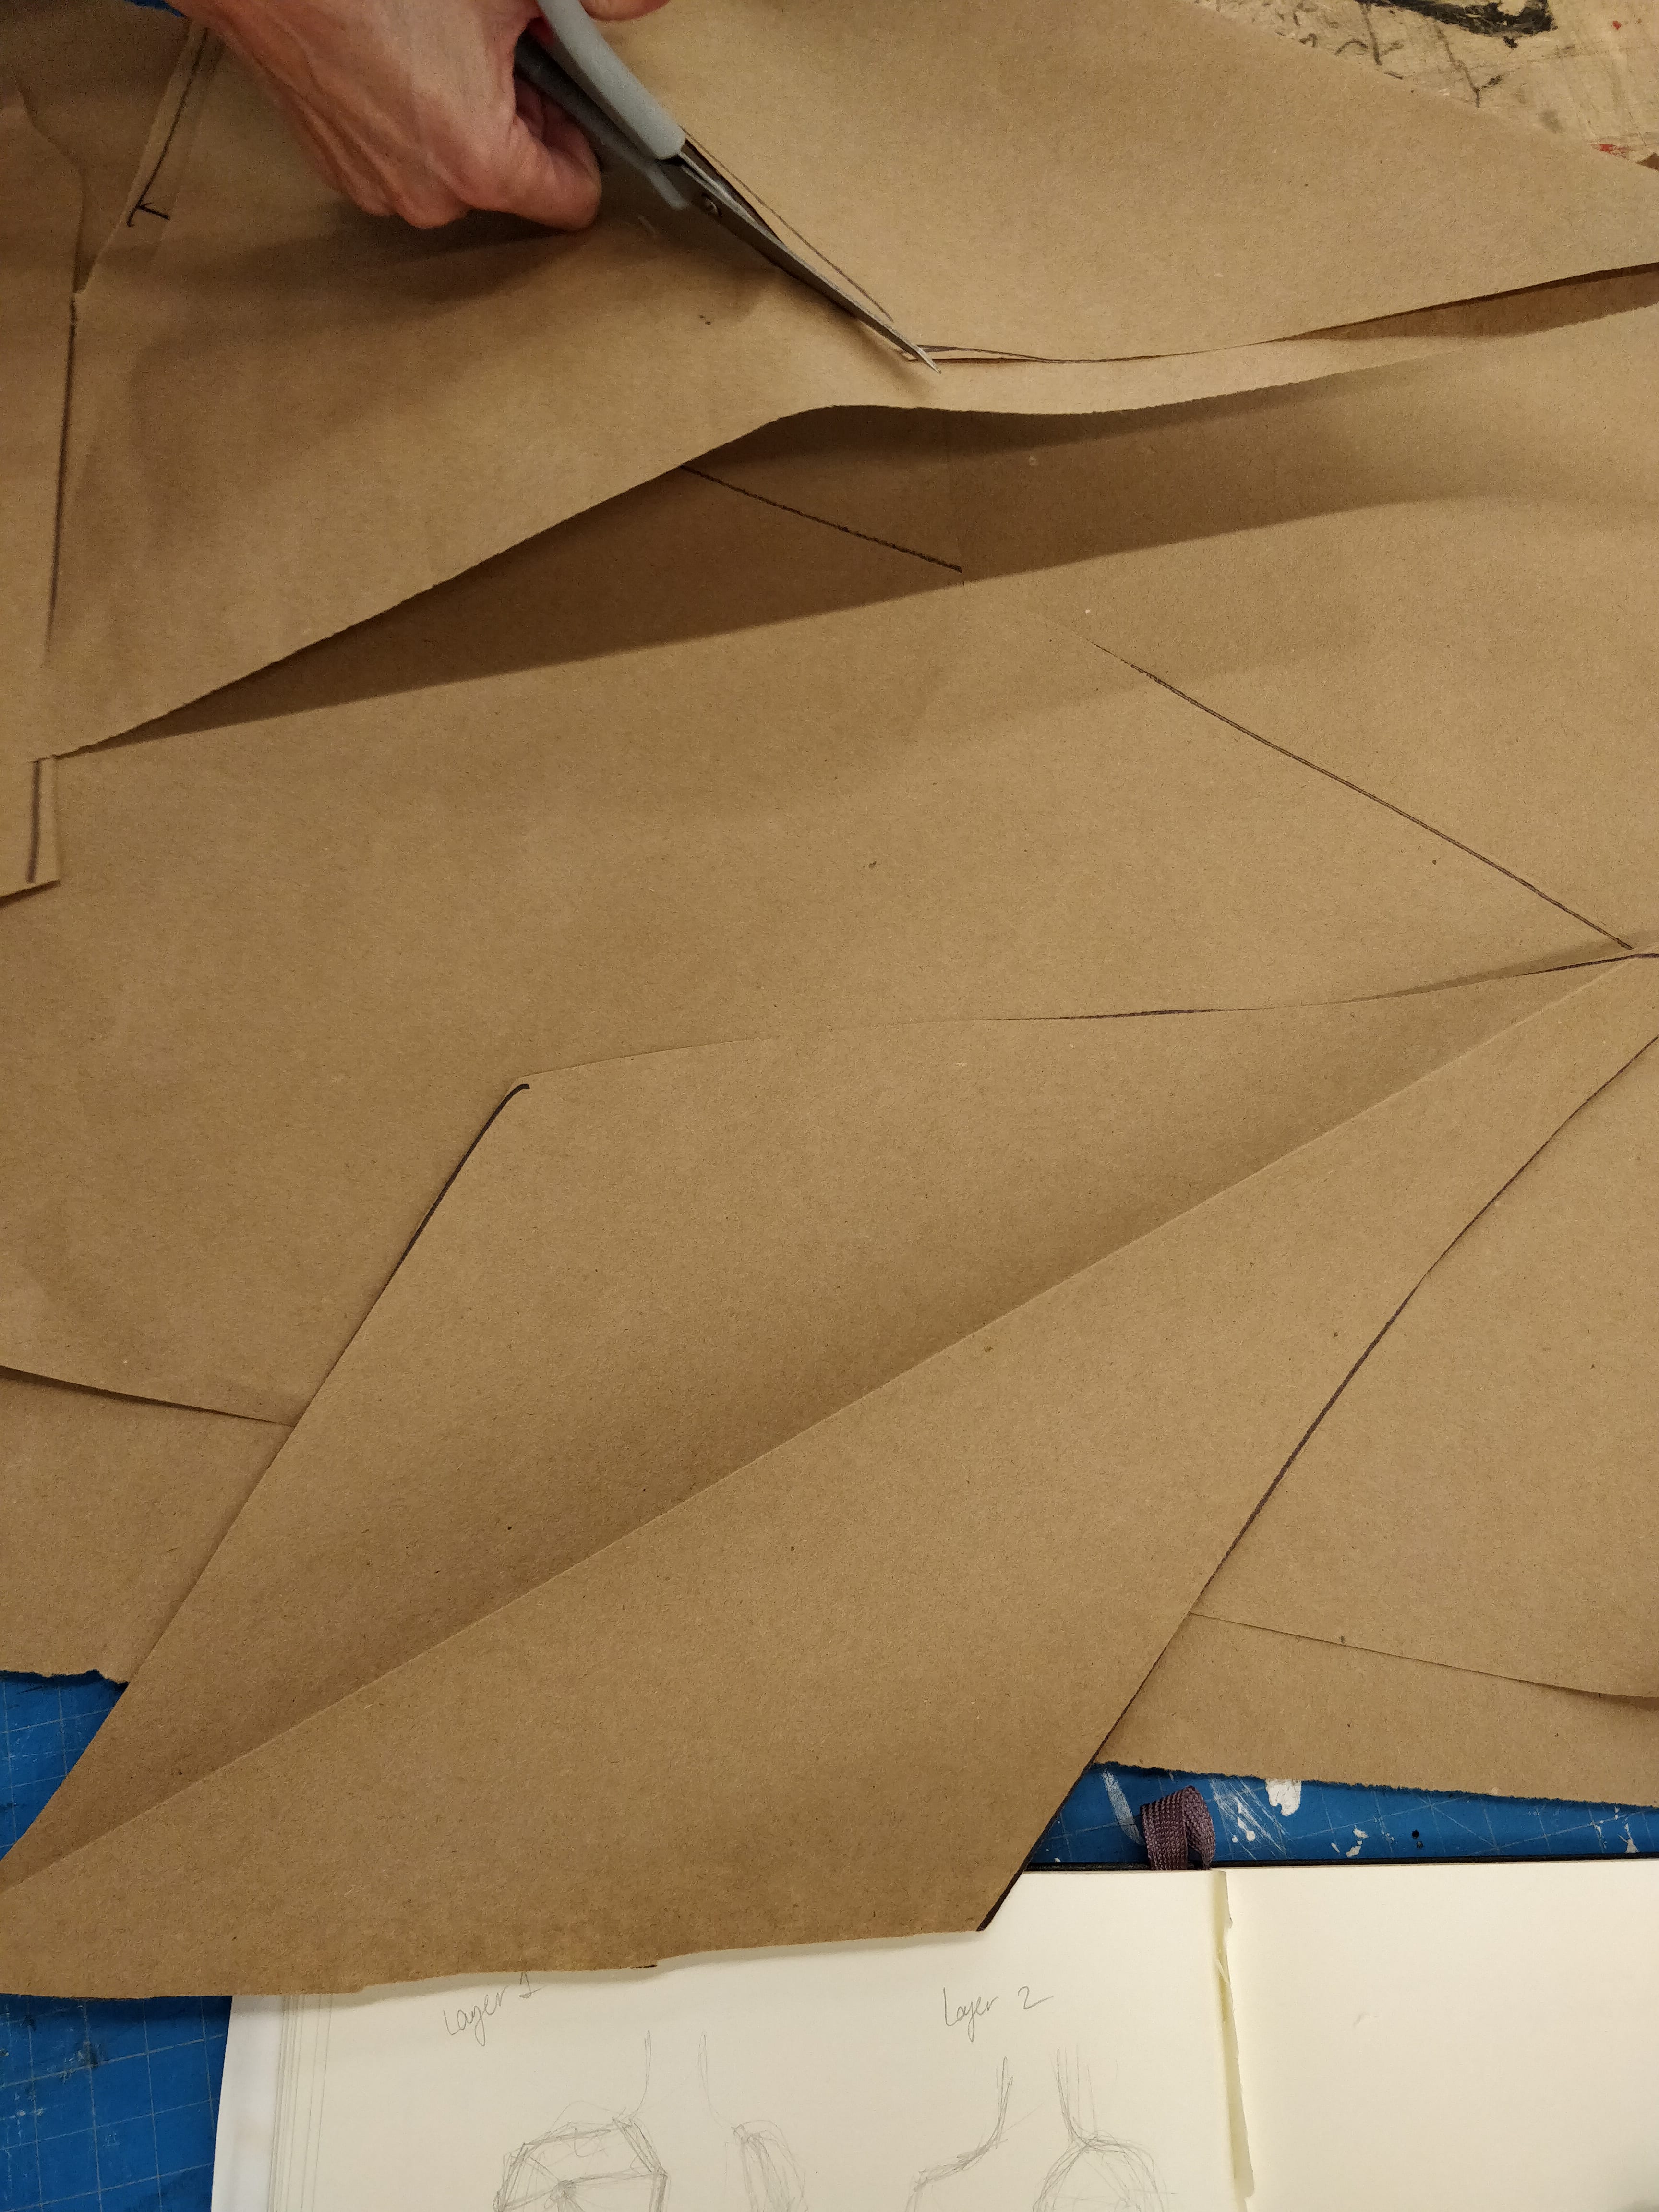
I cut out the general shapes of the pieces I wanted to overlap and pasted them onto my sketchbook. This gives me an idea of how I want my final design to look and how the separate layers look put together.
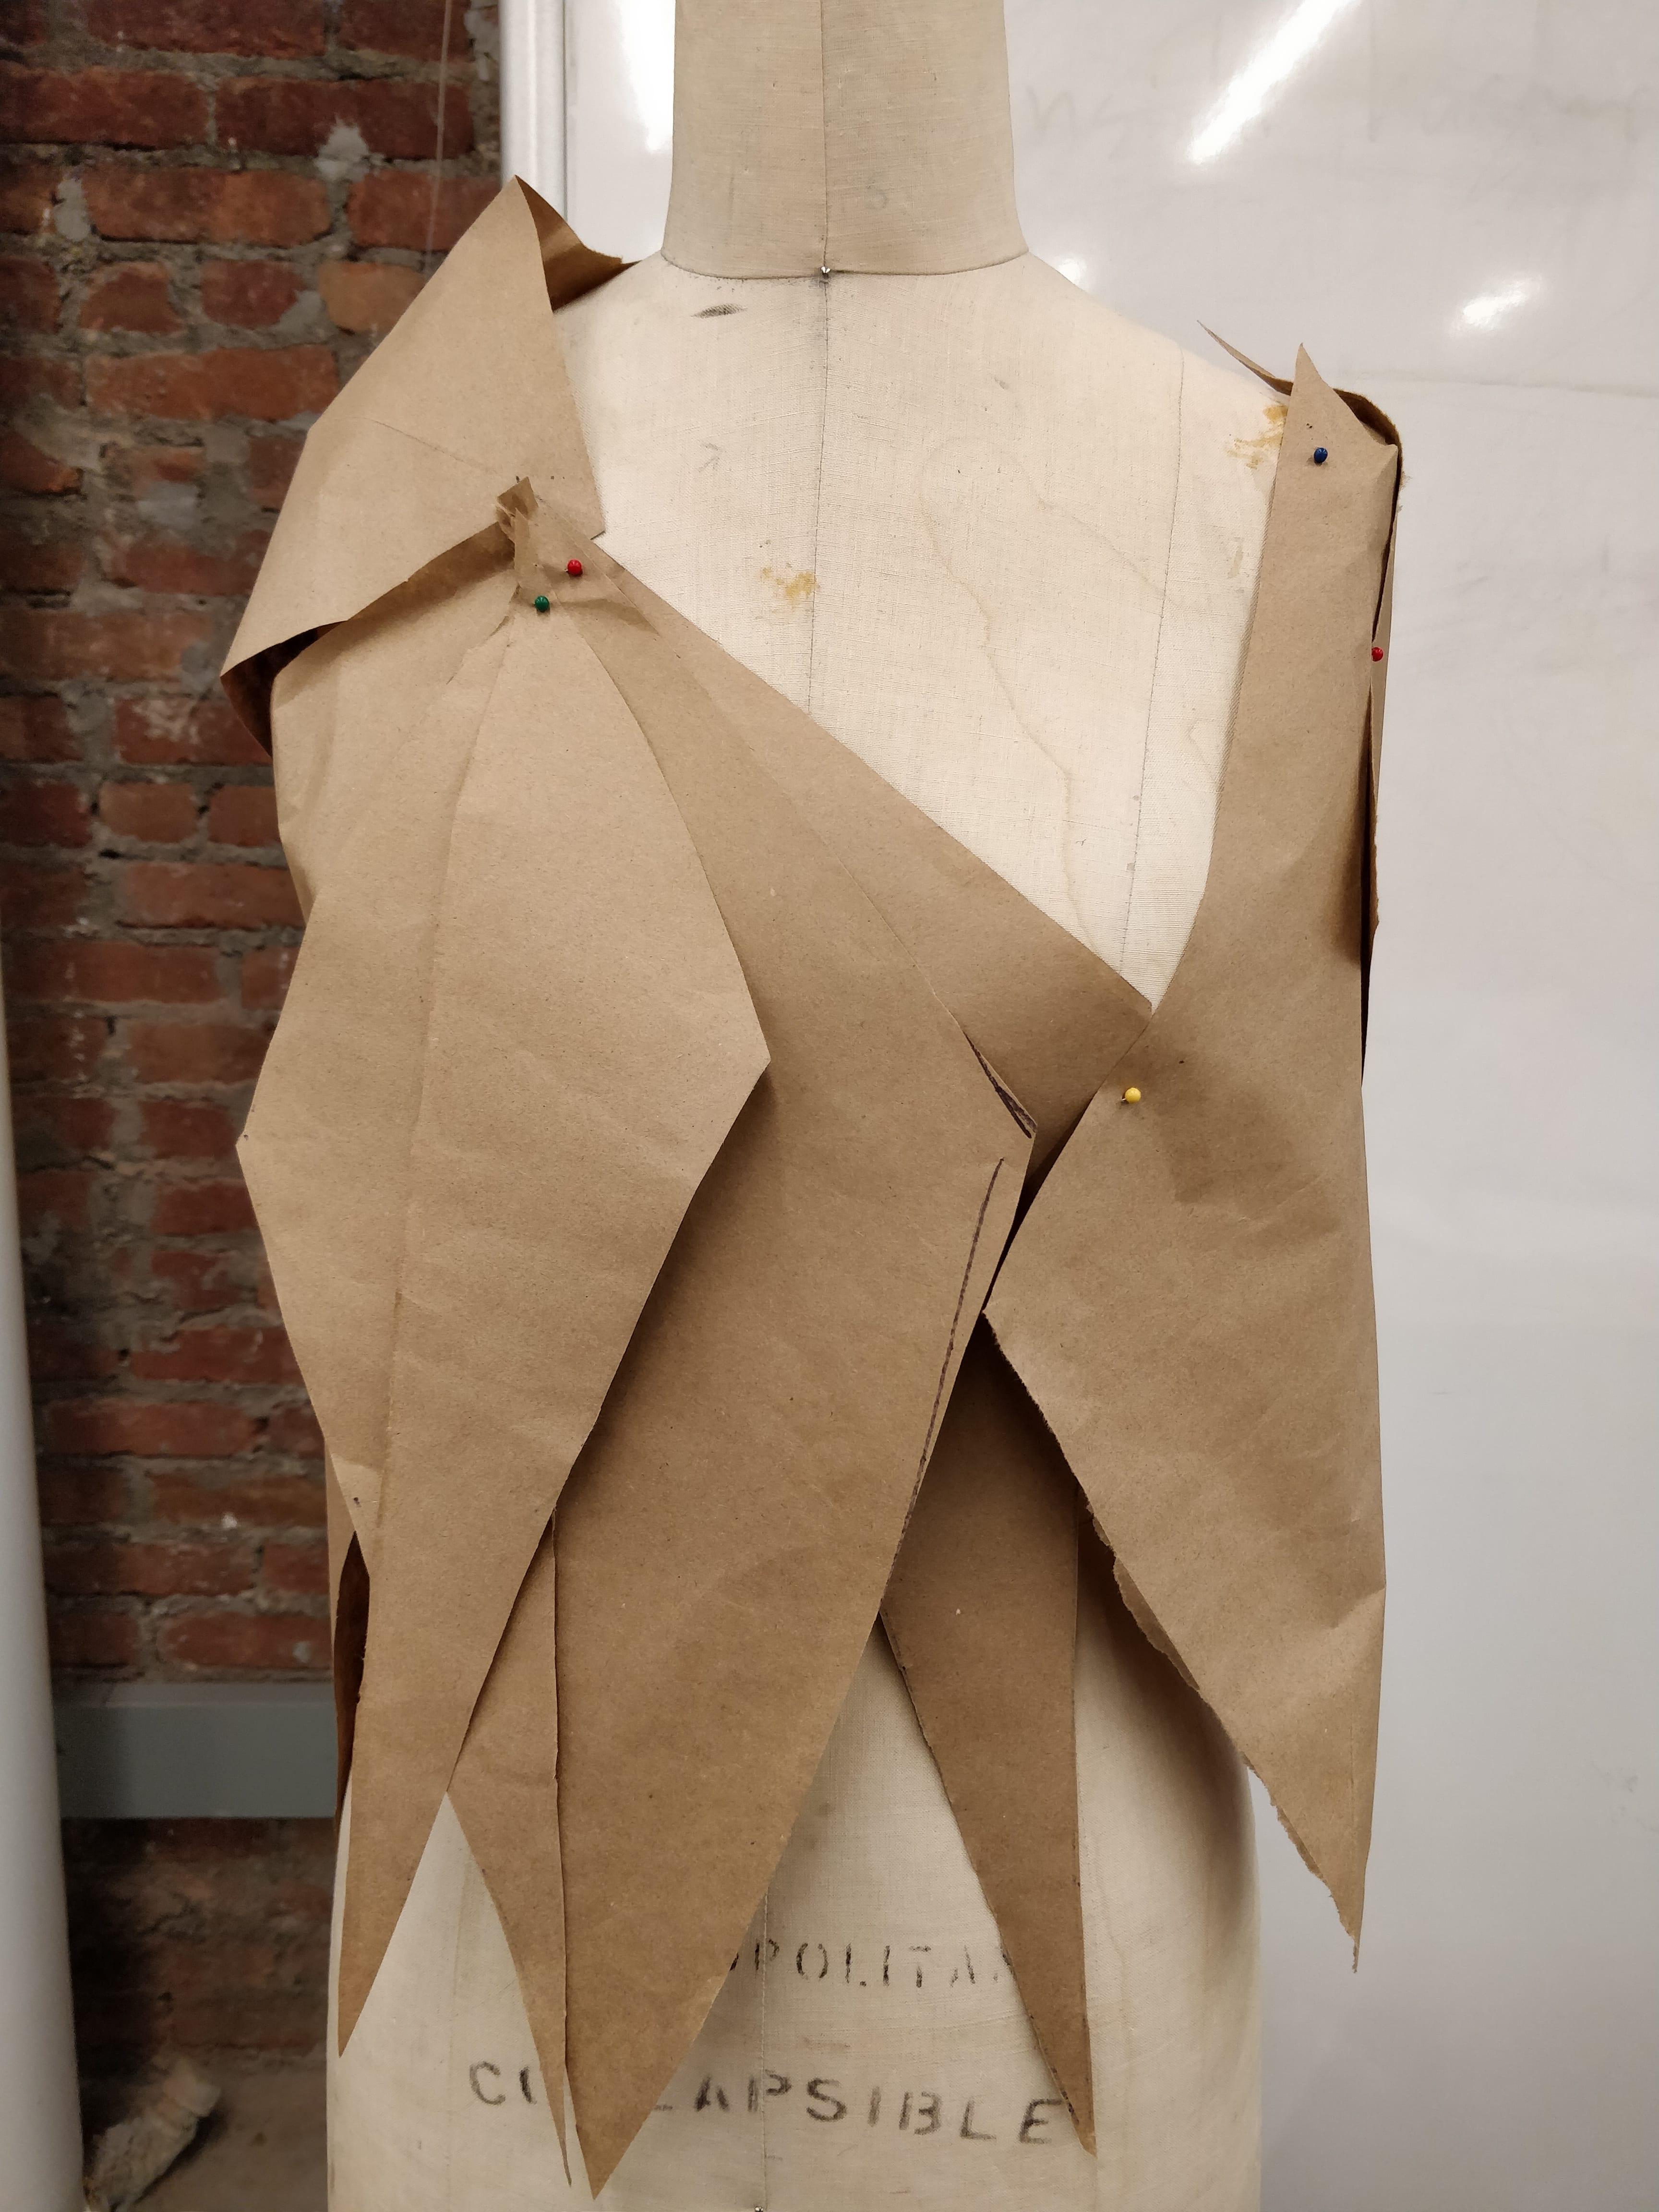
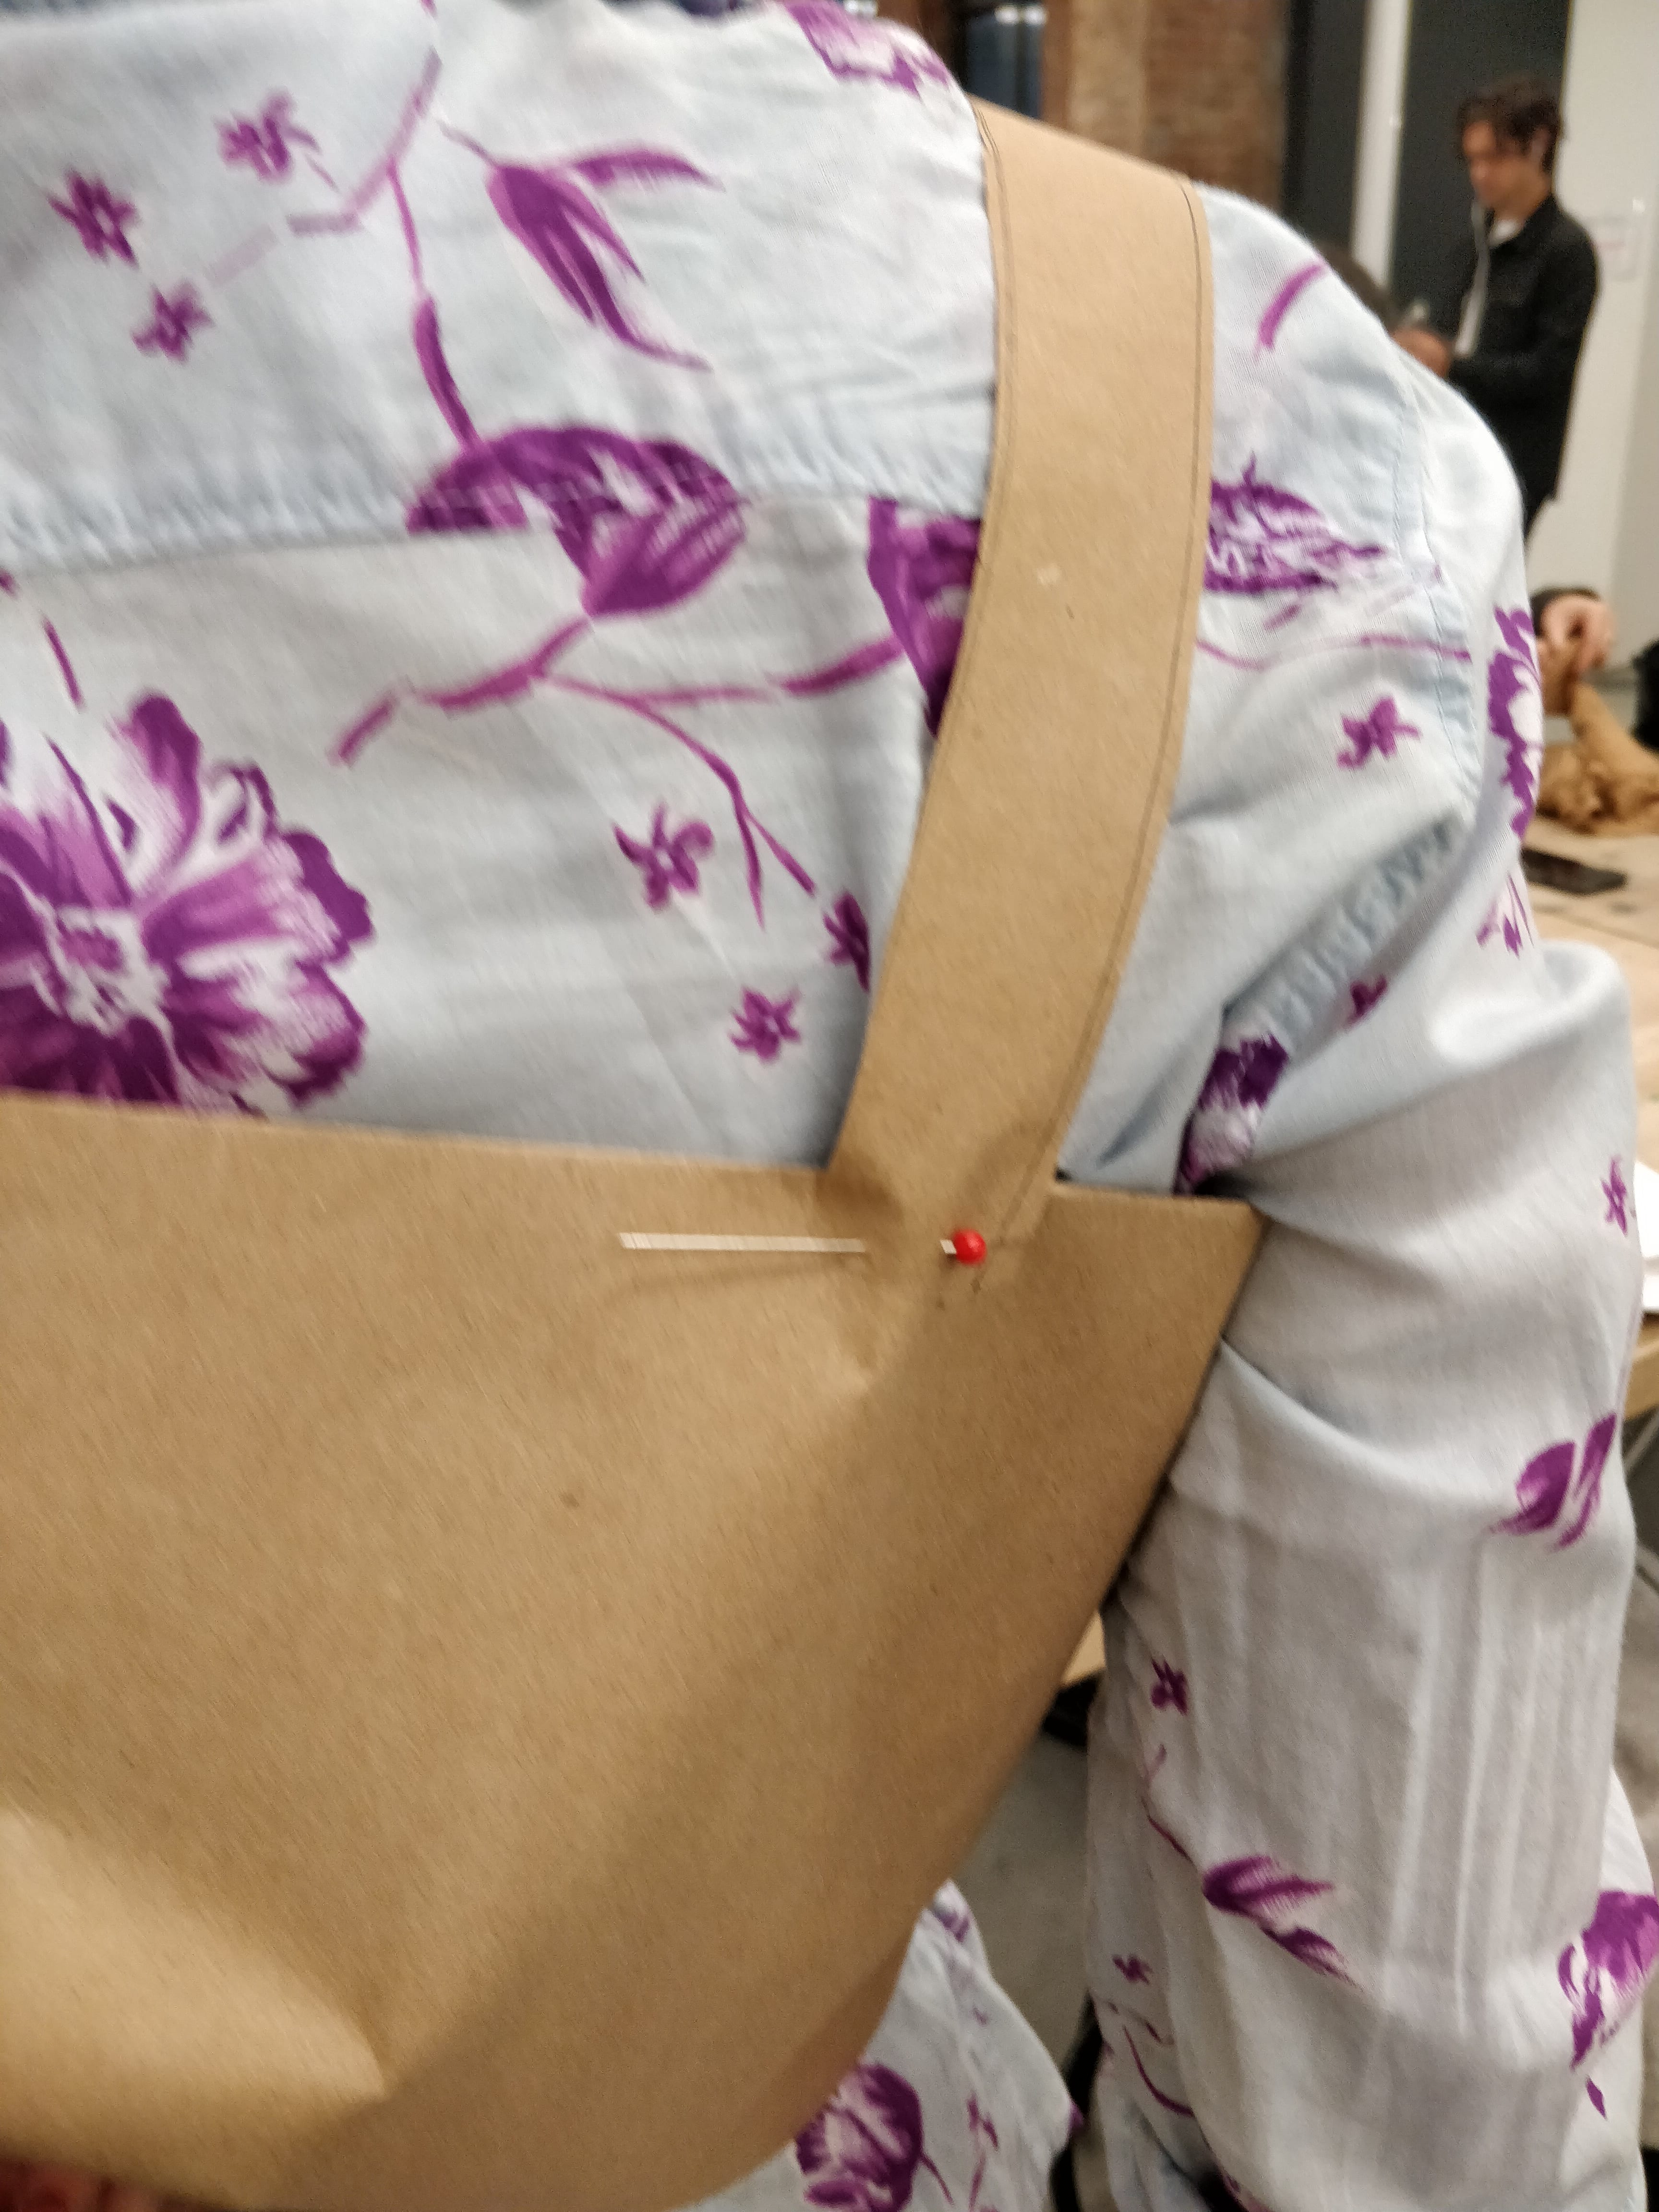
Using thin brown paper, I cut out triangular shapes and wrapped them around a mannequin to lay out my main shapes and how each part would overlap each other. This helped me get a general sense of how my piece would look when assembled together. I used the sketch model pieces as a guide in making my final design.
I created a base layer resembling a tank top underneath the layers to act as the base for the garment piece. When making the final piece, all the connected parts would be added on top of the paper tank top.
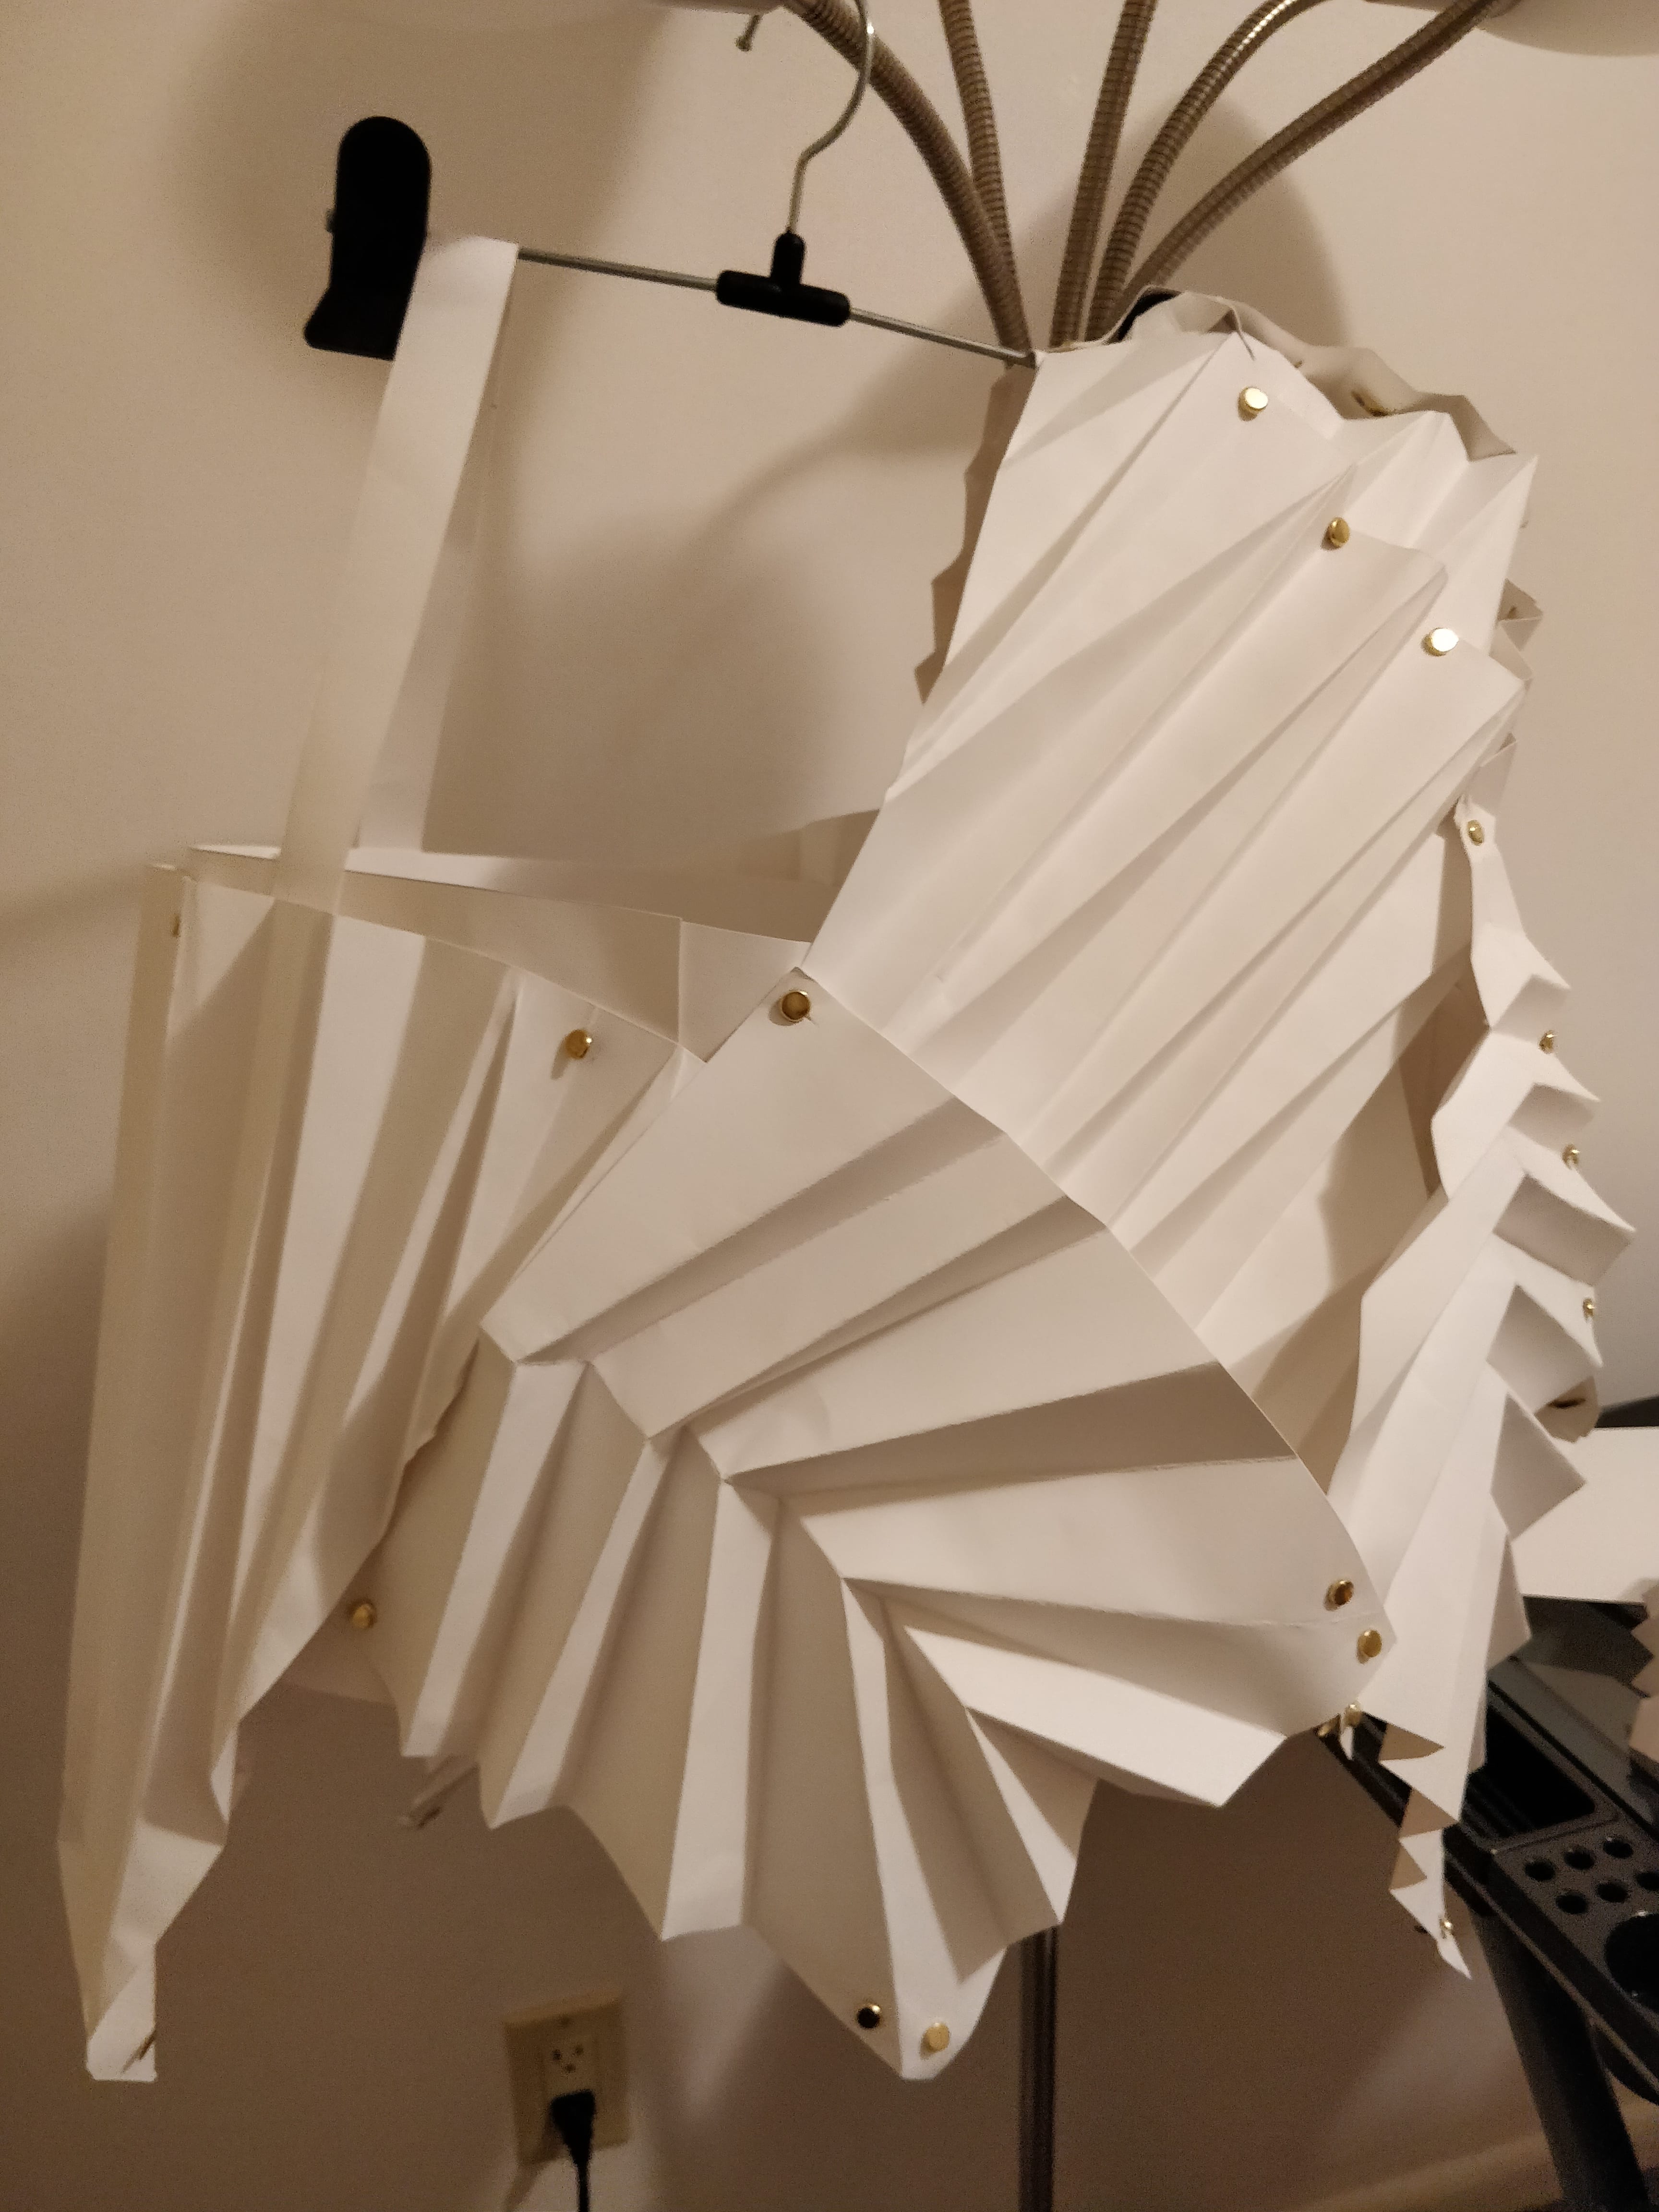
Phase 3- process photos
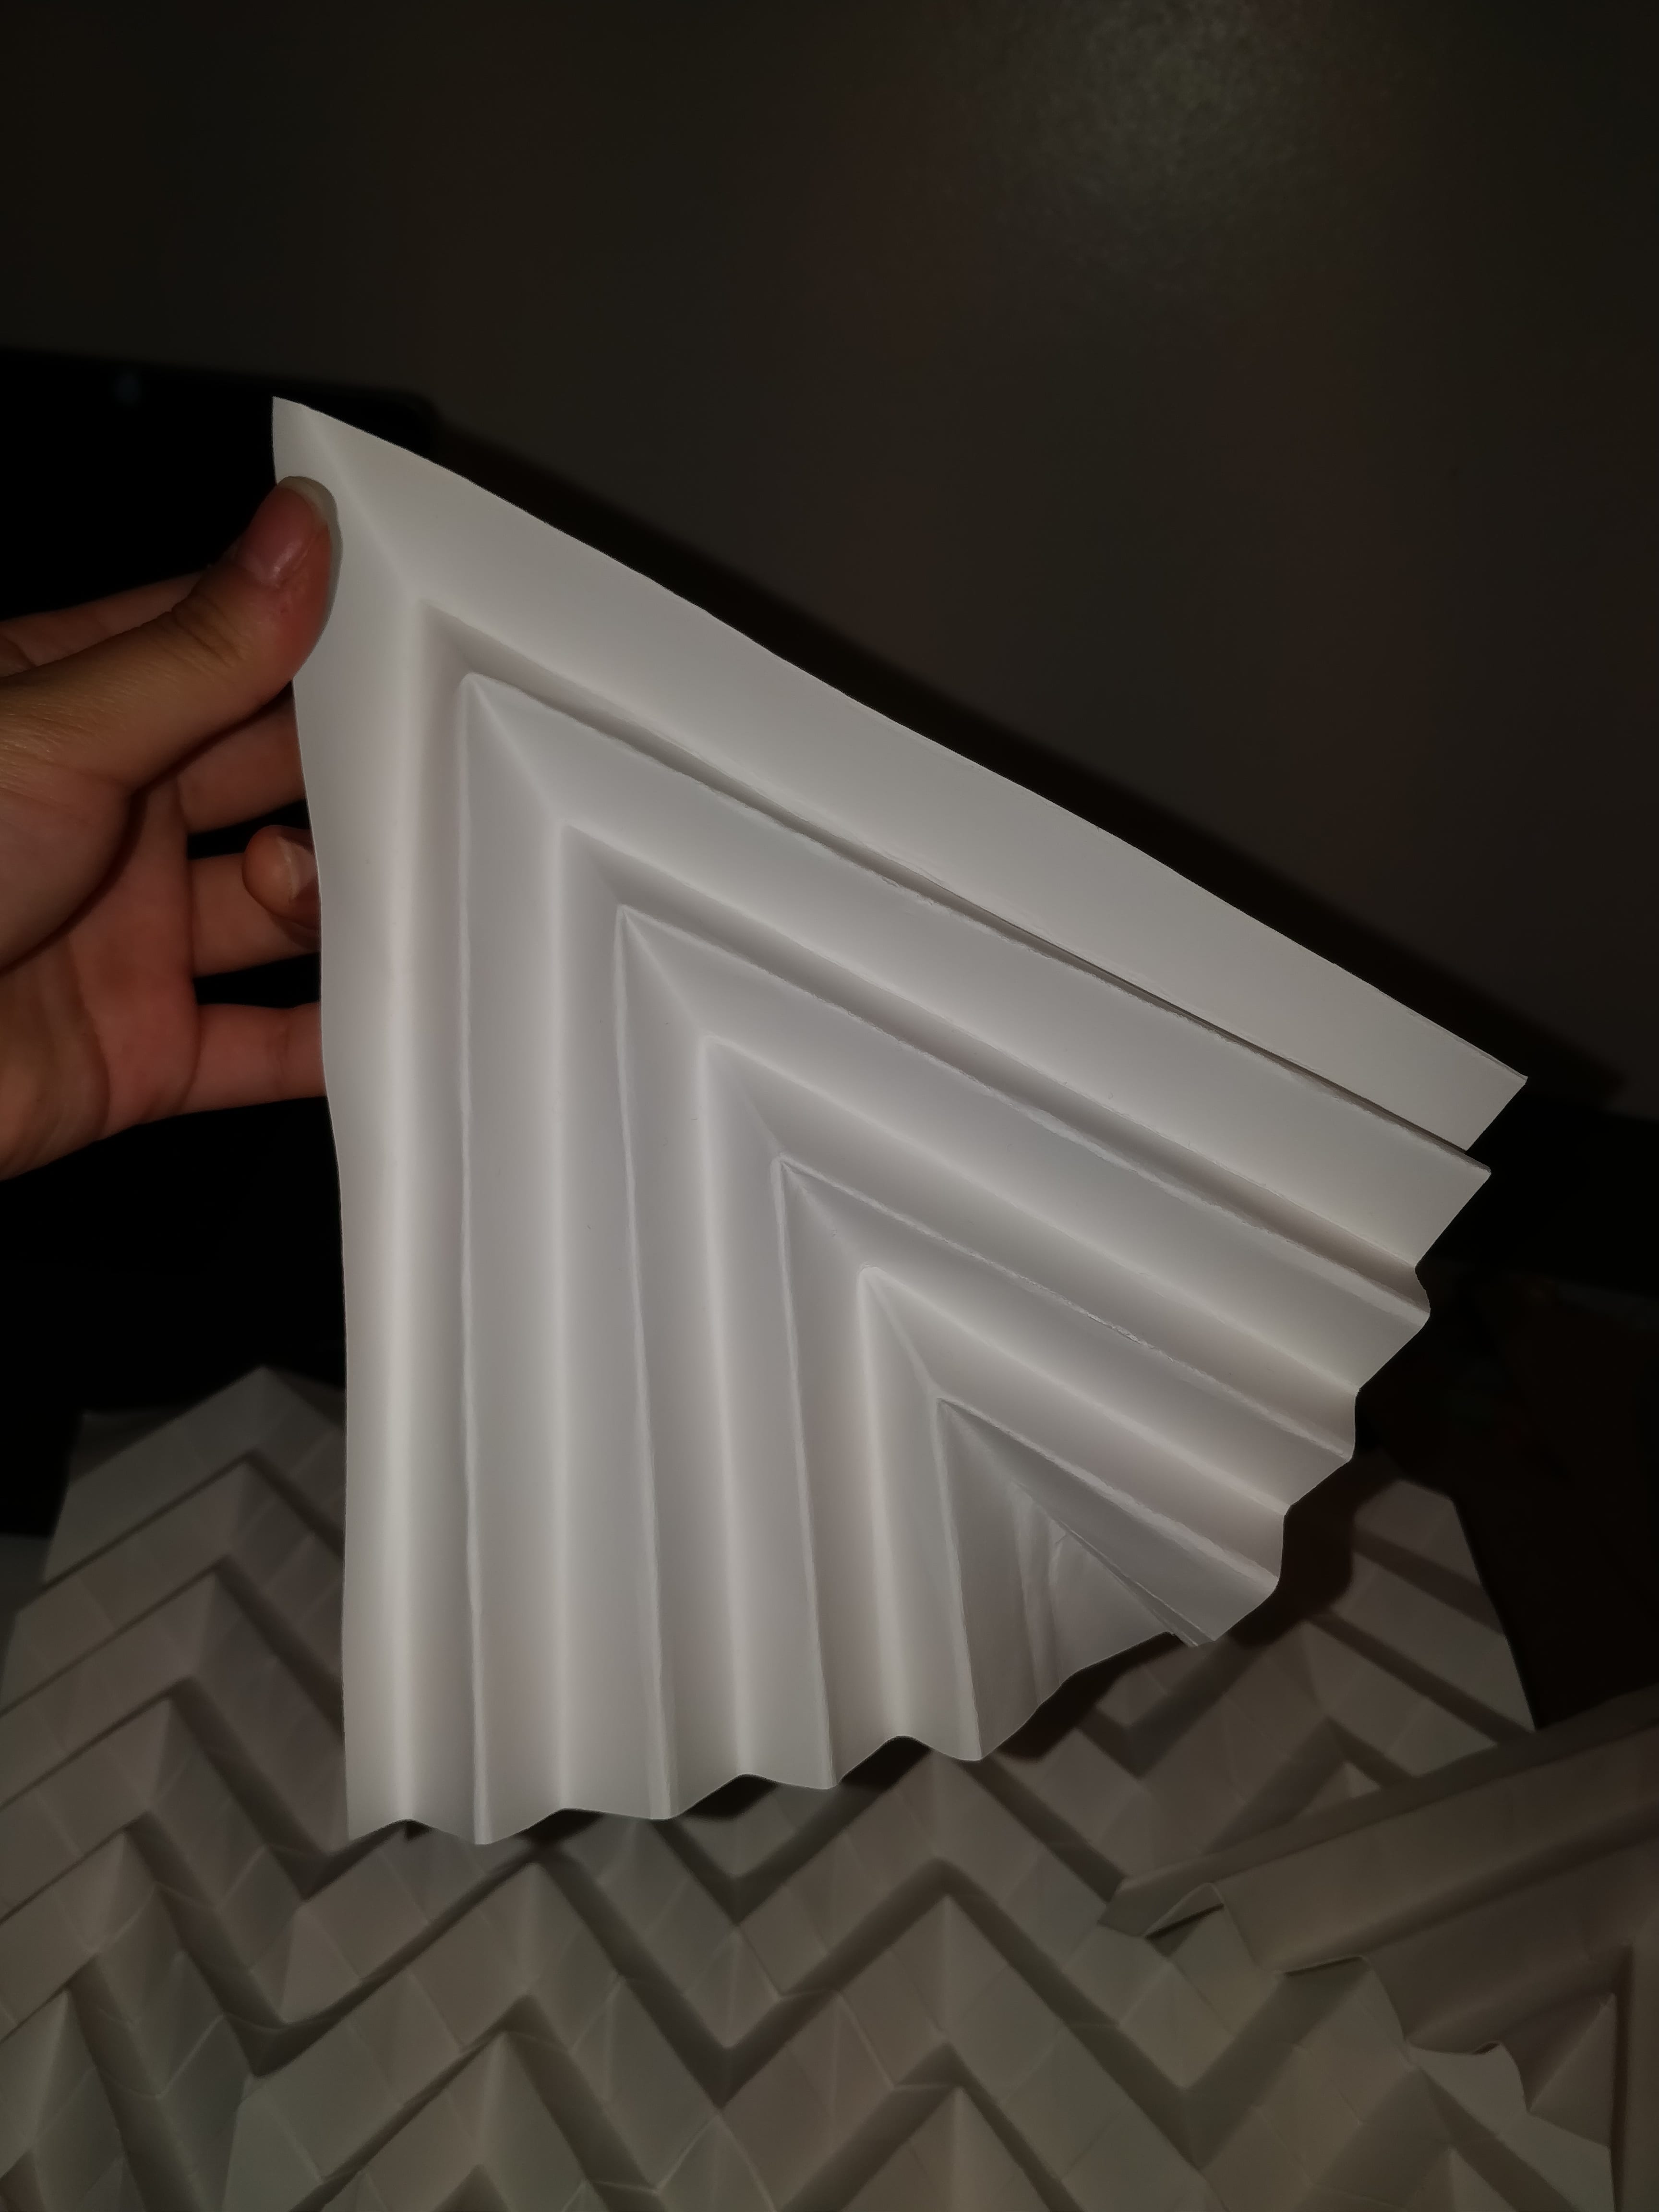
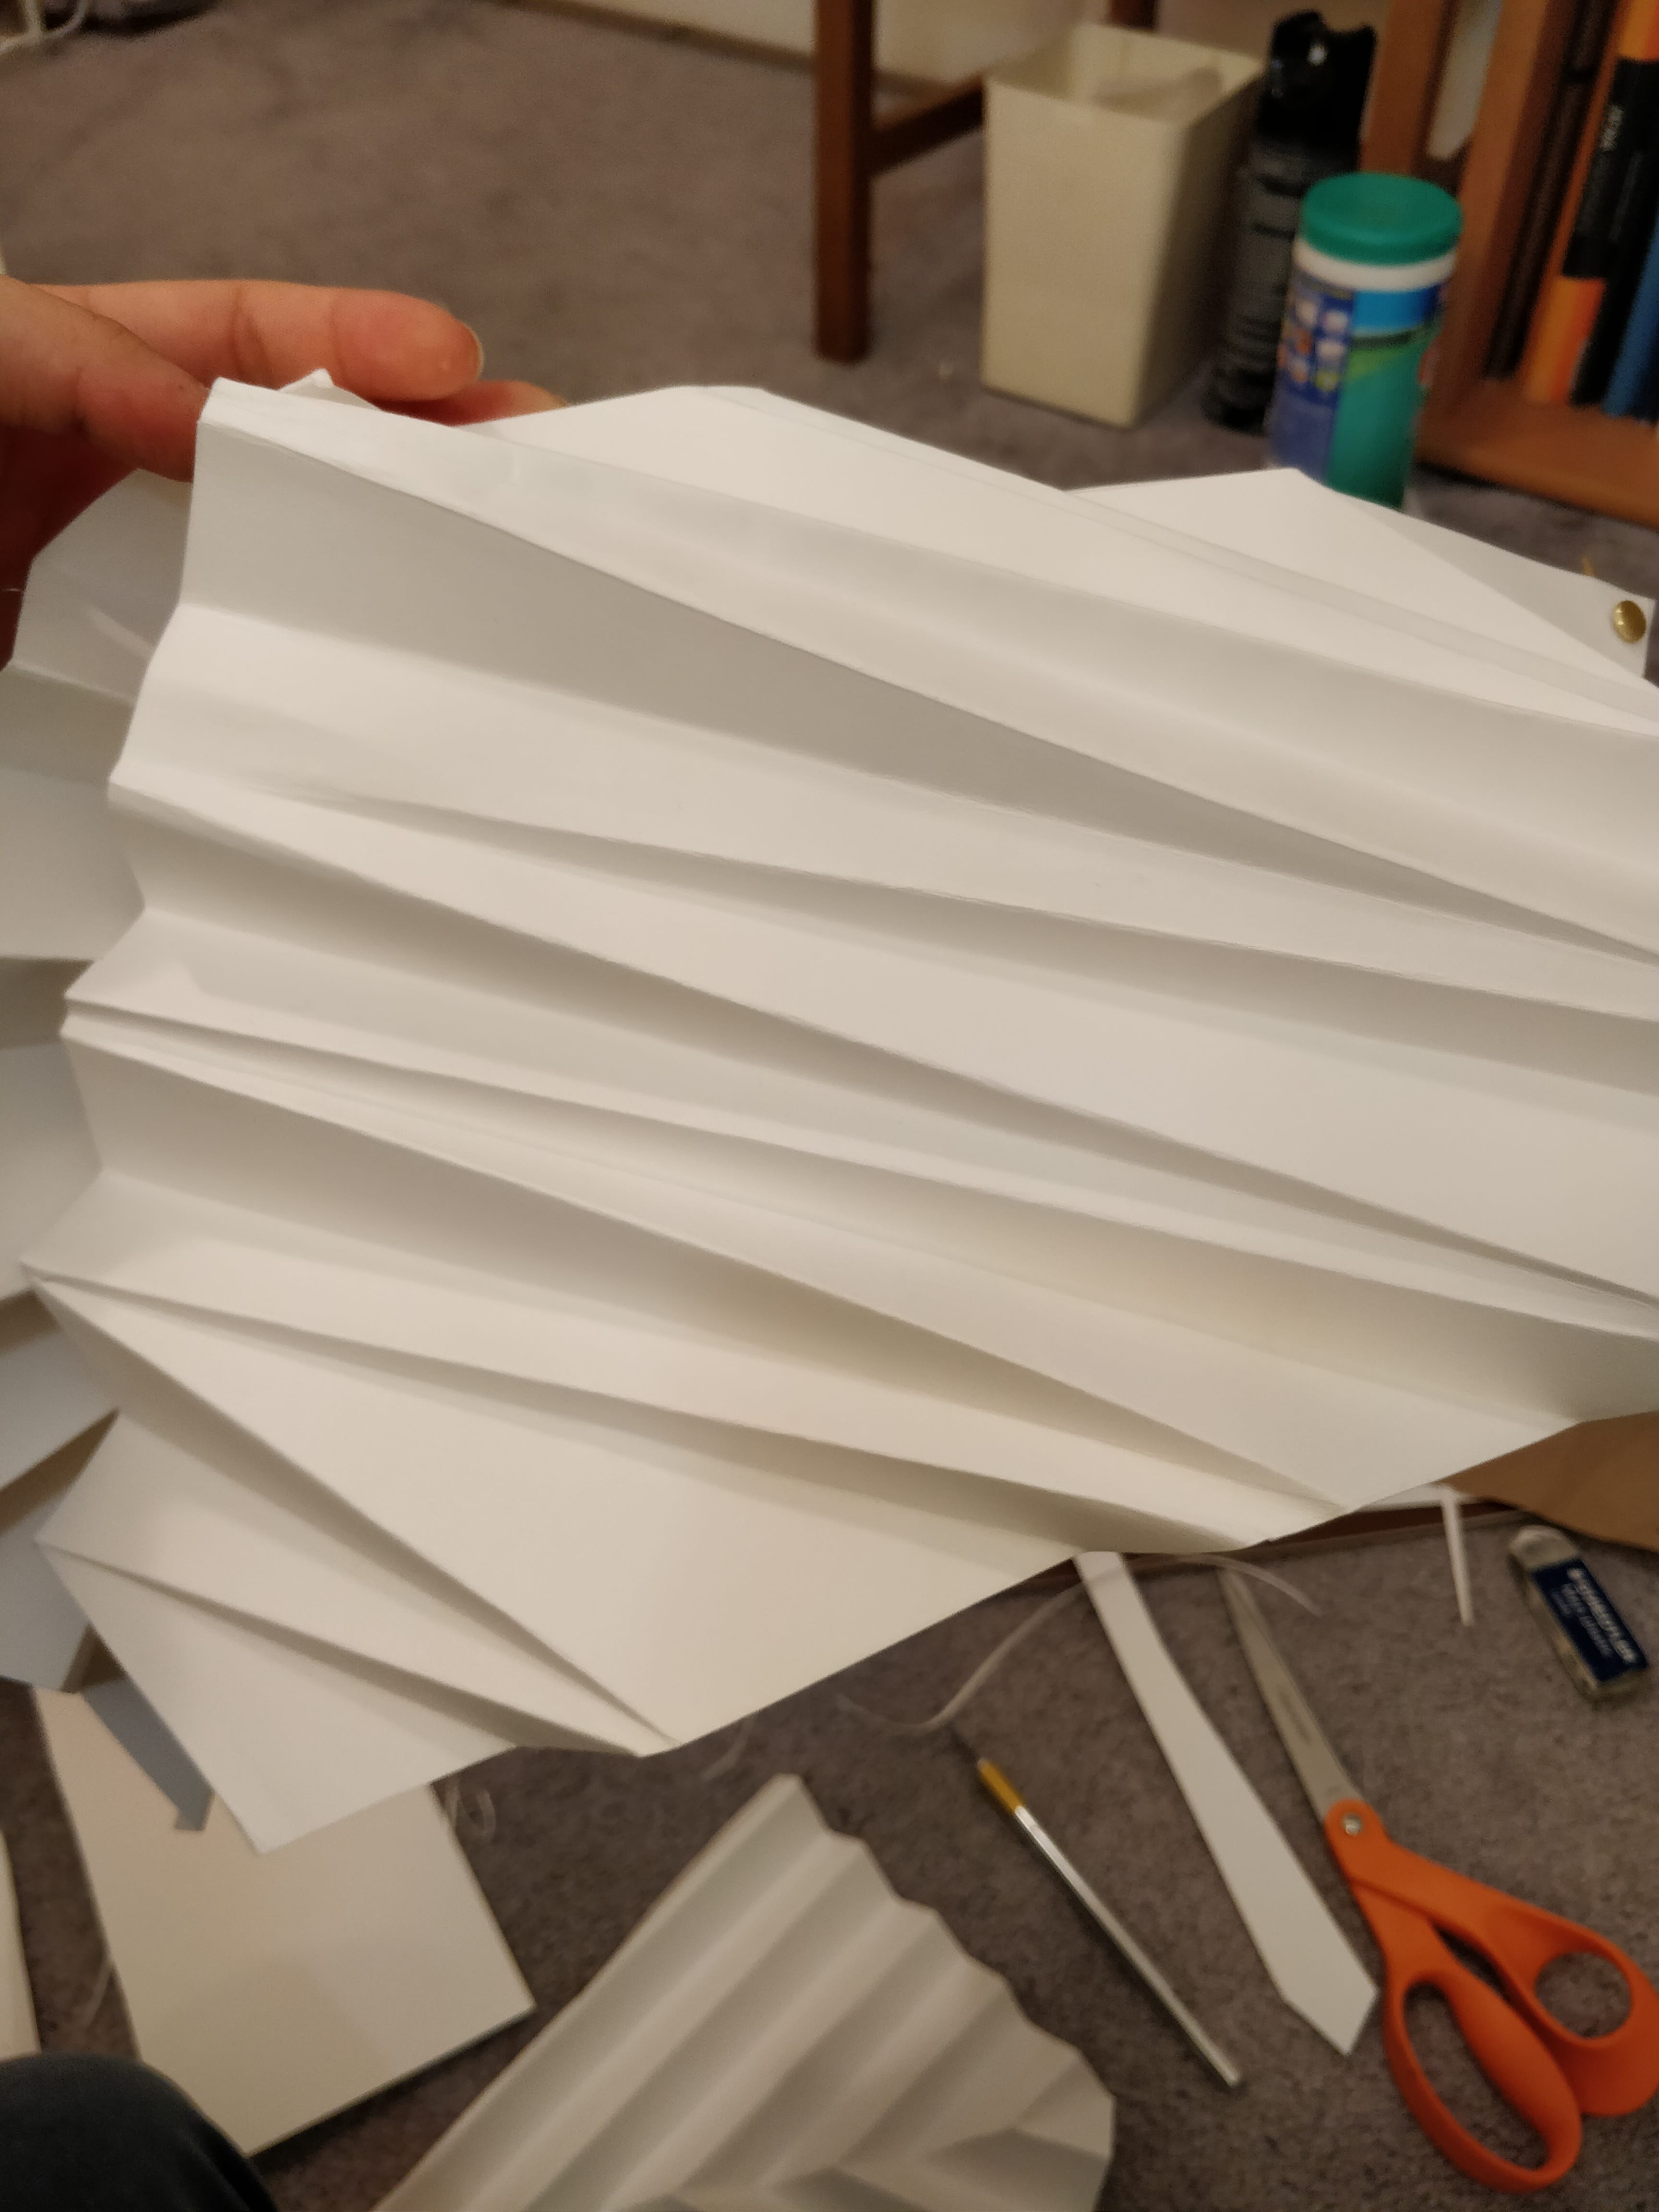
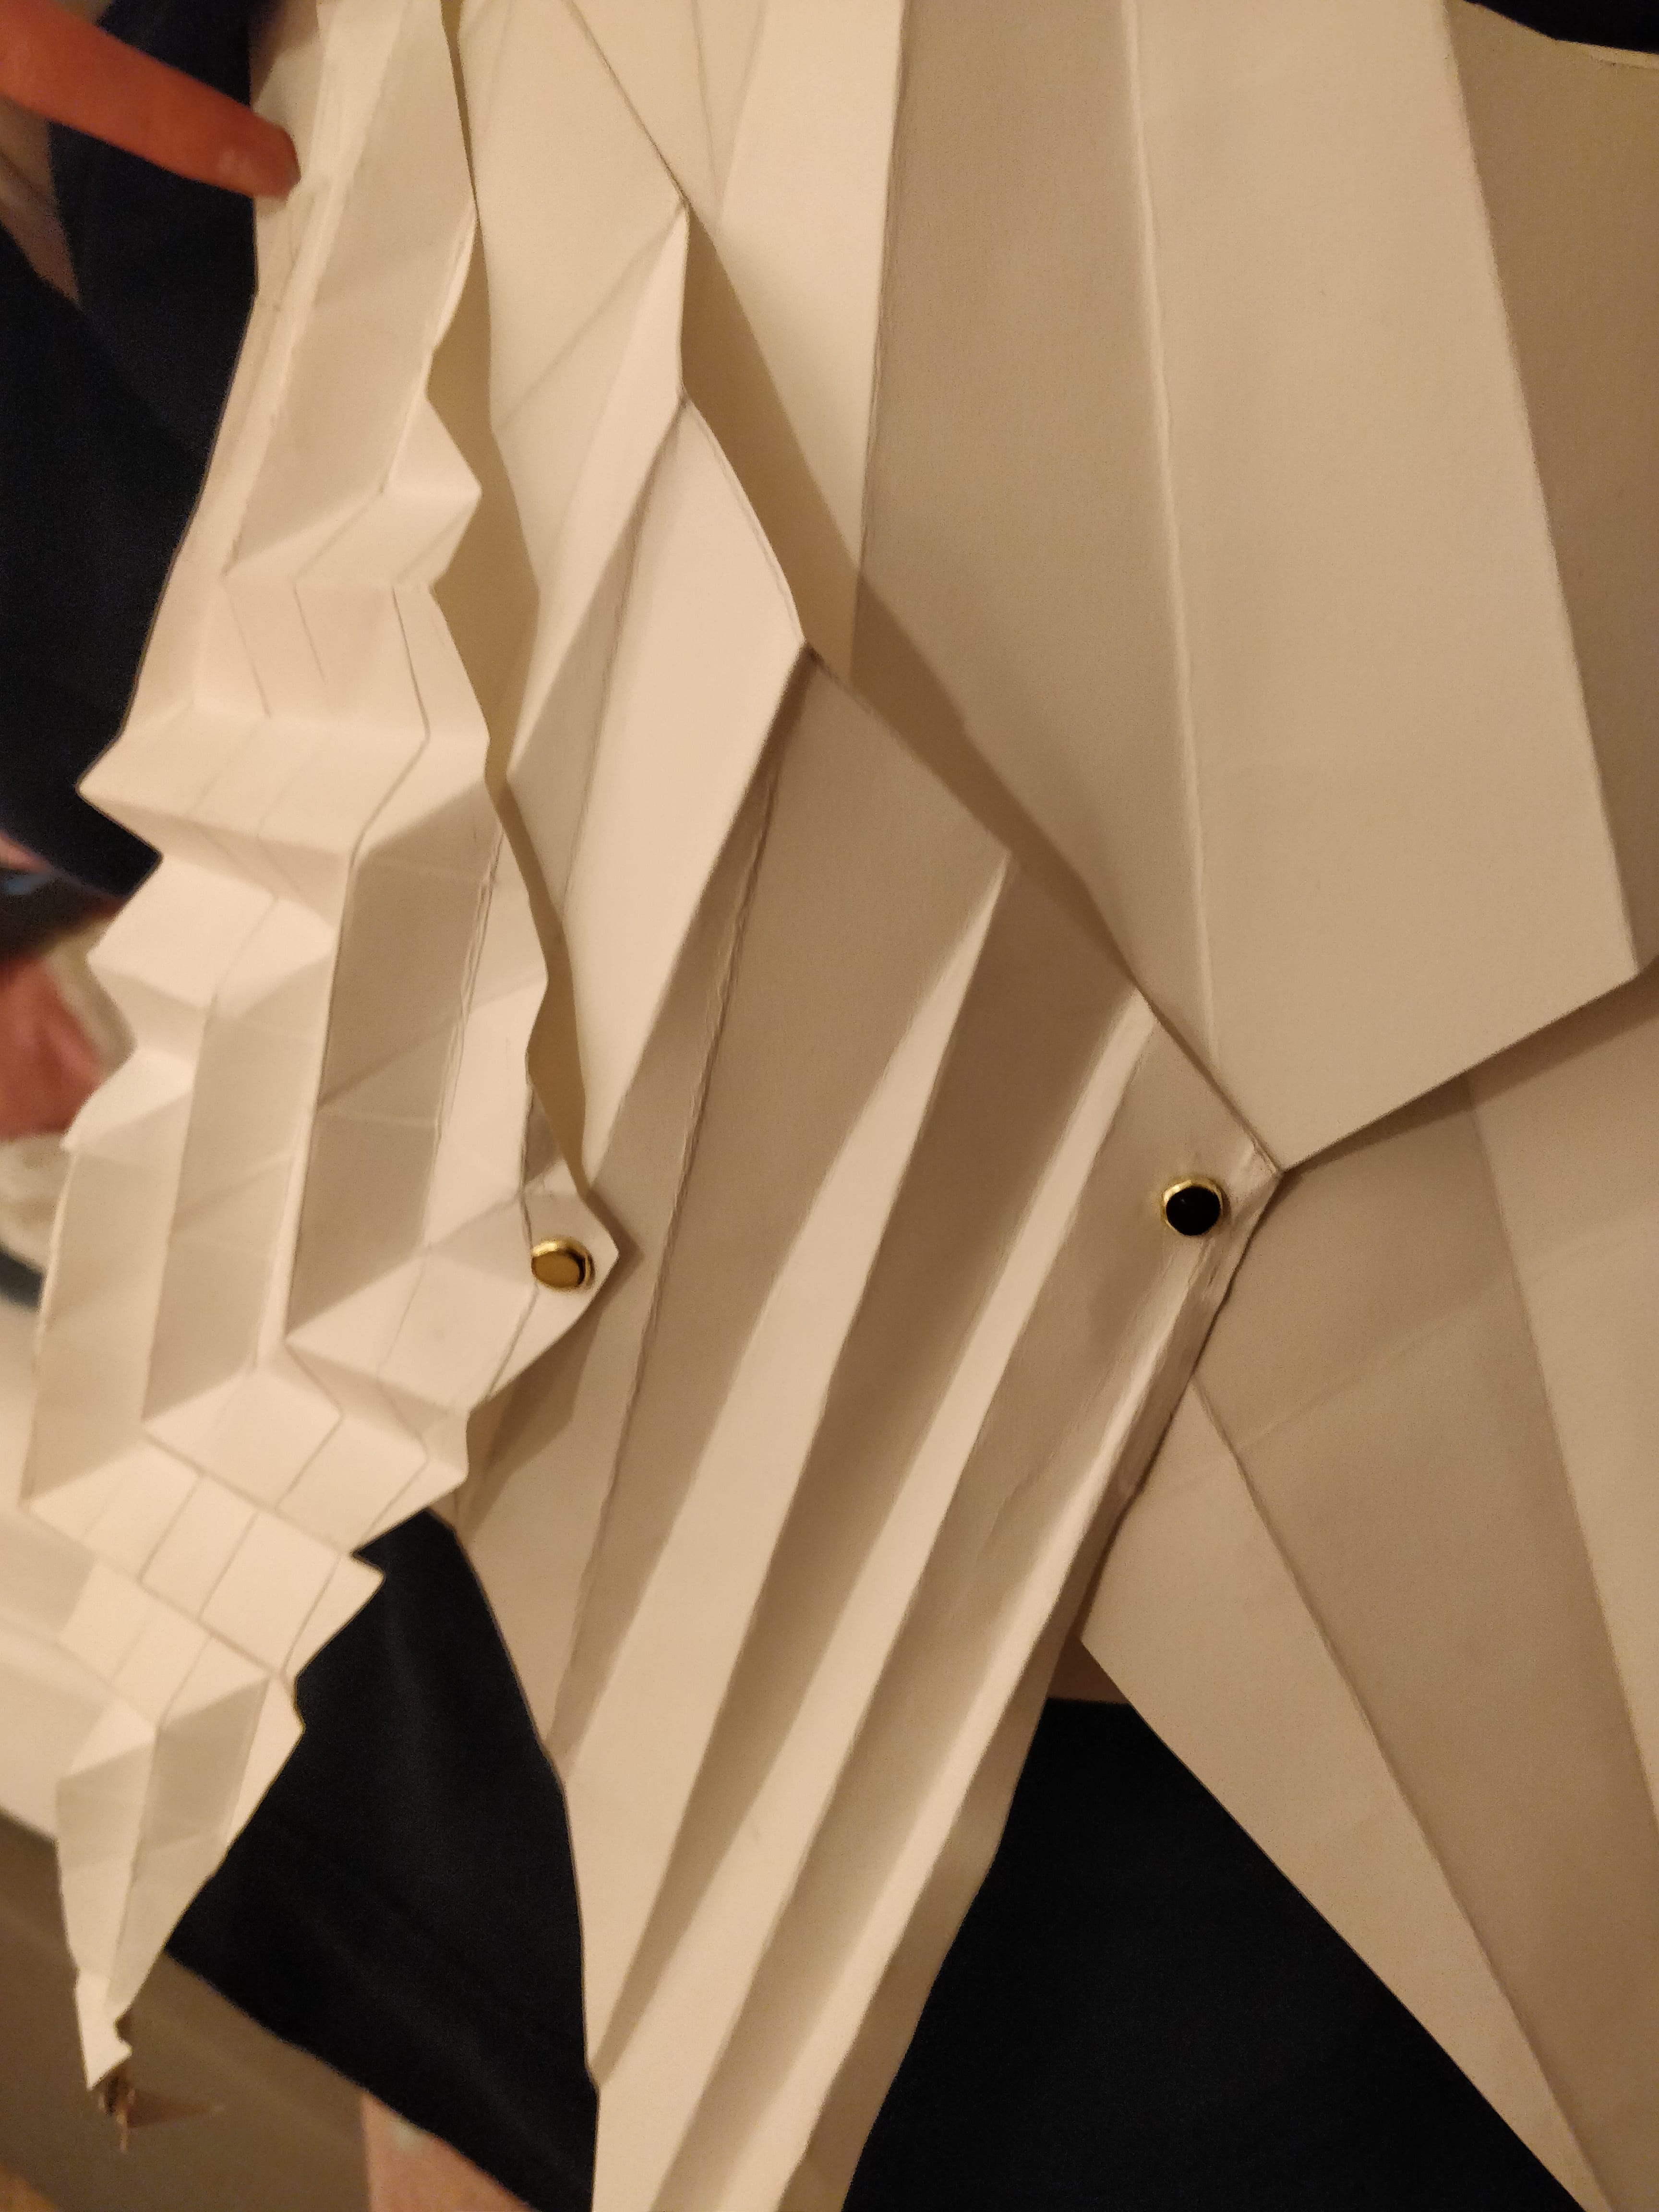
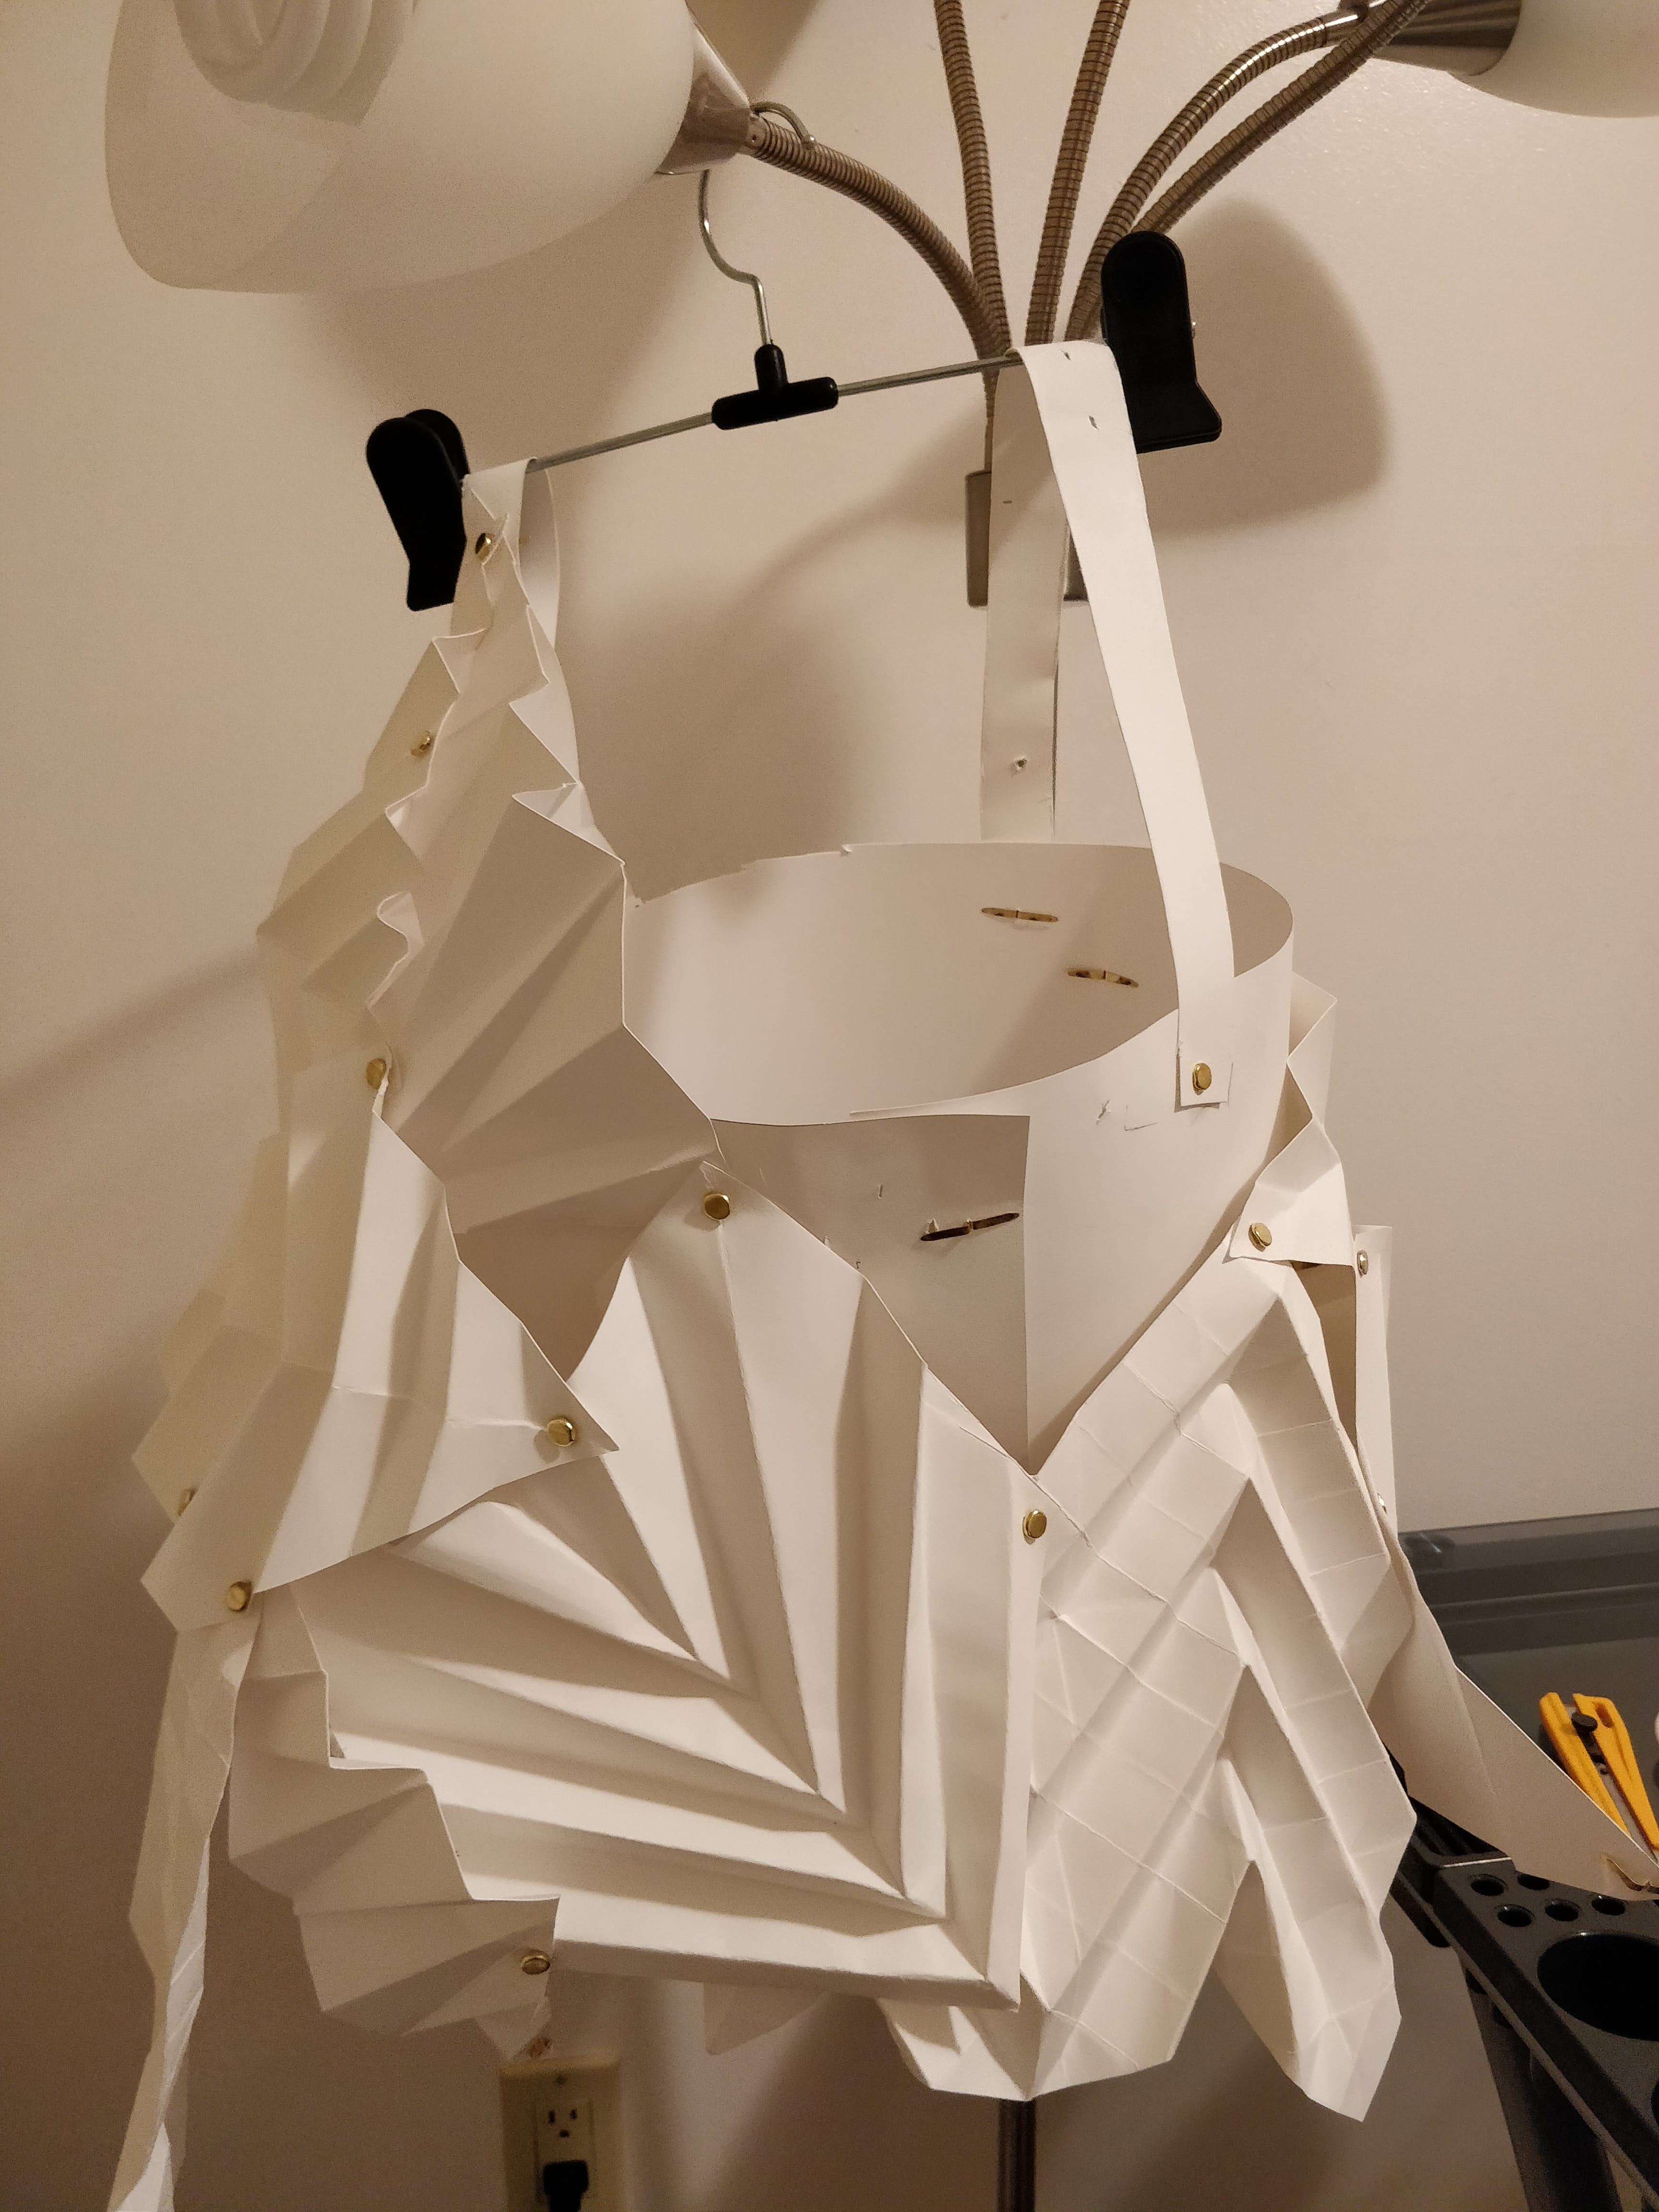
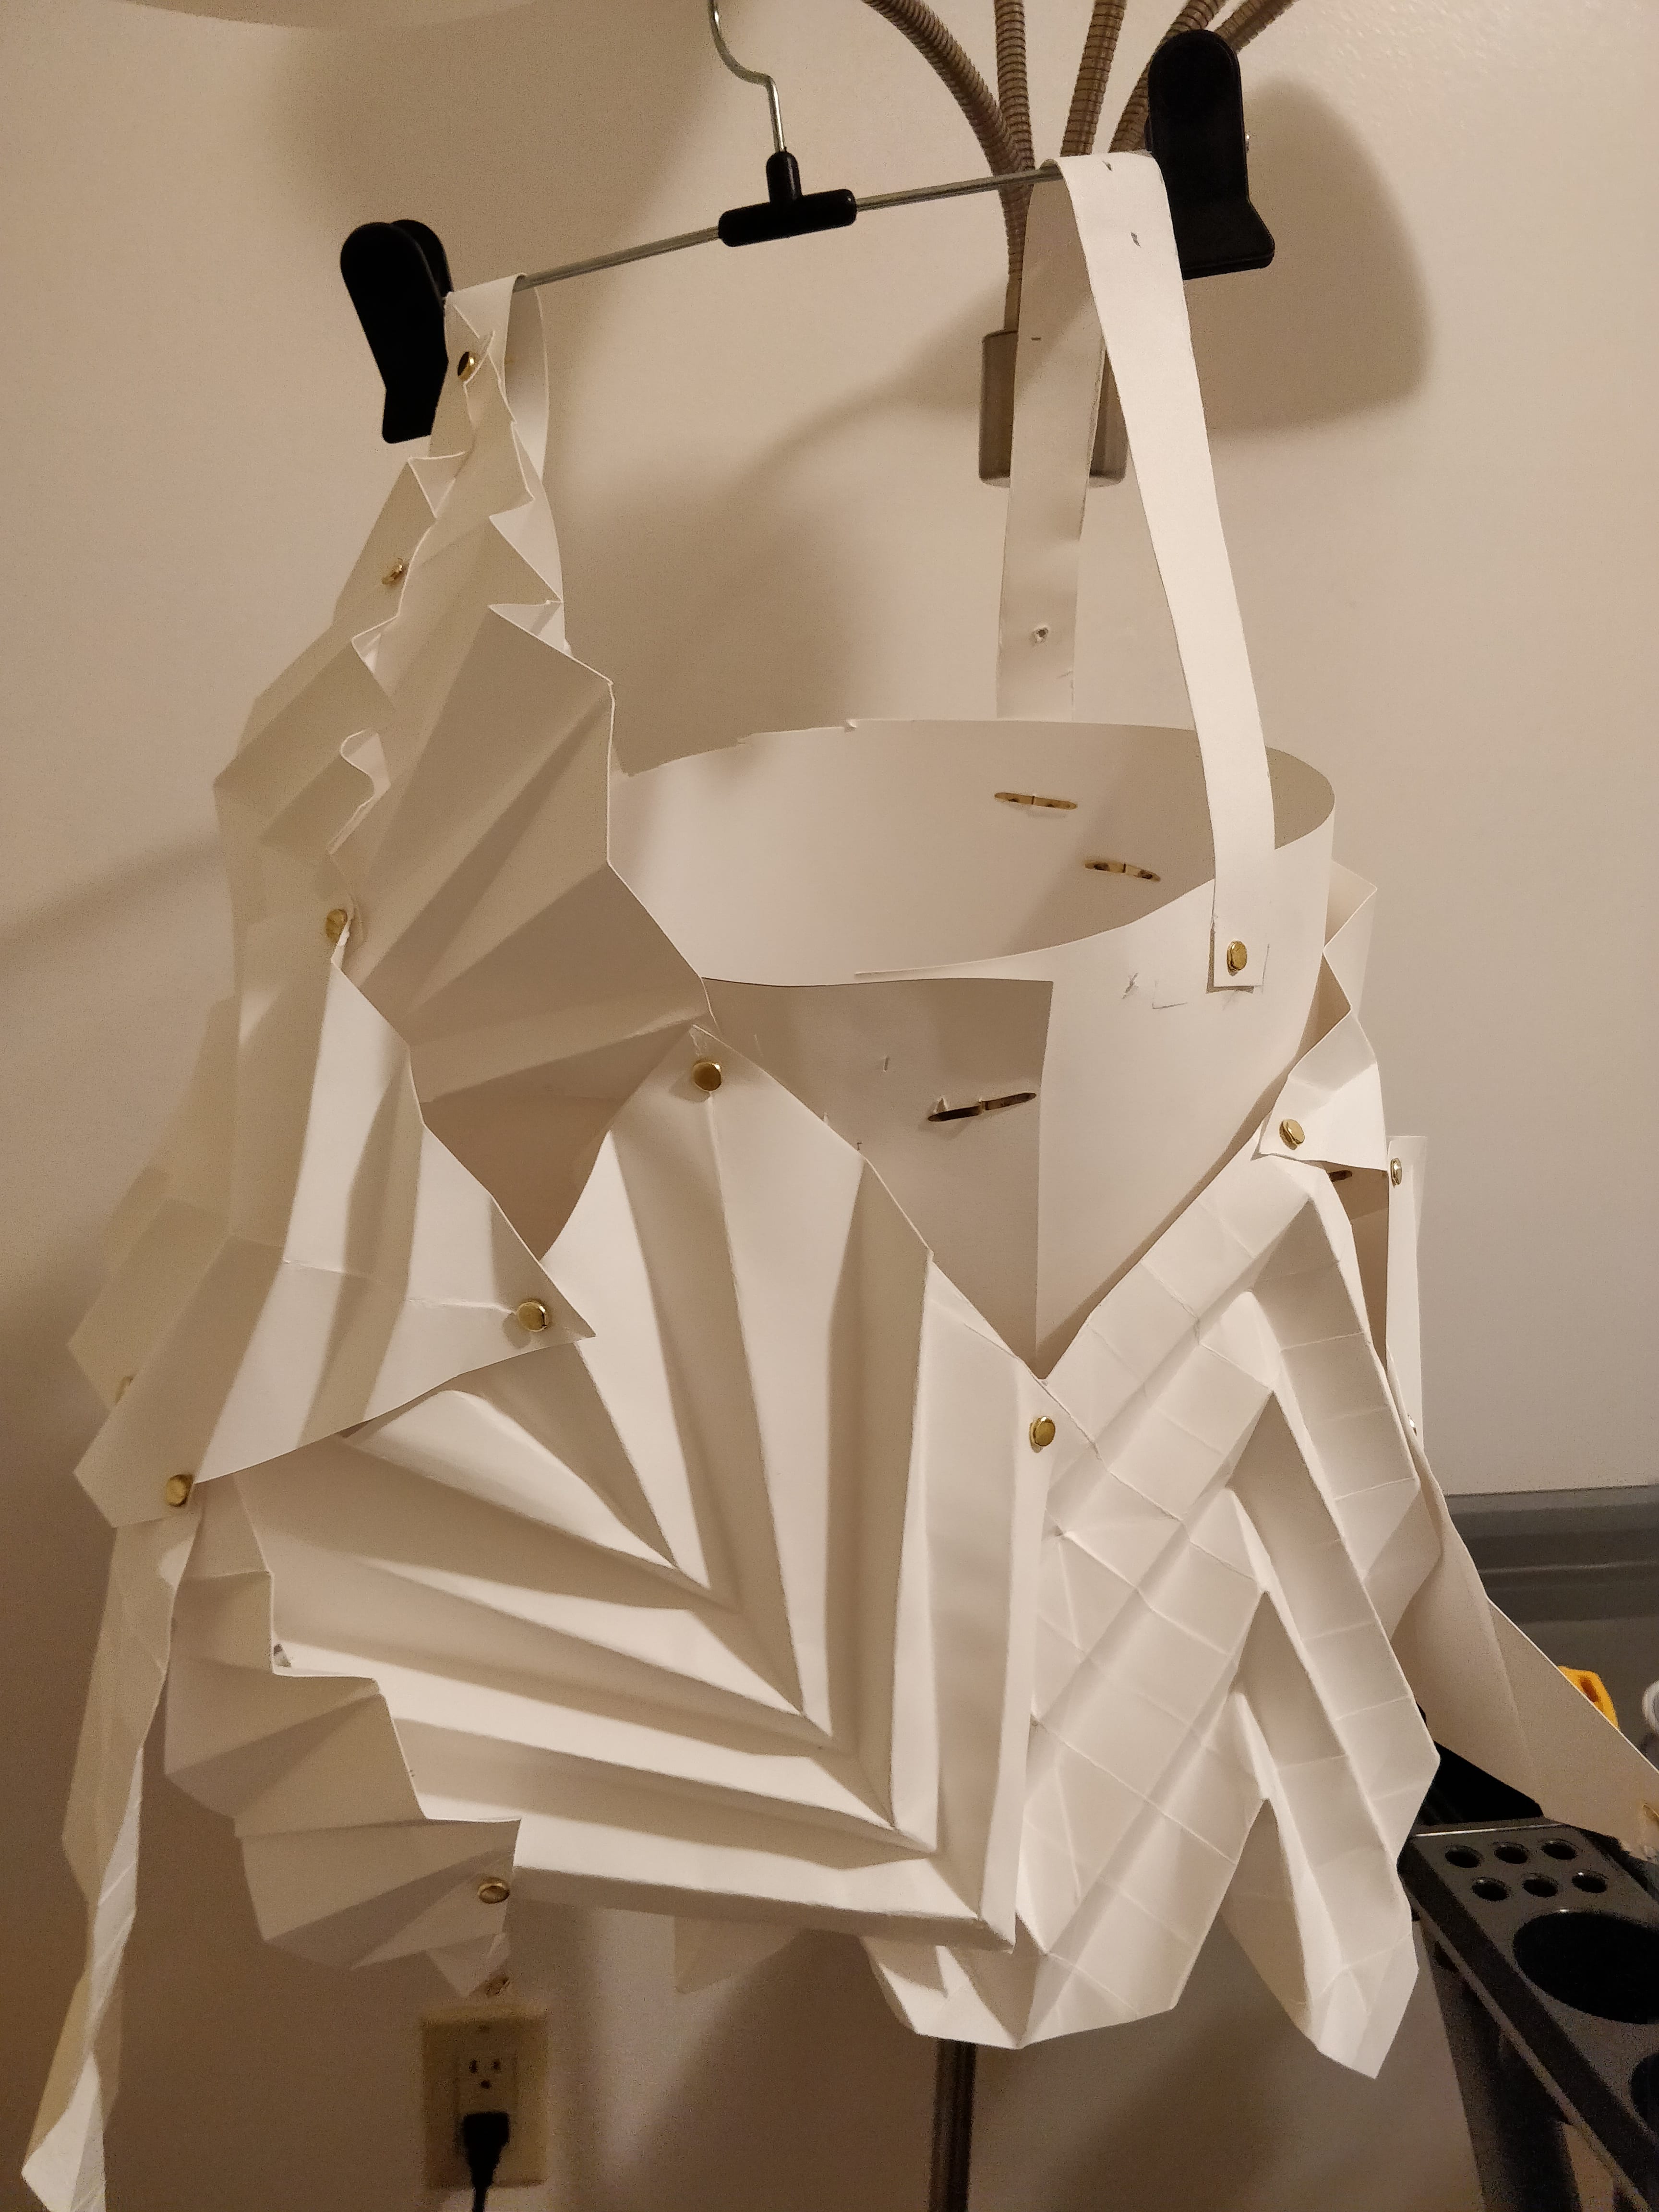
I made the garment piece out of Bristol paper. I folded triangular and chevron patterns to create depth and interesting texture throughout the piece. I used different sized papers and attached the corners of the folds with paper fasteners to connect them together. The paper fasteners allowed some movement onto the attached pieces but was sturdy enough to keep the separate pieces together. After cutting the parts, I layered the pieces on top of one another. I kept the patterns of the parts relatively similar but varied the sizes and changed the way they looked together by overlapping and creating layers. The paper fasteners were not only used as mechanical connectors but it also served as a decorative element throughout the piece.
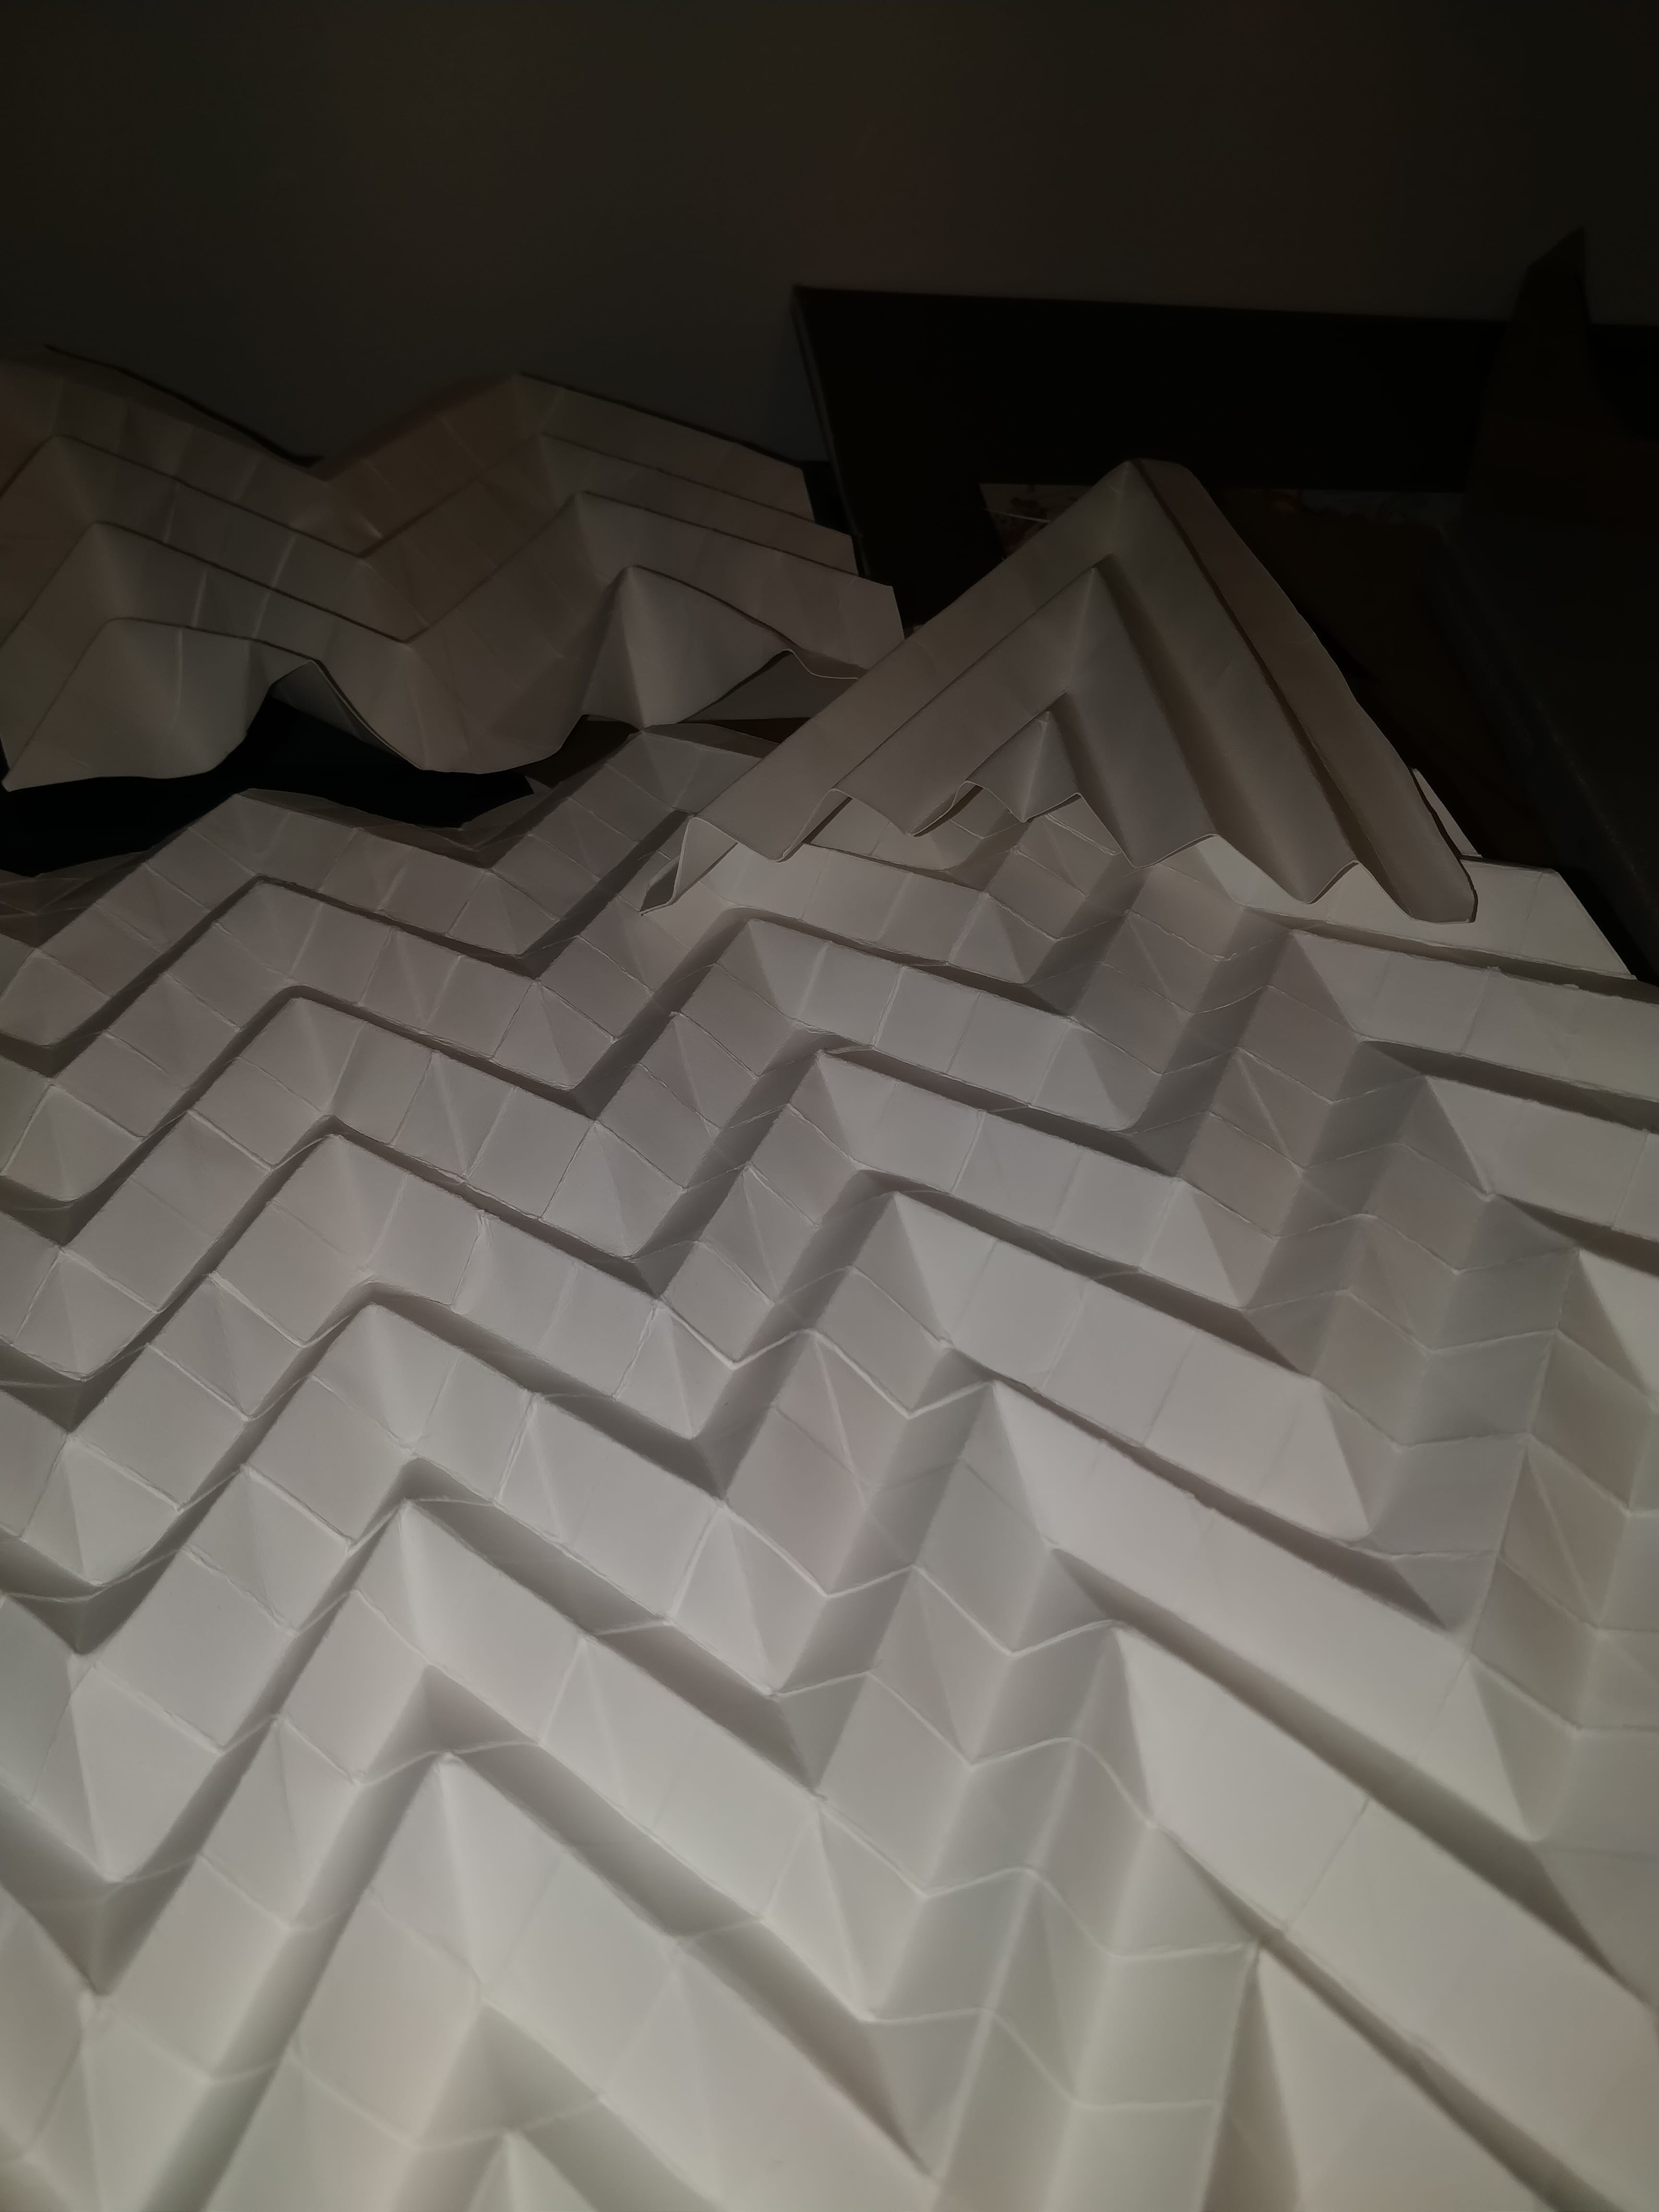
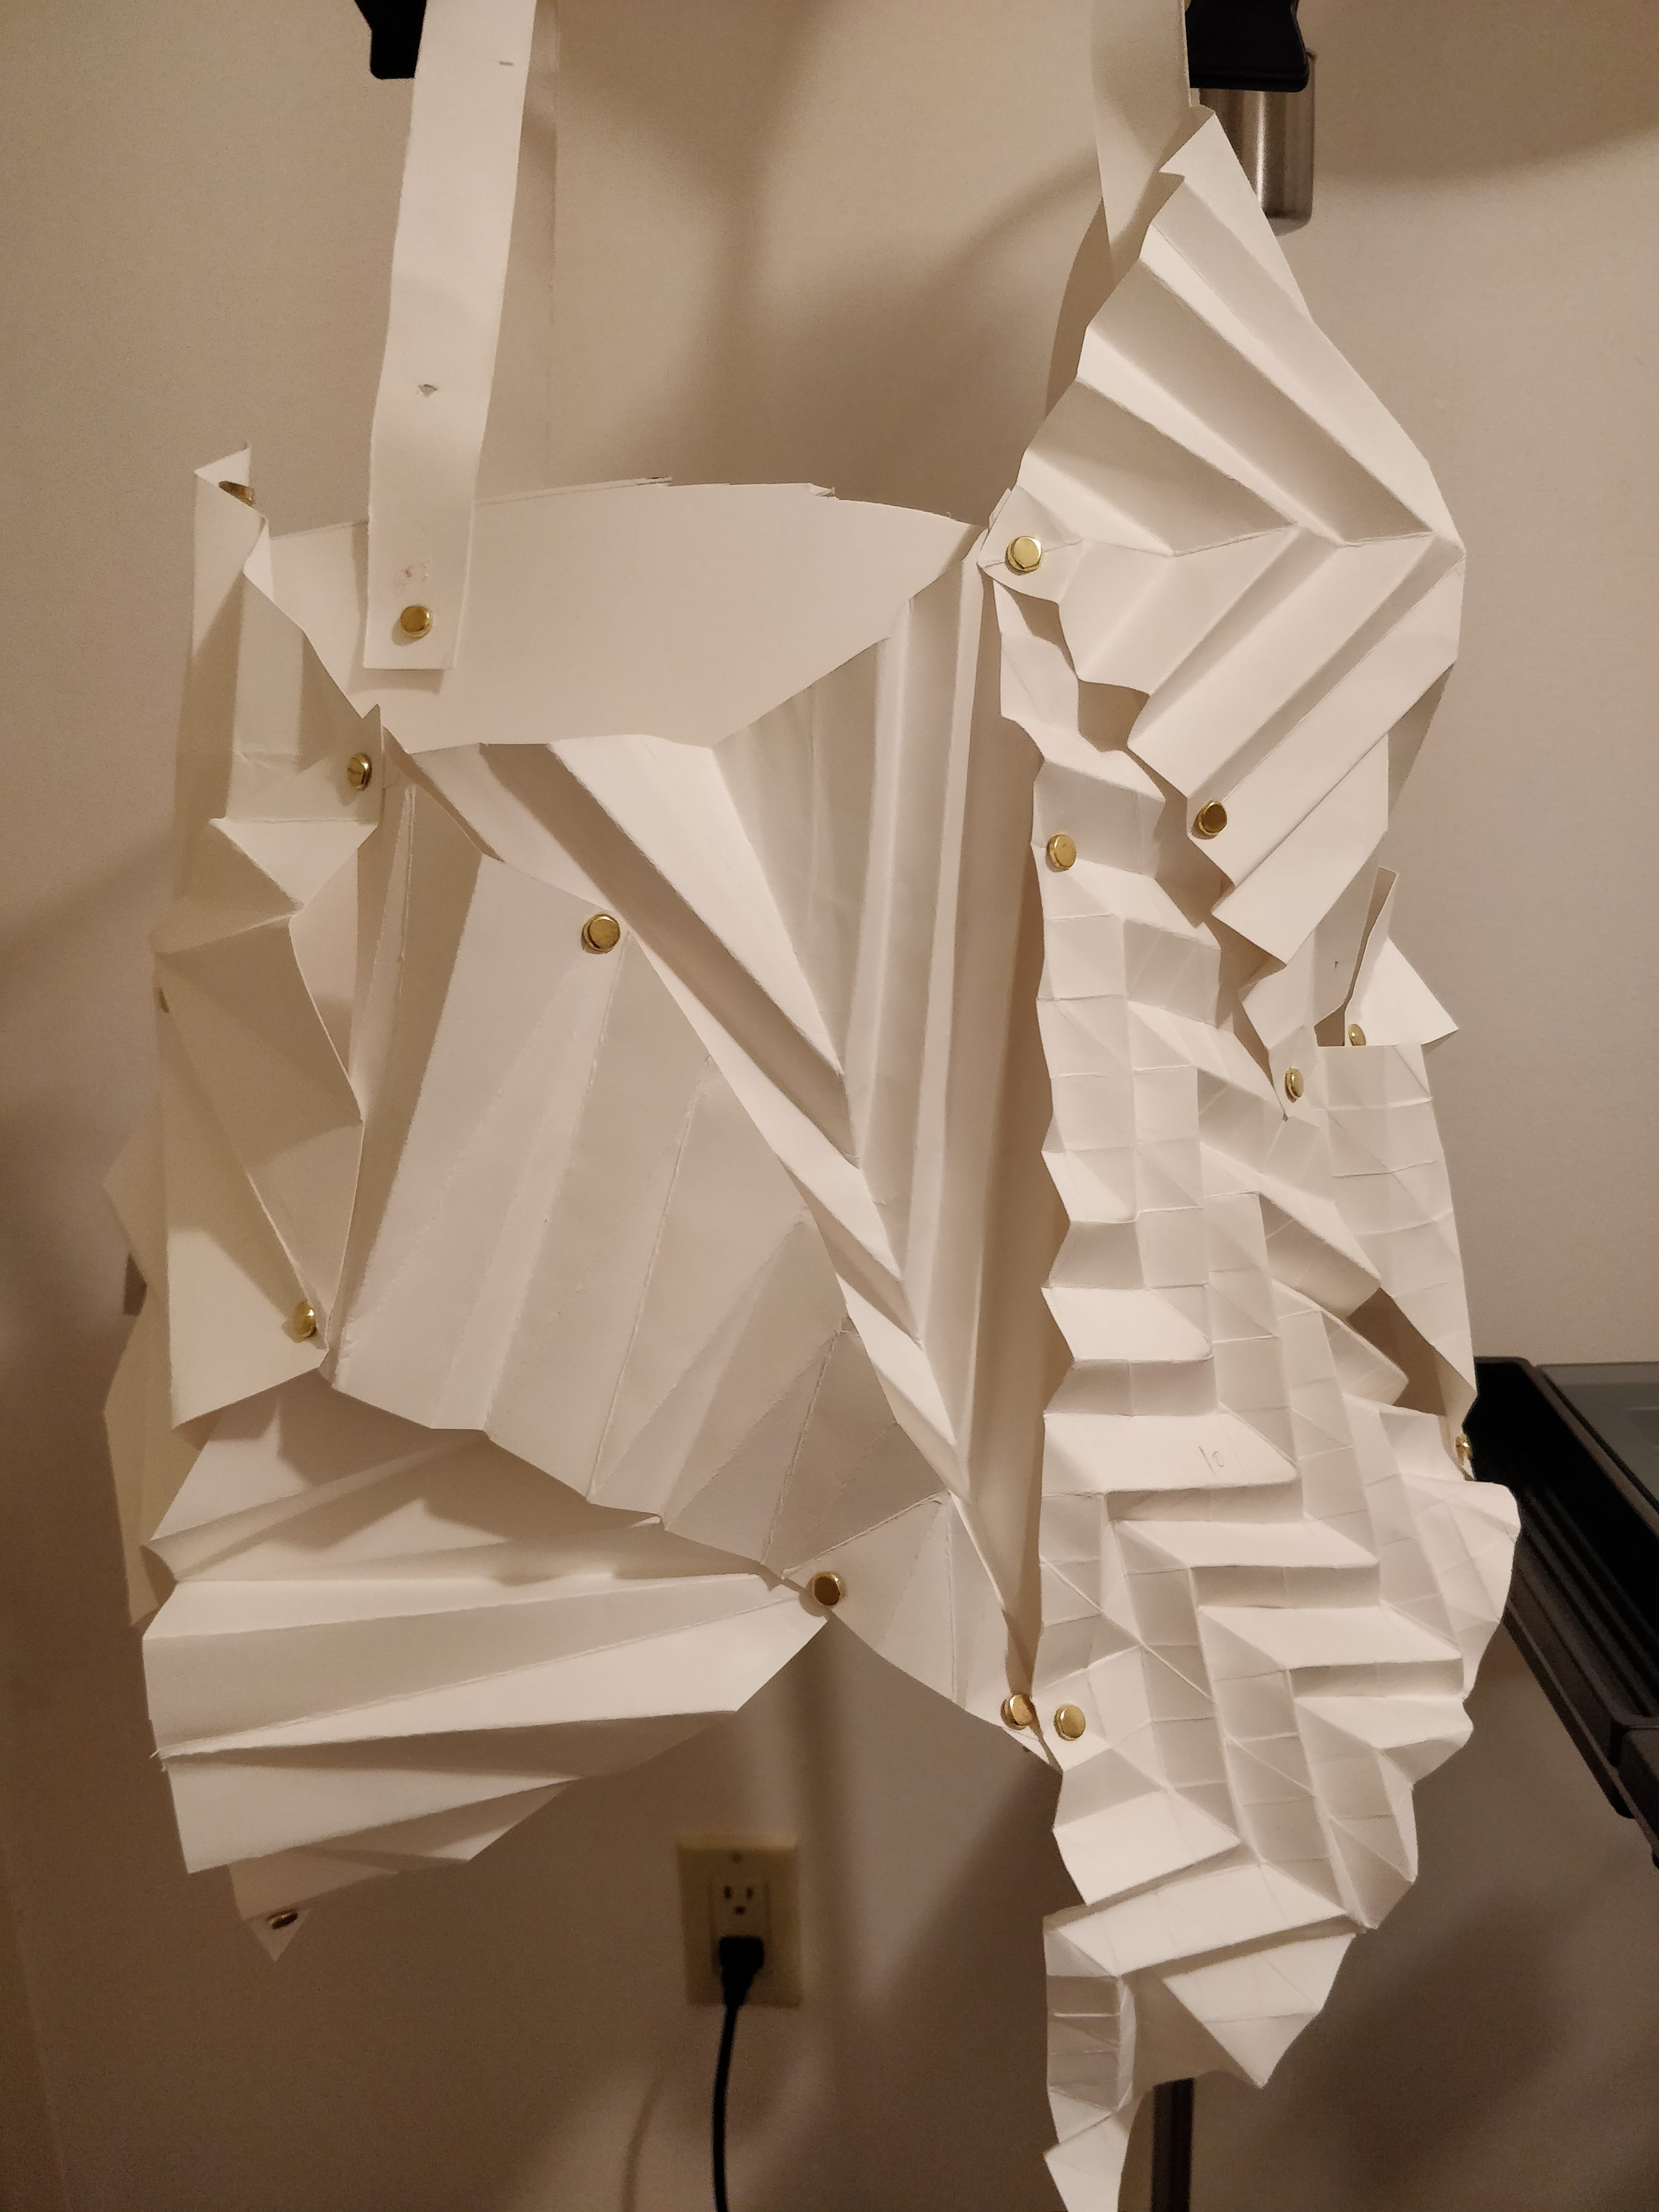
In making the second part of the garment, I used the same folding techniques but played around with different shapes and sizes.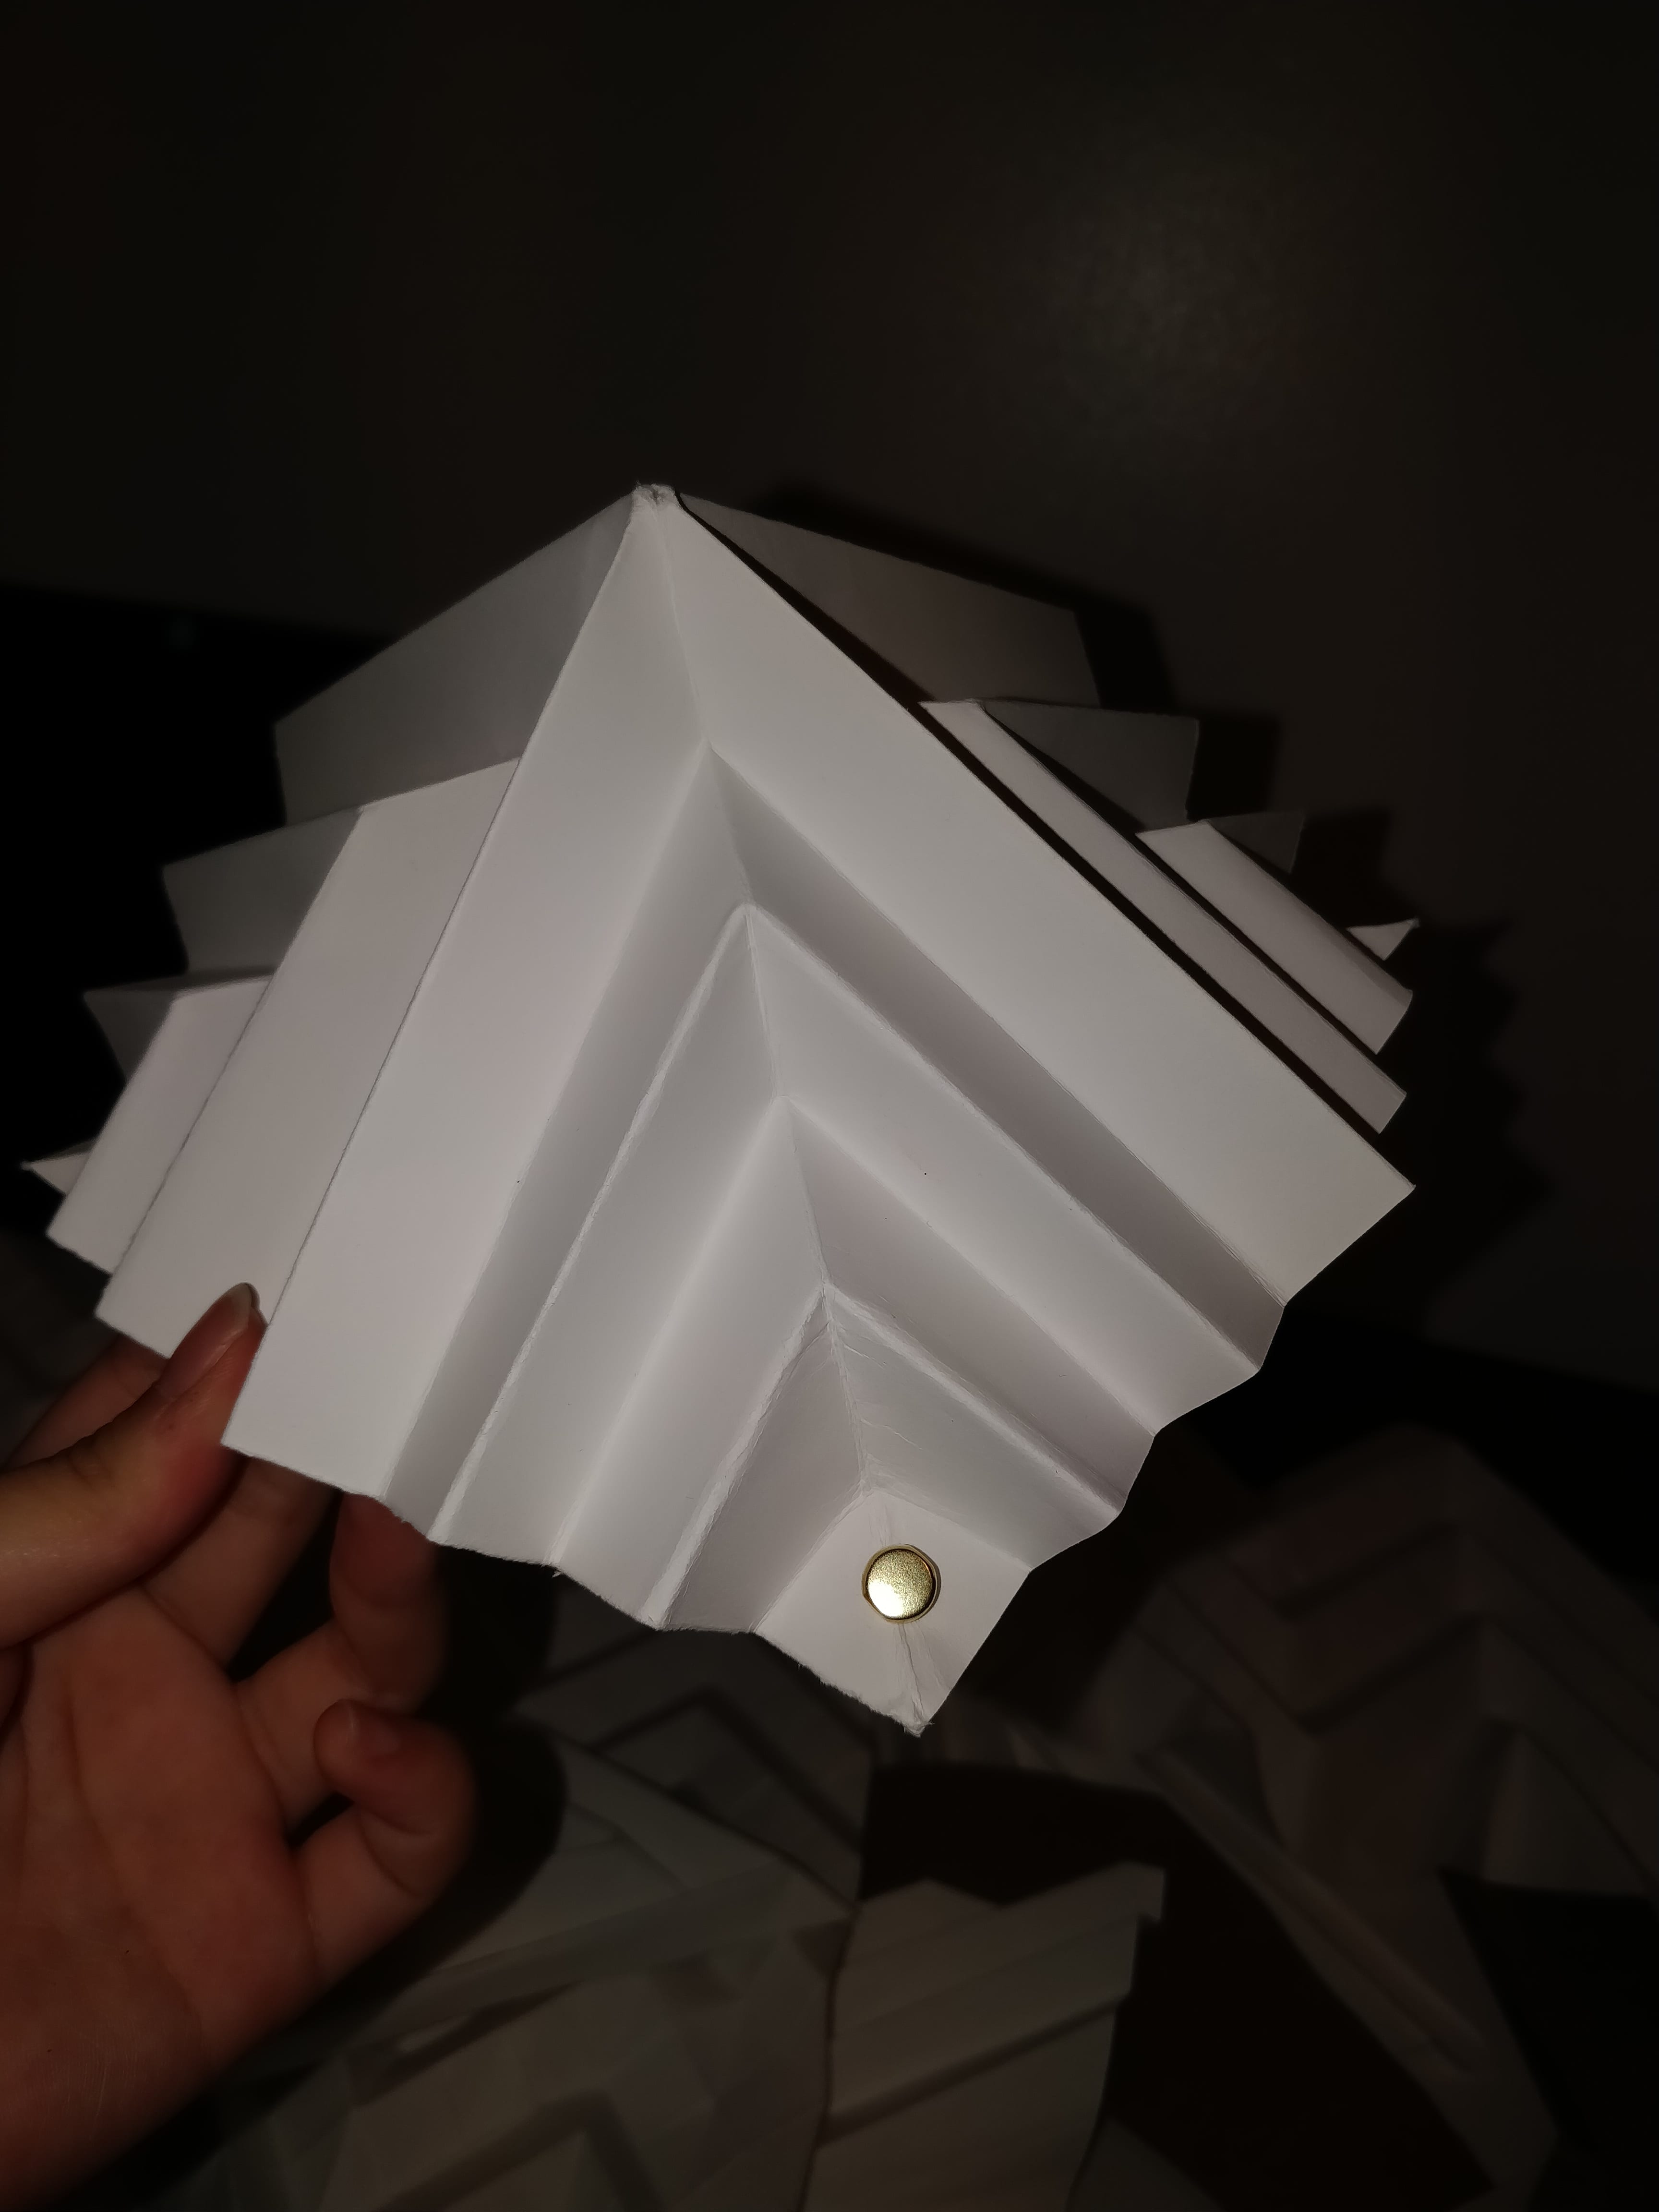
I continued the triangular shapes but incorporated different variations of it to create more depth onto the piece.
I began assembling the pieces together to create parts of the garment piece with paper fasteners. The paper fasteners were easy to remove and work with. I continued adding more layers and folding new pieces using similar patterns to blend in with the other pieces.

layer 1
back of layer 1
layer 2
back of layer 2
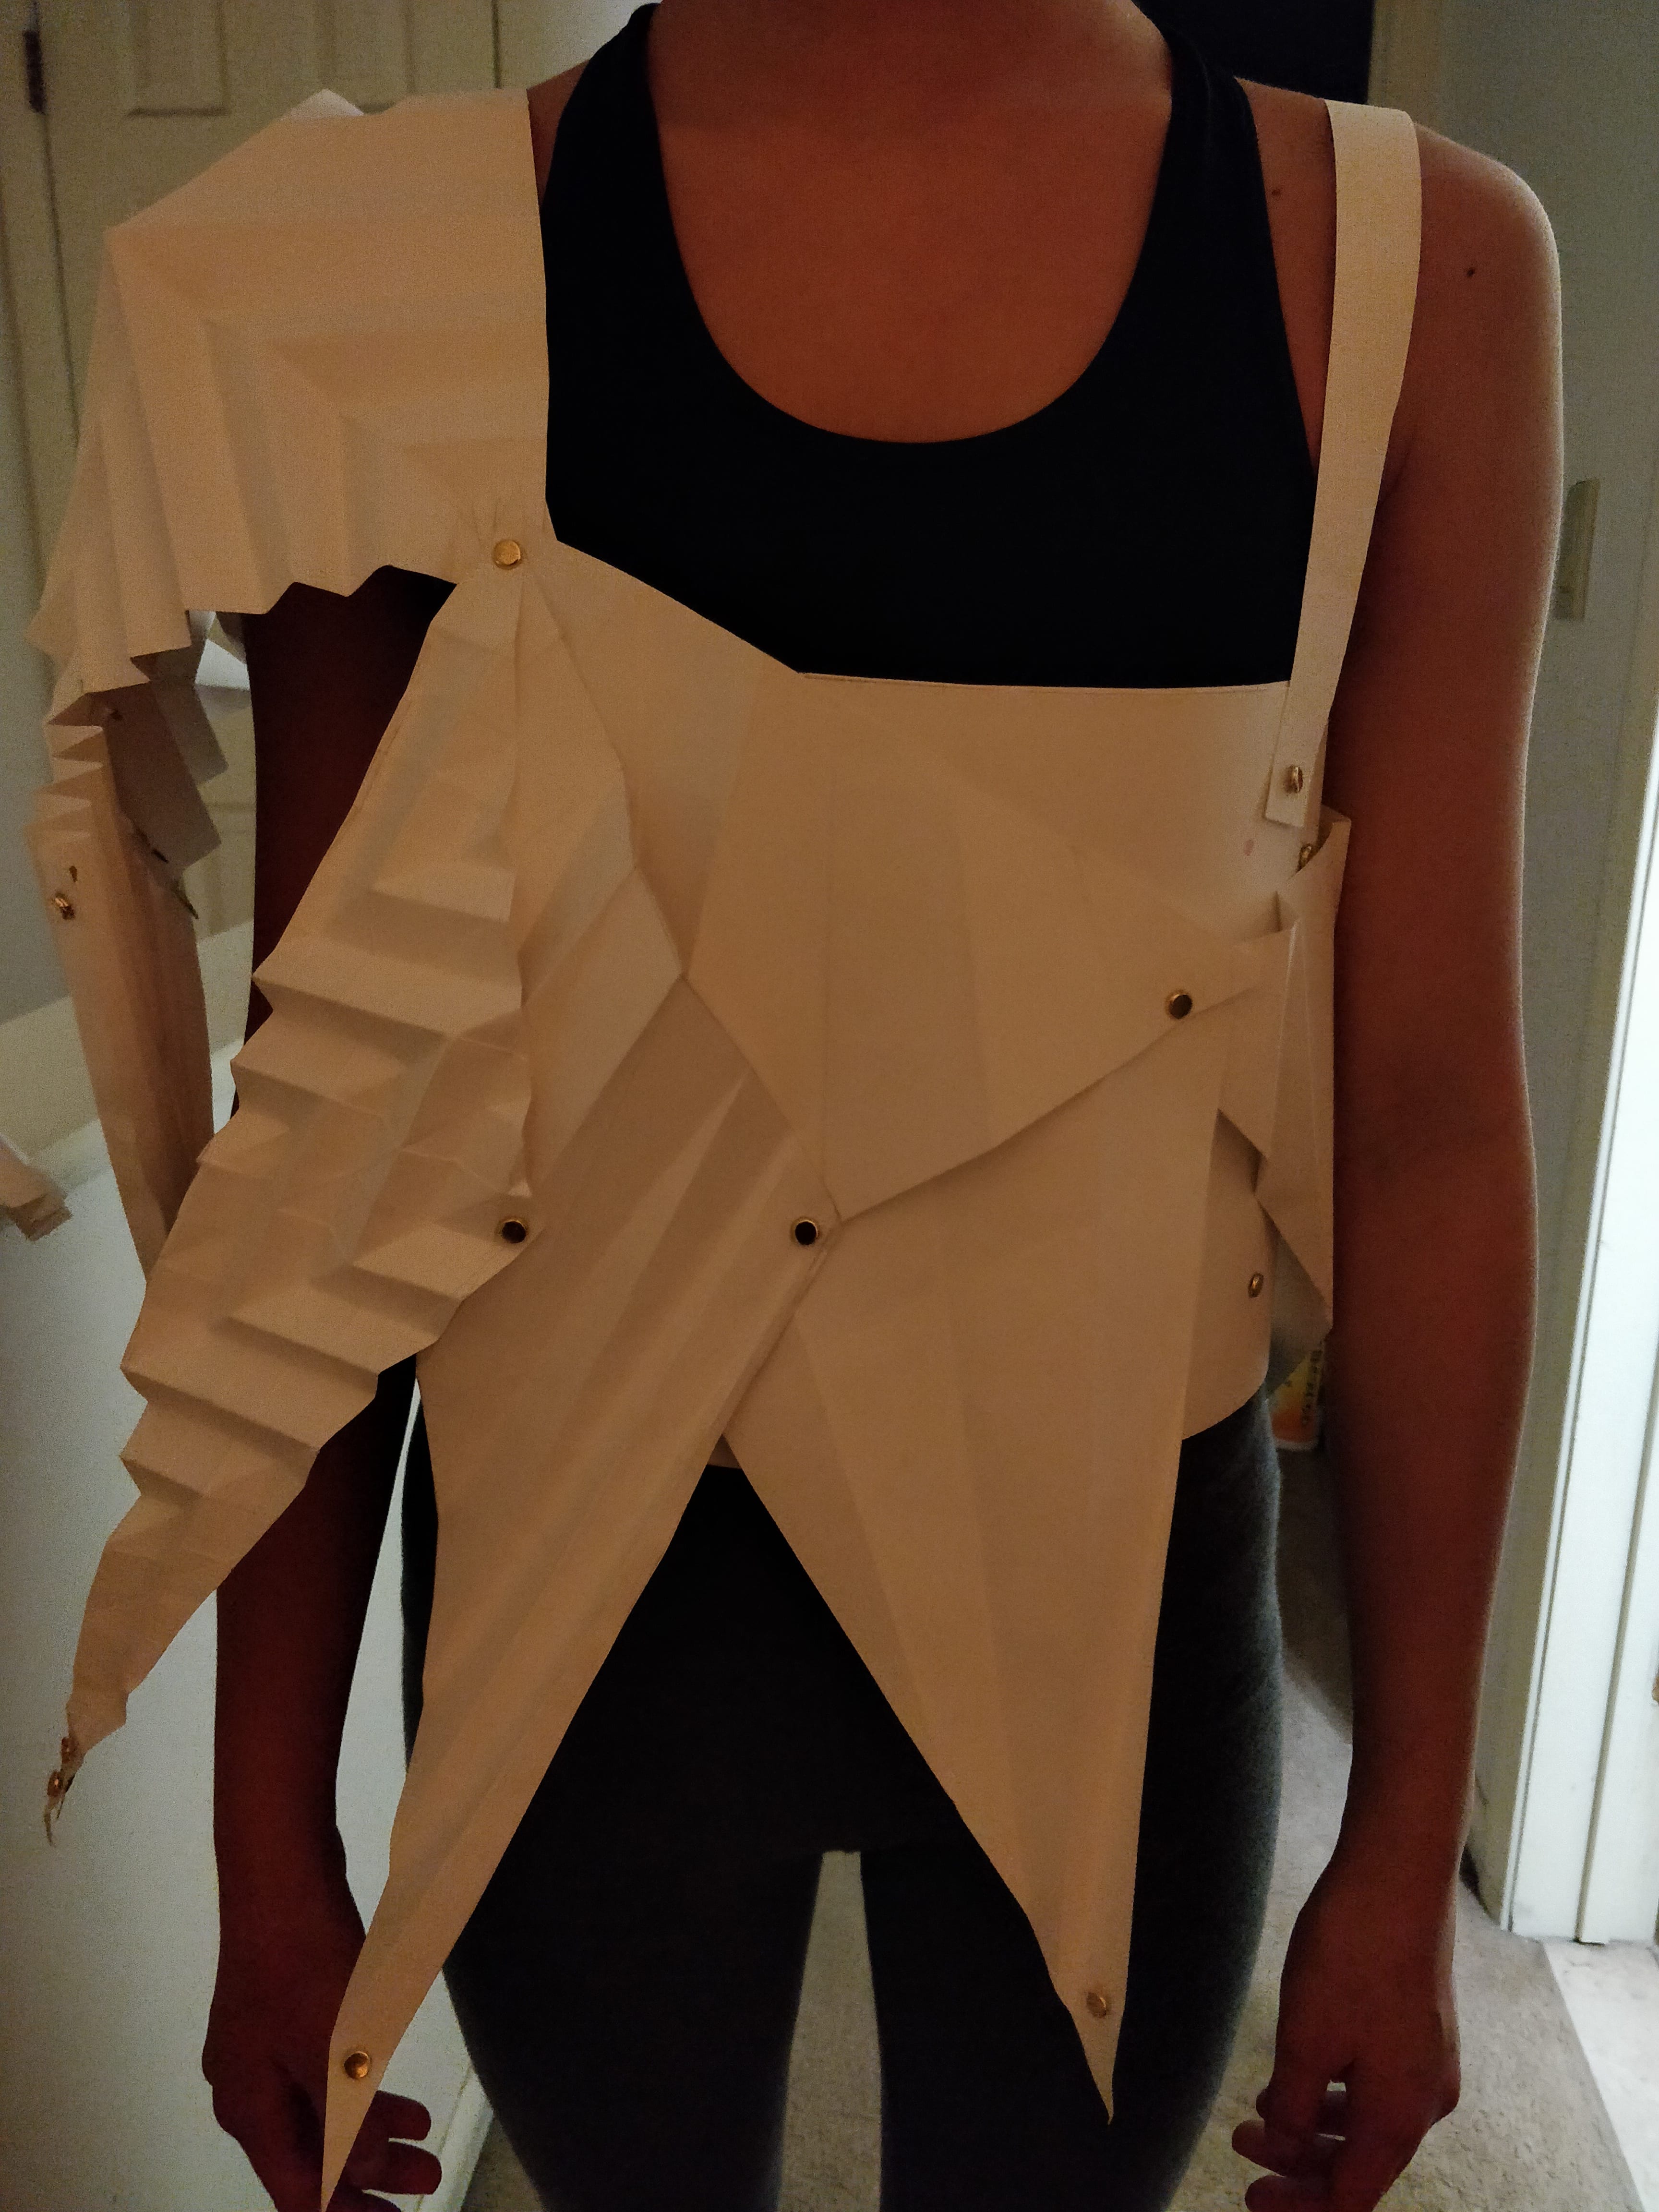
Layer 1 & 2 can be worn together but also separately, worn amongst two people. I wanted to make it easier to wear both parts so I removed the tank top base that helped keep the shape together. When layers 1 and 2 were combined, it was easier to wear and remove without the base as it was no longer needed.
Final photos
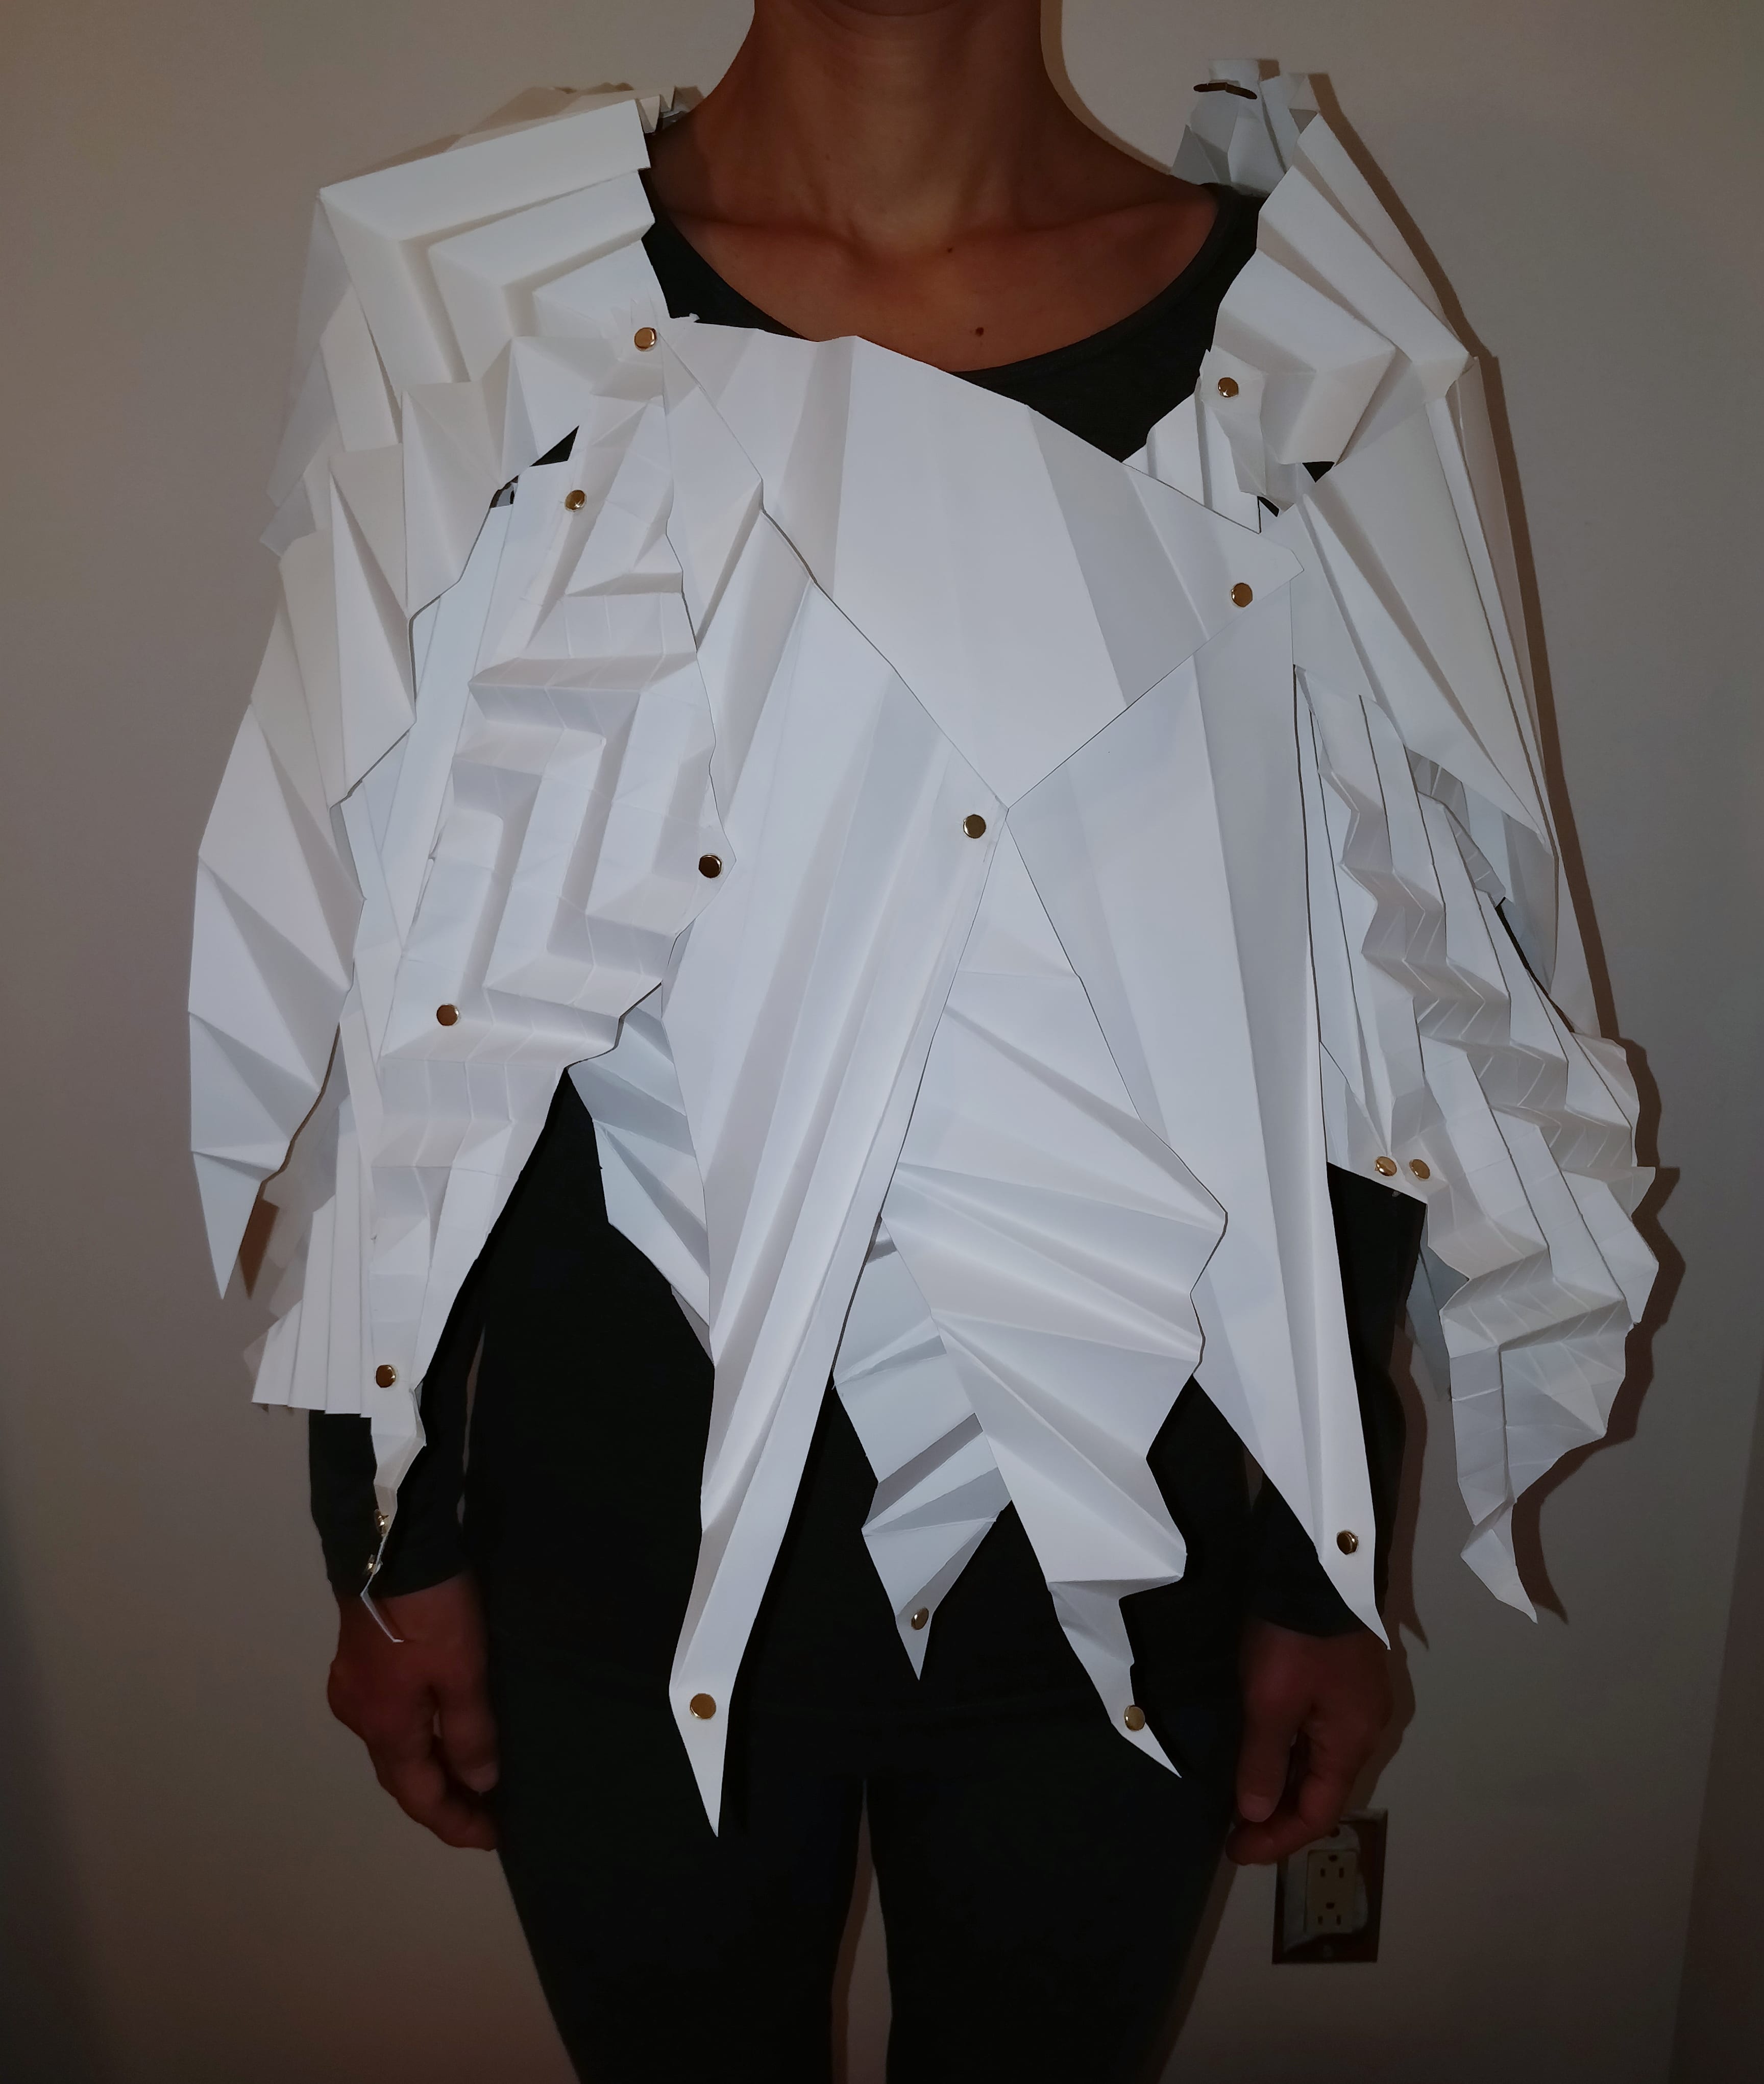
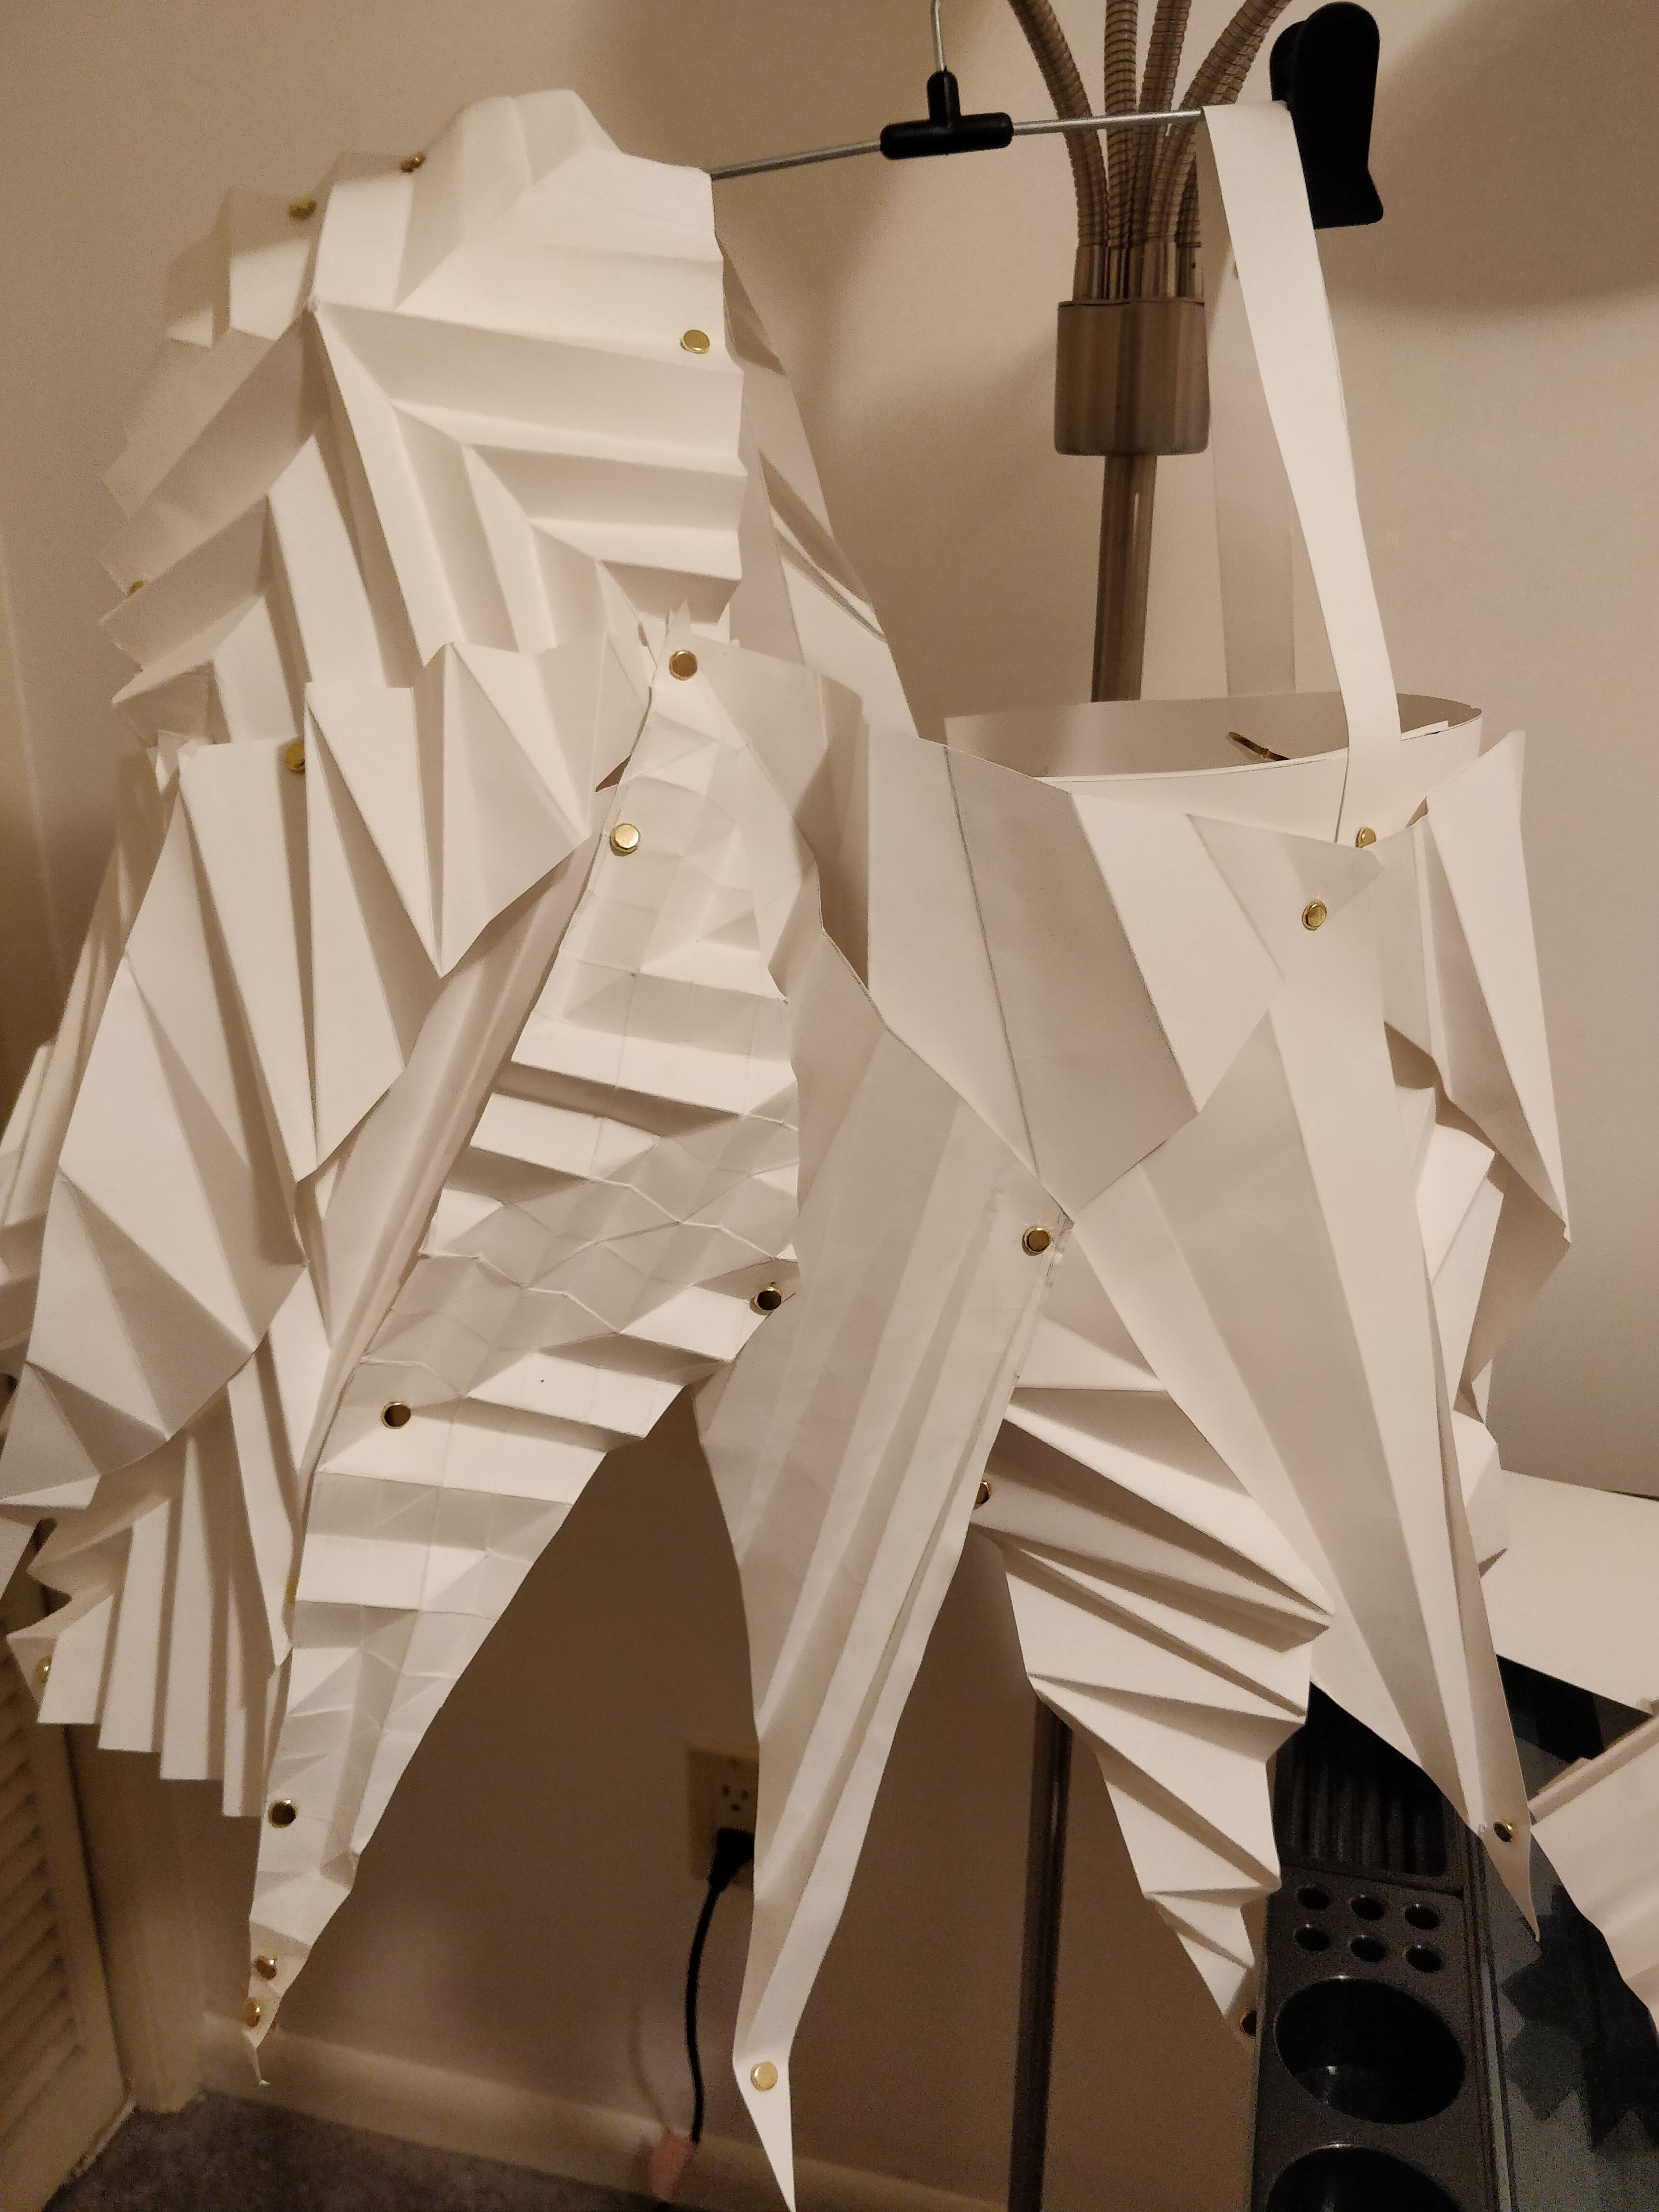
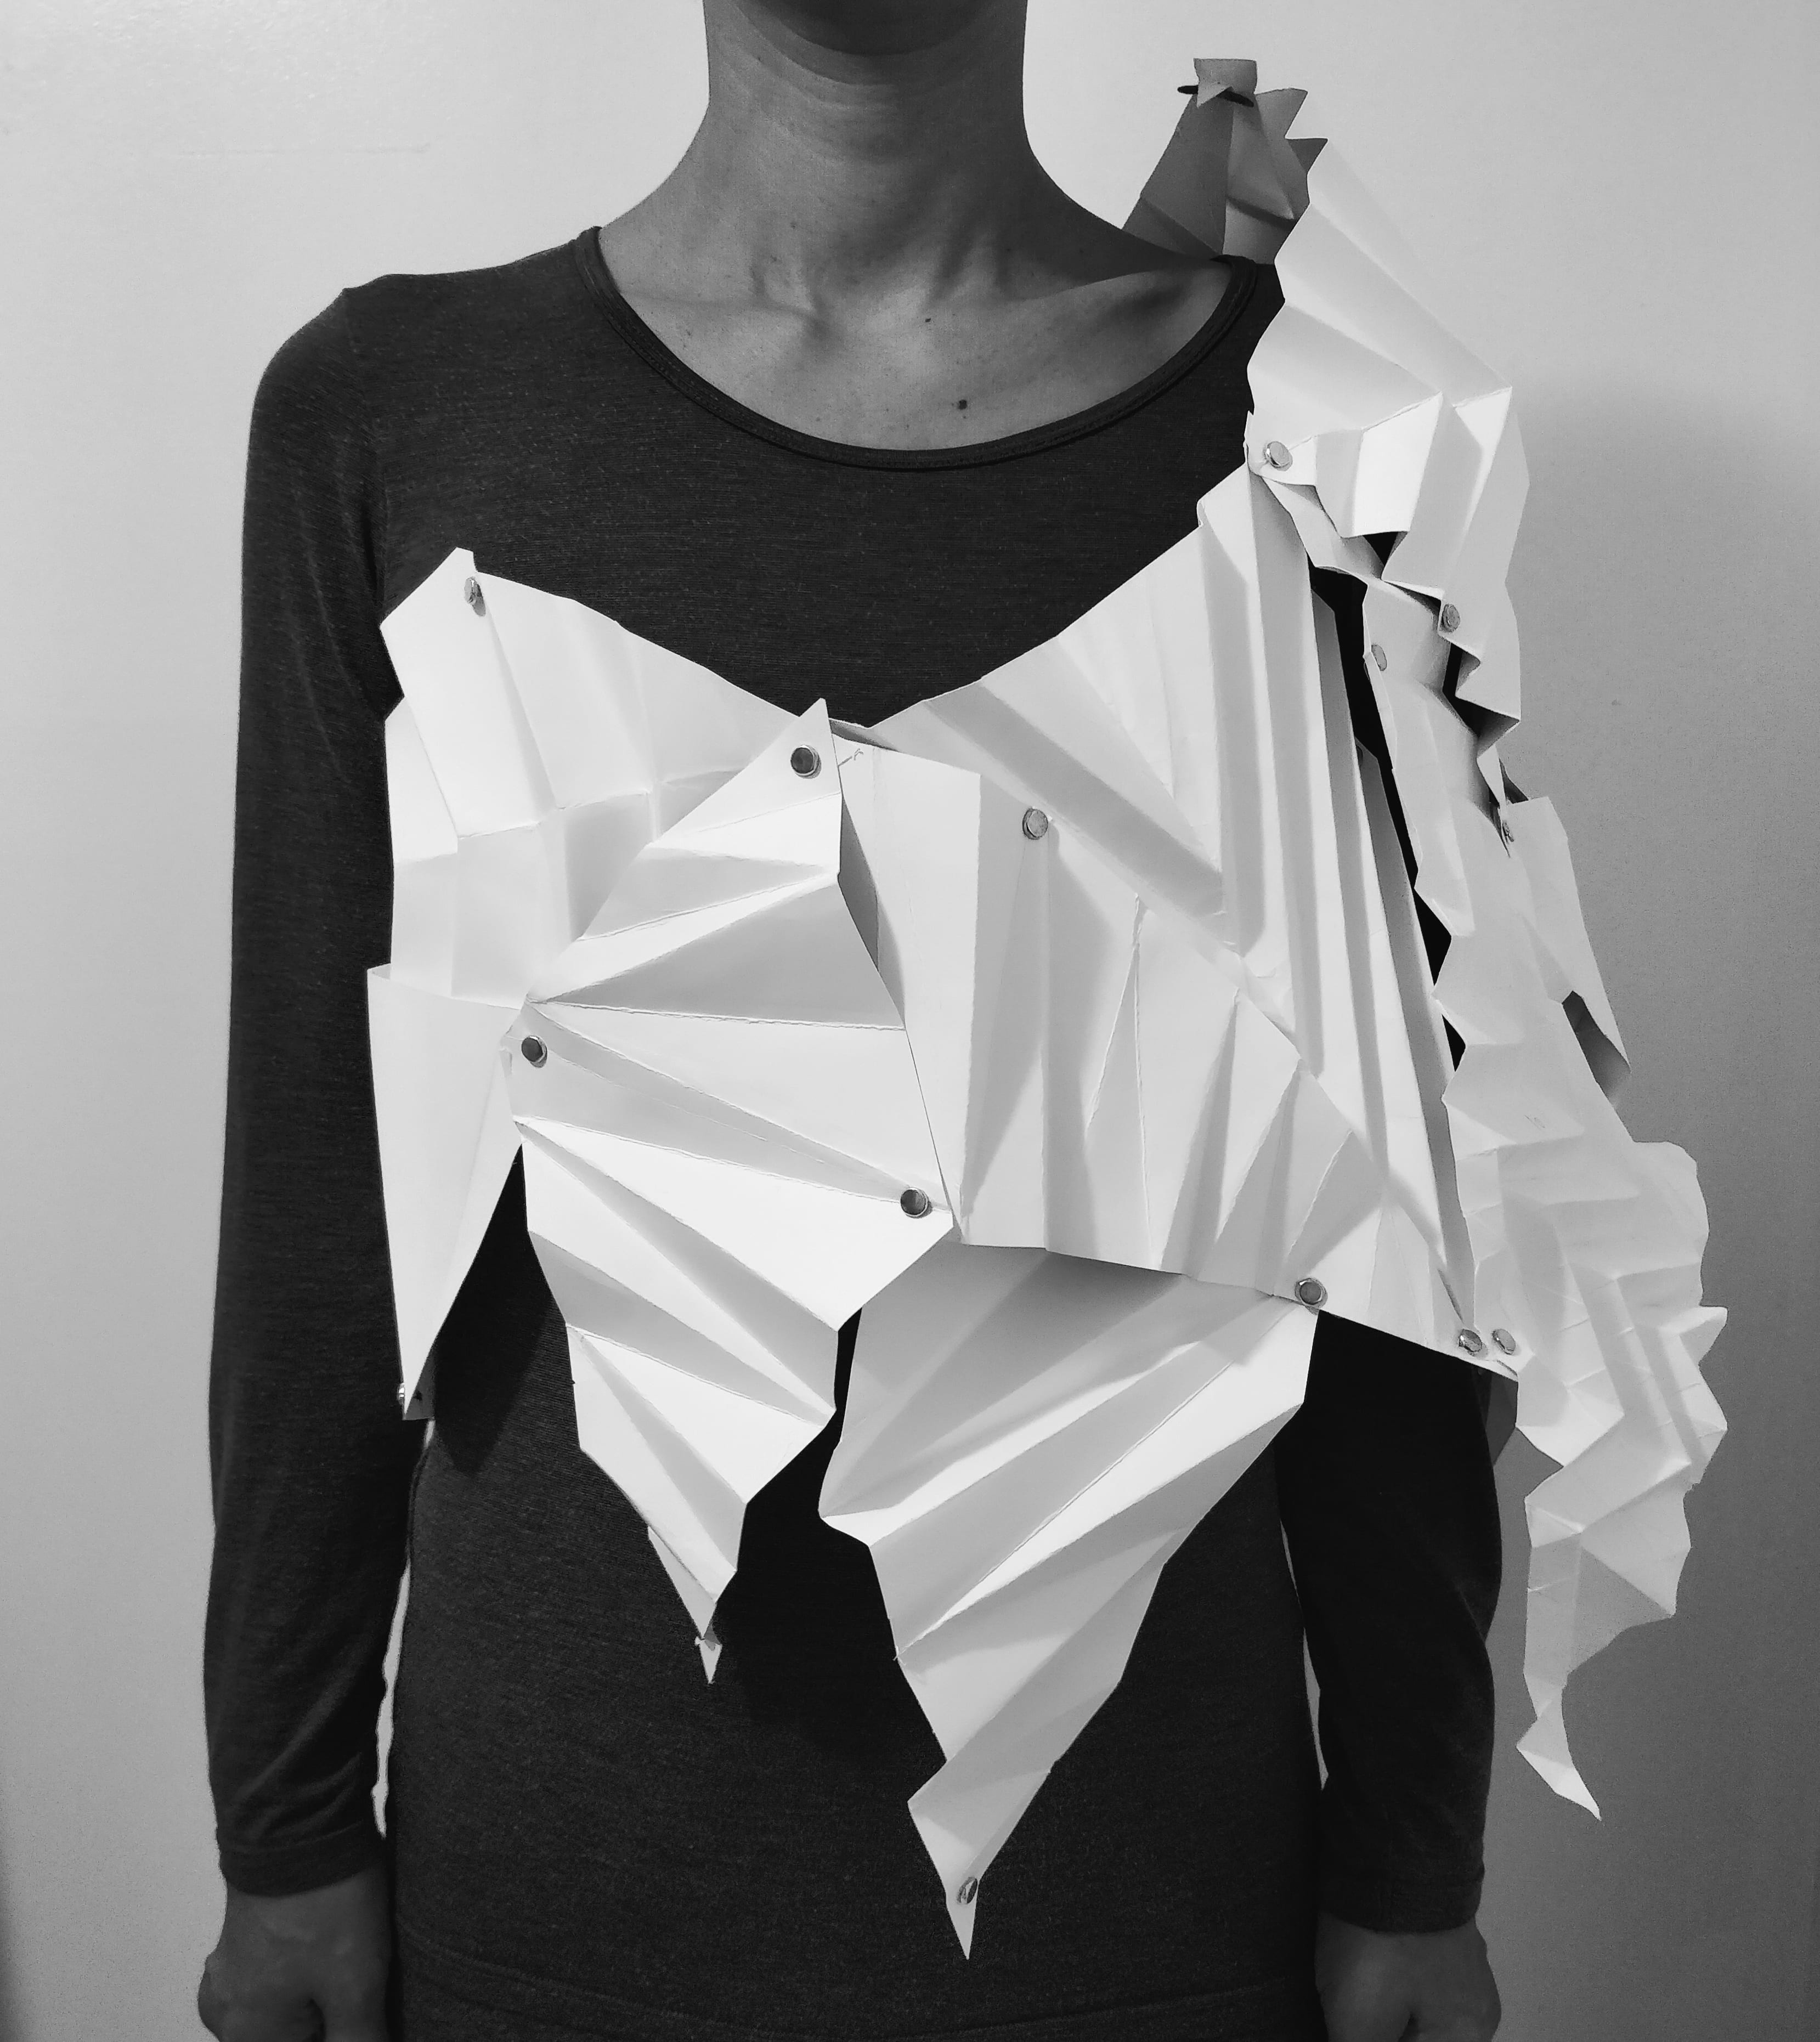
layer 1 & 2 combined

front
layer 1
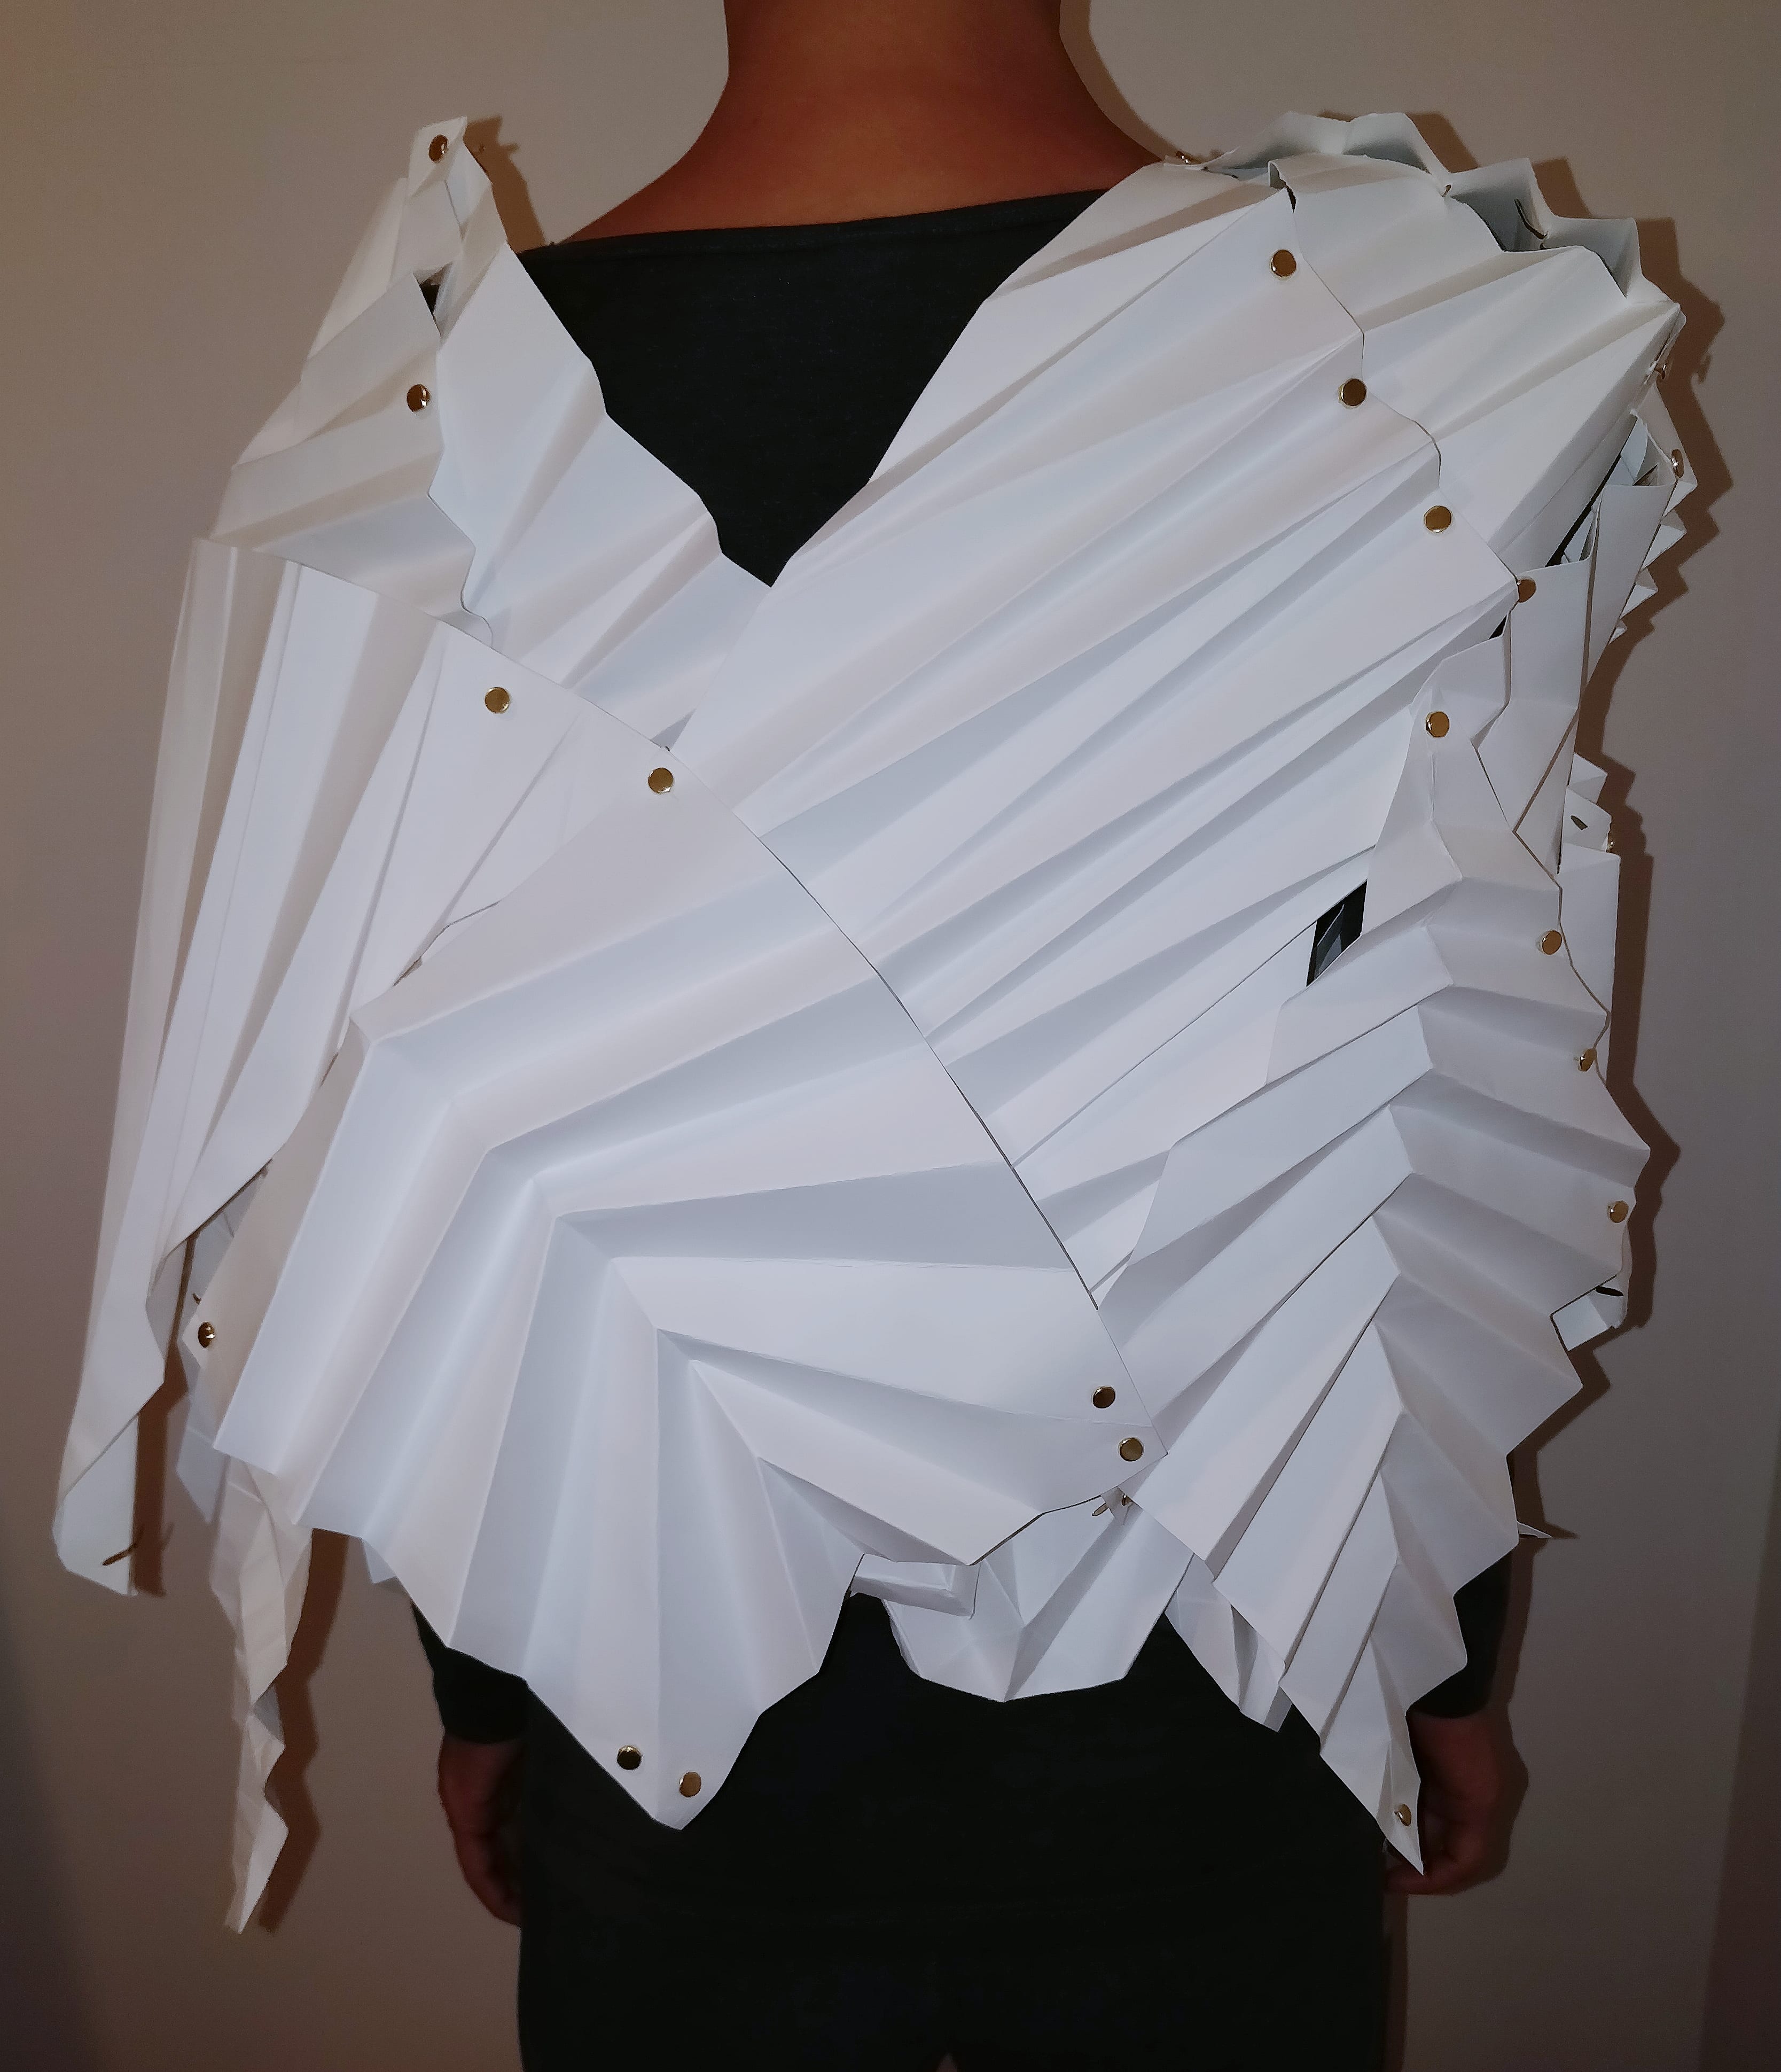
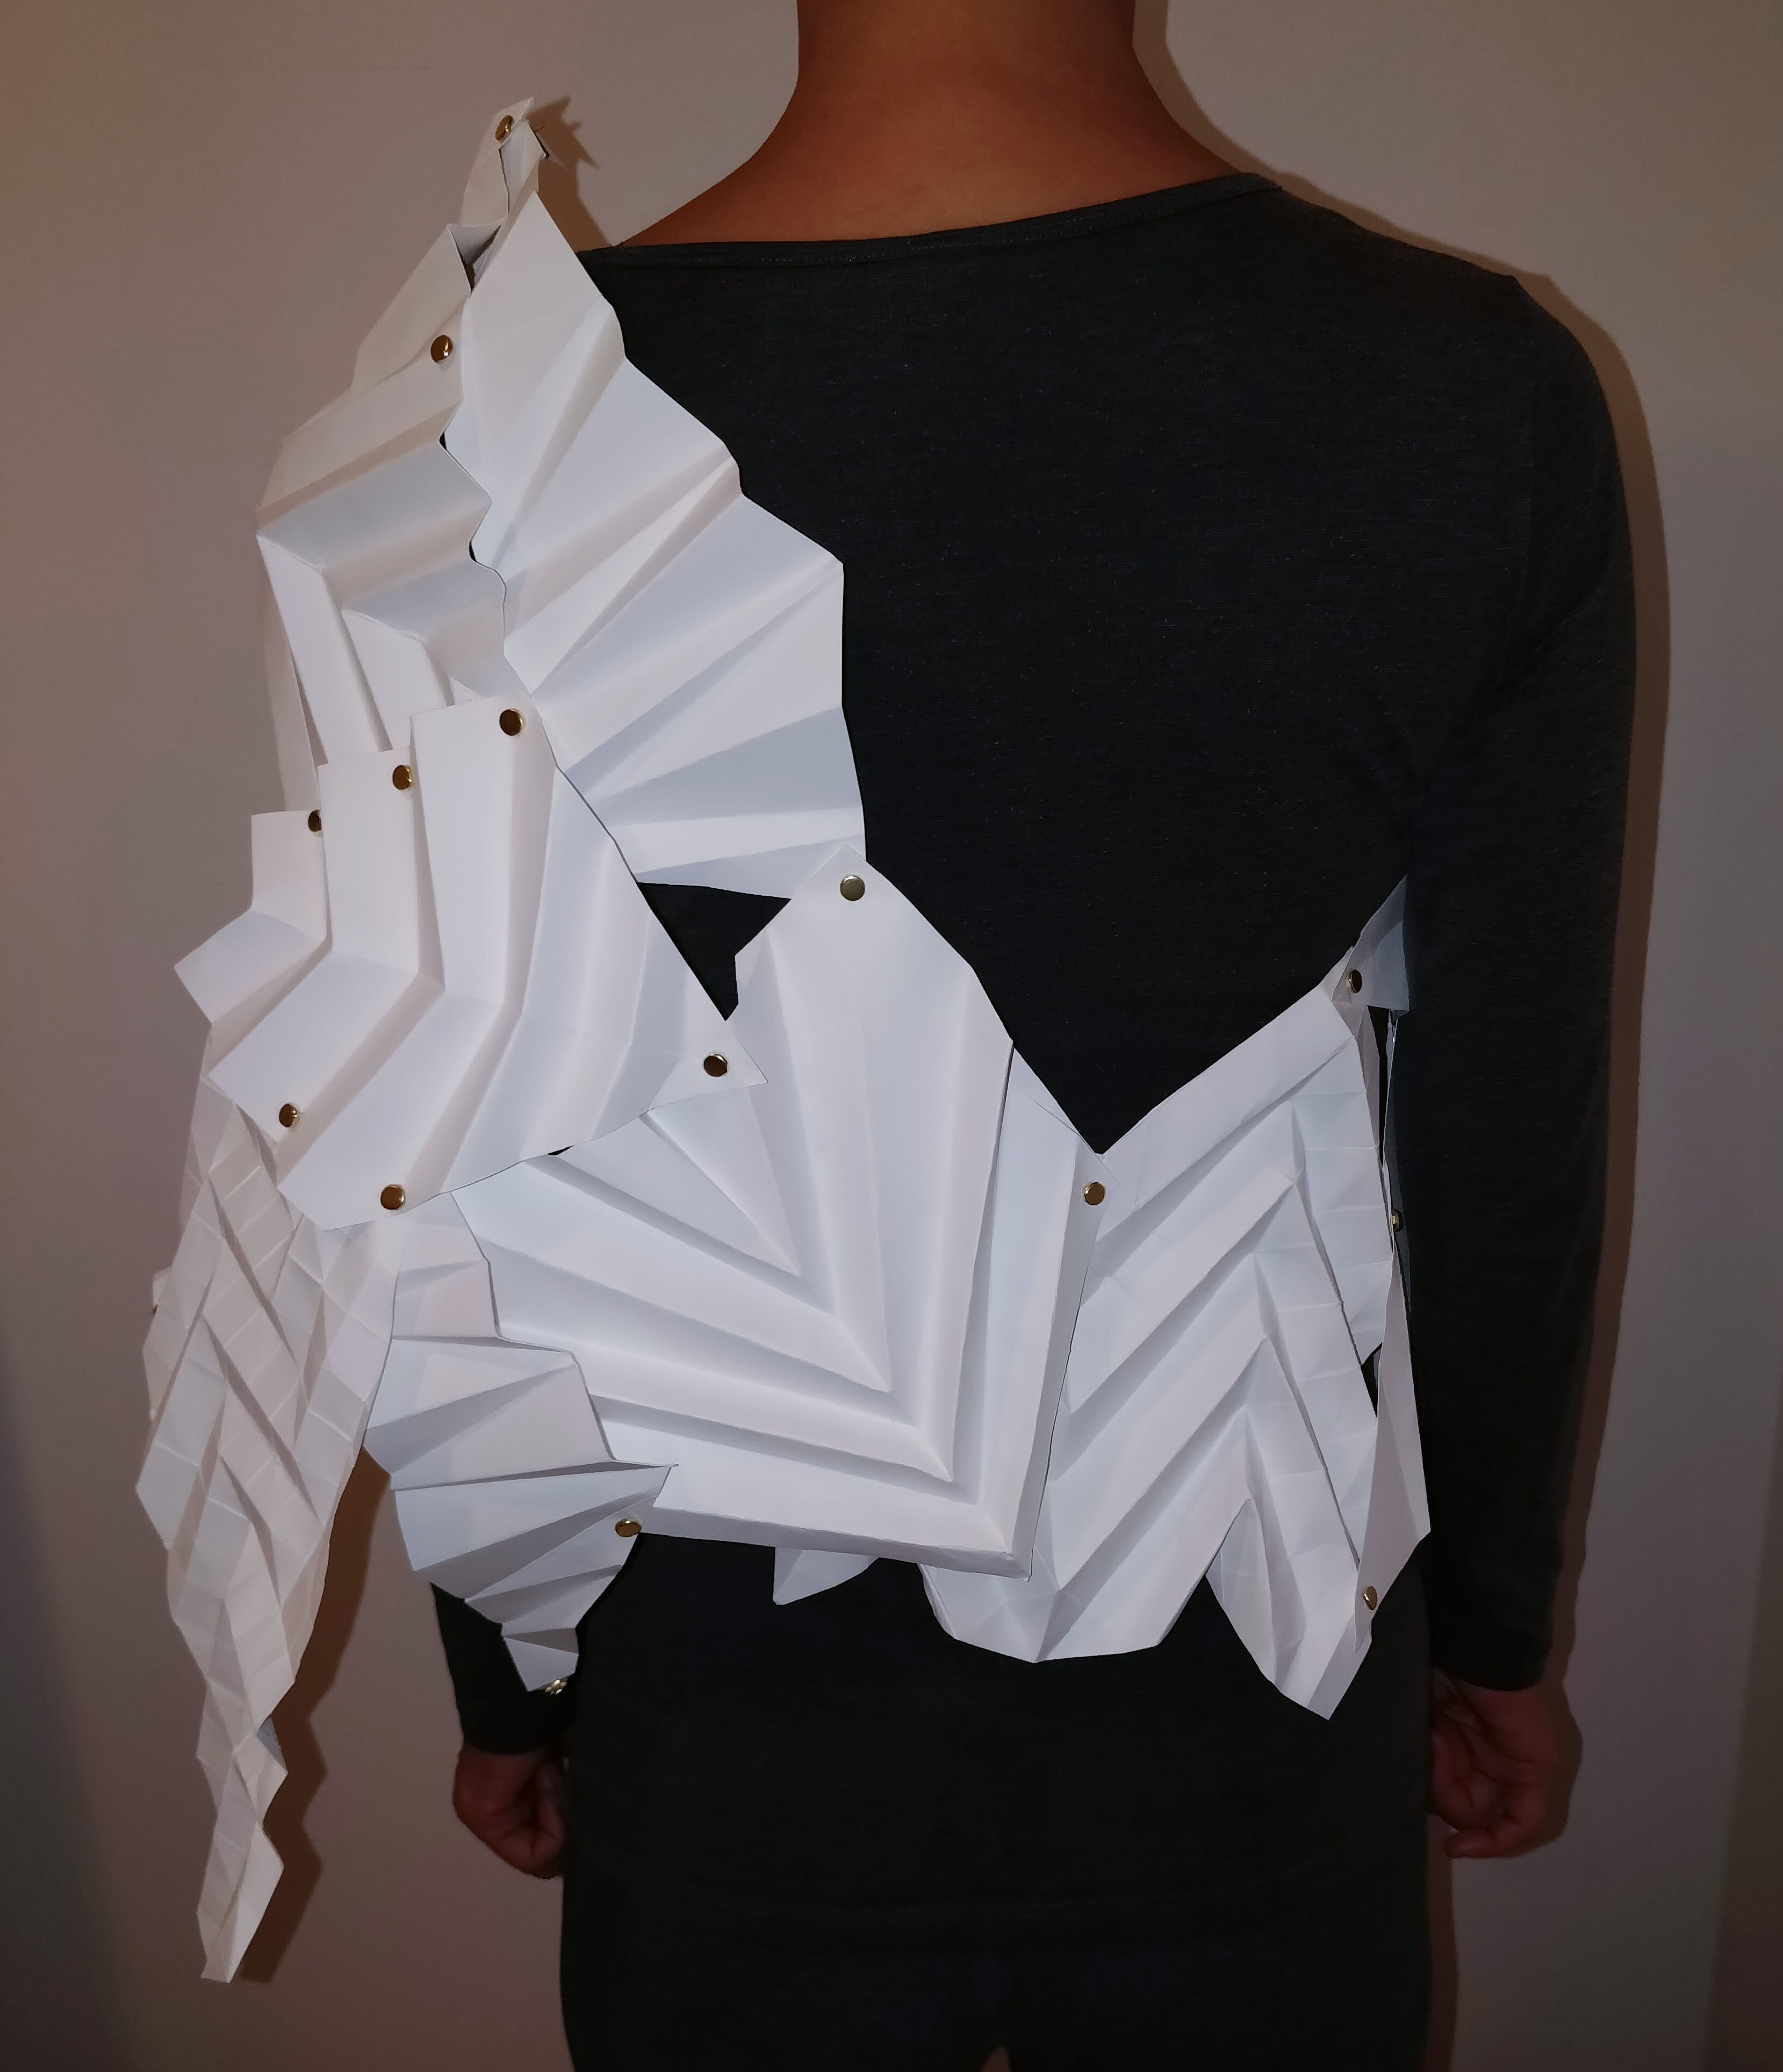
back

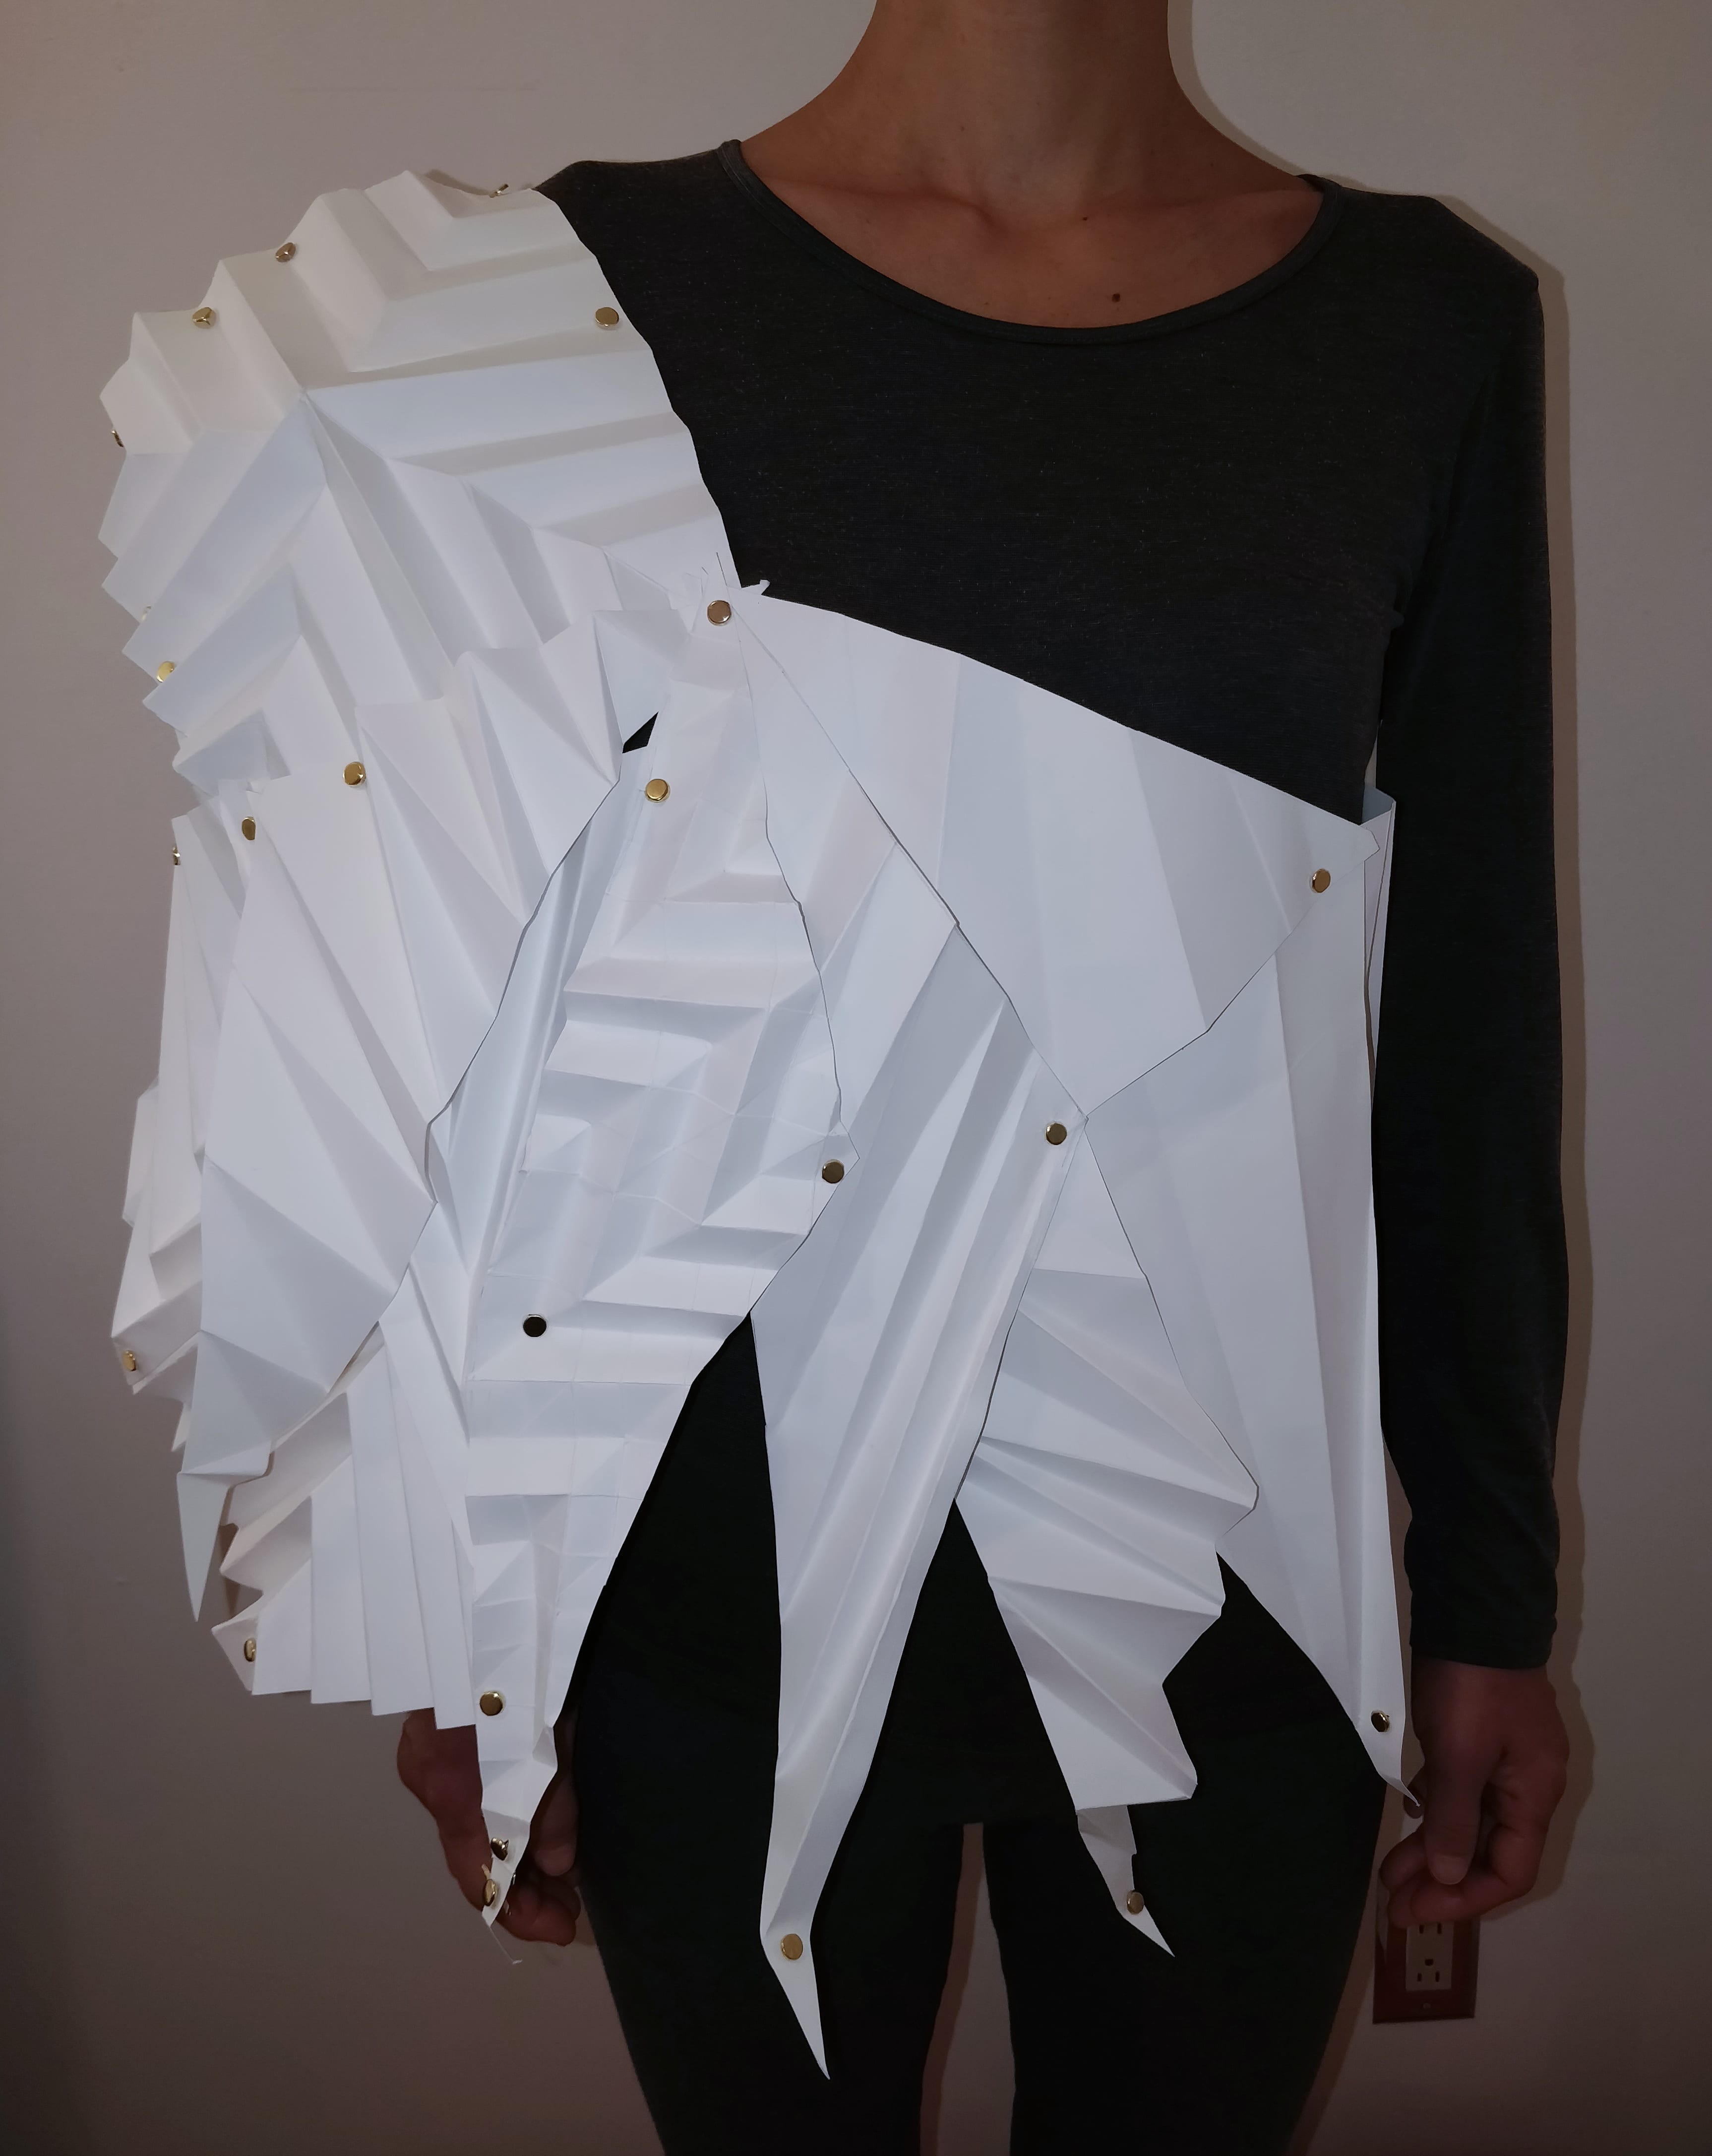
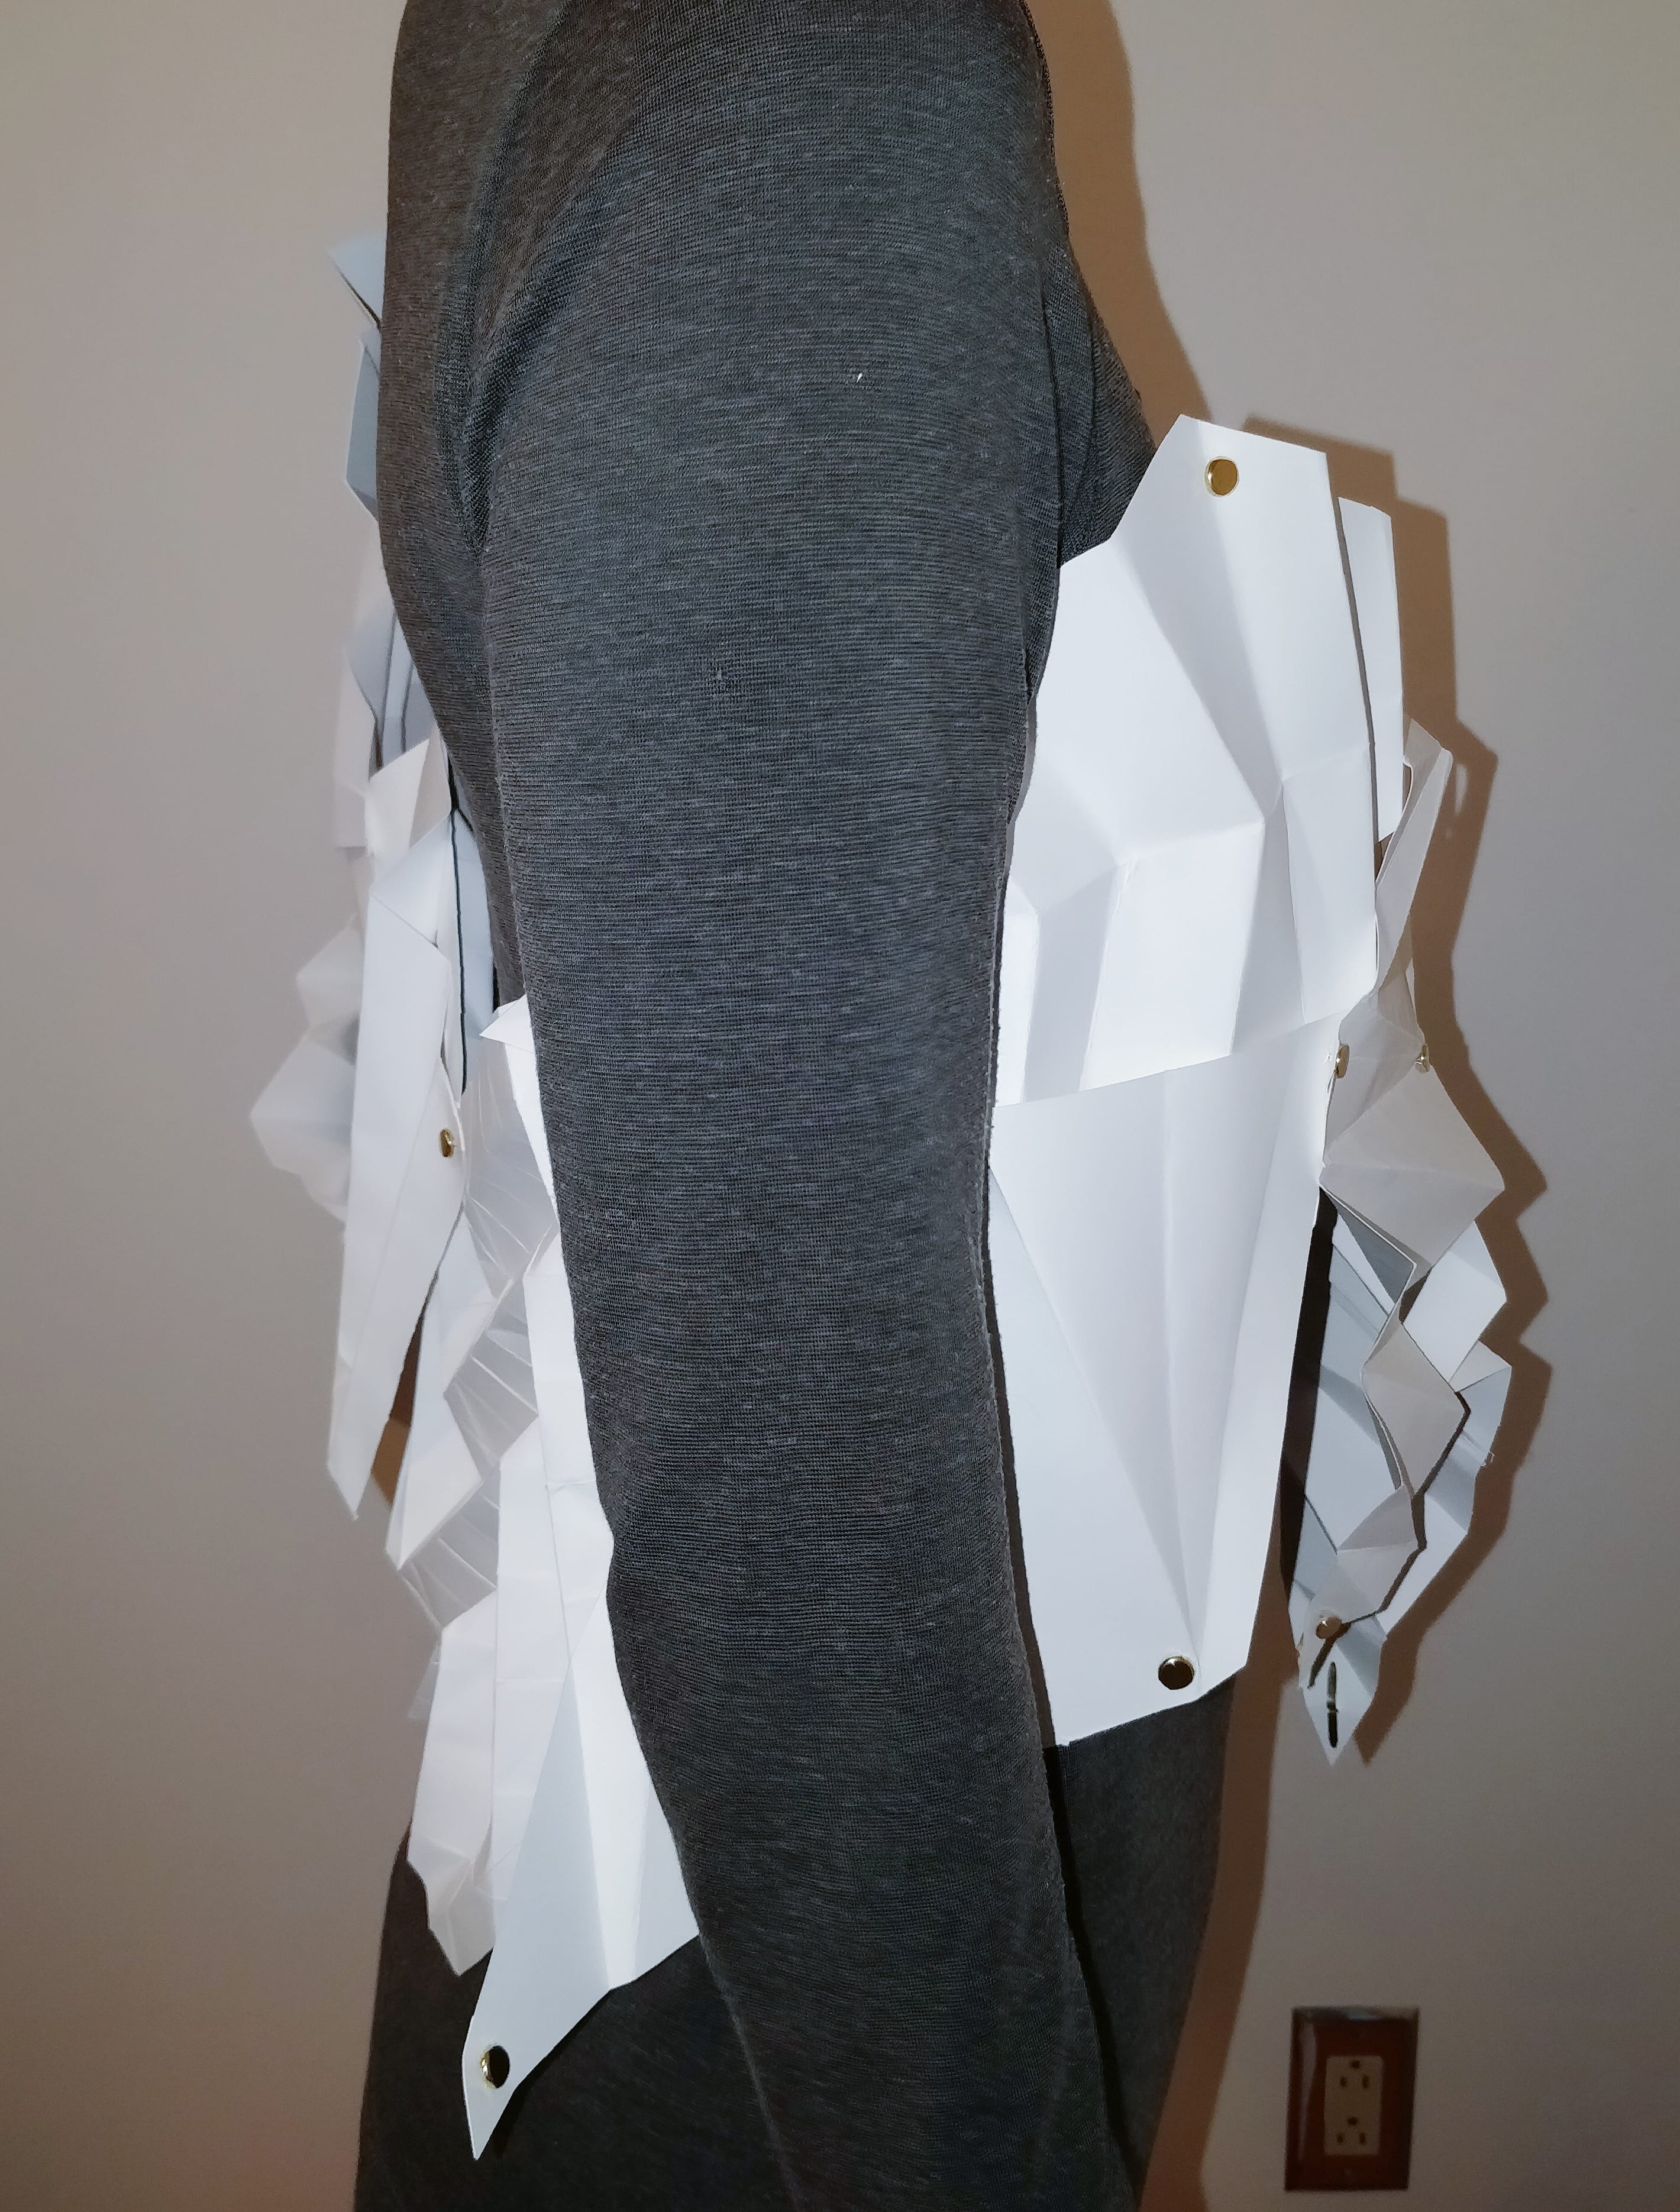
right side

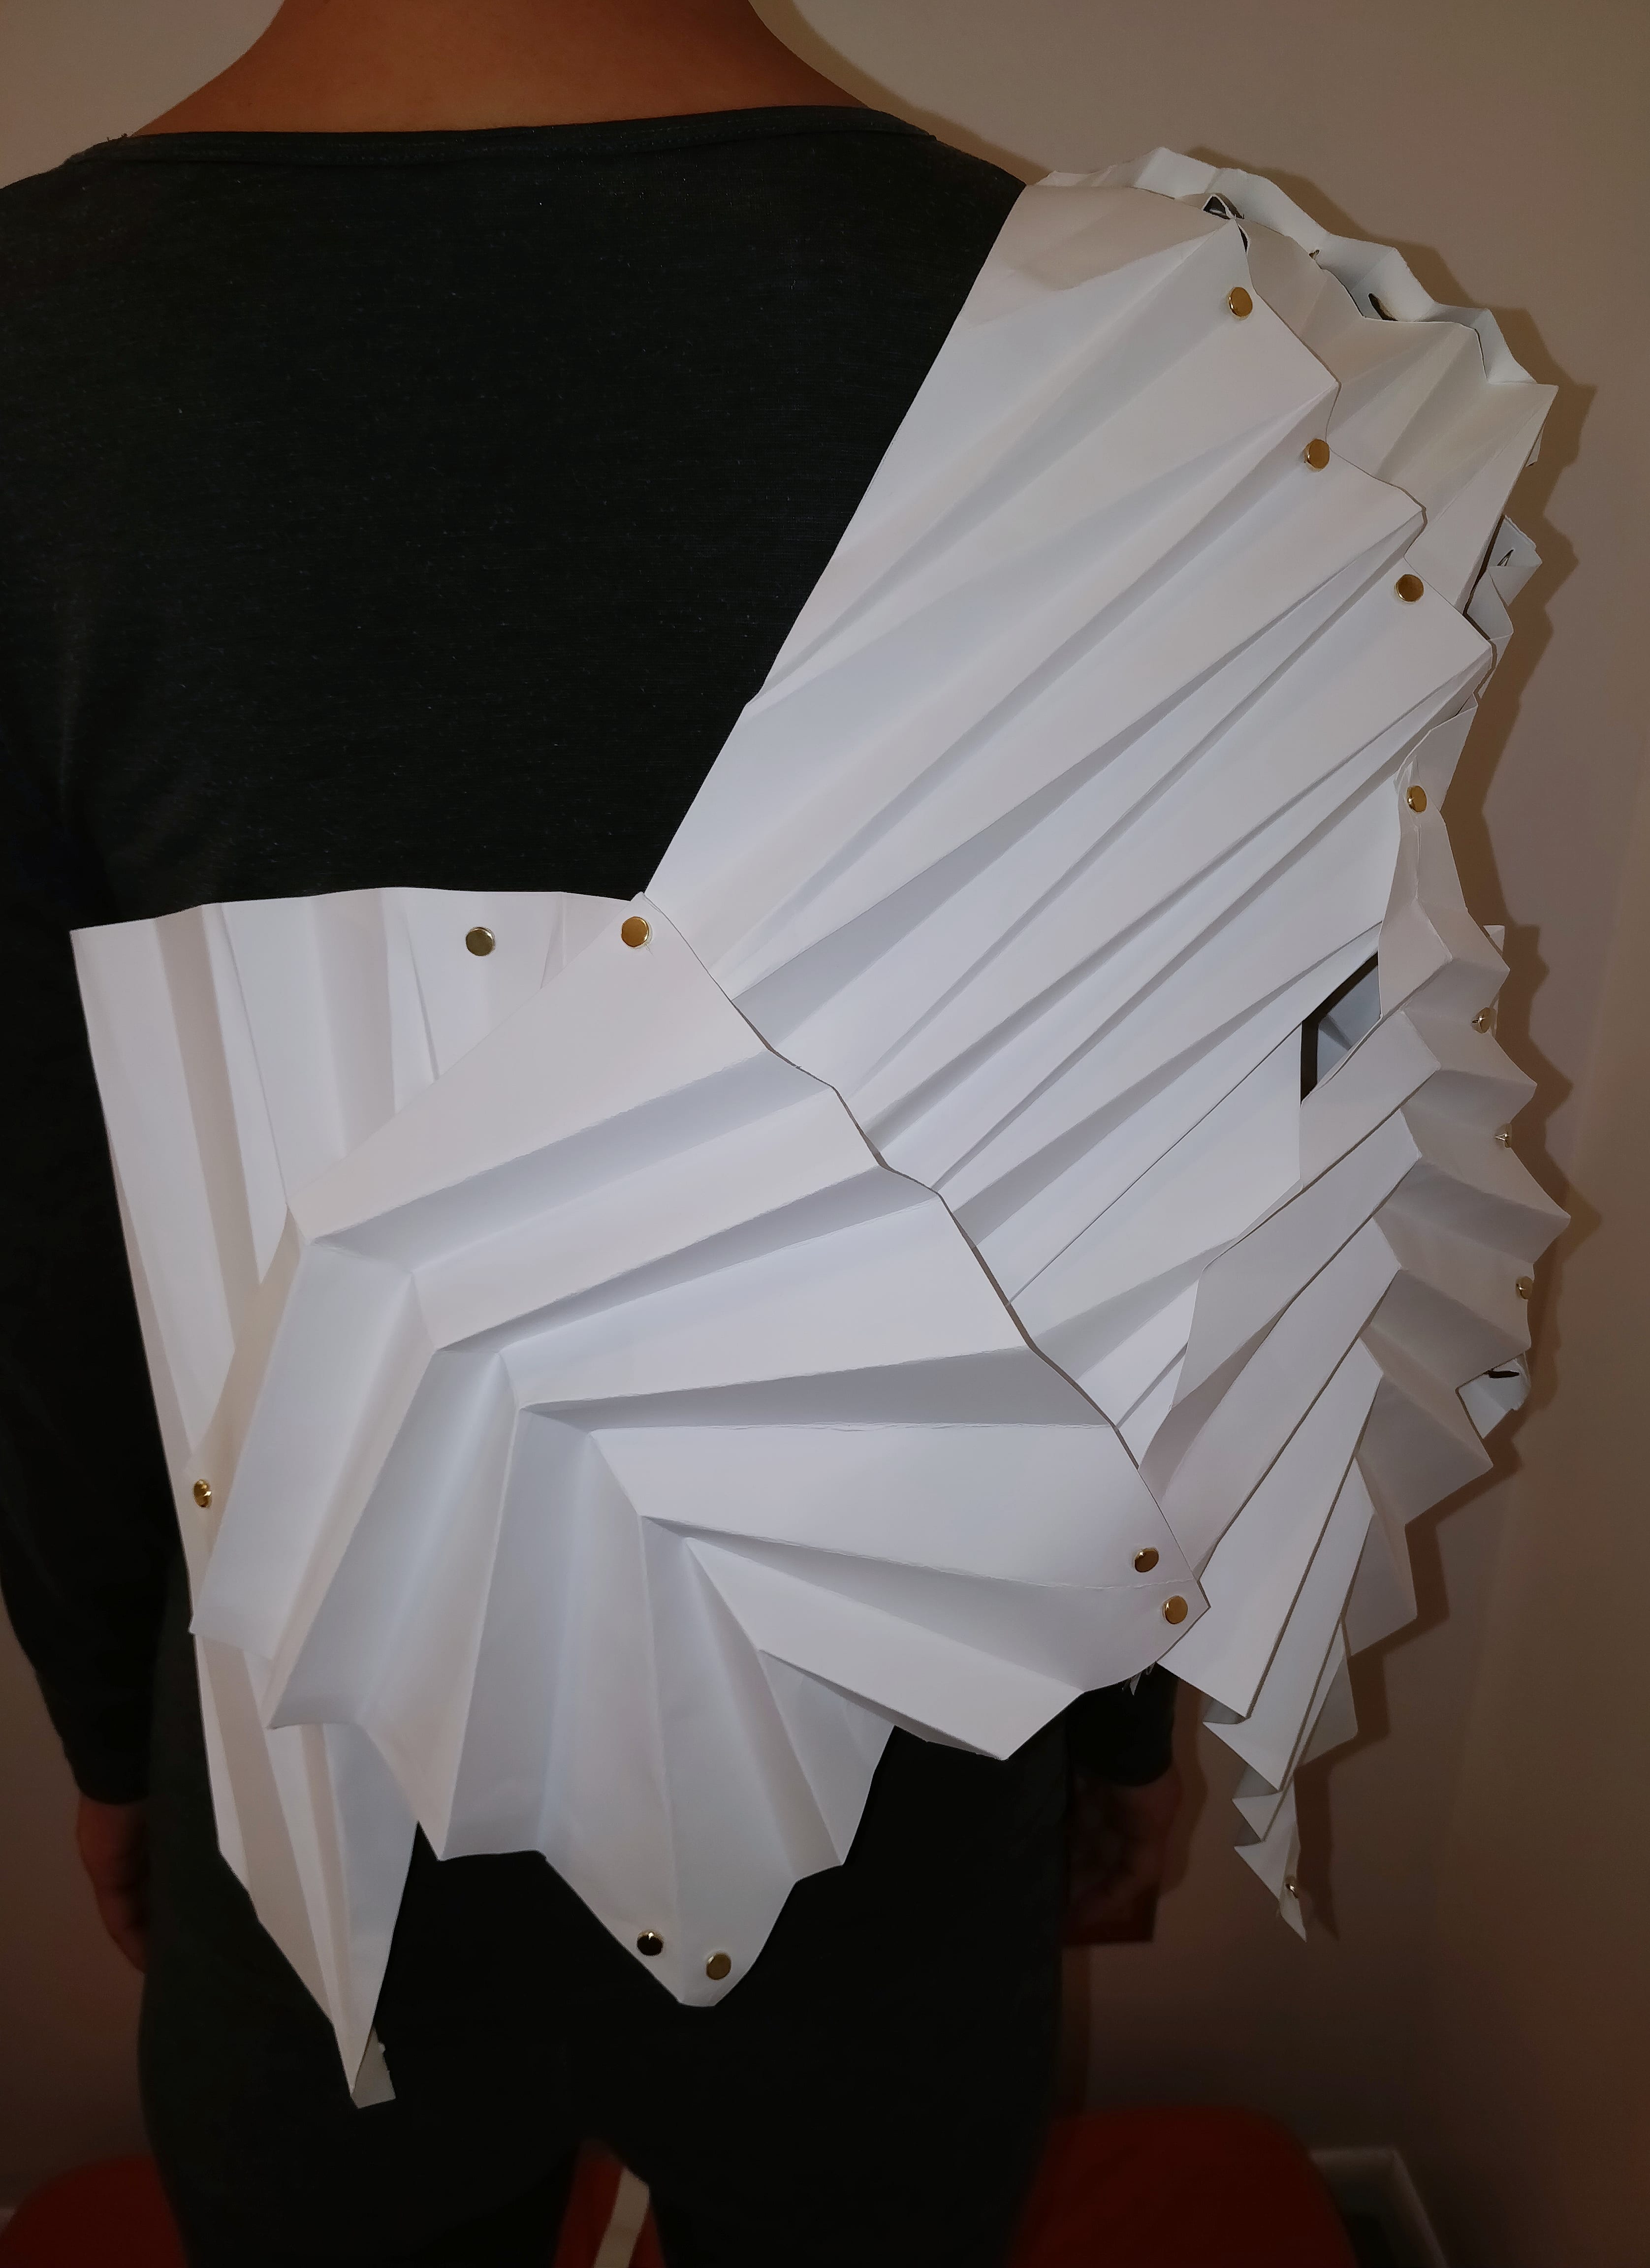
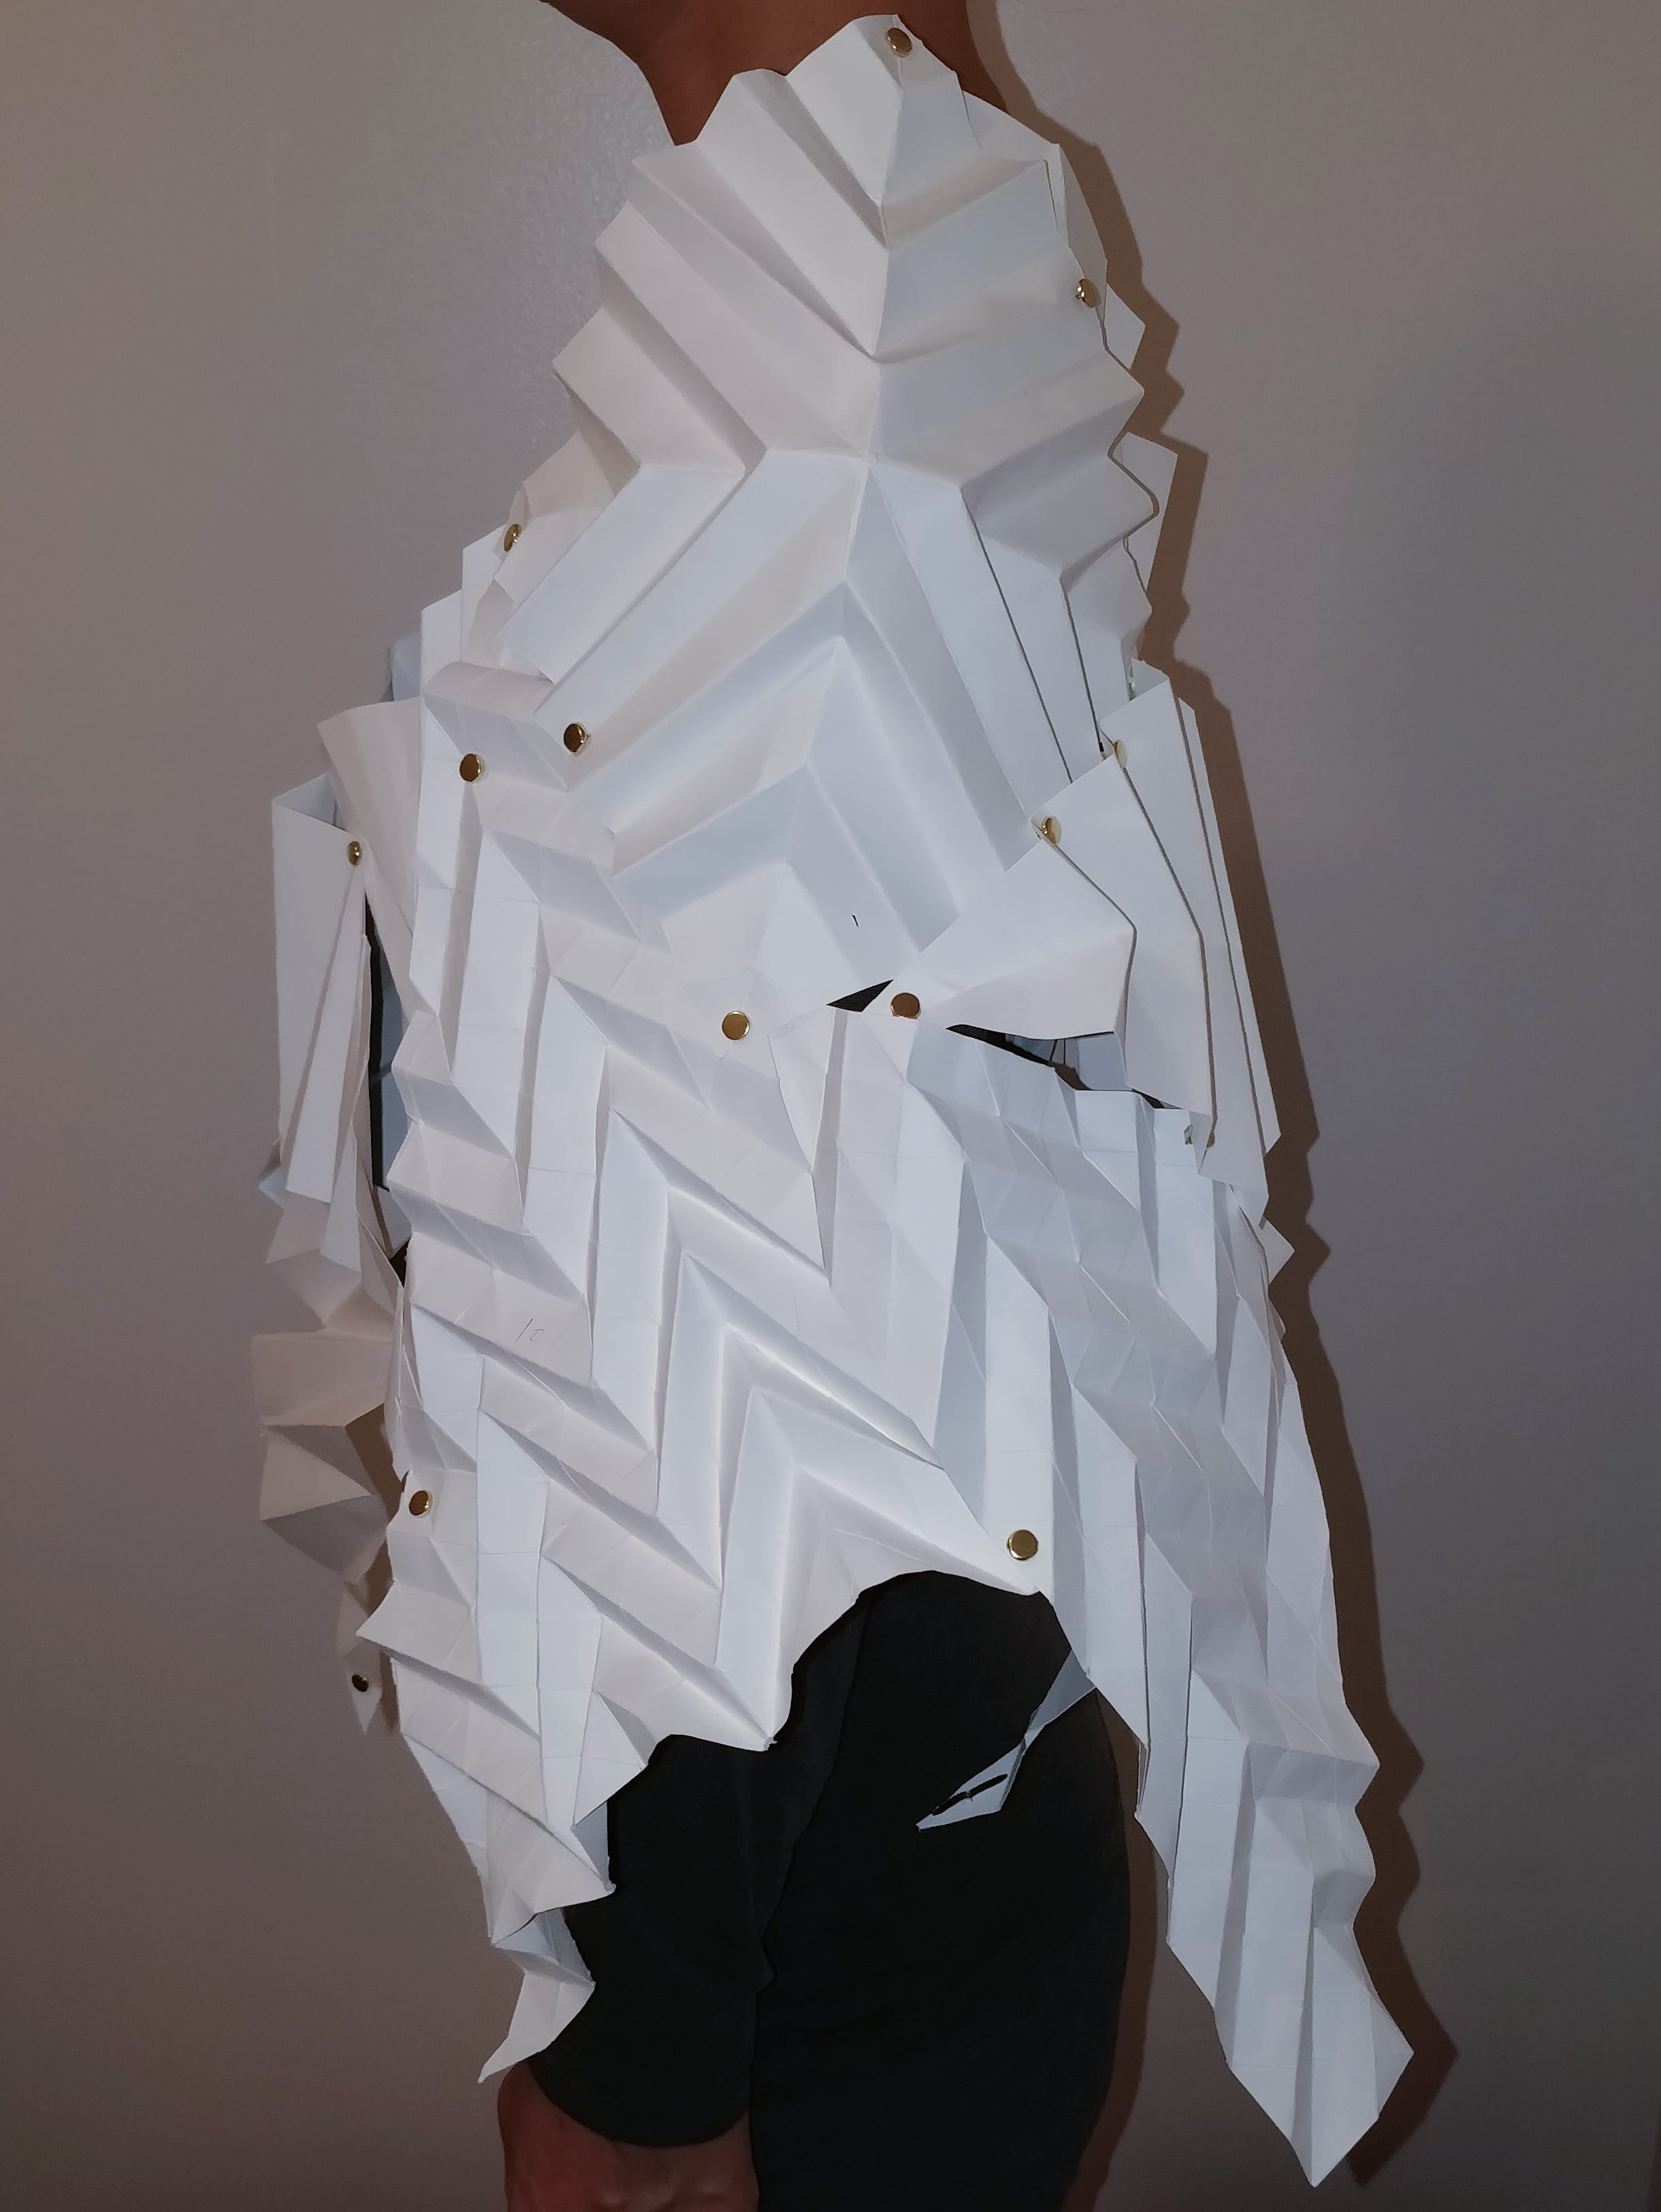
left side
layer 2
Reflection
I decided to create an interchangeable garment piece that can be worn as a whole as well as worn separated into two pieces. I wanted to focus on how an object can be utilized and how we can benefit from an object being in a shared space or being shared amongst a community. I made this piece specifically to resemble a cape or body armor because I wanted to encompass the idea of a shared item bringing warmth and protection onto a community. I was inspired to create something that had to do with physically connecting people because it is an example of how a shared object brings people together and serves a benefit or use to the people using it. When the garment piece is worn separately amongst two people, its effect is shared amongst the people whether it be keeping warm or acting as a layer of protection.
While creating my final product, I chose to use Bristol paper because I liked how how crisp and clean the folds looked on the paper. I decided to choose a paper medium over fabric because I wanted my design to have a more rigid structure resembling a body armor. At first, the Bristol paper was difficult to use because the I had trouble making origami techniques onto thick paper. But it was still manageable and I was able to figure out which patterns looked best on the paper to create the drapery effect I was going for. After making various patterns, I decided focus more on the chevron triangular pattern because I liked how it appeared interlocking with other patterns and the interesting texture it created when overlapped with different sizes of the same print. I enjoyed using the paper fasteners because they were sturdy enough to keep the sheets of Bristol paper together but also allow slight movement in between the pieces overlapped.
I used the Bristol tank top as a base to maintain the overall structure of the garment. I attached the pieces onto the base with the paper fasteners and made layer 1 and layer 2 separately. This made the process of creating the piece a lot more efficient and easy for me to see how the piece looked as I added more layers. At the end, I detached the parts from the base and it was able to hold its shape on its own. I was easily able to combine layer 1 and 2 easily by wearing layer 1 on top of layer 2.
Overall, I found this assignment challenging to create a garment piece that would wrap around the body seamlessly and hold its shape. I never imagined being able to make a garment piece out of paper using mechanical connectors. This was also a tedious process of going back and forth layers in order to see how the separate layers would look attached. I enjoyed the making process of this assignment because it challenged me to try out techniques I’ve never been exposed to before and I was able to learn from it.