PROJECT#3- Social-Ecological Space
Our light installation is being designed for children from the ages of 5-8. When kids are picked up late from school by their parents they are often taken to a supervised room to wait. This is usually quite sad and lonely so we wanted to make a light that could be installed in the room to make it a bit more fun. We have also decided to them the light around the three states of water to relate the piece to topics kids learn in school. The three states, while using sustainable materials, touch on how they are being destroyed or affected by climate change and pollution
All of our pieces are interactive in some way:
- They tell stories
- Have moveable parts
- Facilitate movement around the light to observe different parts
- Create reflections
For my light installation I focused on water’s solid state as Ice.
Research:
- We are designing this installation for younger children, although it can be something for all ages it is mostly going to attract the attention of younger kids. We thought of when kids are put in a room to wait for their parents after school if they are late. This is quite sad so a fun light installation could make this waiting more enjoyable.
- A chandelier is usually a light fixture that is attached to a wall or ceiling. The first known concept to be introduced in the evolution of lighting would of course be natural sunlight, people utilized this even until this day. Then people started to experiment more and go into fire whether that was torches, bonfires, etc. Candles and gas lamps started to become more popular, then it eventually turned into the light bulb which is what is used today. More developed and modern light fixtures would be considered as LED lights.
- Art Installation: Art Installation is an artistic genre of three-dimensional works that often are site-specific and designed to transform the perception of a space. Examples of these art installations would be James Turrell, Olafur Eliasson, & Dan Flavin. These artists focus on different colored lights different opacity in light.


We also did some research on how children perceive the world and react to light and colour to influence our piece.

Mood Board:

Inspiration:
We were inspired by kids toys, specifically building blocks. All the lights when stacked together will resemble a whimsical stacked structure similar to building block creations.
We also looked at some different forms of biomimicry to inspire our natural components about water, ice and air.

-25wguhu")


Group Timeline:
Thursday Nov. 15: Decide the final concept and work on sketches
Tuesday Nov. 20:Work on mock-ups
Tuesday Nov. 27: Continue working on mock-ups
Thursday Nov. 29: Start working on final product
Tuesday Dec. 4: Work on final product
Thursday Dec. 6: Work on final product
Tuesday Dec. 11: Work on final Product
Thursday Dec. 13: Final Presentation!
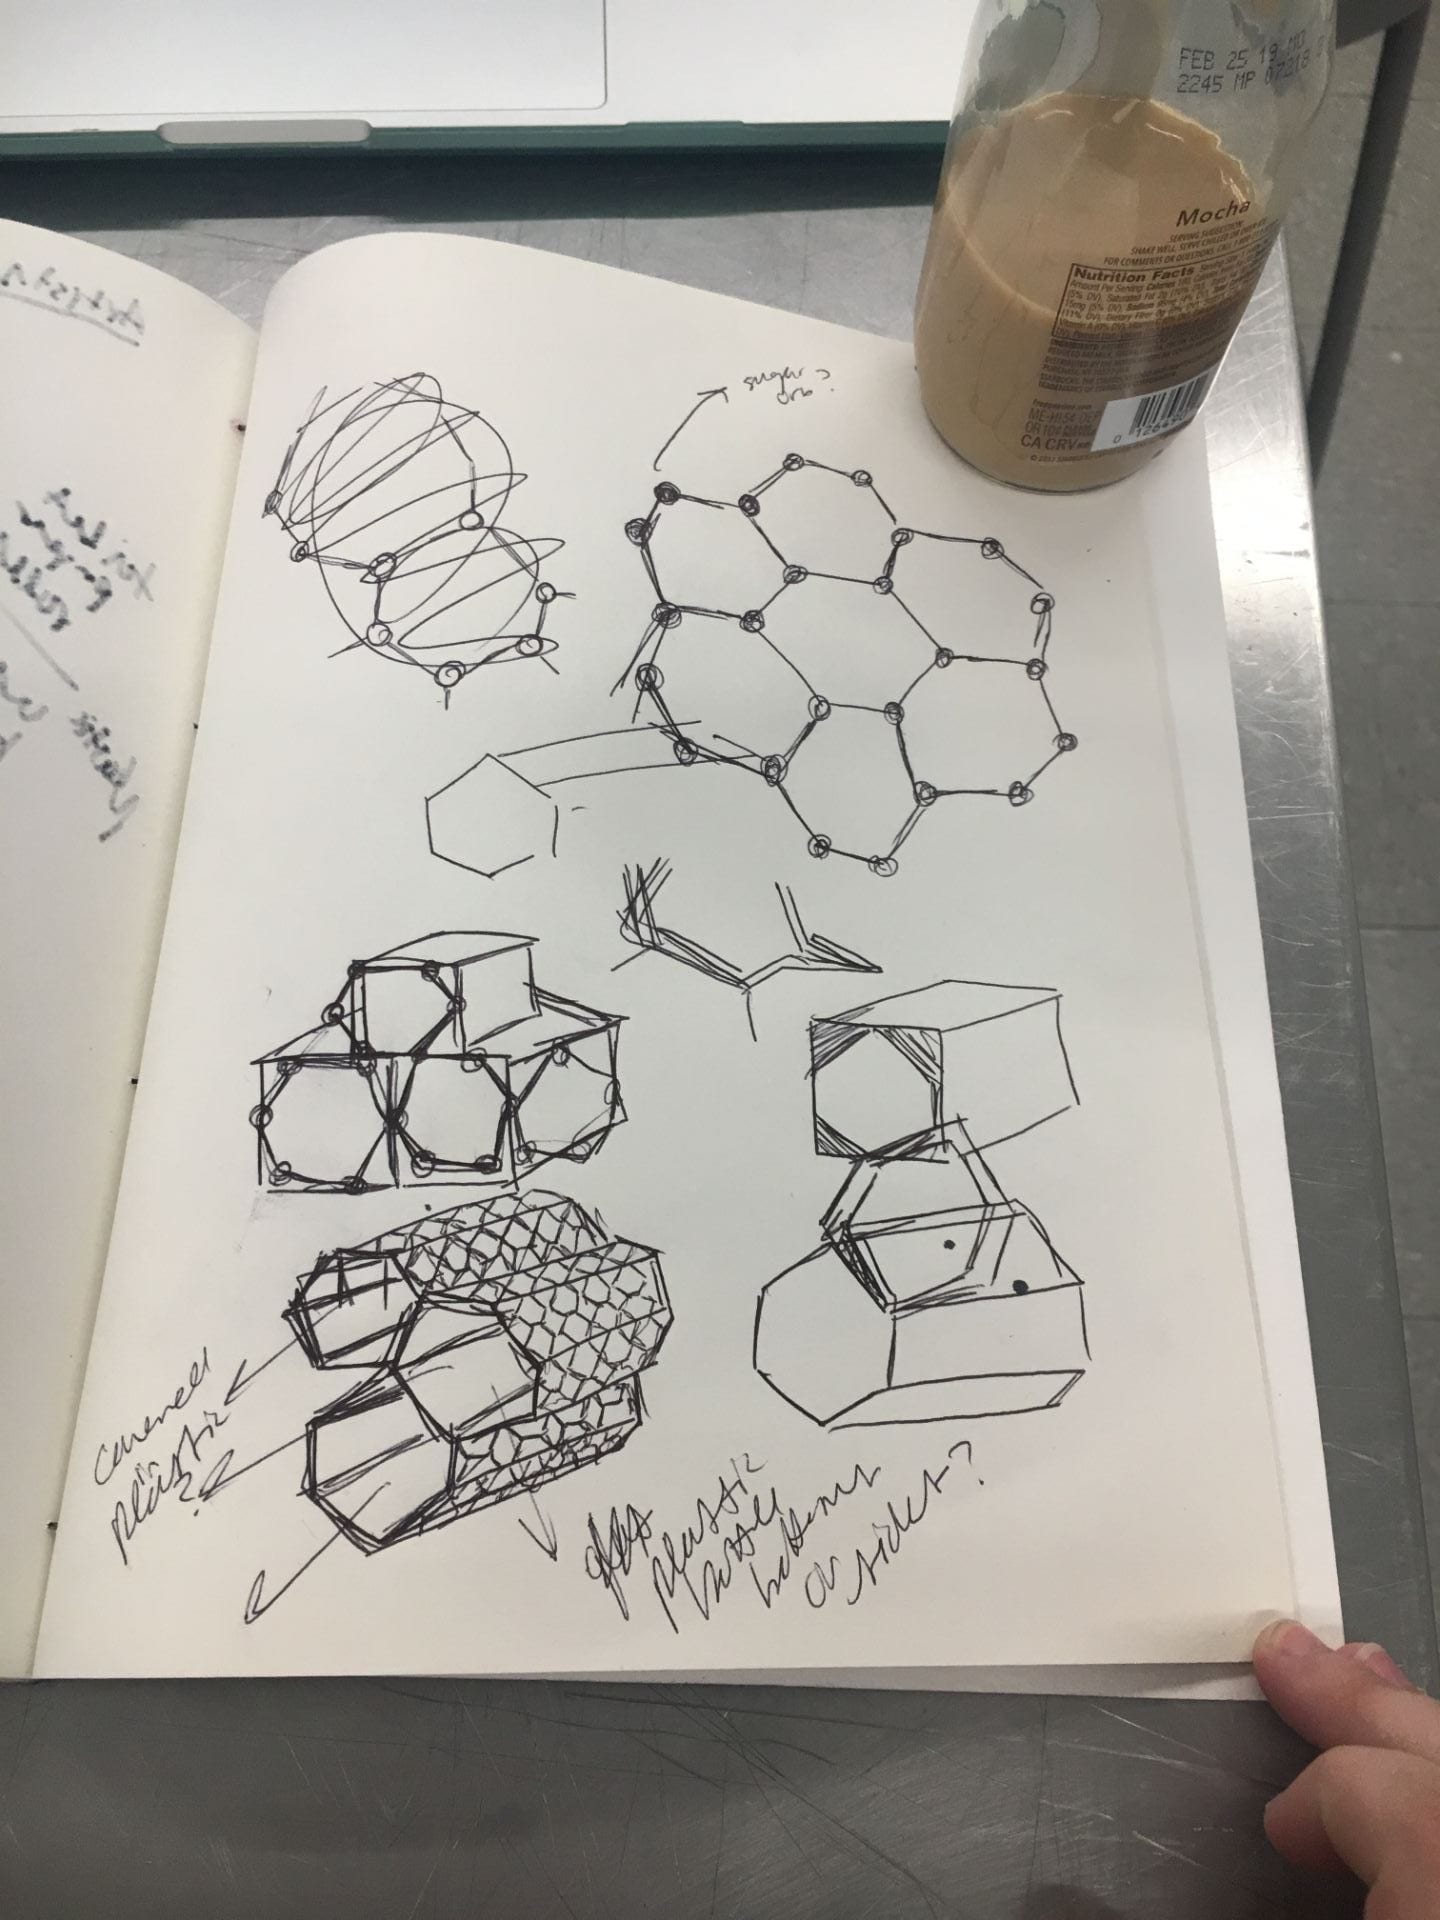
Ideation/Concept Development:
These are some of my initial concept sketches.


3D Modeling/Material Experimentation:
To test my idea of freezing water in up-cycled bottles for my piece I decided to test how long it would take the ice to melt. However, I ended up overfilling the bottle and the glass broke when the water expanded whilst freezing. To make matters worse, whilst it was sitting out defrosting before I recycled it, the bottle ended up actually exploding. I’m glad I tested this method because it would have been an absolute disaster to have the final piece crack or explode after freezing.


Instead of using actual water or ice I decided to research some other ways I could create a similar look. I found information on slime, isomalt and sugar crystals that I am planning on testing to see how they could be used within my piece.
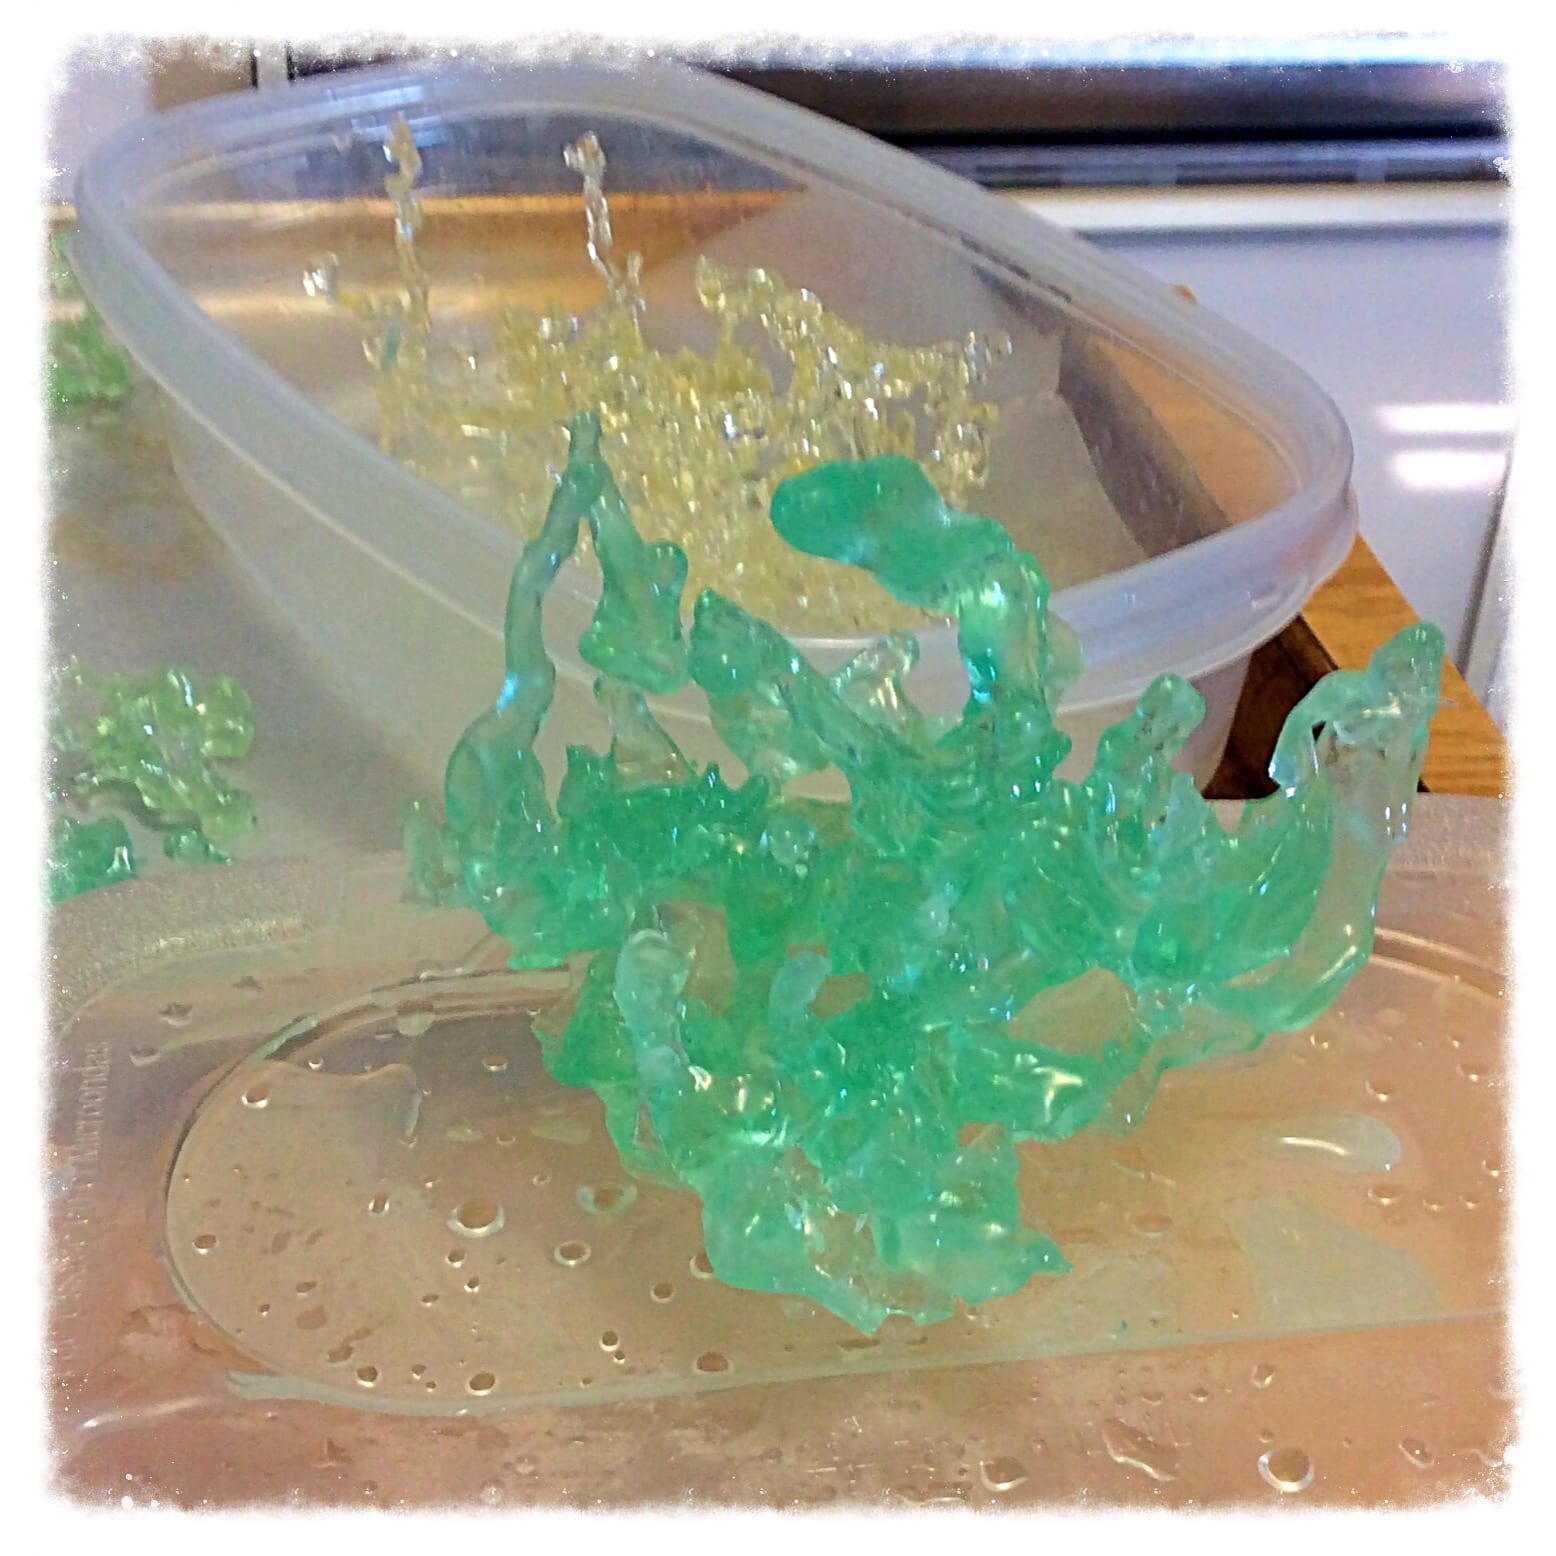
Isomalt or Sugar Coral

I decided I wanted to try and make the sugar bowls to see how this could be used in the assignment. I thought they looked quite a lot like blown glass and when died light blue looked quite ice like as well. Here is my experiment with the material:


Final Results:

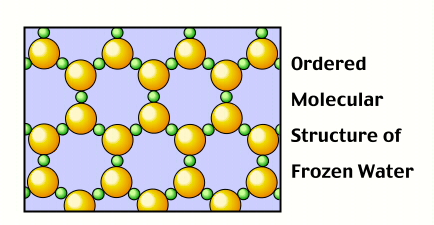
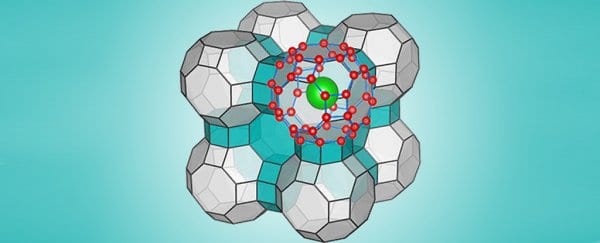
When continuing to plan my piece I also looked into the molecular structure of water and how this could inform my design.


Design Plans + More Modeling:
Below is a diagram I made of my initial design plan. It was shaped similar to the molecular strucure of ice and I planned to have sugar pieces attached inside and outside to decorate it.

Here are some models I did to test this idea:
Process:
Once I began to make the final piece I realized that the sugar was going to be incredibly difficult to work with. As I constructed the piece the sugar often broke or I wasn’t able to find a way to attach it to my cardboard.
I decided to change my design plan into light boxes with hanging pieces of sugar. This way I could include the sugar I had created (which is also the main light reflecting component) but also make sure I could attach it without breakage.
Sketches of new design concept/layout:


Here are the different shaped pieces of sugar I created for the piece:


Experiment with using the sugar with wire to hang

Even when working like this I had some mess ups where I pieces of sugar fell and smashed on the ground. I ended up having to remake another set of rectangles because three of them broke while I was moving materials around.
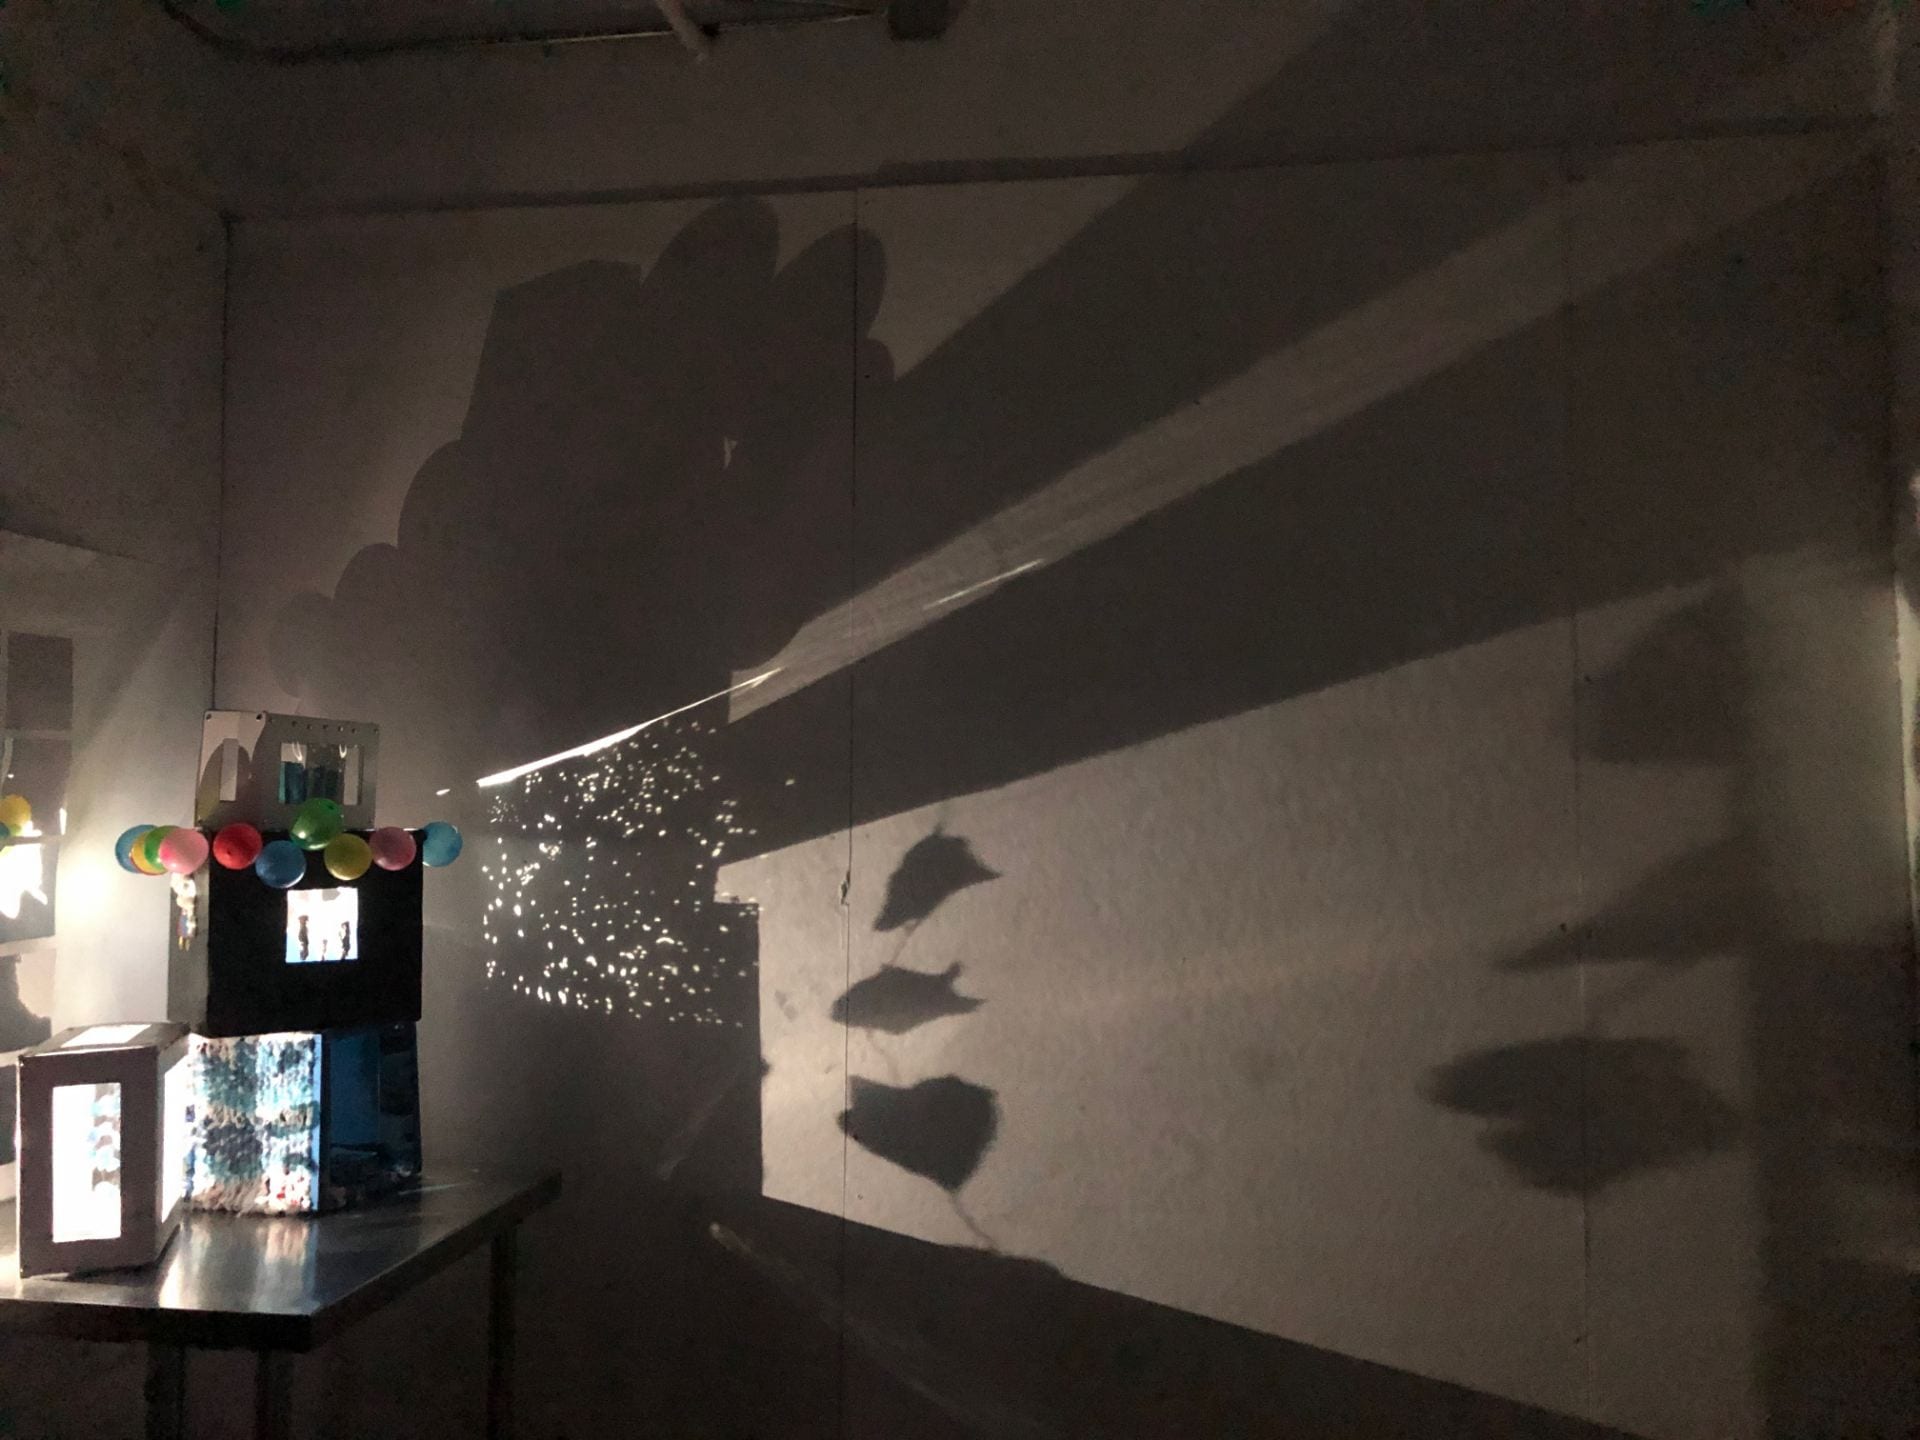
Final Product and Pictures:


Materials:
- Cardboard boxes
- Paper fasteners
- Acetate
- Sugar
- Paint
- Wire


Technical Drawings:


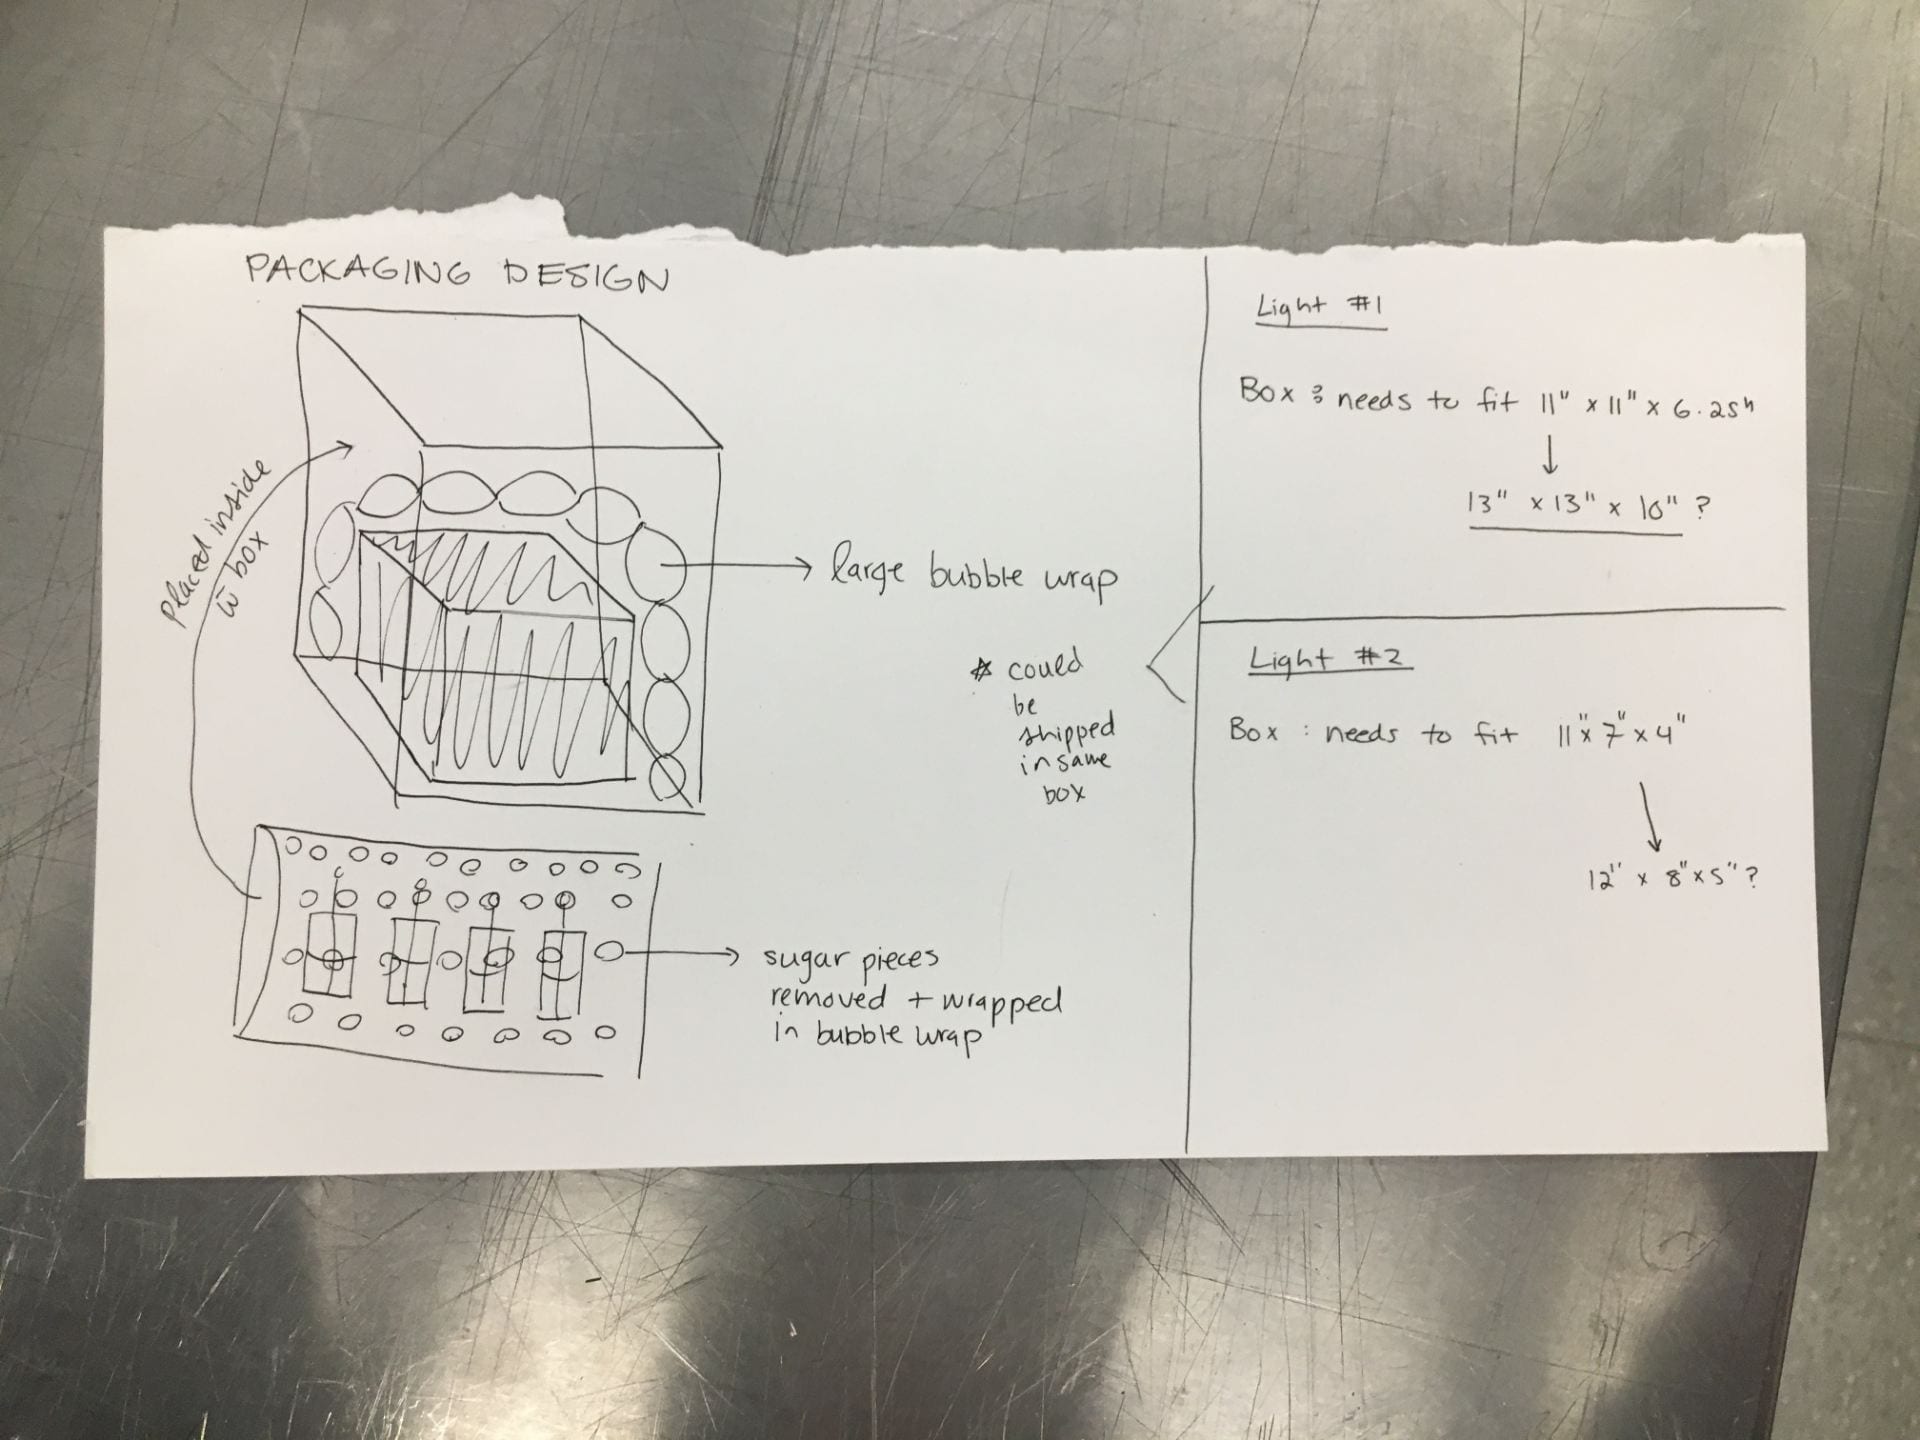
Packaging Design:
Both boxes can have the sugar pieces removed by taking out the paper fasteners. Then they can be collapsed down flat and all pieces can be shipped in flat box shipping (in one box). The sugar pieces would need to be wrapped in bubble wrap to ensure that they do not break.
This is a quick sketch of planning for packing the boxes. However, in the real shipping the box would be collapsed not in tact like it is shown here.
Reflection:
Overall enjoyed this project because it allowed me to really experiment with new materials. Although it was a bit of a struggle to work with the sugar, this experimentation process was really interesting to me. I also enjoyed working as a group because it allowed for us to all bounce ideas off of each other and get critiques as we worked to improve our pieces. I think it also worked to our benefit, as the pieces are stronger as an installation when put together. If I were to do this project again I would probably make sure that I did even more testing on the materials before designing the piece so that I know the materials are capable of creating the shape I want. I think it would be interesting to try and work with sugar like this in the future and figure out how it can work the best as a polymer like substitute. There may be ways I could find to coat the pieces so that they are more durable and won’t get sticky. It’s also possible that the recipe could be slightly altered to make them more resilient. Testing these methods may have lead me to figure out a way to improve the material and give me more flexibility in how I built my piece.