Objective:
To create value scales from white to black, one of which needed to be analog and the other photographic. The value scales would then be utilized in the creation of a figure drawing.
Part 1 – Textured Value Scales:
The first step was to create a digital template for our two value scales. We did this through illustrator, where we established nine different tonal values ranging from white to black. The next step was to use photographs of different textures to build the next value scale.
Initial Value Scale
The photographs I chose ranged from trees to rocks to handwritten notes etc. All of these different textures proved to be very successful, especially when I edited the contrast and brightness to match each of the nine values previously created.
Value Scale & Photographic Value Scale
The last step was to establish an analog mark that we would repeat as we went down the value scale. I chose to base my next value scale on small swirls. This is because I knew that the darker the value it was the more texture I would get from the overlapping swirls.

Value Scale, Photographic Scale, and Analog Value Scale
Part 2 – Value Figure Composition:
The next few classes were regulated to the second part of the project, which was the figure drawing. As a person who has never drawn the human figure in this way it first came as a shock, however, I soon began to adjust to the assignment and ended up enjoying it. After sketching the models, we were asked to create a collage of the best drawing, as seen below. I found this experience to be very rewarding as I never looked at the human body from this perspective before. It was very rewarding.
Collage of Figure Drawings
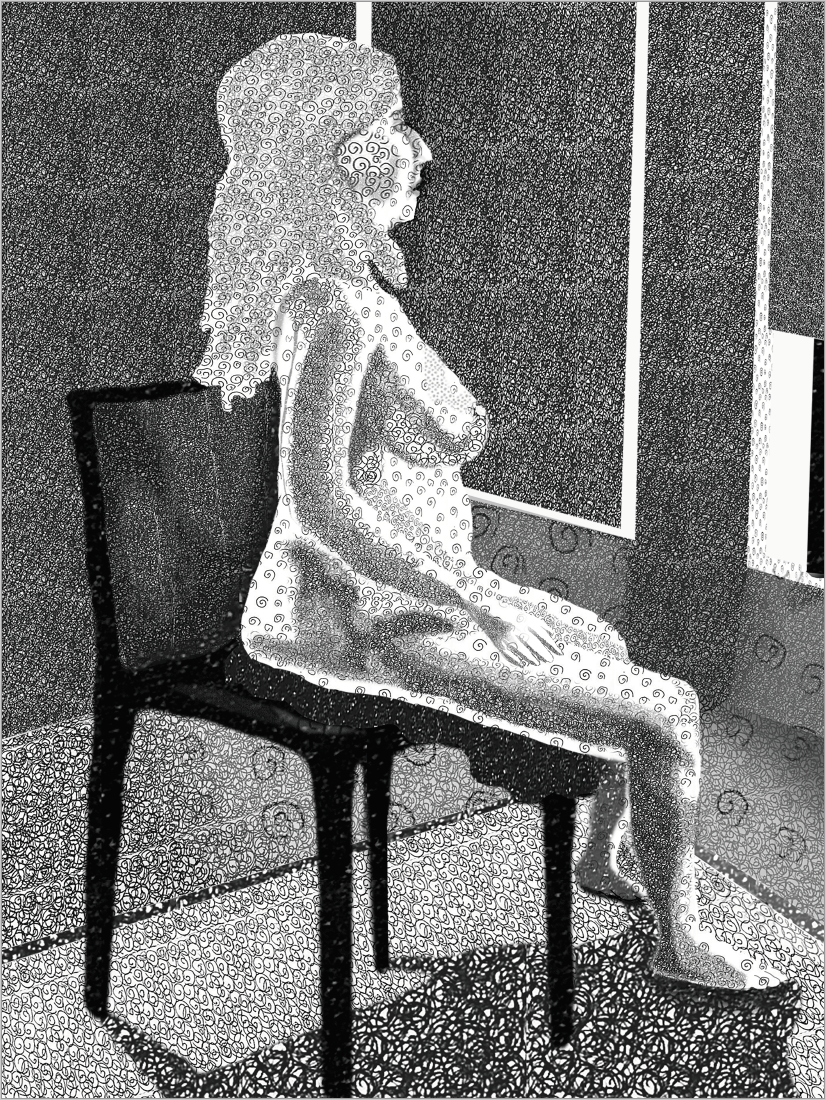
Our last figure drawing session required us to use composition we created to build the digital figure drawing with our value scales, therefore, the drawing had to be developed enough to achieve a sophisticated and intricate final piece. A few techniques I learned in the class proved to be very helpful in the construction of the following composition. These techniques included using your drawing tool as a measurement device (in our case the drawing tool was charcoal) as well as creating a mannequin based off of the model to help with proportions. By utilizing these techniques, my sketch came out quite proportionate and realistic.

Last Figure Drawing
The next step was to take the drawing to our computers and begin using our value scales to build the digital version. I found this to be very tedious as the method in which we added each layer was through a mask. This mask could not be altered so if one were to make a mistake in the shape they would have to delete it and start again. I went through this a few times. Nonetheless, by adding layers upon layers to the image it comes out being successful as it captures how, in real life, things are built on layers rather than pieced together.

Figure Drawing Update Image
Final:
Reflection:
Overall, this assignment was very informative of the nature of two radically different mediums. Not only did I get more experience with analog methods but I also learned more about programs I use a lot. If I were to change anything about the final piece it would definitely be the minute details of the hands, face, and feet. I had quite a bit of trouble with them as the analog drawing above did not utilize shades in these smaller areas. To remedy this I would have used less contrasting colors as not to make it cartoon-like.


