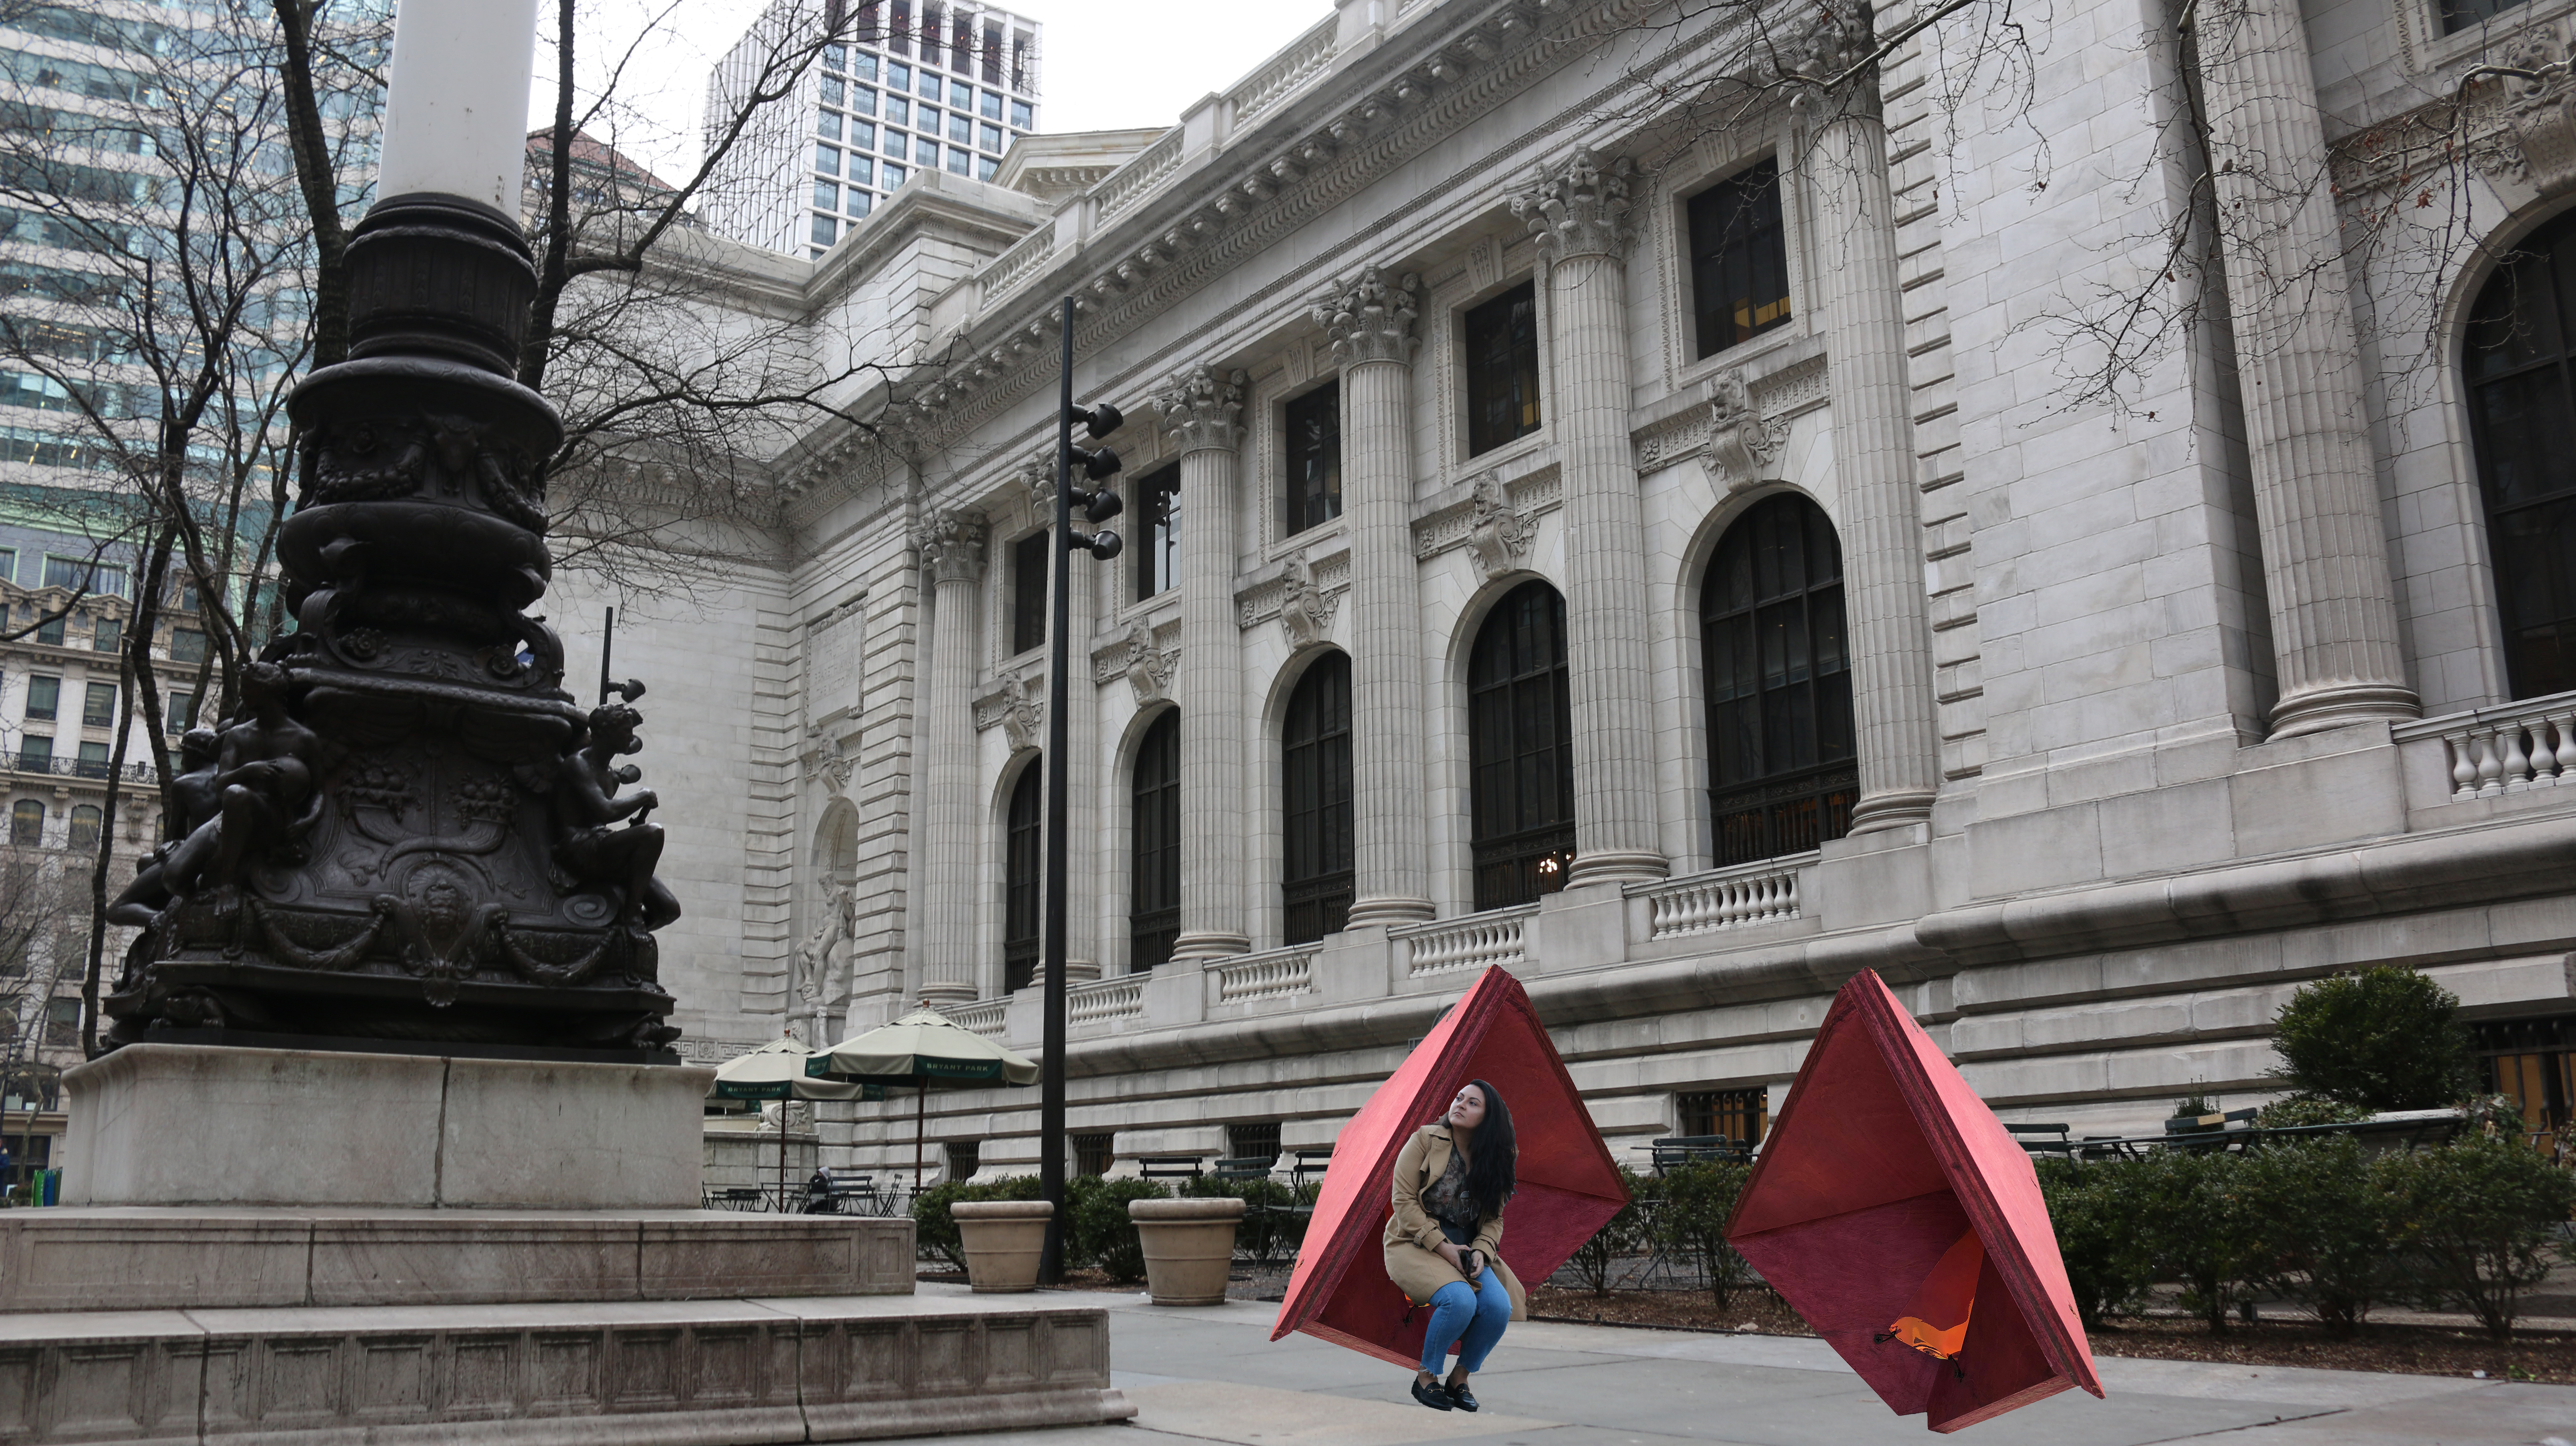
THE COMMUNAL IDEA
The idea behind this is a little enclosed space in the public to rest, be private, yet still accessible. There would be multiple pods in an area to create a sense of alone togetherness. The colors are something of my own style with the rich plum and vibrant hammock.
THE PROCESS
When doing the first sketches, I wanted to go for something a bit simple and hopefully easy to do, since wood is not a materials and all to familiar and confident in. Knowing how long I took with other projects in the past in this class, and how I seemed to make things hard for myself by choosing something hard, that is why I tried to go for something easier. The universe was against me and I ran in to many unnecessary problems.
I chose a diamond form with an opening to enter and sit in. When doing the tape model, for some reason, I did two diamonds, one inside the other (now that I am writing this I realize how that didn’t need to happen). So having these two diamonds, I came up with the idea that there was a flat border in the front of it, not remembering it should be angled like in my bristol model, and so I started basing everything off of that. I made a chip board model that had a flat border. I should have looked to my bristol model for this, since it had angled borders. The chipboard model did not work but I figured I would have a better job of addressing the problem in the medium that is was meant to be made in. Starting on my wooden piece, I still made the flat border, trying my best to make exact measurements so that the pieces were flushed and wouldn’t cause any problems. I finally realized what I was doing wrong and decided to start over. I made four triangles and tired my best to get the right angles to have them fit together.
I ran into trouble trying to get the top two already attached triangles to connect with the bottom. I had the idea to have an oddly angled screw, but that just ended up splitting the wood.
I wanted to stain my wood with something natural, and since the construction wasn’t going as planned, I wanted to go for something extra and make my own stain. I used blackberries and vinegar to create the stain and I really liked the color it produced on my wood.
To finish up the piece I still need an area for a person to actually sit on. Once the structure became tangible, I realized the seat I had first planned on was not going to work. And so, I used material from the open/closed project to create a sort of hammock in the structure.
In the end, my favorite part of this was the outcome of the staining. If I were asked if I could do it again what would I do better, I’d maybe say change the whole design but this field really isn’t my forte and so no matter what I chose I would face problems, and so why no this design.
MINI ASSIGNMENT:


SKETCHES:


BRISTOL MODEL


REAL SCALE WALL TAPE:


FINAL SKETCH WITH WALL TAPE MEASUREMENTS & SMALL SCALE MEASUREMENTS:
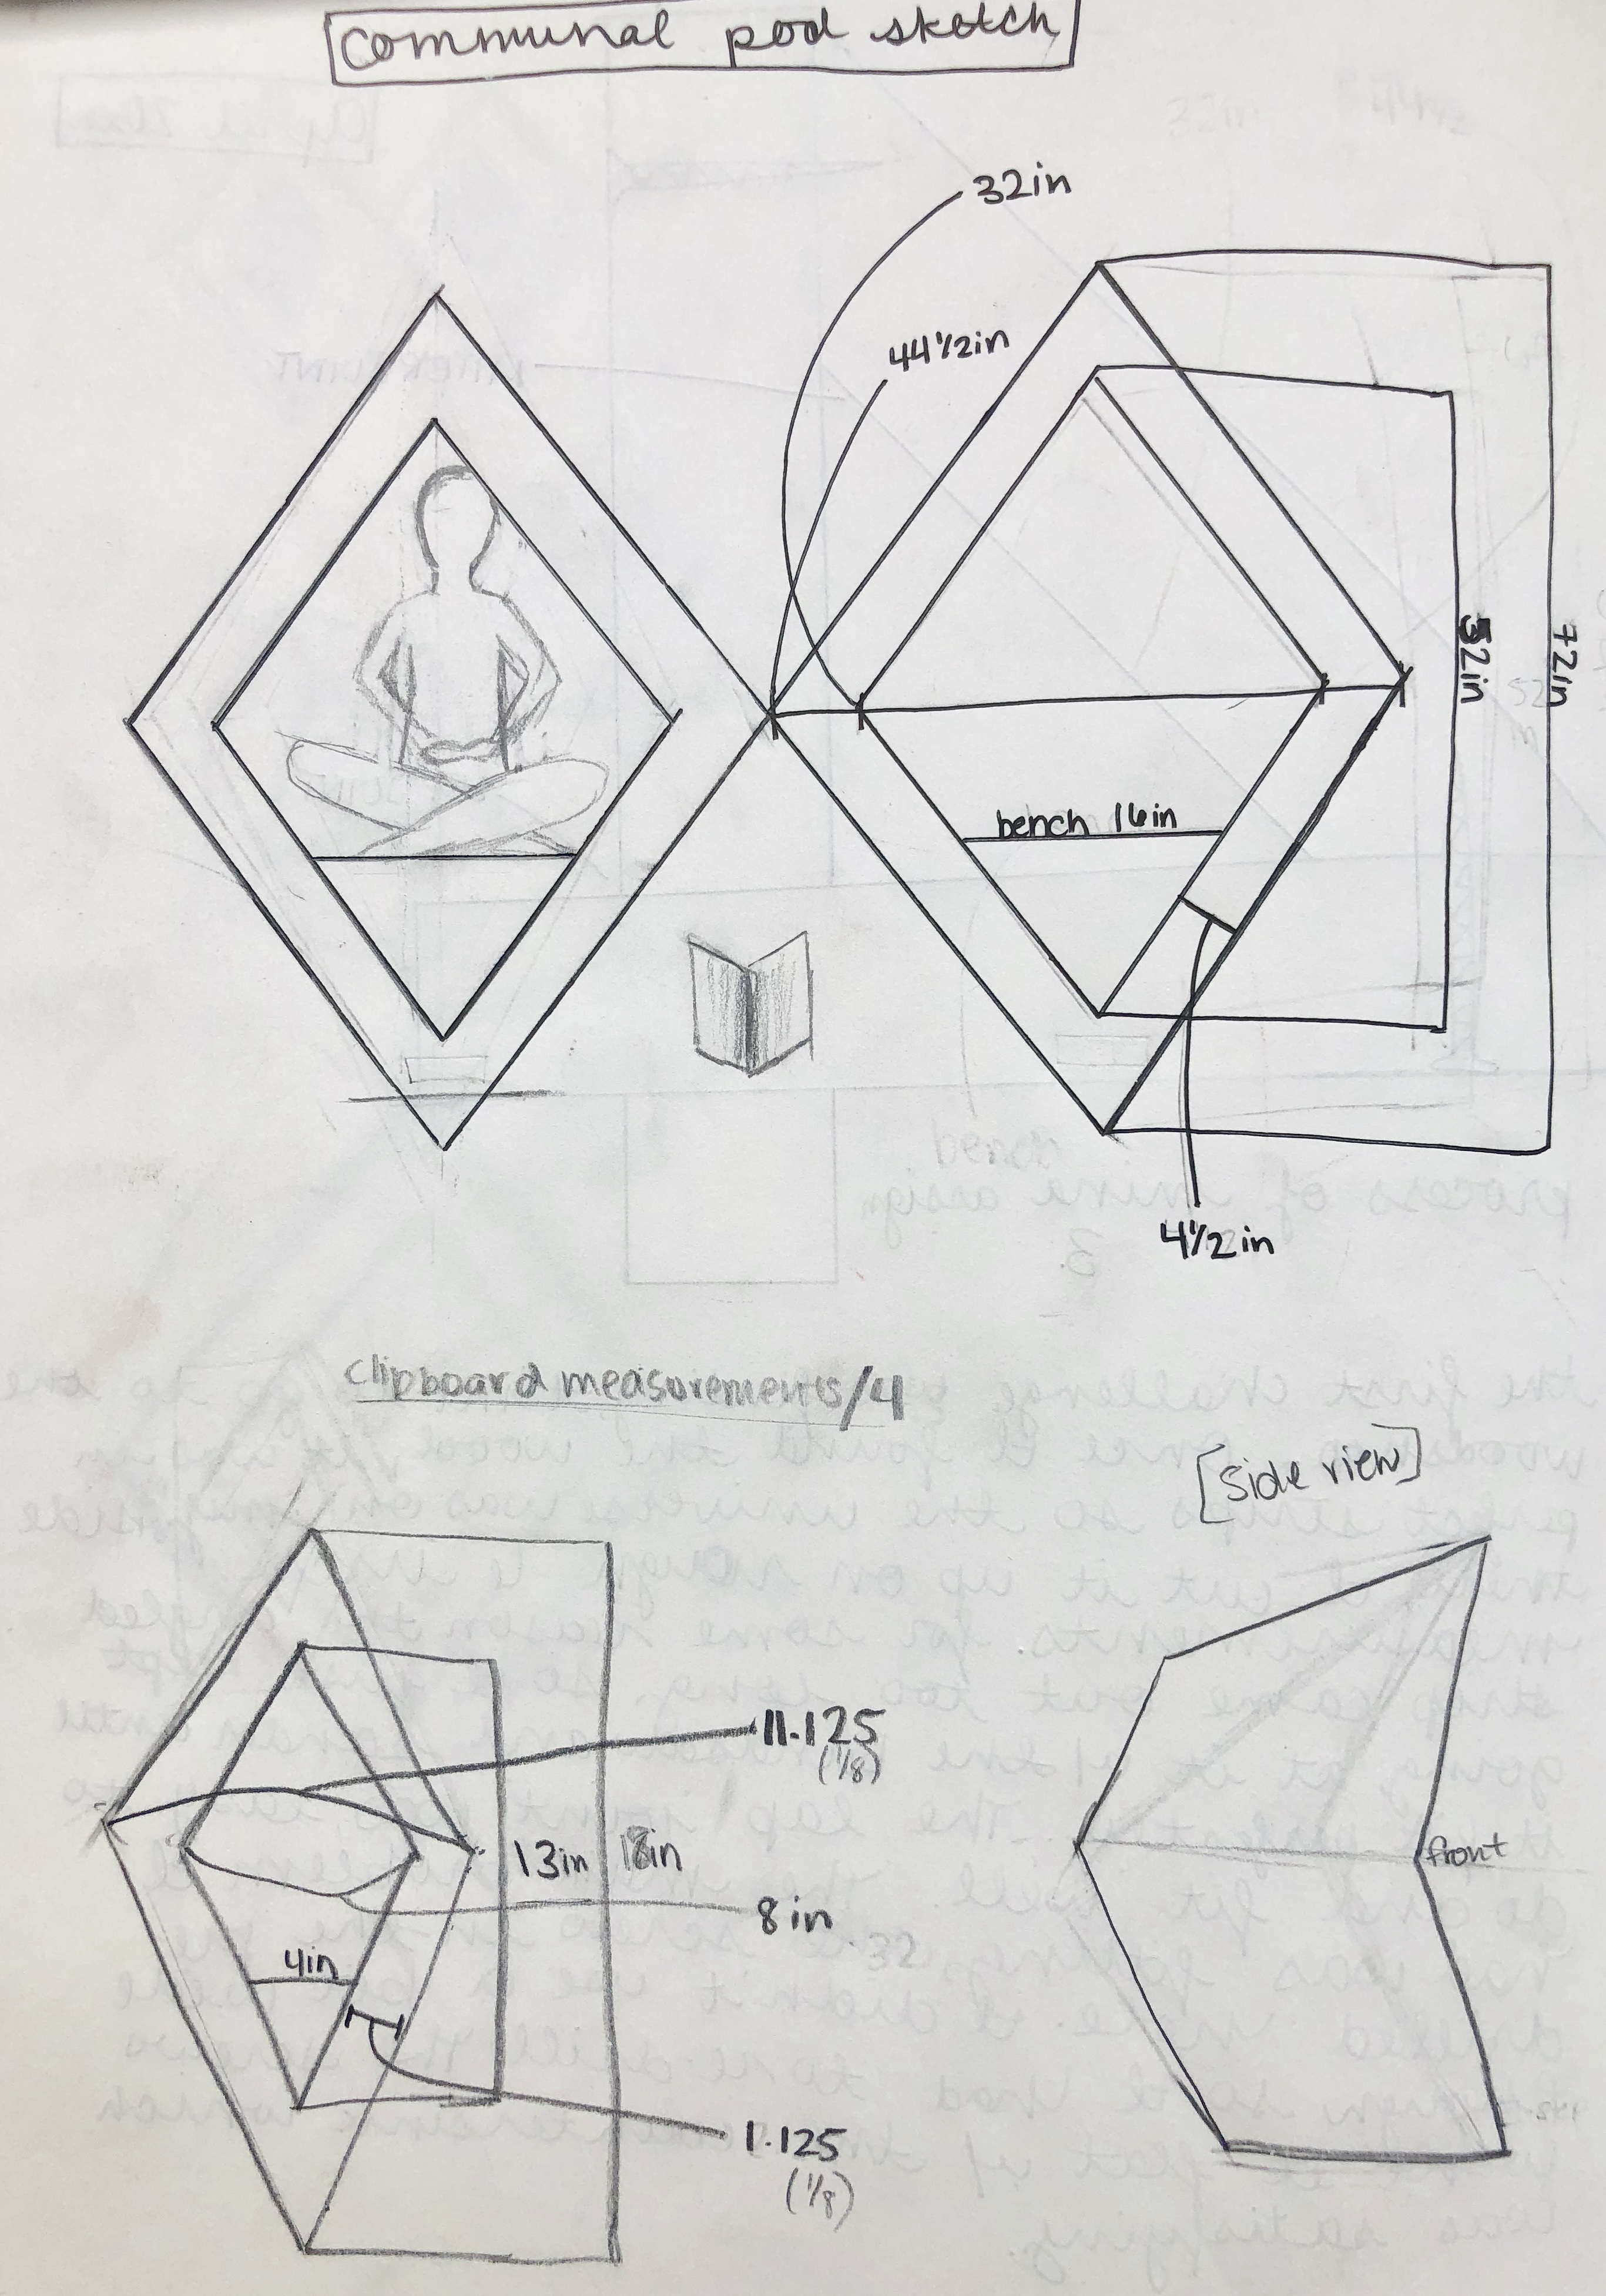
CHIPBOARD MODEL (failure):


PROCESS…
FIRST TRY, FRAME (failure):


SECOND TRY, NOT SCREWED TOGETHER:

Used tape to hold it together while I tried to decipher the angles.
SCREWED TOGETHER AND STANDING ON IT’S OWN:

FINAL:

OBJECT IN LOCATION:
-K.K.