Scraps: Fashion, Textiles, and Creative Reuse at the Cooper Hewitt Museum
I visited the Copper Hewitt as part of my research for this project. The exhibit was all about Reusing and repurposing material that normally would go to waste. I noticed that the objects that caught my eye were the gold-colored threads and fabrics and also the selvedges of fabrics (I have always wondered why most designers do not use them in their products). It really interested me how Luisa Cevese incorporated this waste material into her designs and created pouches out of it. The gold quality of the golden threads creates a nice contrast against the polyurethane she uses to bind all the threads/selvedges together.


Shirt Deconstruction
As the second part of this project we had to take a shirt apart so that we would be able to make patterns out of it. I bought my shirt from Goodwill for 8 dollars. It was a nice deal since the shirt was made from black raw silk and had 6 raw mother of pearl buttons. I chose to seam rip it, instead of cutting it, so that it was easier to see how much seam allowance there was in between the pieces. I was not aware it was going to take as long as it did until I was about half the way through. However, it did make it way easier to figure out my seam allowances and my patterns came out pretty accurate.


Designing the shirt
For this project I knew that I had to use scrap fabrics from my previous project. I initially chose the black shirt because I thought it was going to go well with the red fabric that I had used to make my previous project from. However, when I figured out what I wanted to do, I found out that I did not have enough red fabric. I wanted to do a roll collar, cut on the bias so I knew that it was going to take a lot of fabric to make. I knew I had to buy some fabric but, to fill the requirements, I was still going to use my scrap pieces from the shirt I deconstructed.
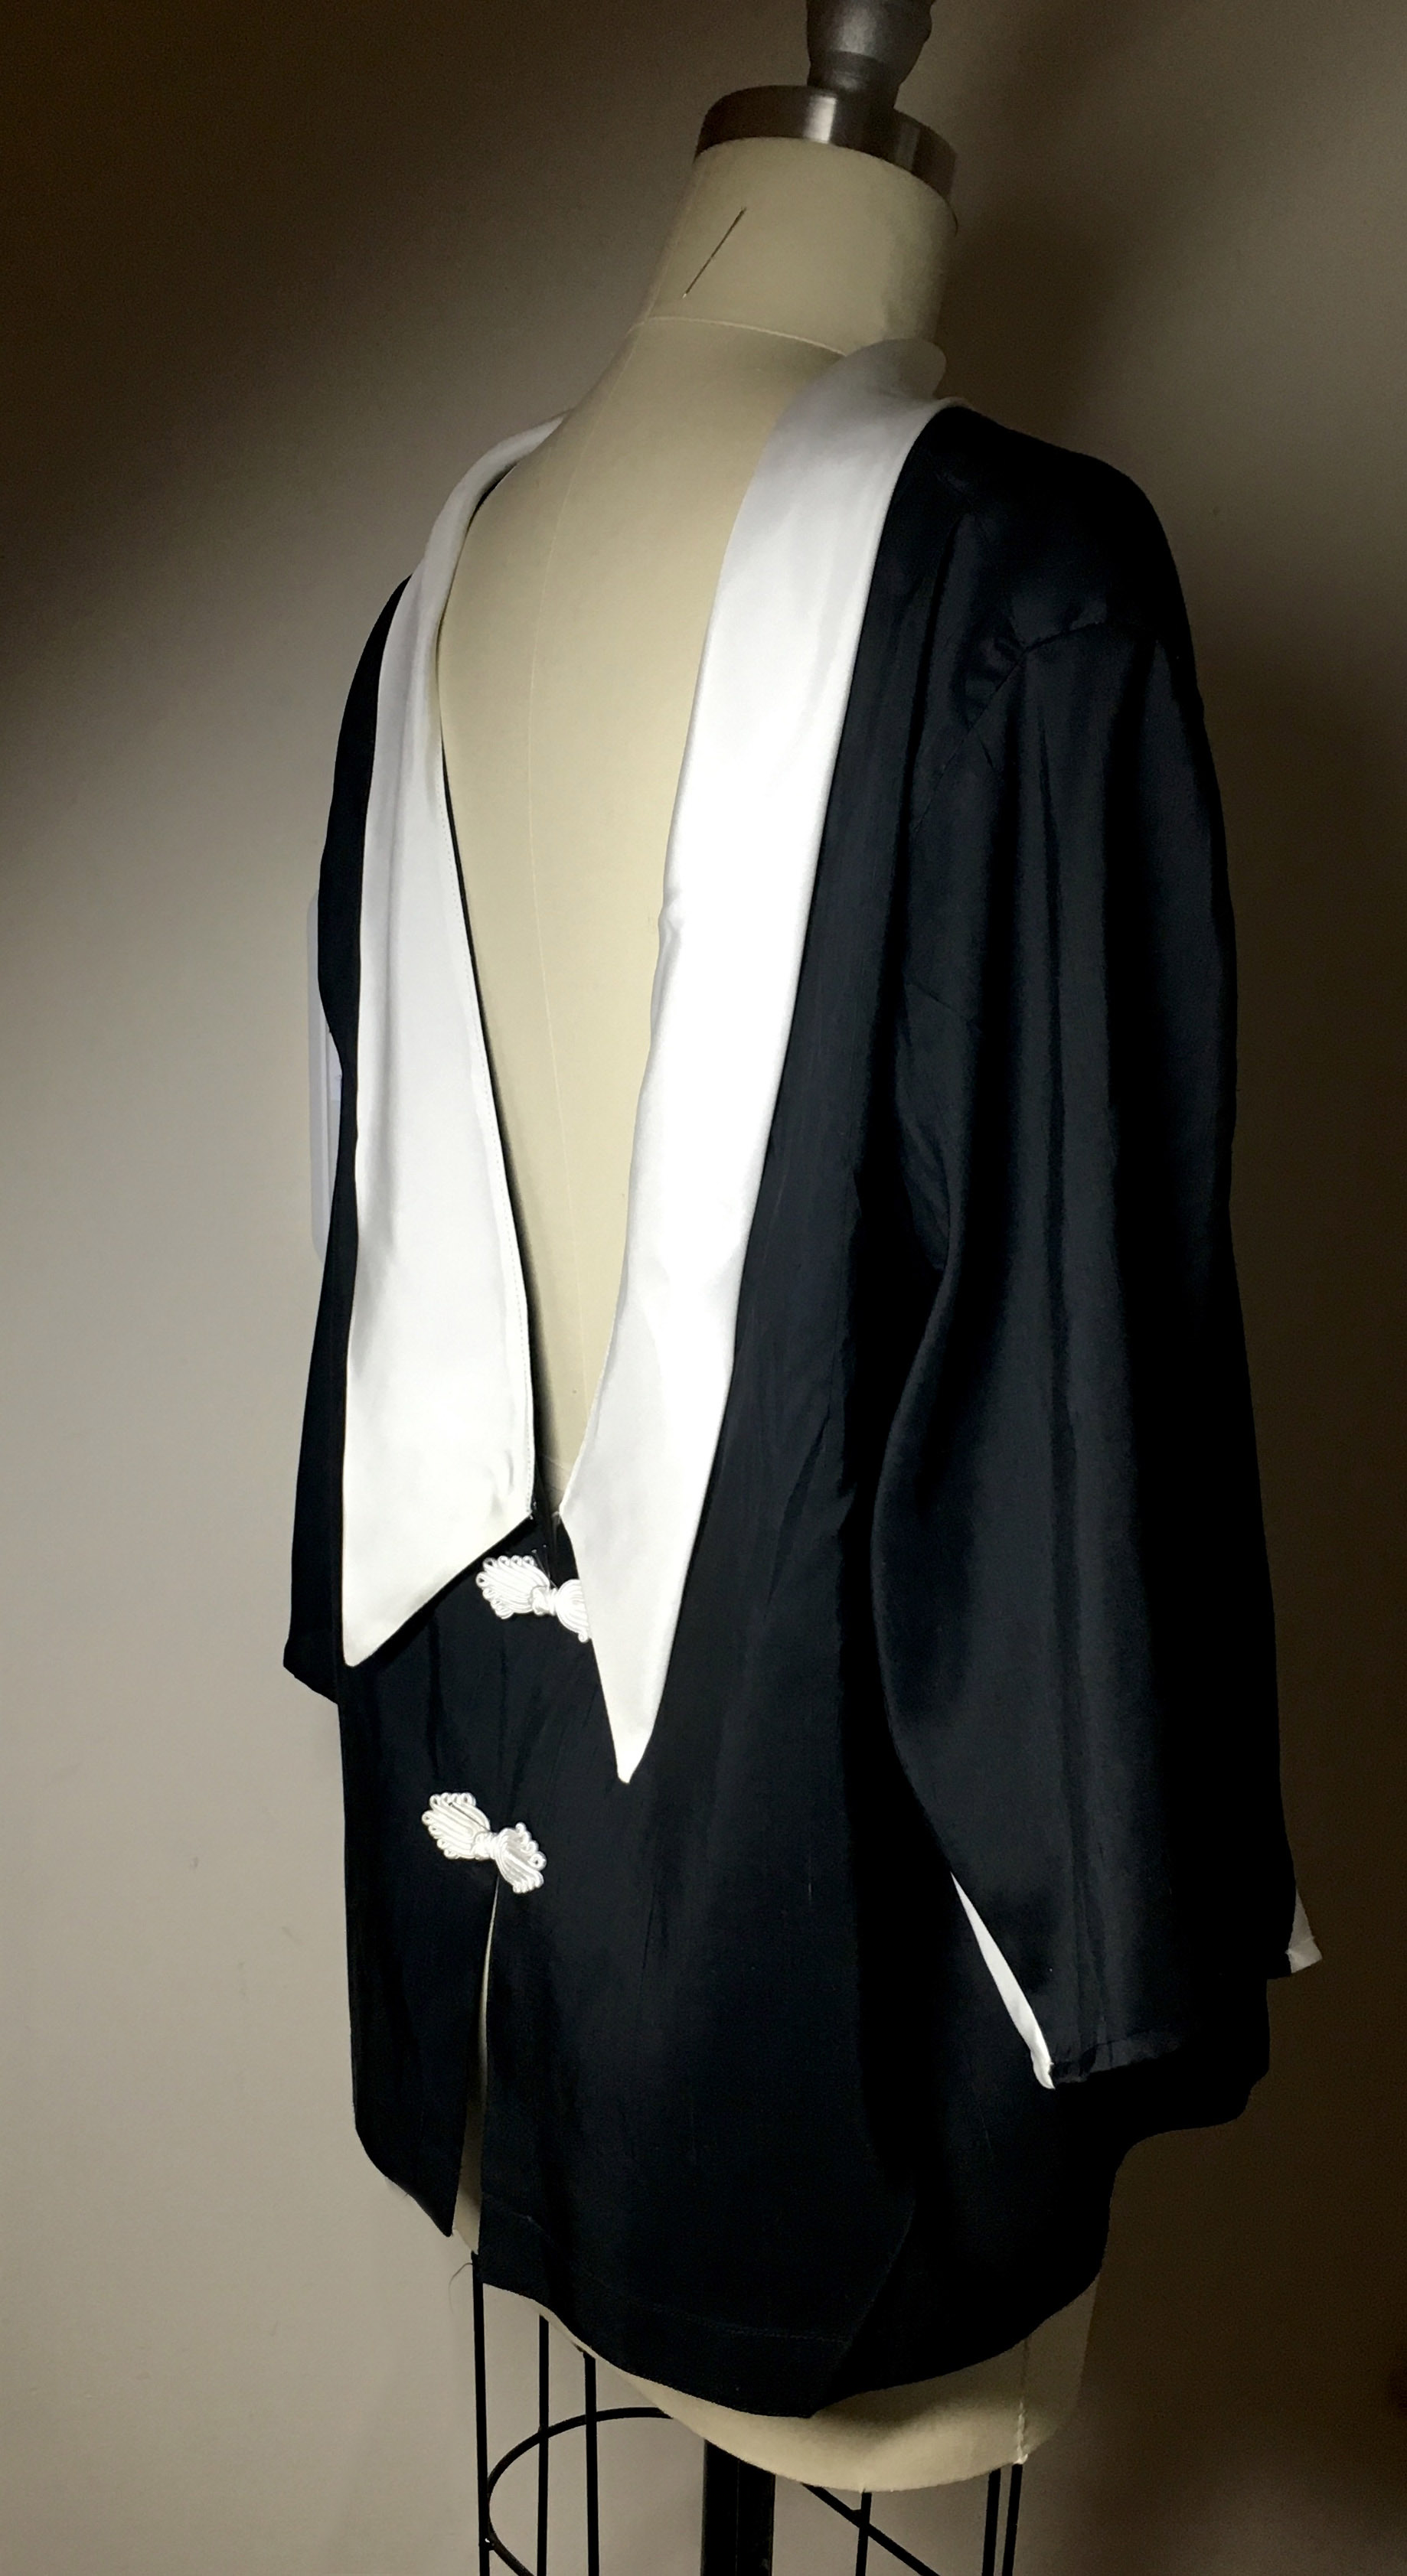
I knew I wanted to use the original back of the shirt as the front of my designed shirt, as well as the original front as my back. This would allow me to make it a high-collar on the front and a low-back on the back, completely changing the aesthetic and vibe of the original shirt. To really visualize my design, I started by making a muslin shirt with the patterns I had made from the shirt deconstruction. After putting them together and taking measurements I made two new pieces: the roll collar and a triangular segment that made the sleeve roomier and made the look more balanced.


When I was happy with my muslin, I started preparing my black cloth to be cut and sewn back together. I had to use some fusible interfacing to fix some spots of the fabric that were a little bit torn apart from when I seam ripped it, as some parts had a lot of thread in it and I accidentally went through the fabric too. When I finished preparing the fabric, I transferred the new patterns into the raw silk; there were not many changes but the ones that were made, were key to the fit and design of the final shirt.


After I finished preparing the existing pieces I went on and started cutting another yoke and the underarm triangles for the sleeve in the new fabric that I bought; a white silk with a similar weight to the black cloth. I decided to finish most of my shirt with french seams, as it looks really clean. The only seams that were not finished this way was the yoke and the roll collar, which were both flat-felled.


I would say one of the most challenging part of this project was finding the true bias. The fabric was really slippery, and I did not want to have any markings in the fabric (since it was white and a little bit sheer). I had to stick pins through the fabric in order to mark the correct grain. However, once I finished doing that, it was relatively easy to pin the roll collar pattern using the pins as a guideline. Even though I was expecting the collar to take a lot of fabric, I was definitely not anticipating it to take as much as it did. It took 1 yard and 1/4 so that I could fit the complete pattern without having any seams.


The pinning and stitching of the roll collar to the neckline took a lot of time to do, since it had to be very precise or otherwise the bias could warp. After I finished doing that, I trimmed the seam allowance to 1/4 so that it would not be as noticeable (since the white fabric was kind of sheer). After I did that, I carefully ironed the top part of the collar so that I could “sandwich” the other seams in between it, then I topstitched very carefully to close it.


After I was done with the collar, I stitched my sides together by doing a french seam. The final step was putting the sleeves in which I tried to do with a flat-felled seam as it was suggested. but the seam allowance that was left from the shirt was not enough to make this finishing. I ended up making a french seam at the end, which ended up looking really nice.