


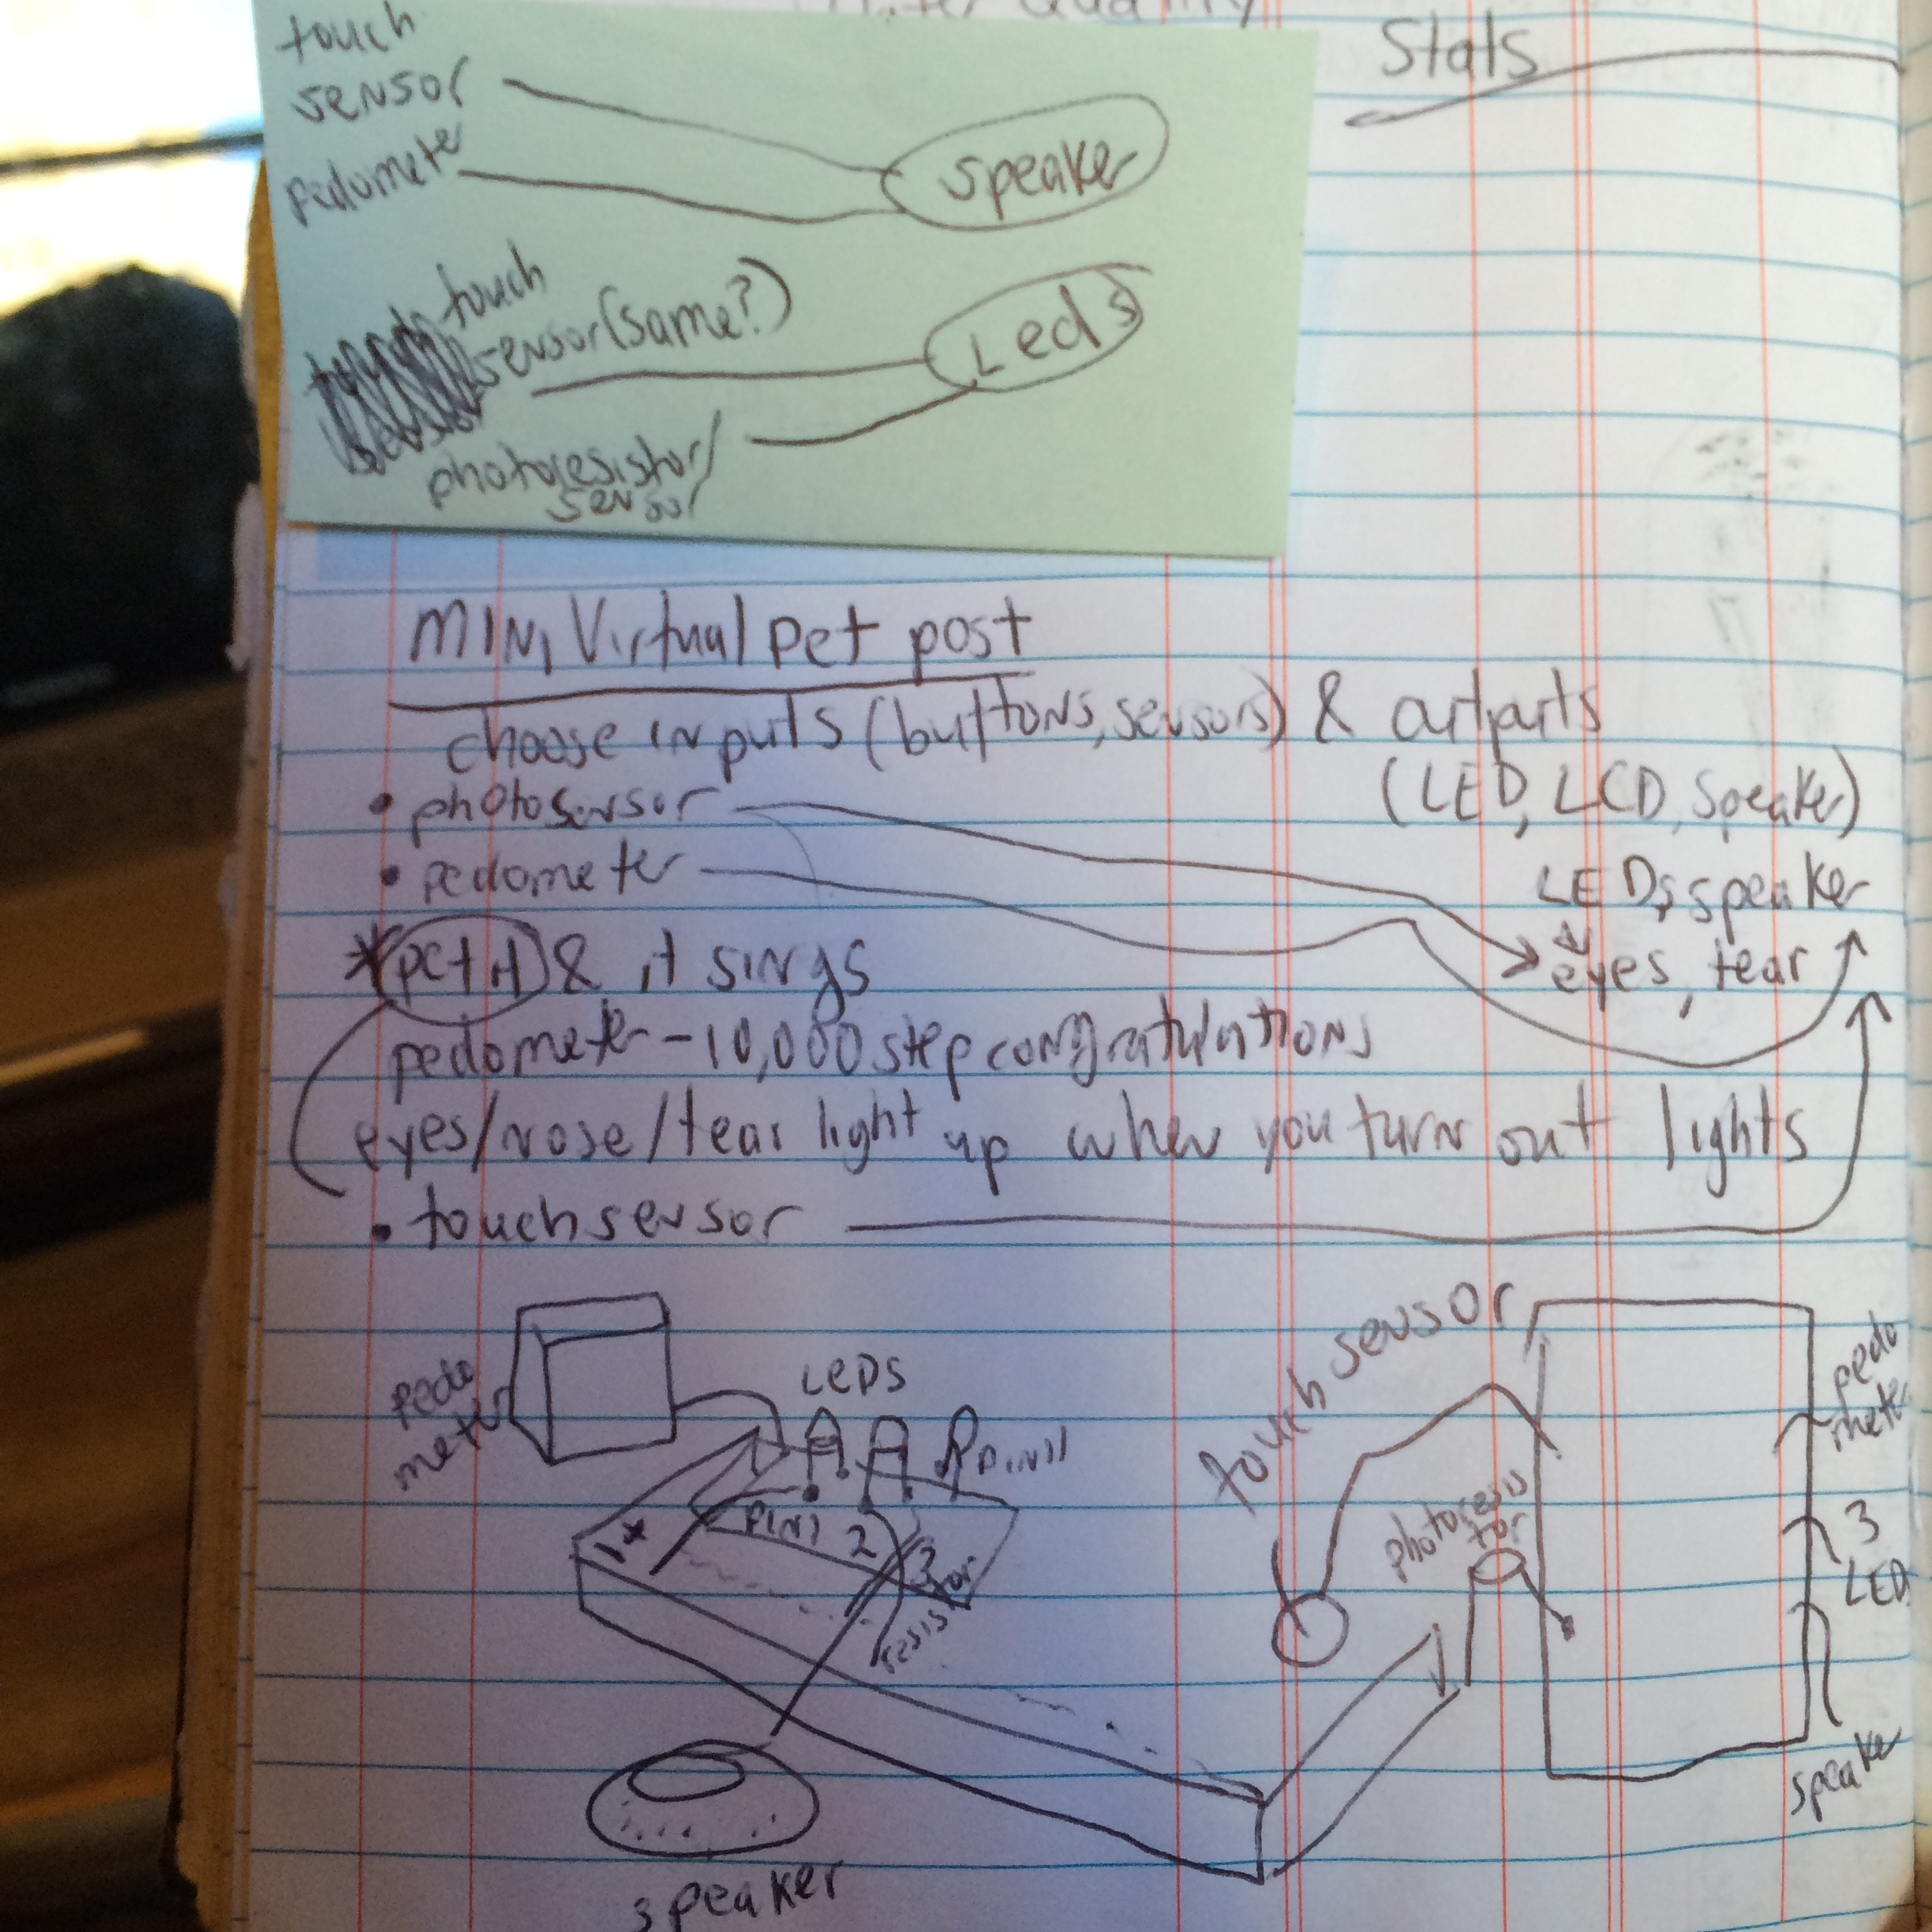
inputs: outputs:
touch sensor –speaker, touch sensor
pedometer —speaker
photosensor —–leds
ACTIONS
-Pet it (touch sensor) and it sings (speaker, ISD 1416p sound chip for recordings) + light (LED) animation in eyes
-Walk 10,000 steps (pedometer) and it congratulates you (speaker)
-turn off the lights (photosensor) and it cries (led tears)
UPDATES:

Although this project never ultimately came to fruition, I had planned to dissect a handmade mole stuffed animal and use the microchip from the peripheral device project to have the animal make noises when certain sensors were triggered. I did, however, advance my soldering skills and learn to make a DIY arduino board with not much more than an adafruit pin board, crystal, 2 capacitors, and atmega chip. Once the wiring is done, it’s time ot burn the bootloder, or transfer the Arduino software to your new system:
1.Wire up the Arduino board and microcontroller (as displayed on various websites easily accessible through search engines).
2.Select “Arduino Duemilanove or Nano w/ ATmega328” from the Tools > Board menu. (Or “ATmega328 on a breadboard (8 MHz internal clock)” if using the minimal configuration described below.)
3. Run Tools > Burn Bootloader > w/ Arduino as ISP.