


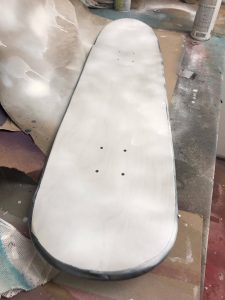
-Spray painting the board white in the spray booth-
My next step forward in creating my final product was to spray paint the board white. The board originally was black on one side with red graphics, and on the other side was nice maple wood. This was my first time spray painting an object, so I made sure that my first coat of spray paint was a light one for me to understand the power at which the spray paint is released from the bottle and how to create an even coat. As I completed the first coat, I noticed that the maple was still visible through the white spray paint, which I thought was incredibly cool. I was hoping to leave it like that as it will be a nice detail to my final product, but for me to be able to write on the board with Sharpie, I continued to add coats until the maple was no longer visible. It was important for me to be patient during this process because if I rushed the process and spray painted heavy coats, the spray paint would create bulges and later on be make it difficult for me to draw on. This process was particularly exciting for me because I’ve always wanted to create a final product that incorporated spray paint and this was a great opportunity for me to do so.
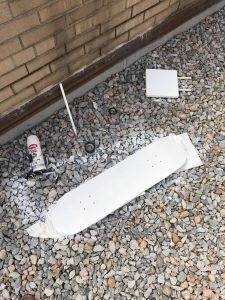
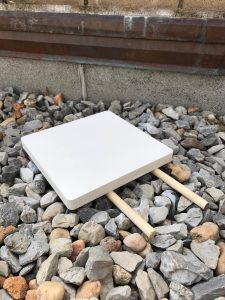
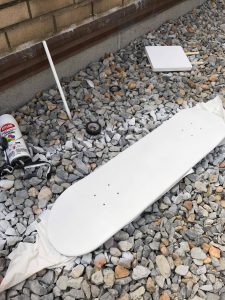
-Adding more coats of spray paint to the skateboard and spray painting the stand of the board as well-
After spray painting in the spray booth, I took home the skateboard and let it fully dry so that I could gauge whether I had to add more coats or if there were any visible flaws that I should mask. I set up a station on the roof of my building where I could spray paint without spray the board without the smell bothering other people. As seen above, I spray painted the board directly over the stones, eventually leaving a mark on the stones. This step was crucial in creating my final product because the final coats of spray paint were done neatly enough that any existing marks were covered up and the board was completely white, ready to be worked on. I did make a mistake on one end of the board, by doing a coat the was too heavy, so the paint started dripping and creating bulges. In hopes of resolving the issue, I wiped the paint with paper towels, but it made it worse because it affected nearby areas. I eventually had to sand out that section and apply a new coat of spray paint. Also seen above is my stand for the skateboard which was being prepared in white spray paint. After this process, I let the board and its stand dry outside for about an hour in the sun.
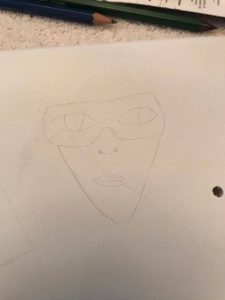
-A visual progression of a figure that I drew on the board-
This figure ended up turning out very nicely and more detail was added to it.

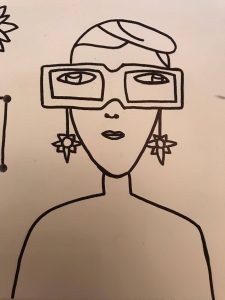
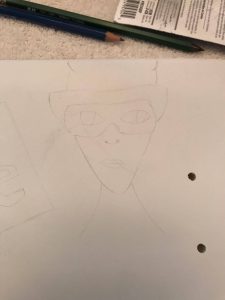
-Another visual progression of a figure that I drew, from pencil sketch to inking in sharpie-
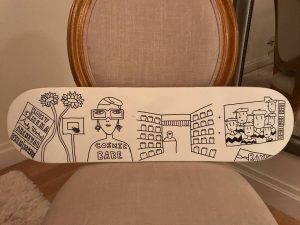
As seen in the image above, I drew the figure with odd proportions in hope of creating a “raw” feeling which is sort of a common theme in my drawings. When the drawing was completed with detail, I was happy with how it turned out.
-Photograph taken midway completion-
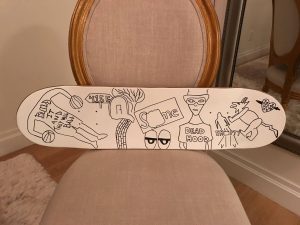
At this point in my progress, I was honestly very excited to see how my drawings turned out. I played with the concepts of spacing and theme to create a certain flow when looking at the board from afar. As well, at this point, I had to make some important decisions. I had to decide where to add drawings and I also had to decide whether what was in one section was enough. I didn’t want to clutter the board but I still wanted there to be enough visuals for the viewer to get a real sense of my block. To make sure that my spacing was done sufficiently, I started drawing from the middle then outwards to the sides. It also included a lot of sketching on the board for sizing. The images seen above were not in full detail but it was the foundation for me to start adding detail that would be meaningful and not excessive. I have never actually engaged in drawing before, so I had to do multiple sketches and erasing on the board. This was my first real attempt in incorporating my drawings into something that would eventually be so meaningful to me.

-Experimenting with typography and how the phrases would best be presented-
On the large drawing pad, I explored different typography and did many different versions so that I could choose which one would suit the theme best. On the drawing pad, the phrases were moving in a wavy form and this was a way for me to explore how typography can affect the way a reader reads something. I also explored the concept of bubble letters and how to make them pop. In the end, I stuck with bubble letters in a linear motion. A detail added to that was the dots progressing upwards. It affected the way I read the last word of the phrase, in a way that the idea was going up into the air. I’m glad I was able to explore typography when I was working on this project because as I continued to add phrases to the board, I incorporated a lot of the typography that I sketched out.

-The different Sharpies I used for this project-
I really enjoyed using Sharpies to create my final product. The different thicknesses that each of them have gave me options to use. As well, the Sharpies on a white spray painted background gave it this edge and rawness that I feel was a big part in the look of the skateboard. I plan to continue using Sharpies in future projects because I built a connection with it and I feel comfortable using it as a way to express my ideas.