


Step 1: Printing a circuit
To make my own circuit, I first had to learn either EagleCad or Fritzing. Although Fritzing is a nice visual program, useful for visualizing breadboards, I found EagleCad & it’s highly specific library not so difficult as it may at first seem. I built a schematic on EagleCad, which can be autorouted. Once a functioning circuit was drawn, this was printed on glossy paper by and inkjet printer.
Step 2. Preparing the copper.
First you must wash and scrub (sponge+a baking soda) your copper plate extensively, until water is no longer resisting the surface and puddling up but instead sliding off of it like sheets. Then you rub the copper with acetone for about 10 minutes, or until dark smudges stop comming off of it. and a piece of copper, using an iron, sandpaper, acetone and ferrofluid
Step 3. Transfer
Iron the print onto the copper for about 3-5 minutes.
Step 4:
Dump the copper plate into a sink with water and let it cool for about 10 minutes. Do not remove the paper yet.
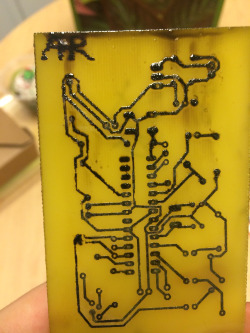
Step 5:
Once your print is cool, peel away paper slowly.The circuit should now be on the copper board. If any of your circuit didn’t make it, redraw its path with a sharpie.
Step 6:
Dump your board in a tub of ferric chloride. Agitate occasionally. Let it sit until the copper has completely eroded around your circuit.
Step 7:
Clean off and viola: drill holes in that baby and solder away!