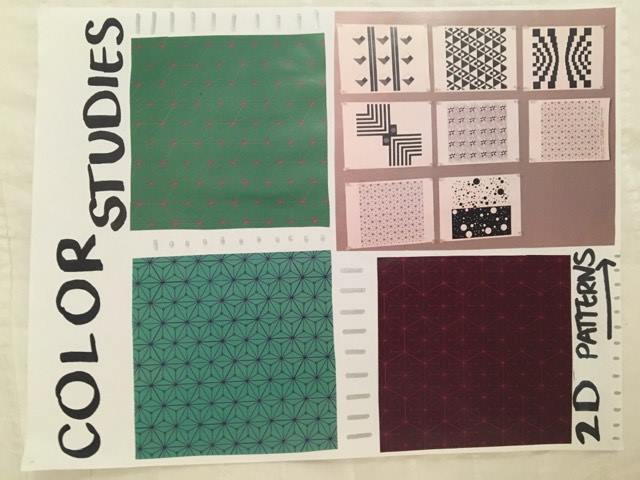
For this assignment we had to create a 3D structure inspired in the 2D patterns we had created. The process of the creation of the patterns are shown in Project 1a: Underlying Patterns and Project 1b: Color studies. To begin with, the pattern I choose had different lengths of triangles which formed a series of interesting shapes. Based on those triangles, I decided to experiment with different materials in order to find the one that would work best to achieve that similar pattern in the structure. First, I used materials such as paper, straws and tape to create my first trial, however, the materials weren’t strong enough and the shape would not meet the required measurements. Brainstorming on other options, I tried using shorter and stronger straws and connect them using foam balls to see if it would create a more stable structure. Finding the right connectors was also a challenging part of this project. When using the foam balls to connect the straws, I realized that they would not work properly because with time, the foam started breaking and the straws would move constantly. For this reason, I had to keep on looking for other options.
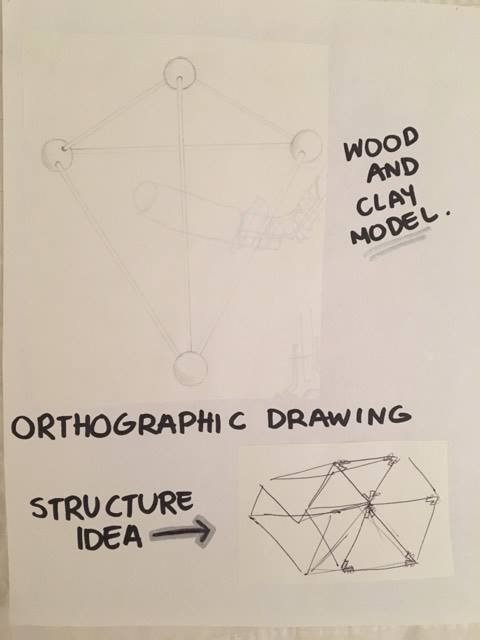
Moreover, after brainstorming what material would work best to have a stable and strong structure, I decided to work with wood, which I had never used before. I knew this would be a more challenging process but I was ready to accept the challenge and learn new skills and techniques. First I went to Blick store and looked for the wood that would best work for my project. This was a thin, hard, rounded wood which would be easy to cut and work with. As I had problems finishing the Shop Orientation due to bad organization with the staff, I had to first find the type of wood that would be easy to work with and second of all, find the materials that would be needed in order to do so, just as a wood cutter and shaper. After choosing the wood, I had to find the right connector that would attach the different pieces together to form a triangle. With this in mind, I bought clay because I thought it would be a good idea to make them into circles and just attach with no effort the different pieces of wood into each one. After several trials, and different models, I realized that clay would not work either because the sticks would still move and didn’t look very well made. Thus, after sketching, thinking and talking to Mr. Kraft, I decided to create connectors using metals and wire. From the pictures below you can have a clear idea of the process and the different sketches made in order to reach my goal.
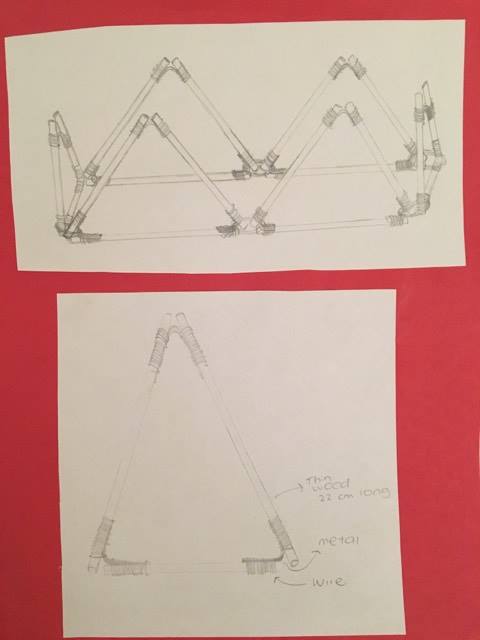
Last, in order to create my final structure, I used a system I invented by cutting out thin medium long pieces of metal and placing them in two sticks forming an angle and then wrapping them around wire so it attached to the sticks. By giving it a series of turns around the stick, the metal would be strong enough to hold both sticks together. Then, I repeated the same process on the other sides of the sticks in order to create the illusion of a triangle by not having the points touching each other. After finishing all triangles, I put all of them together according to the given measurements of the wall and created a semi like rectangle using the triangles as seen in the pictures below with the red frame. When finishing the structure I had had in mind, I felt something else was missing so I decided to play around with the structure and make it more interesting. I attached the middle part of the rectangle together, and then added a few new triangles in the middle to create pyramid like forms shown in the last pictures. Finally, after finishing the structure I collected all the pictures and sketches I had of my process and put them together in cartulina in order to present it to my class.
Something I would have liked to change about my structure is the connection between some triangles. As changing it last minute wasn’t part of my vision, I had several circles of wire that didn’t look very neat in my final structure. Next time, I will coordinate my time better and leave time for experimentation in order to prevent unwanted changes in my design.


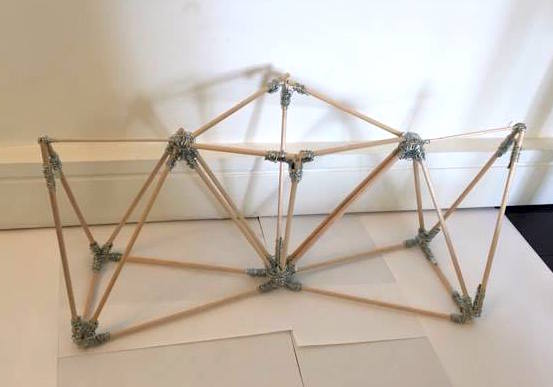 FINAL 3D STRUCTURE!