Studio/Lab: Systems Final Projects – The Punishment Game
Final Presentation is here: The Punishment Game – Final Presentation
Code is here on my Github
Final Presentation is here: The Punishment Game – Final Presentation
Code is here on my Github
The following file is a detailed report and mind map for my final project.
Workflow:
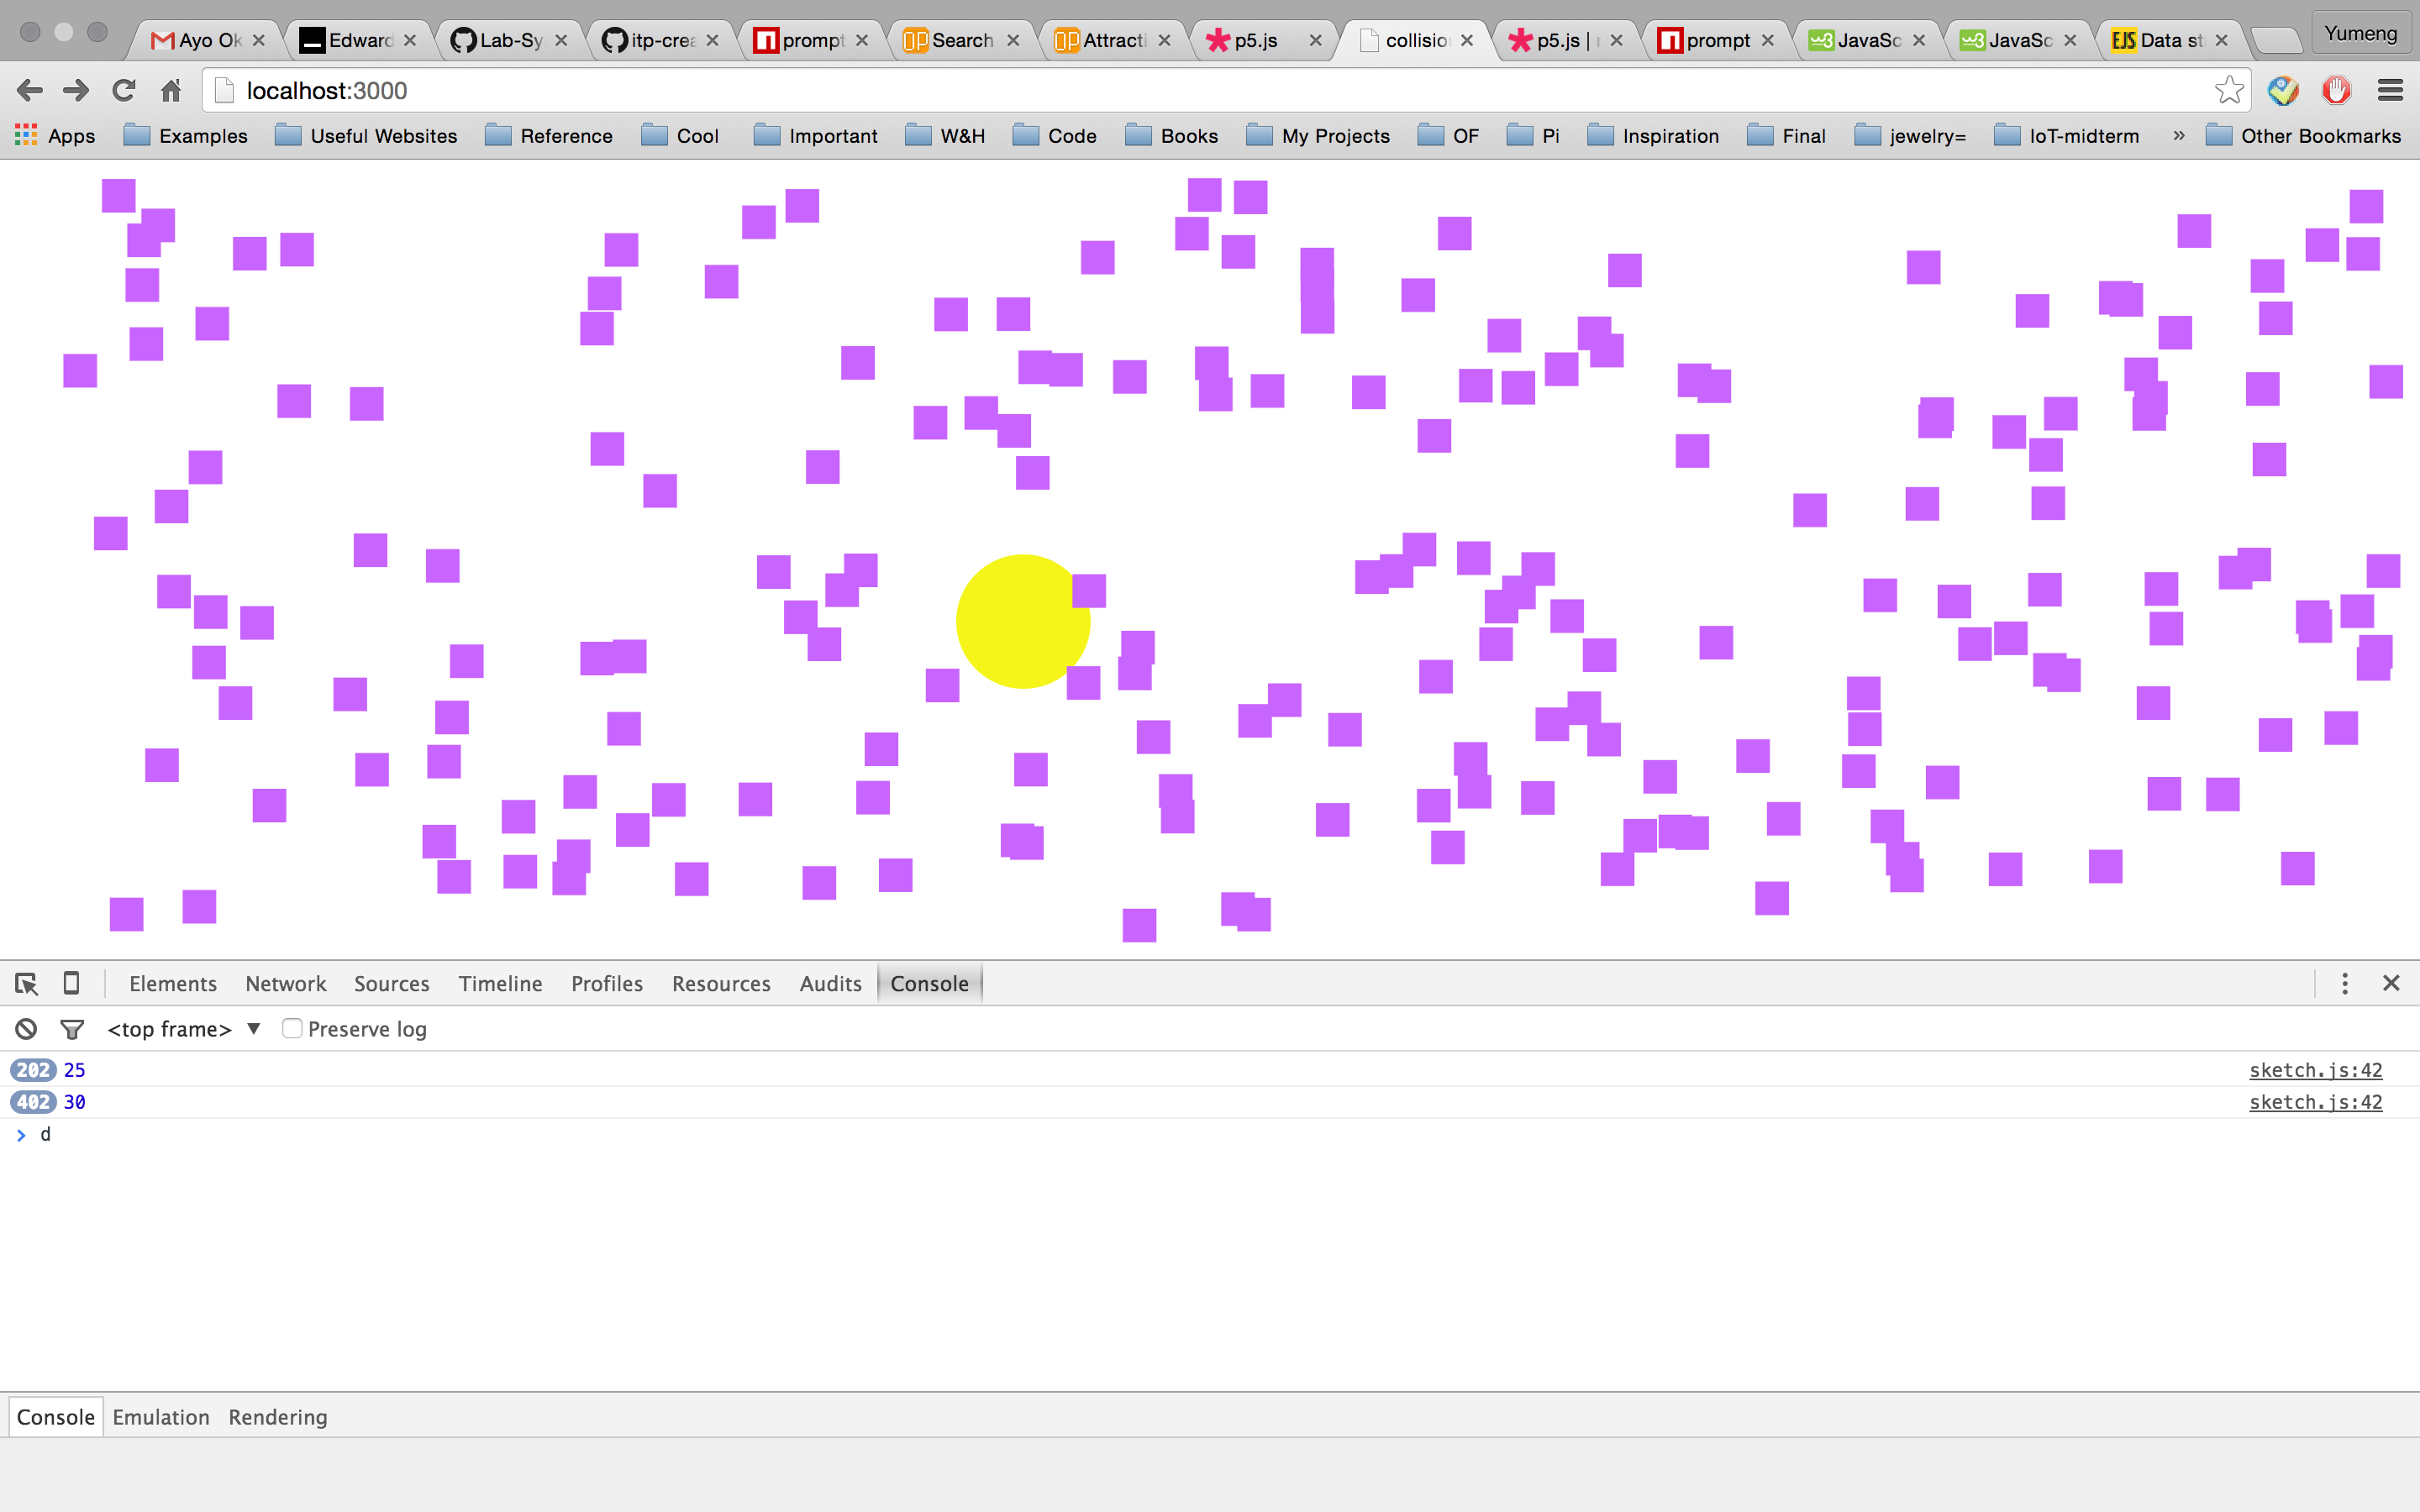
For this homework, I created a P5.js sketch and using an app.js file to serve the sketch. Meanwhile, I used NPM prompted so that the user can have input in the Terminal to affect the sketch in the browser through Socket.io. When the server js file is funning, there will be a prompt in the Terminal window asking the user for the size of the particles on the screen. The user can keep entering different numbers. However, if the prompt receives “p5”, the data of the yellow circle’s position will be printed in the Terminal window instead.
Visual:
In the P5.js sketch, I created an object for the particles and then wrote an array of them randomly appearing on the screen. The avatar, the yellow circle, follows the mouse position and chases the particles away. Because I used pmouseX and pmouseY to determine which direction the avatar comes from, the particles are repelled in the same direction.
Potential Ideation:
I learnt about Tibetan Mandala sand art in the past summer and I was very fascinated in the delicacy and endurance of the creating process of Mandala. During the China trip, Henry, Regina, Vivian (MFA) and I visited a Tibetan temple in Beijing and therefore came up the idea of making a digital version of Mandala. This homework can be a prototype for the digital Mandala. Taking it further, I can use an image and turn each one of the pixels into a particle (like sand grains). The yellow circle can be the hand that destroys the image.
Here are two screenshots of the homework:

Cursor Toolbox
Concept, Usage and Technology
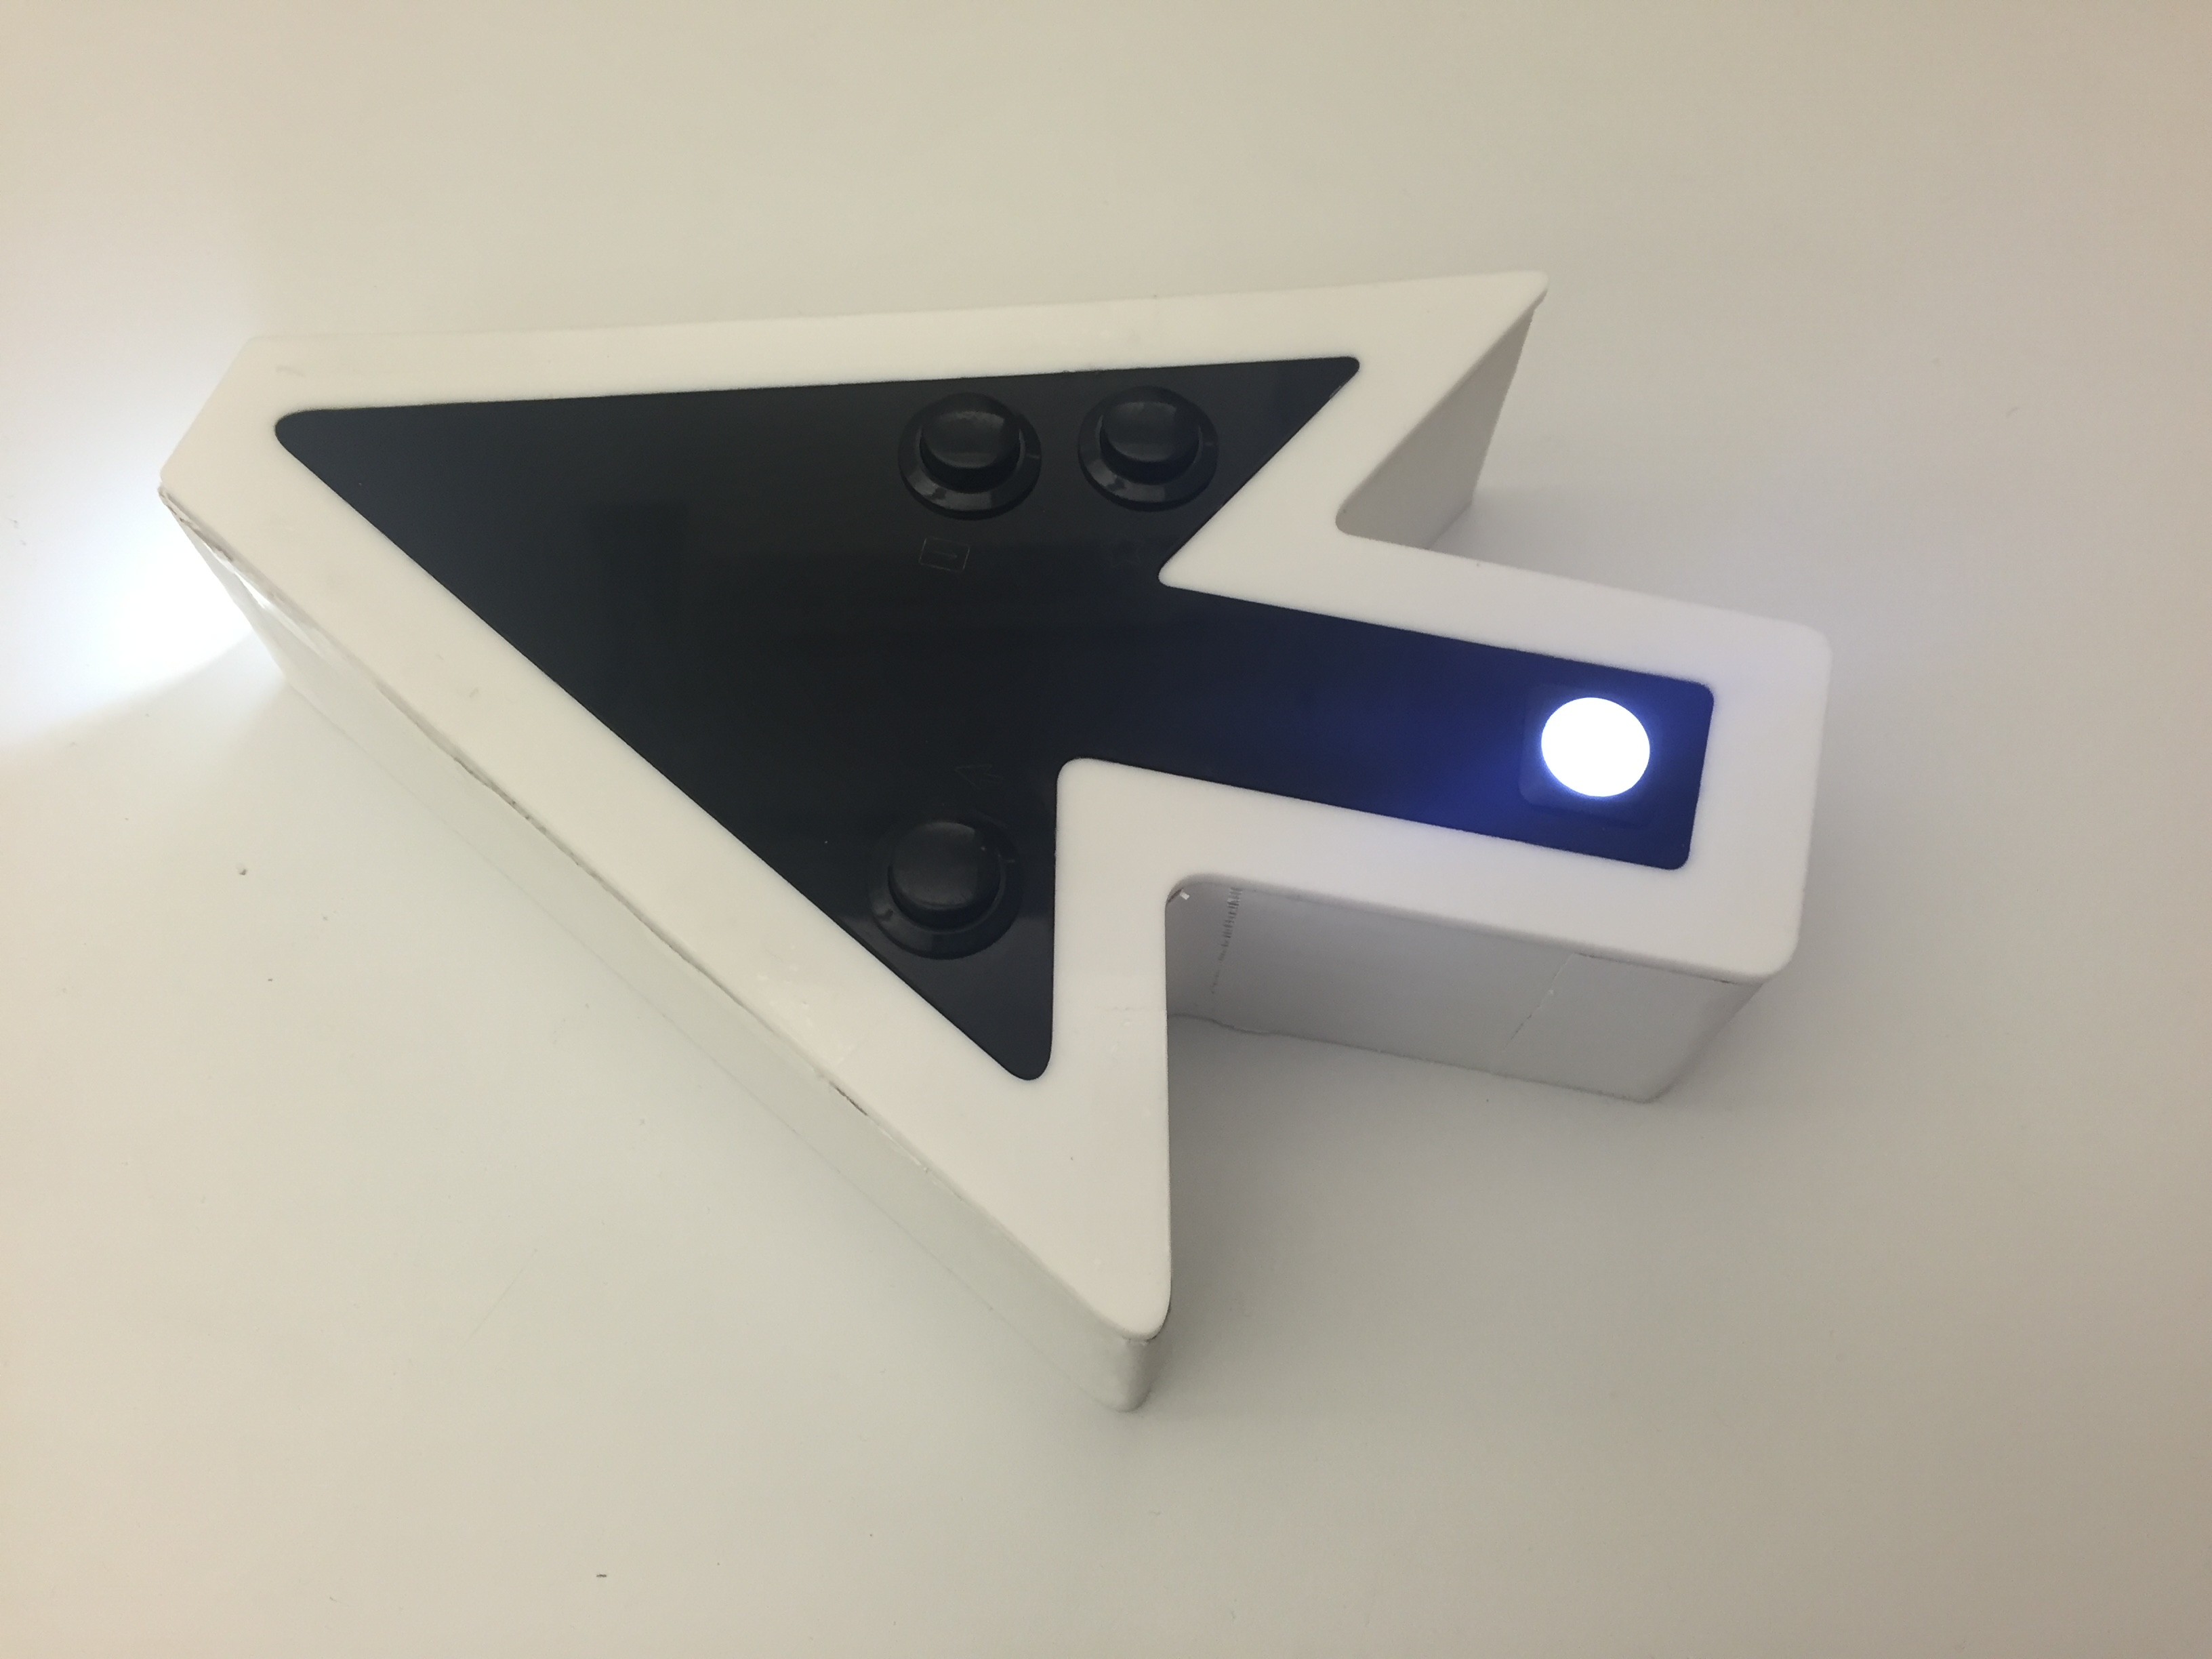
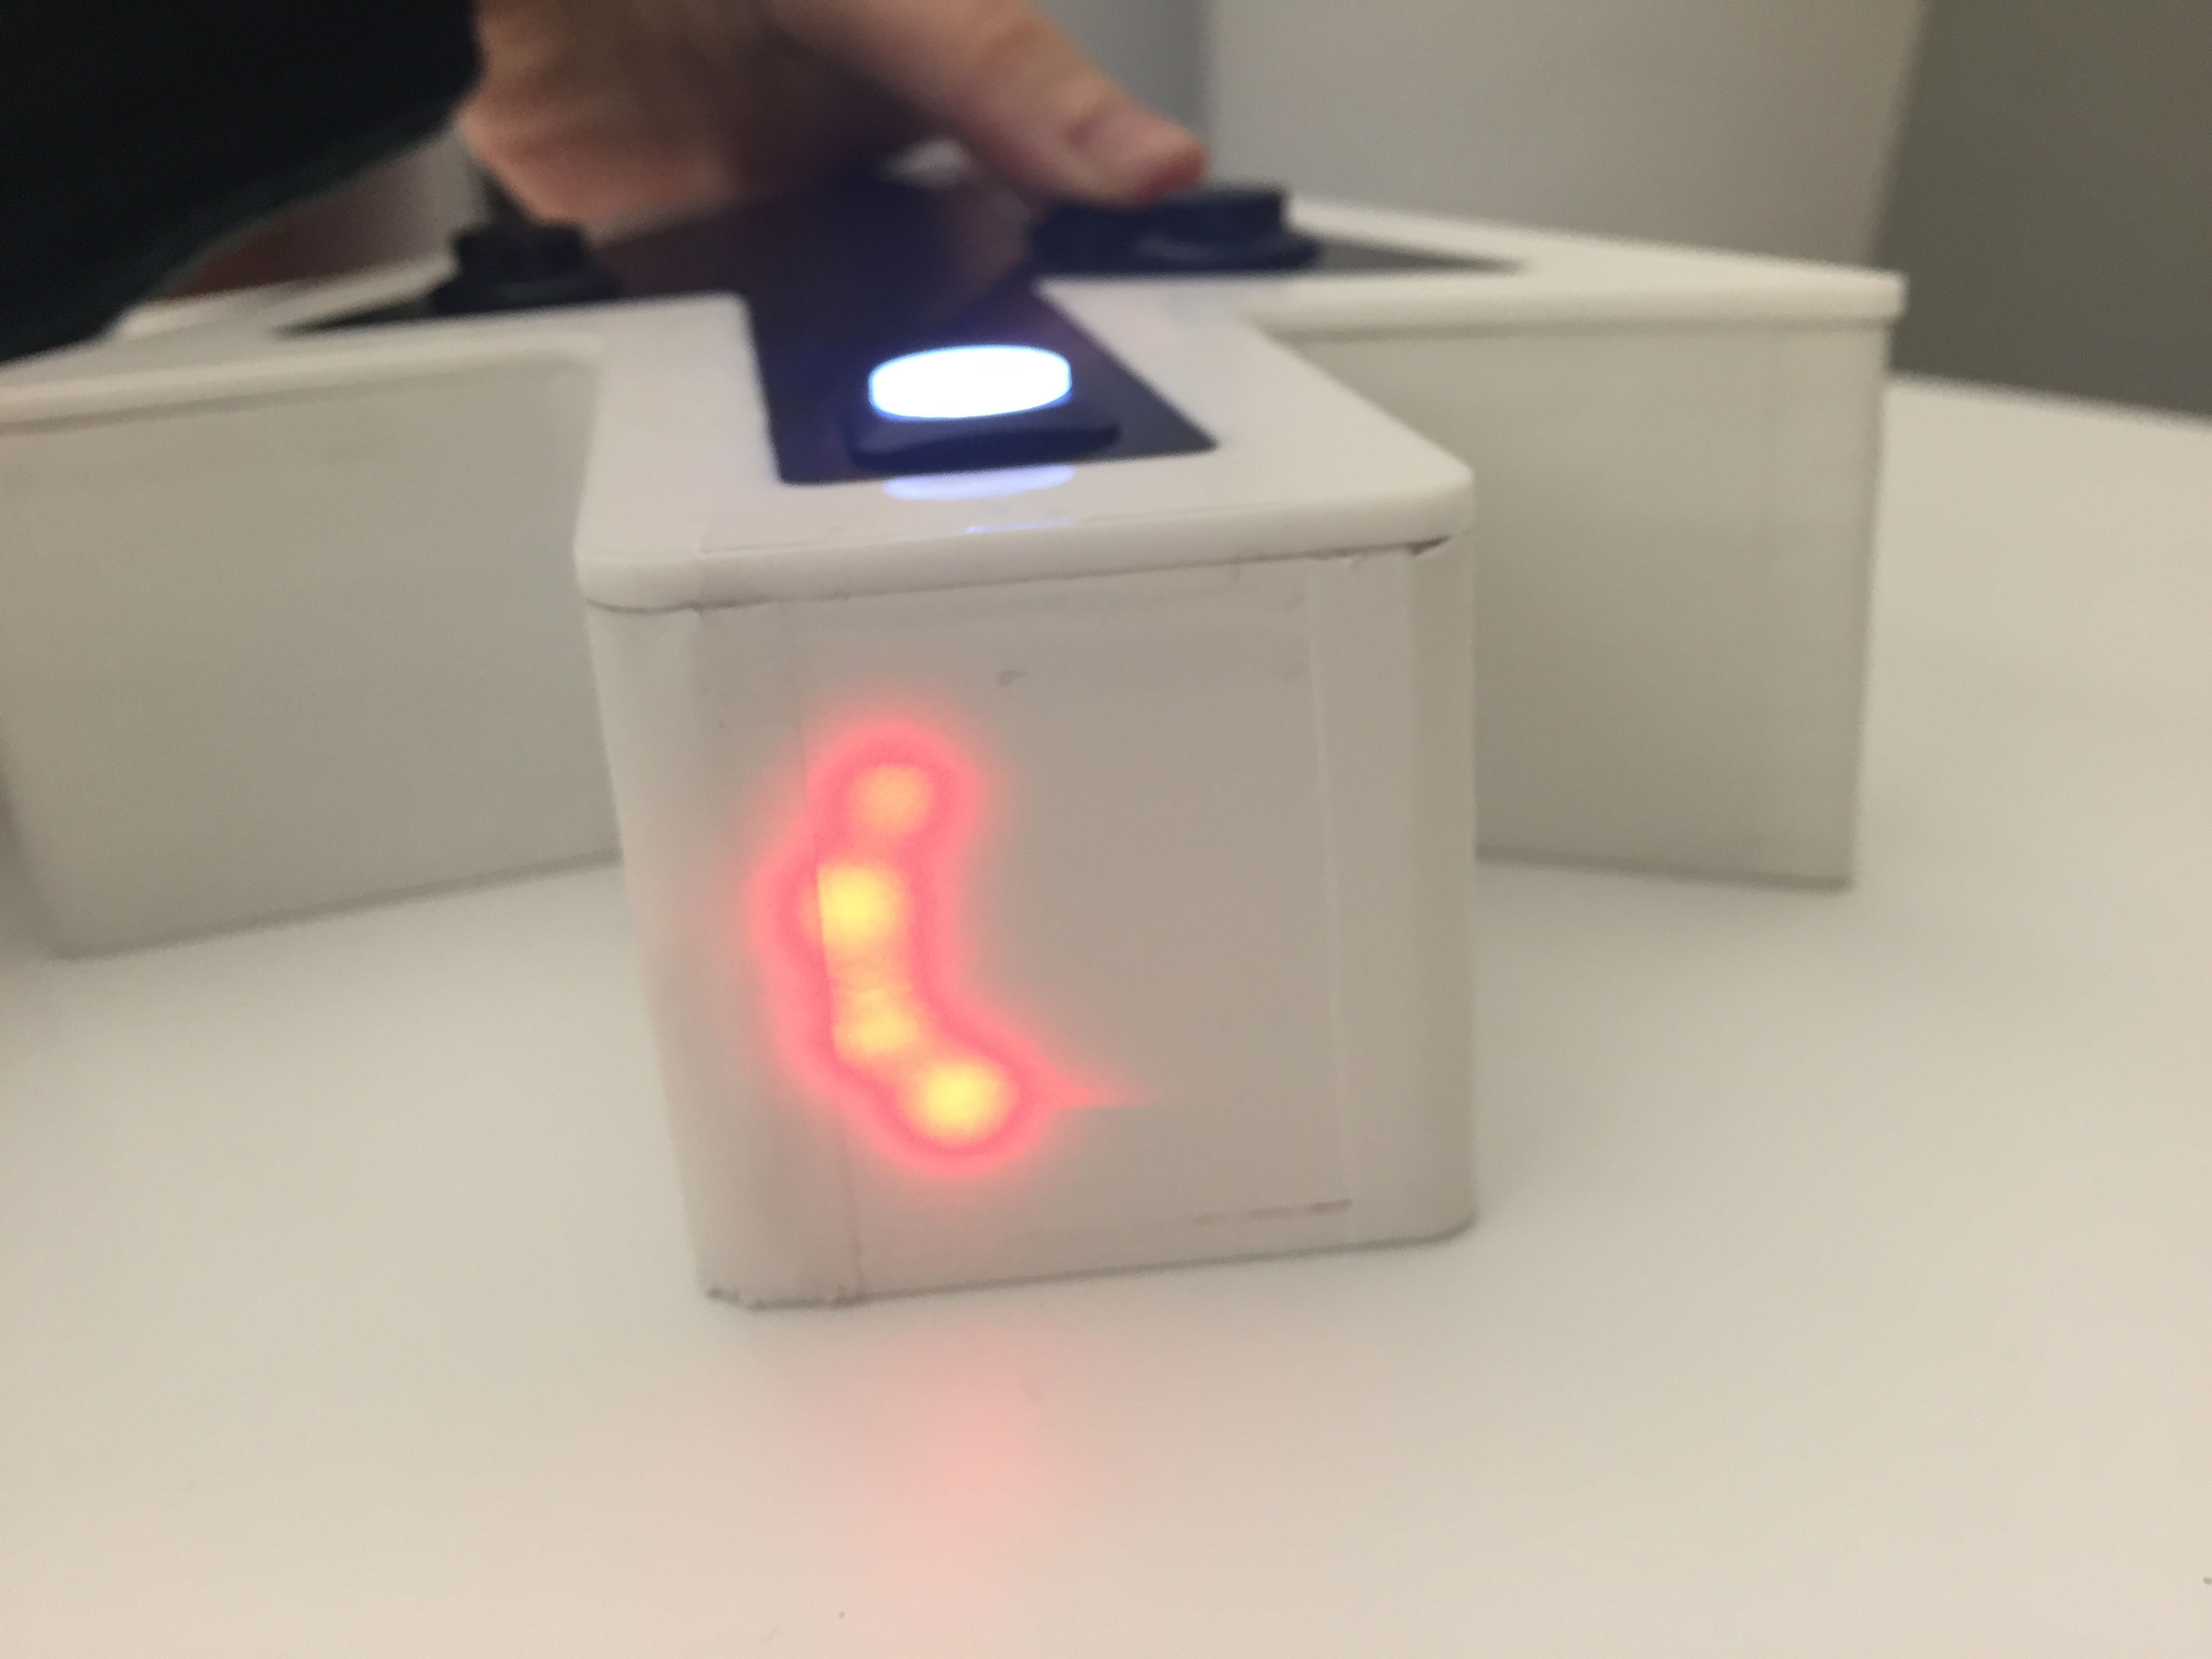
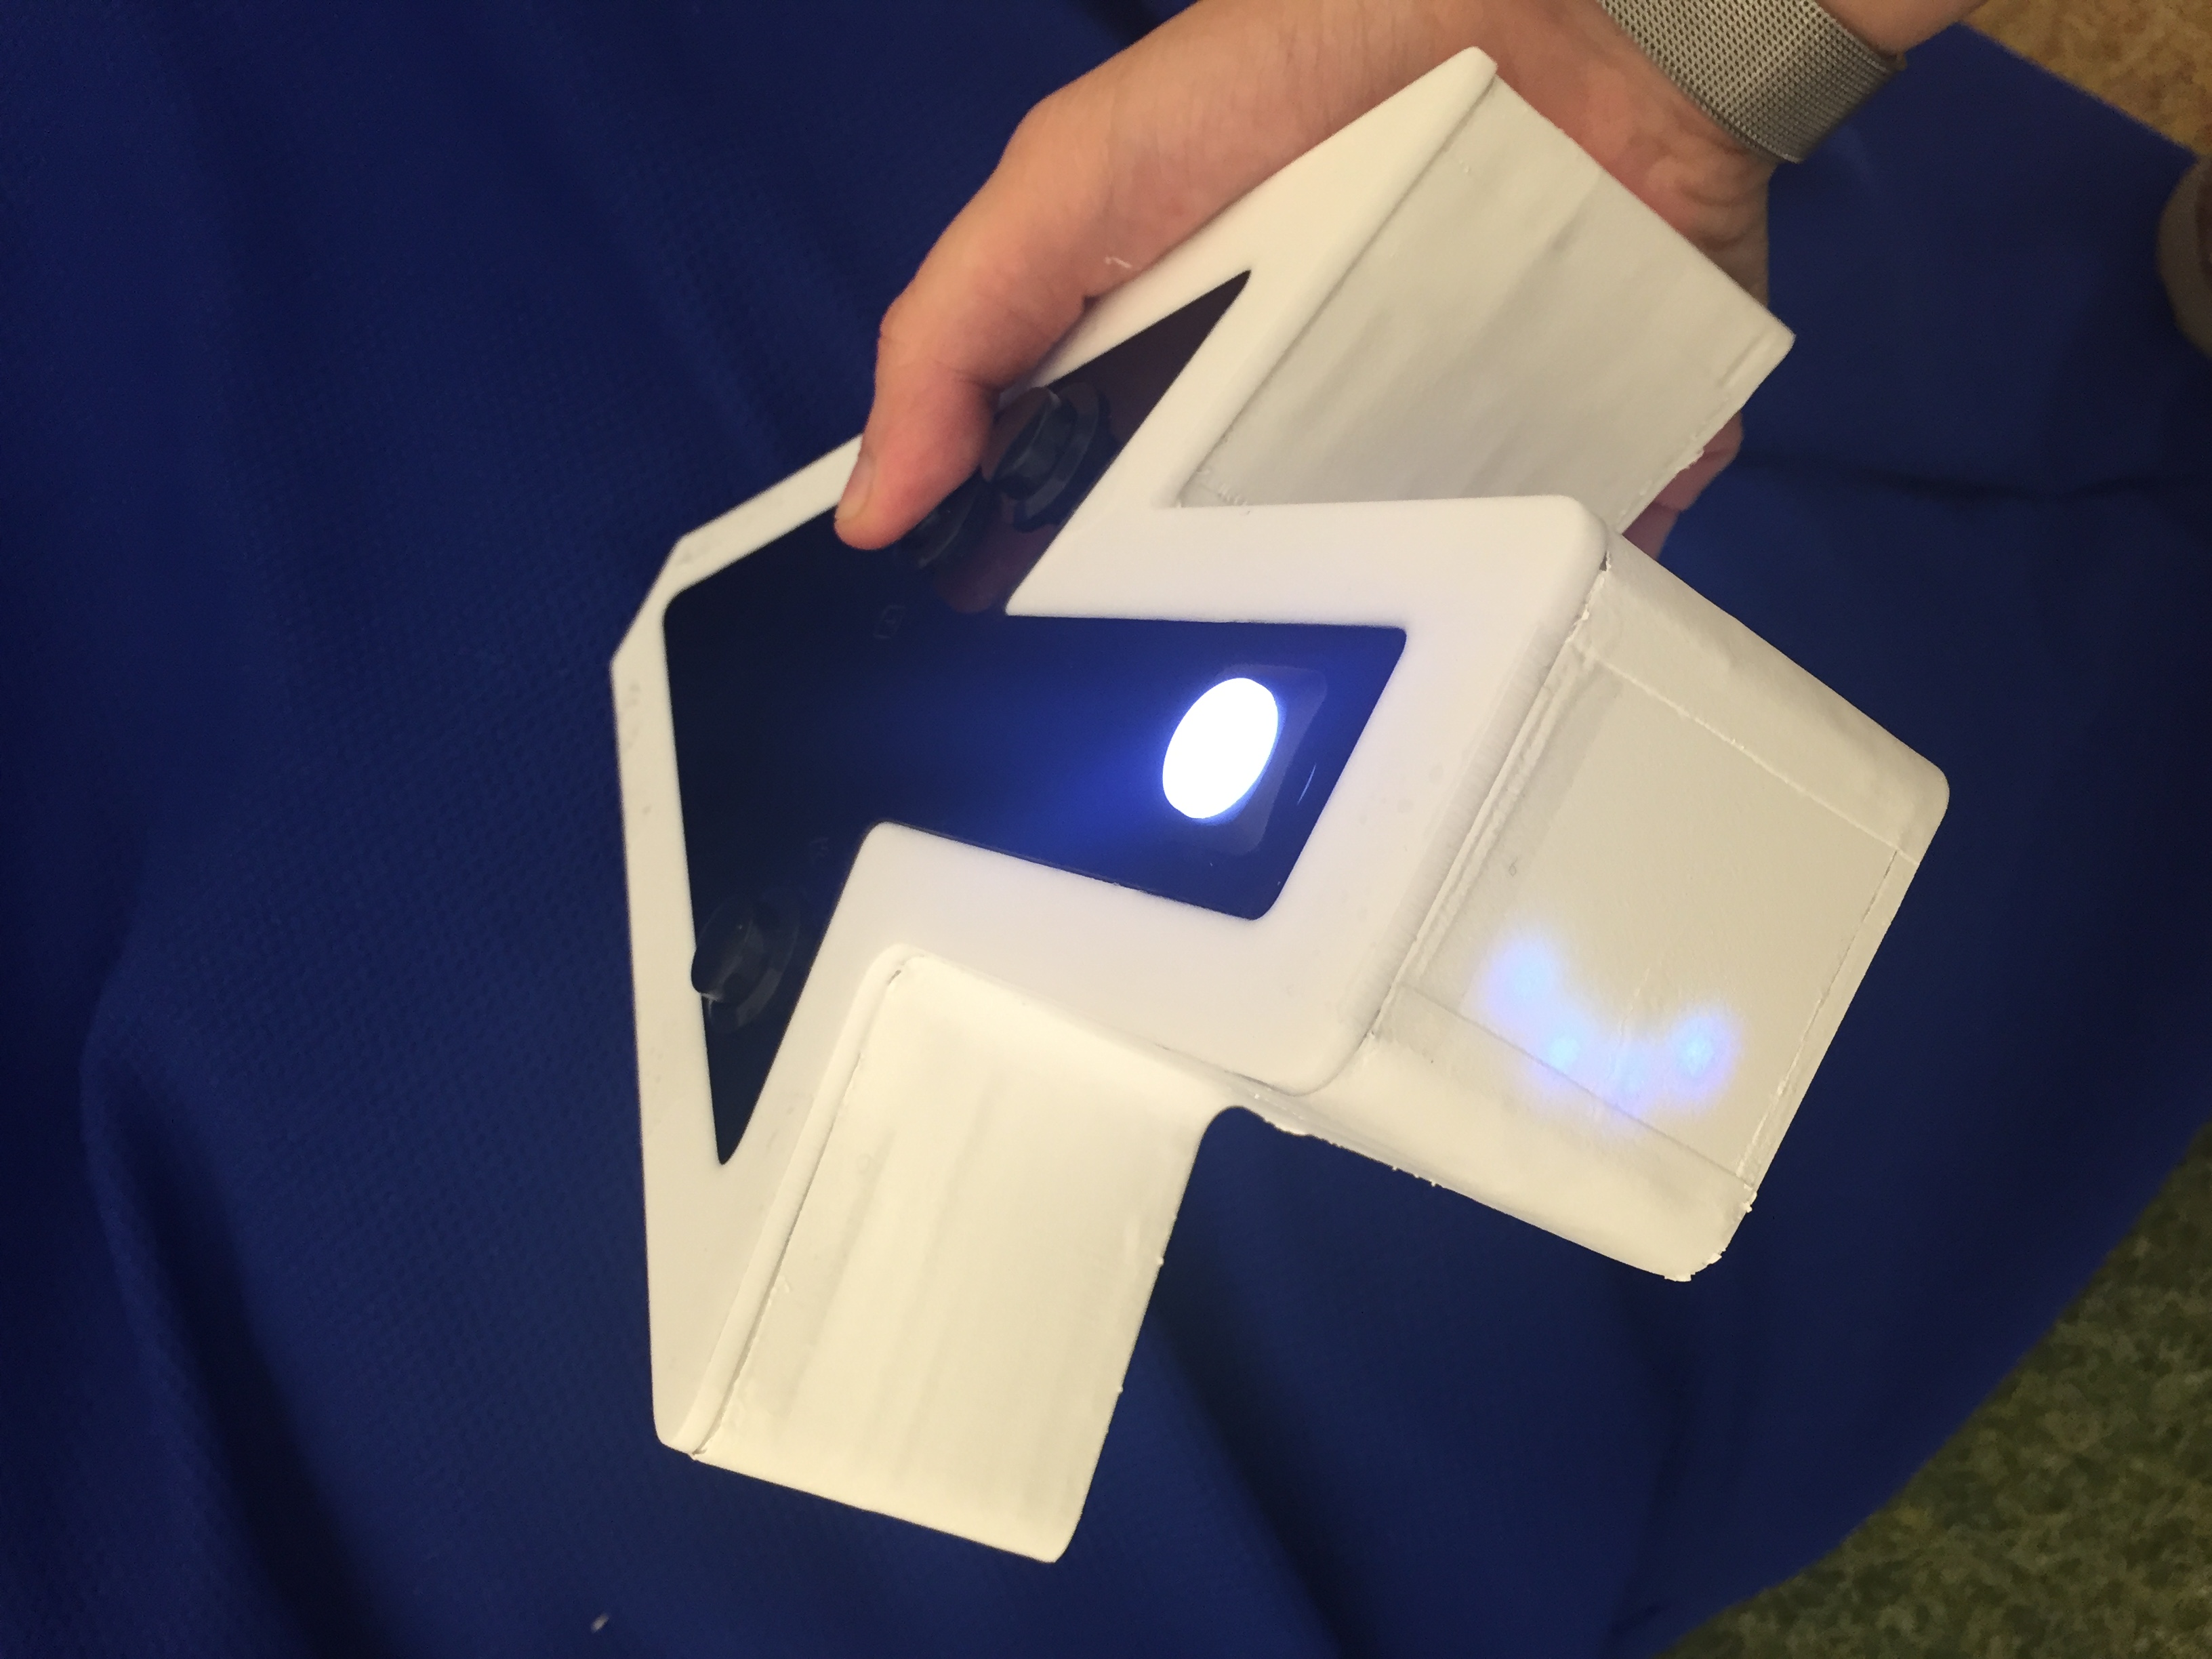
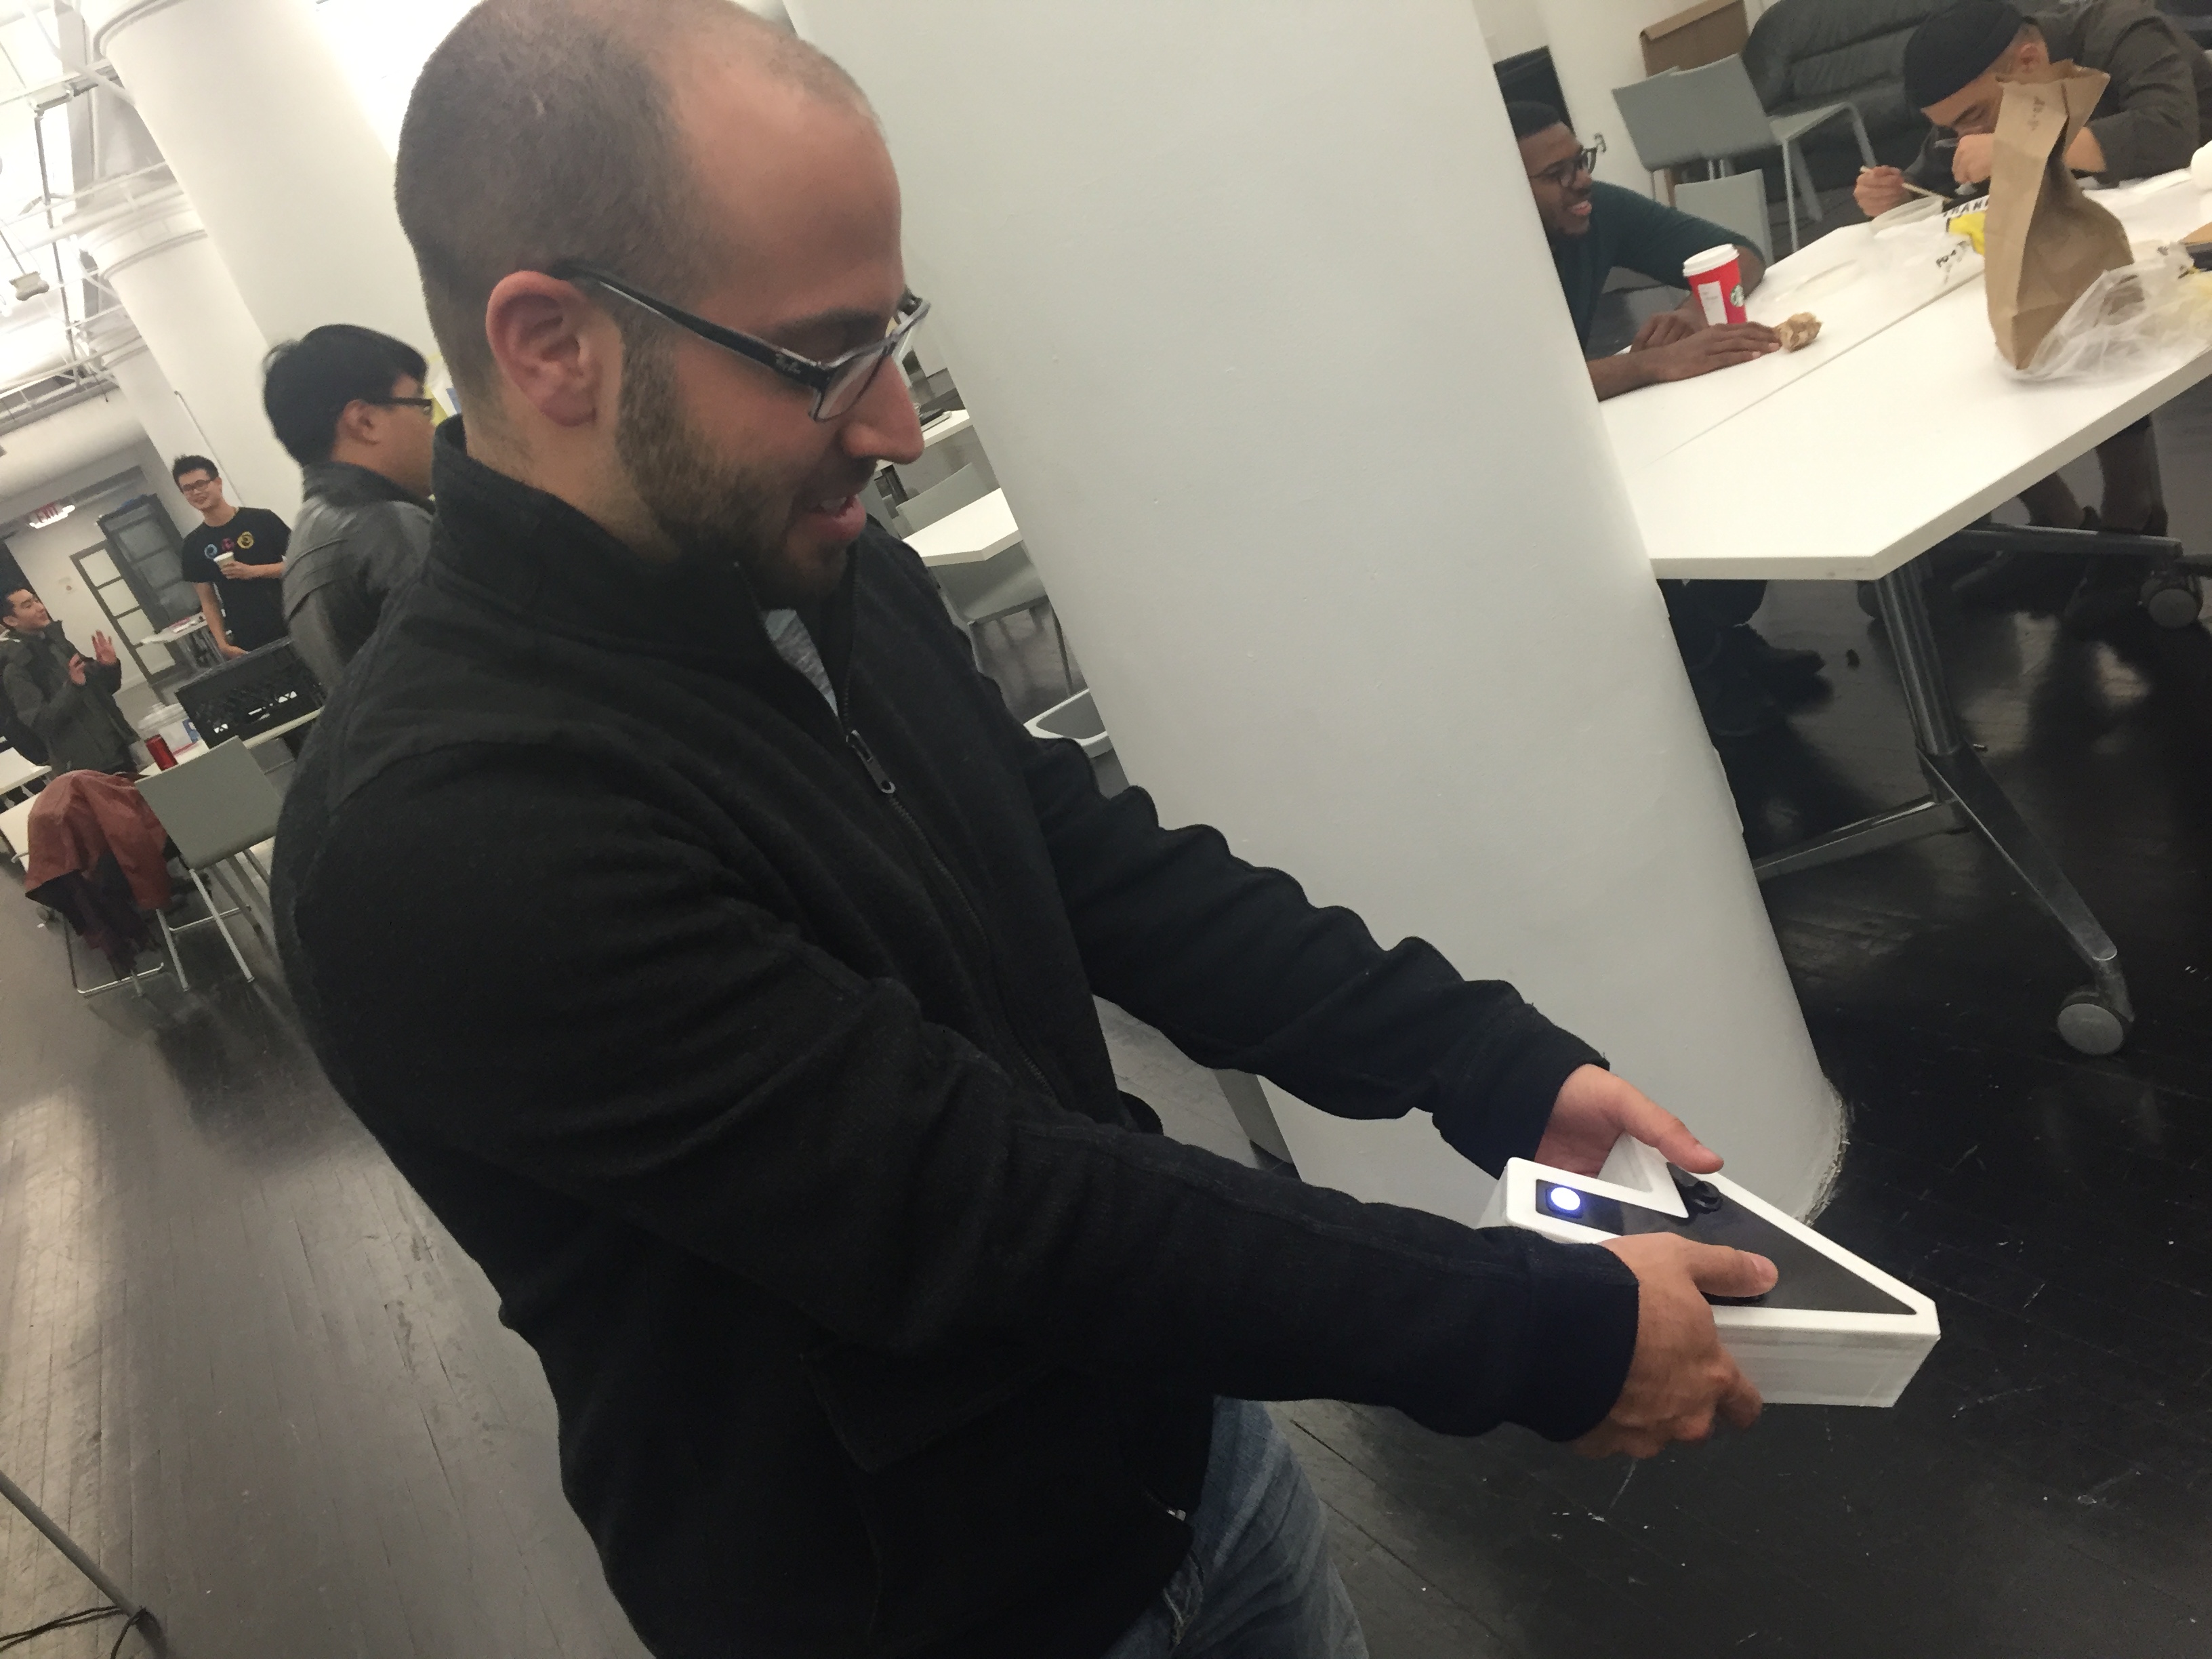
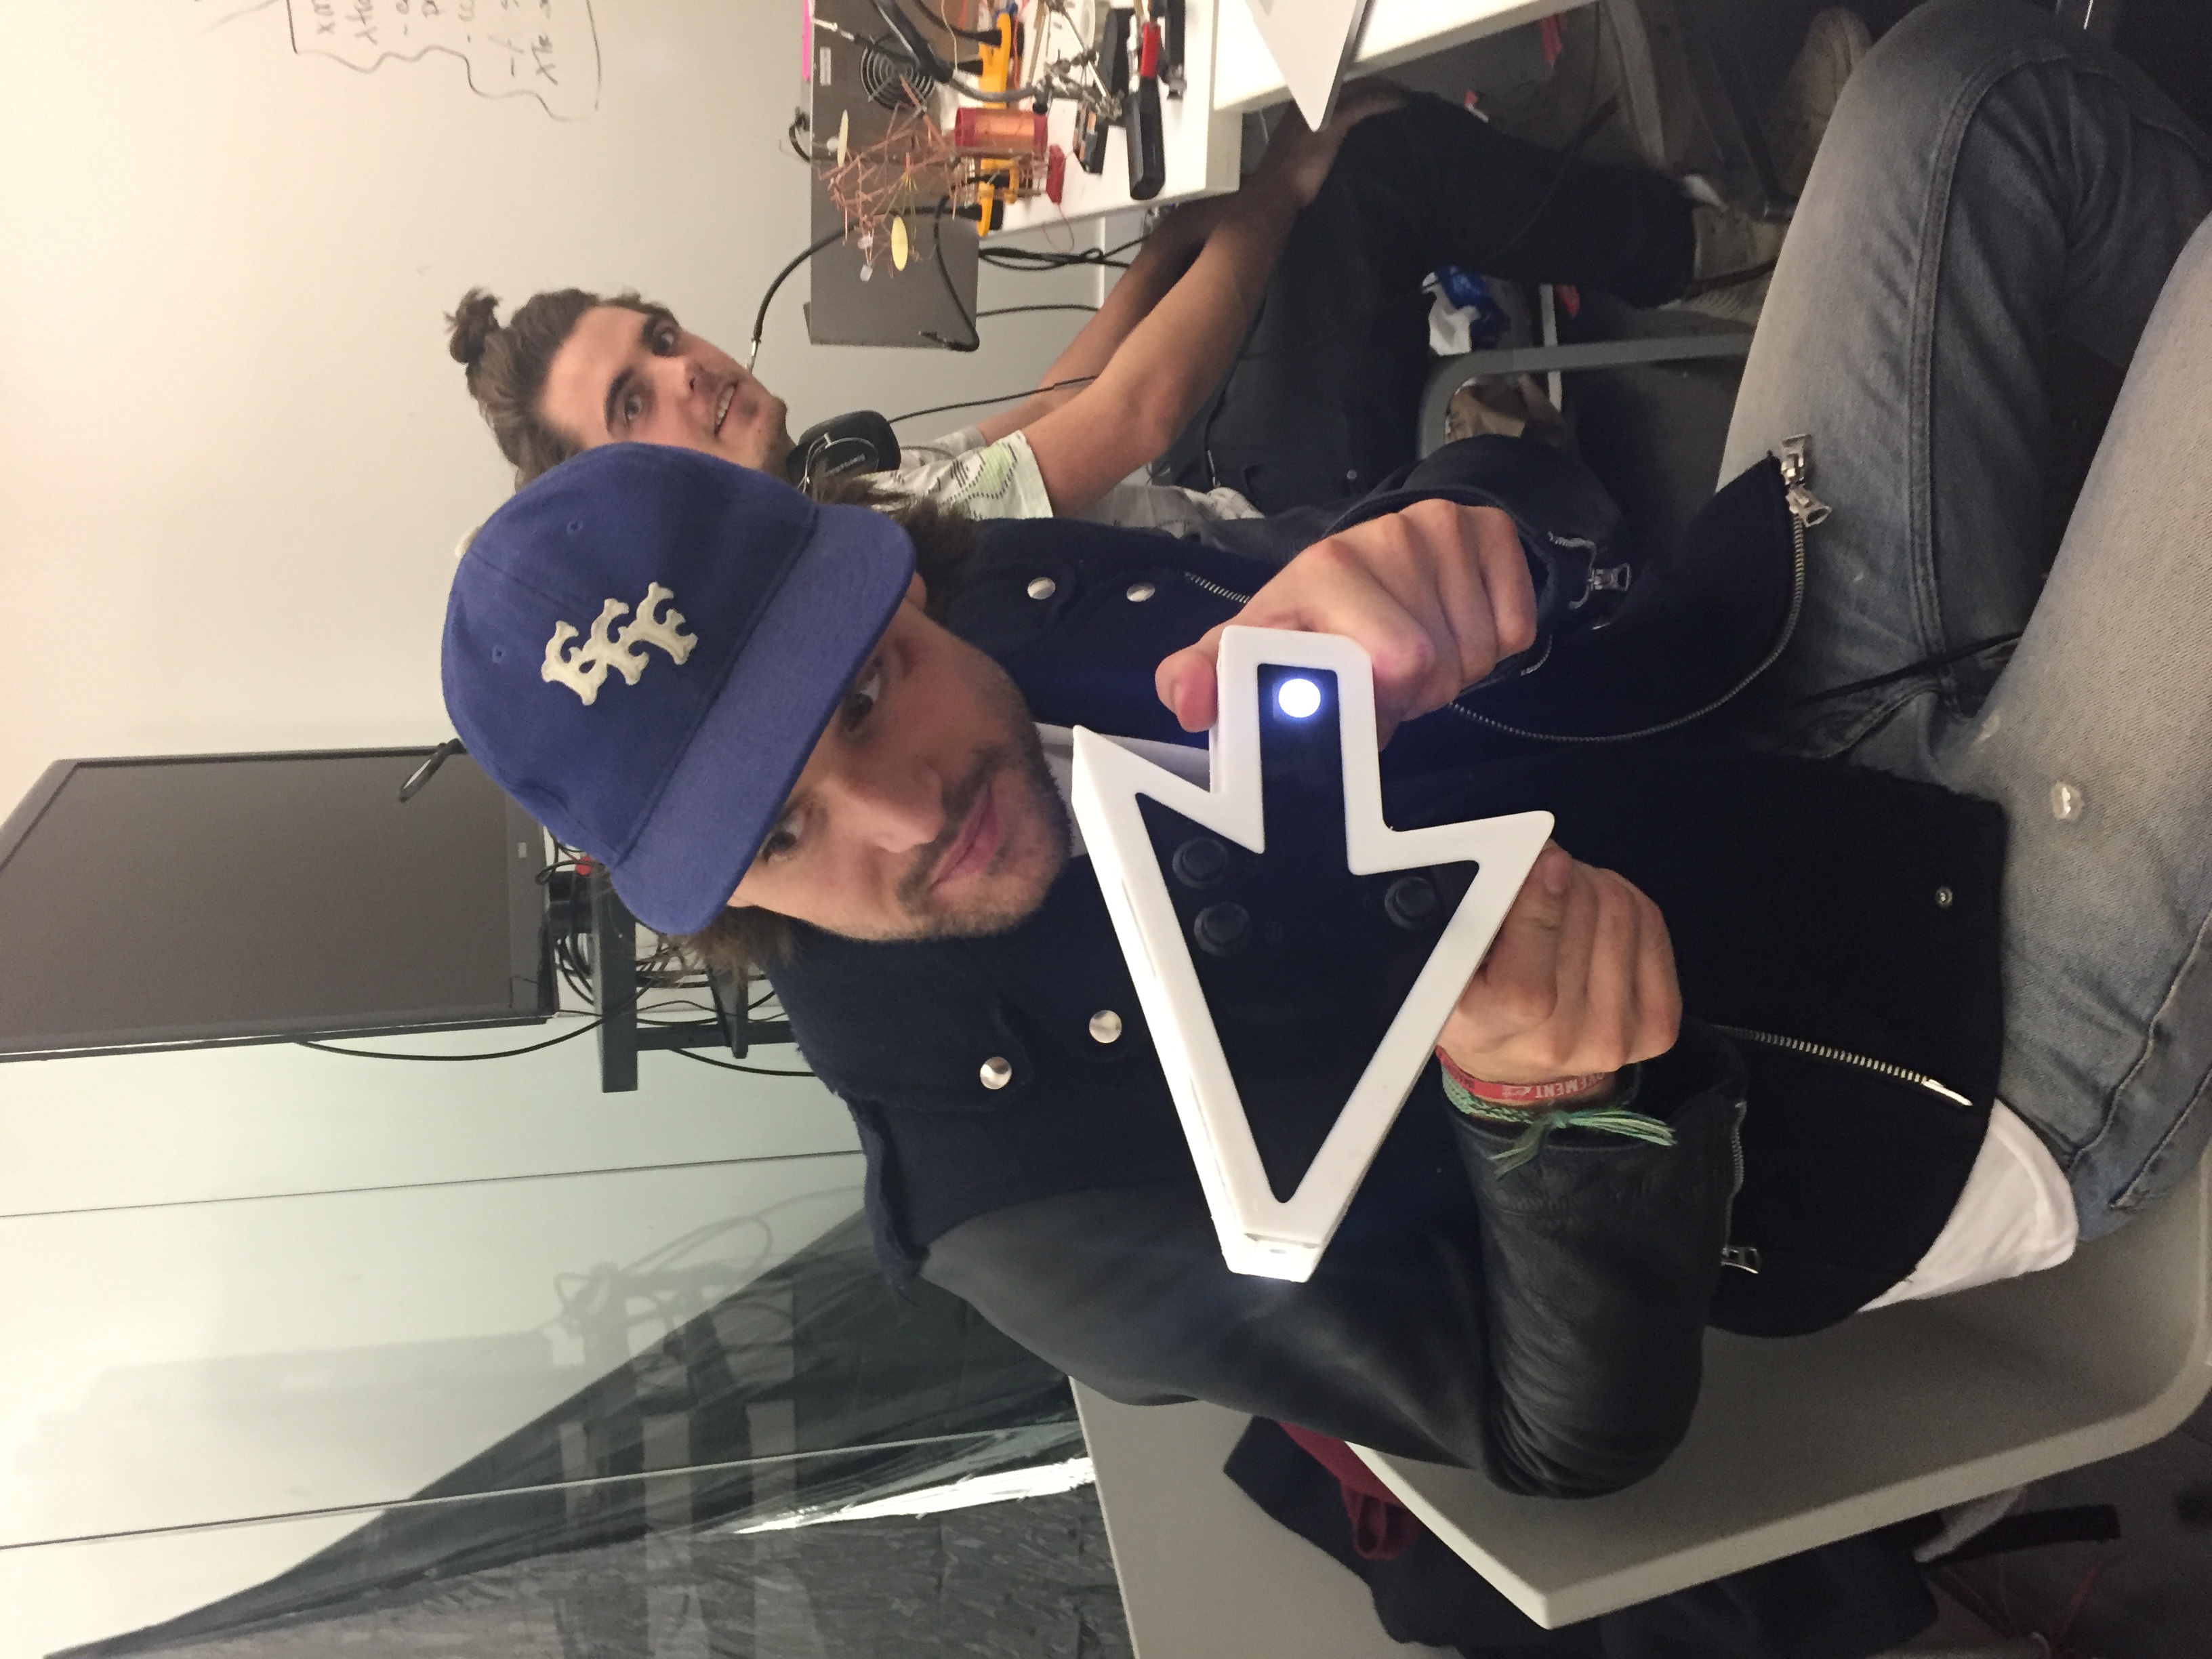
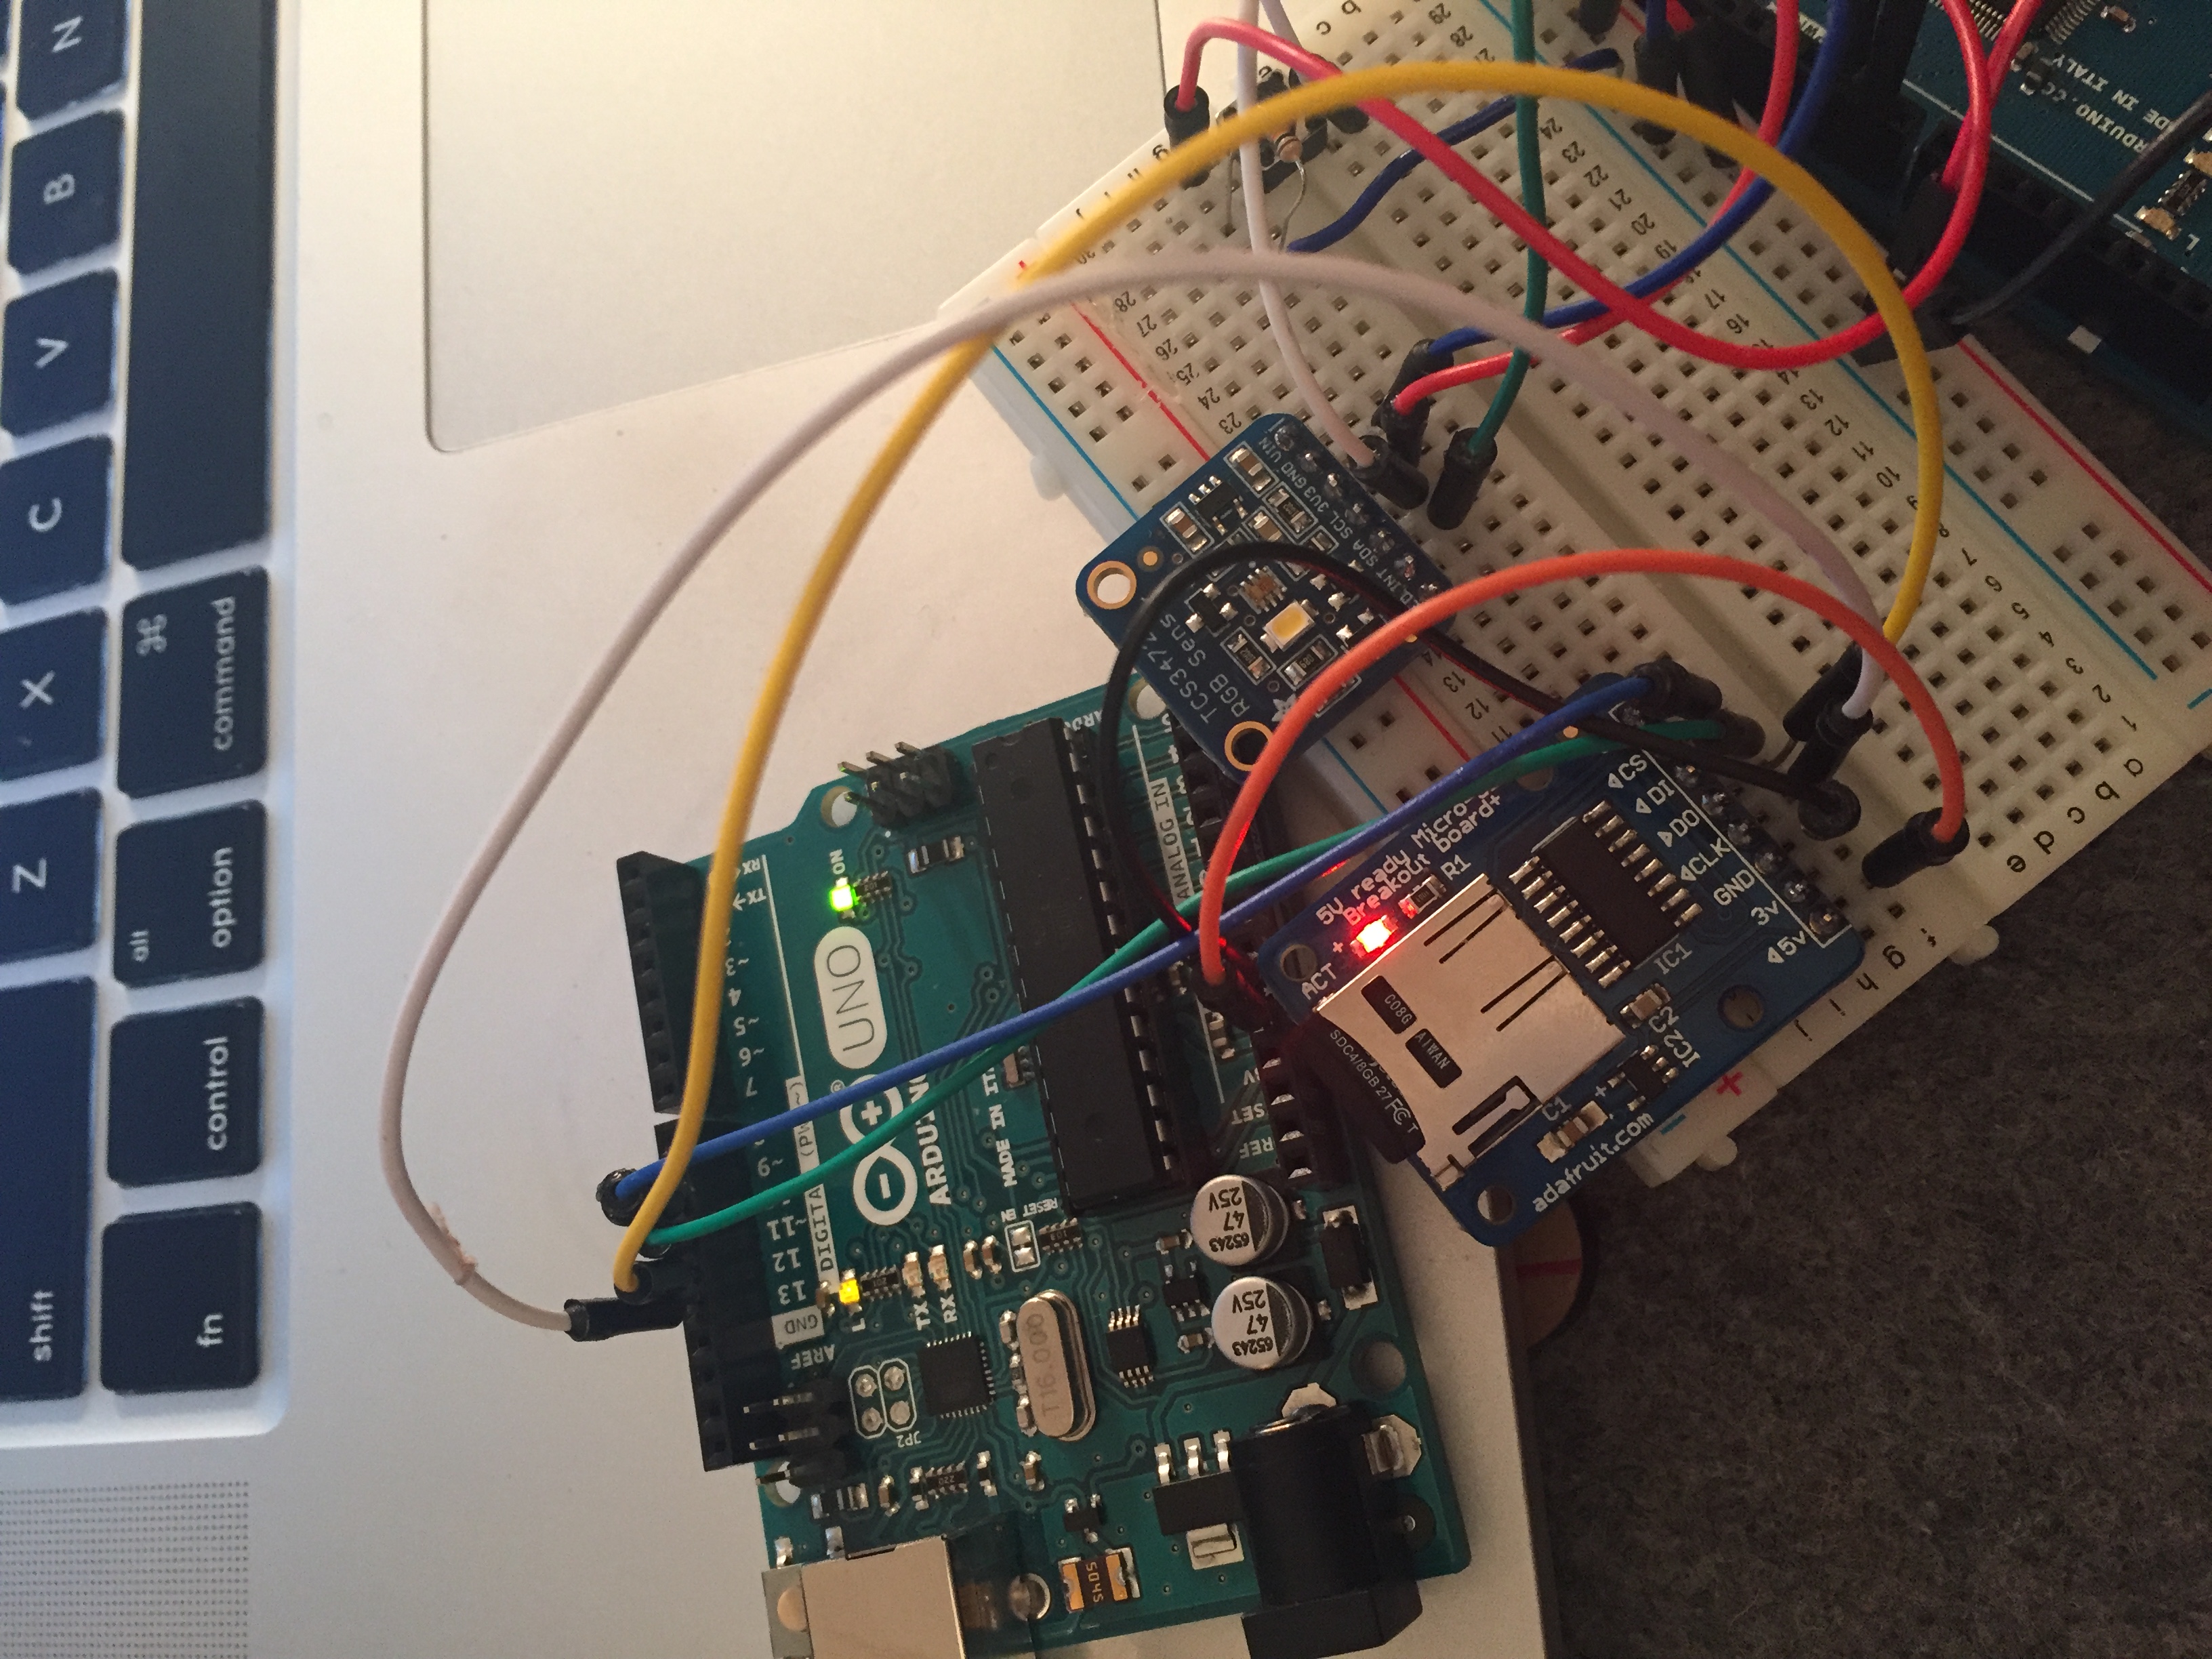
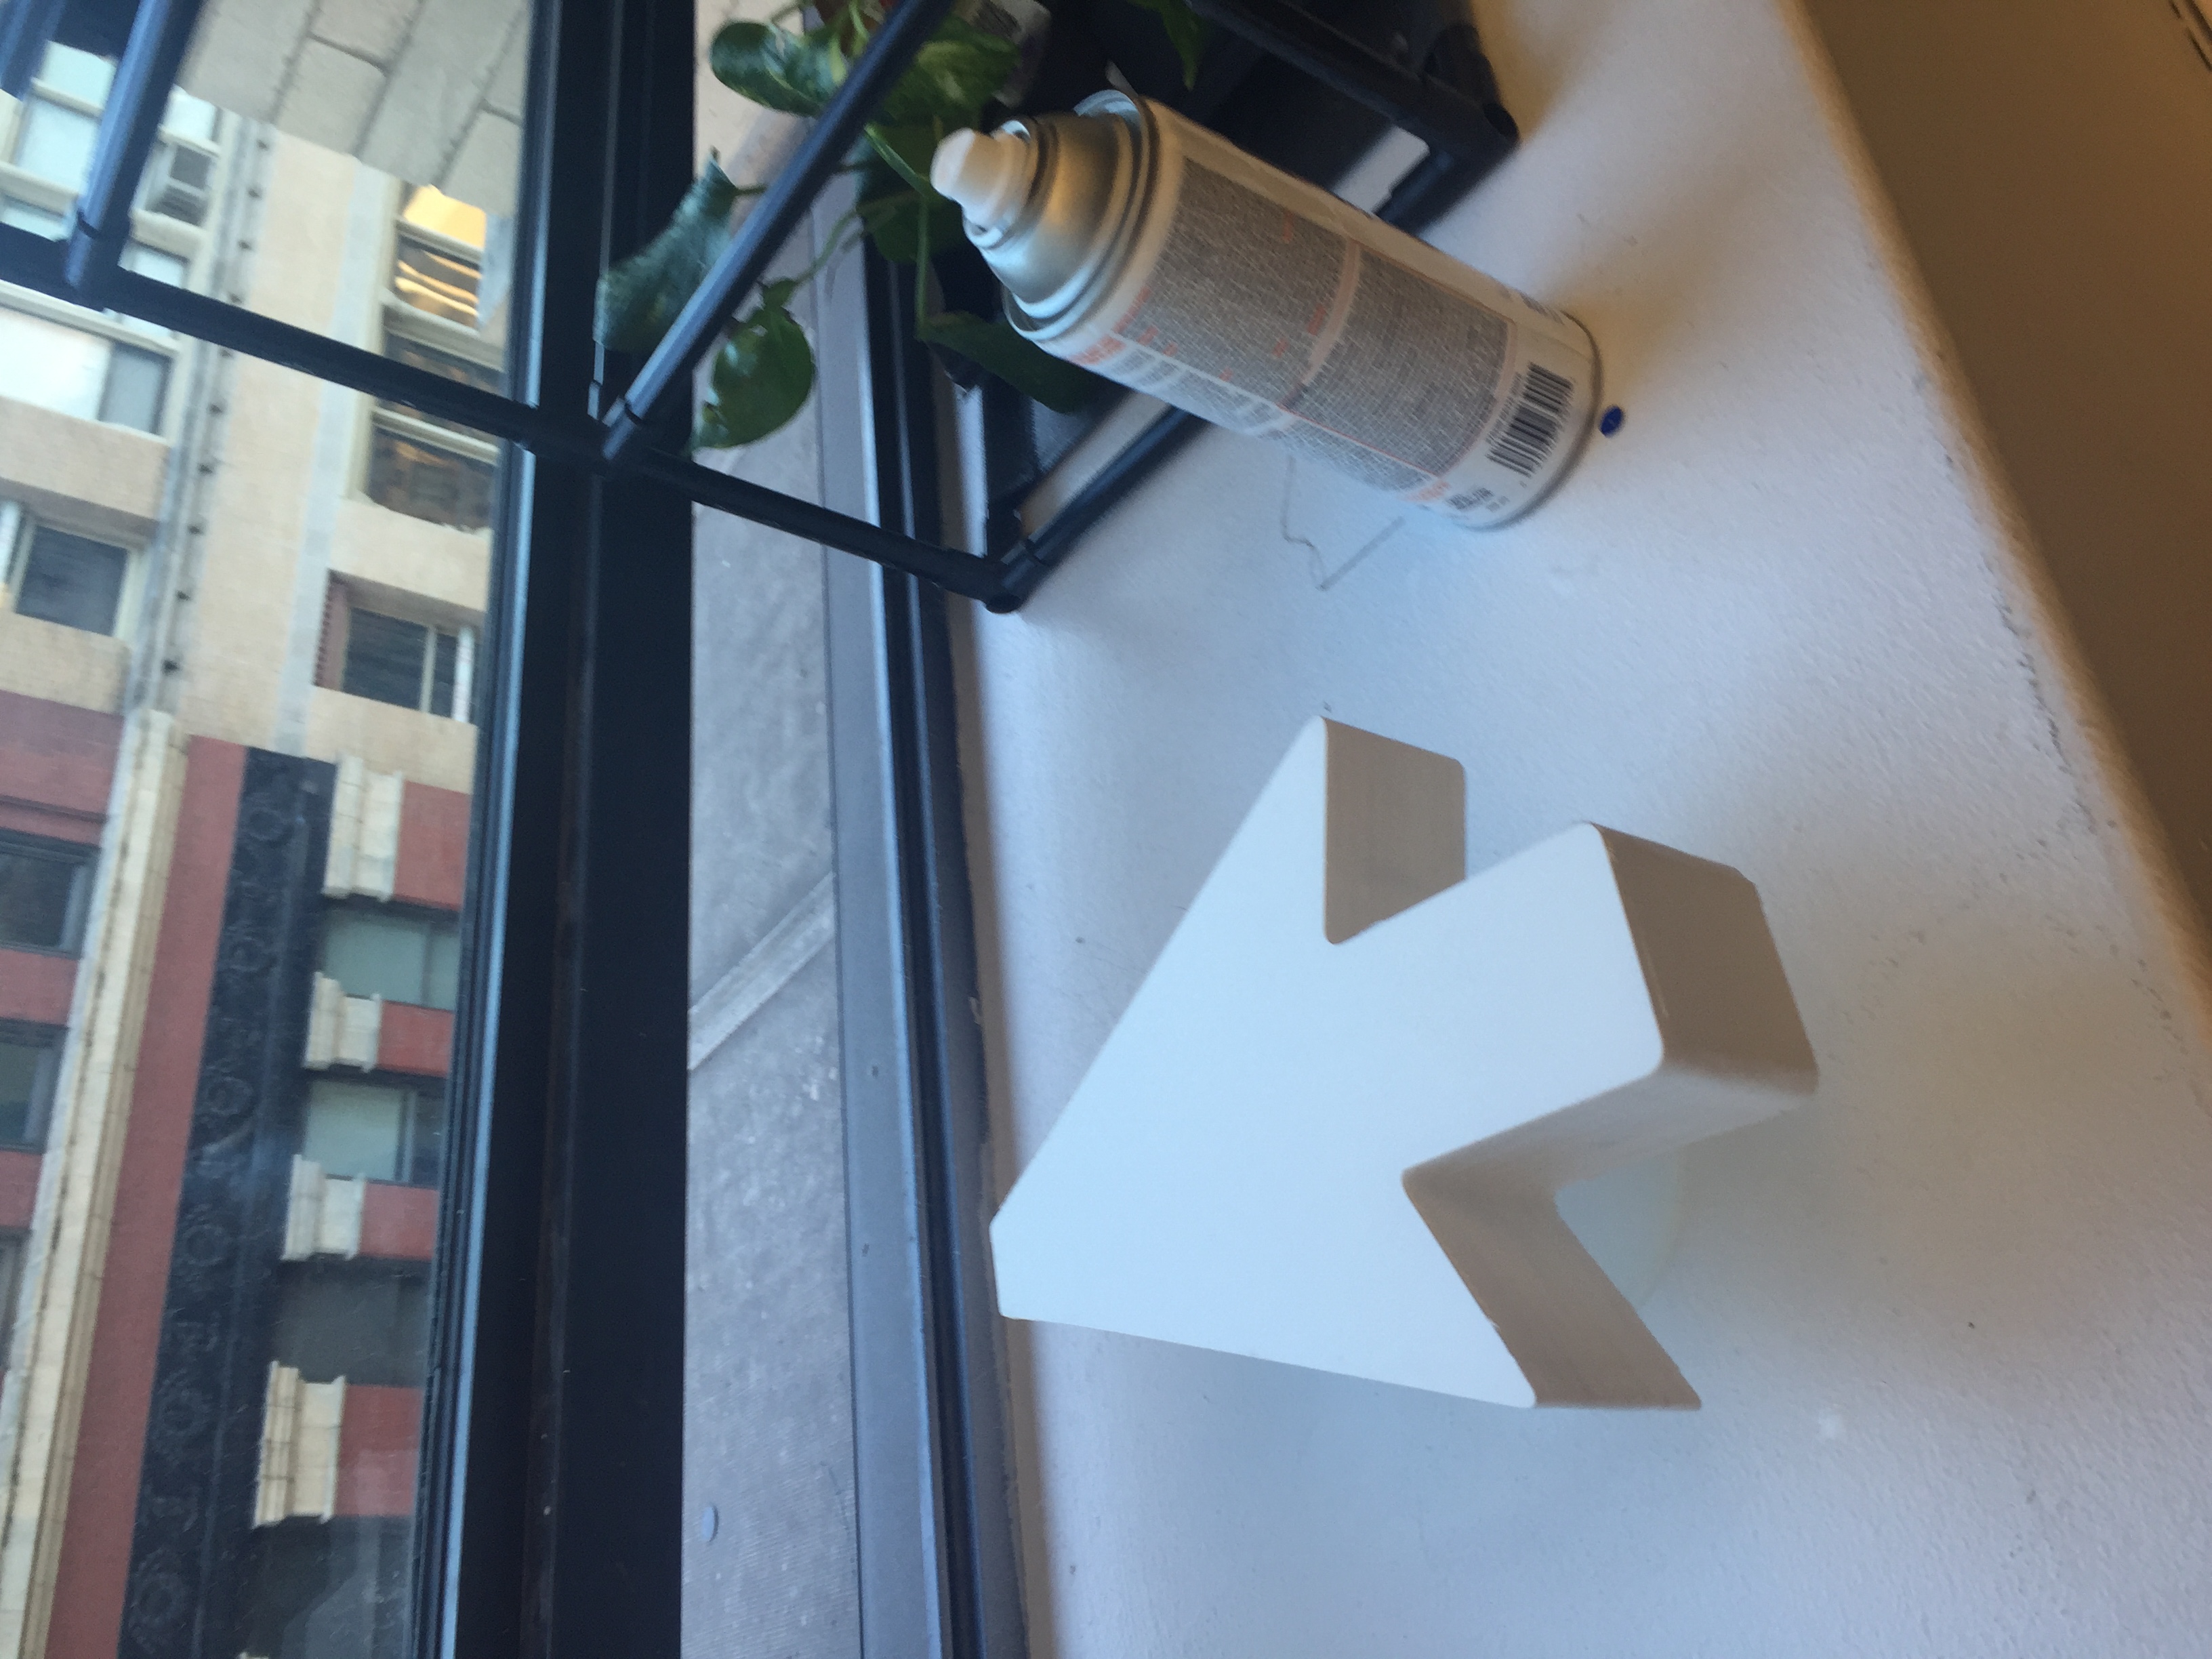
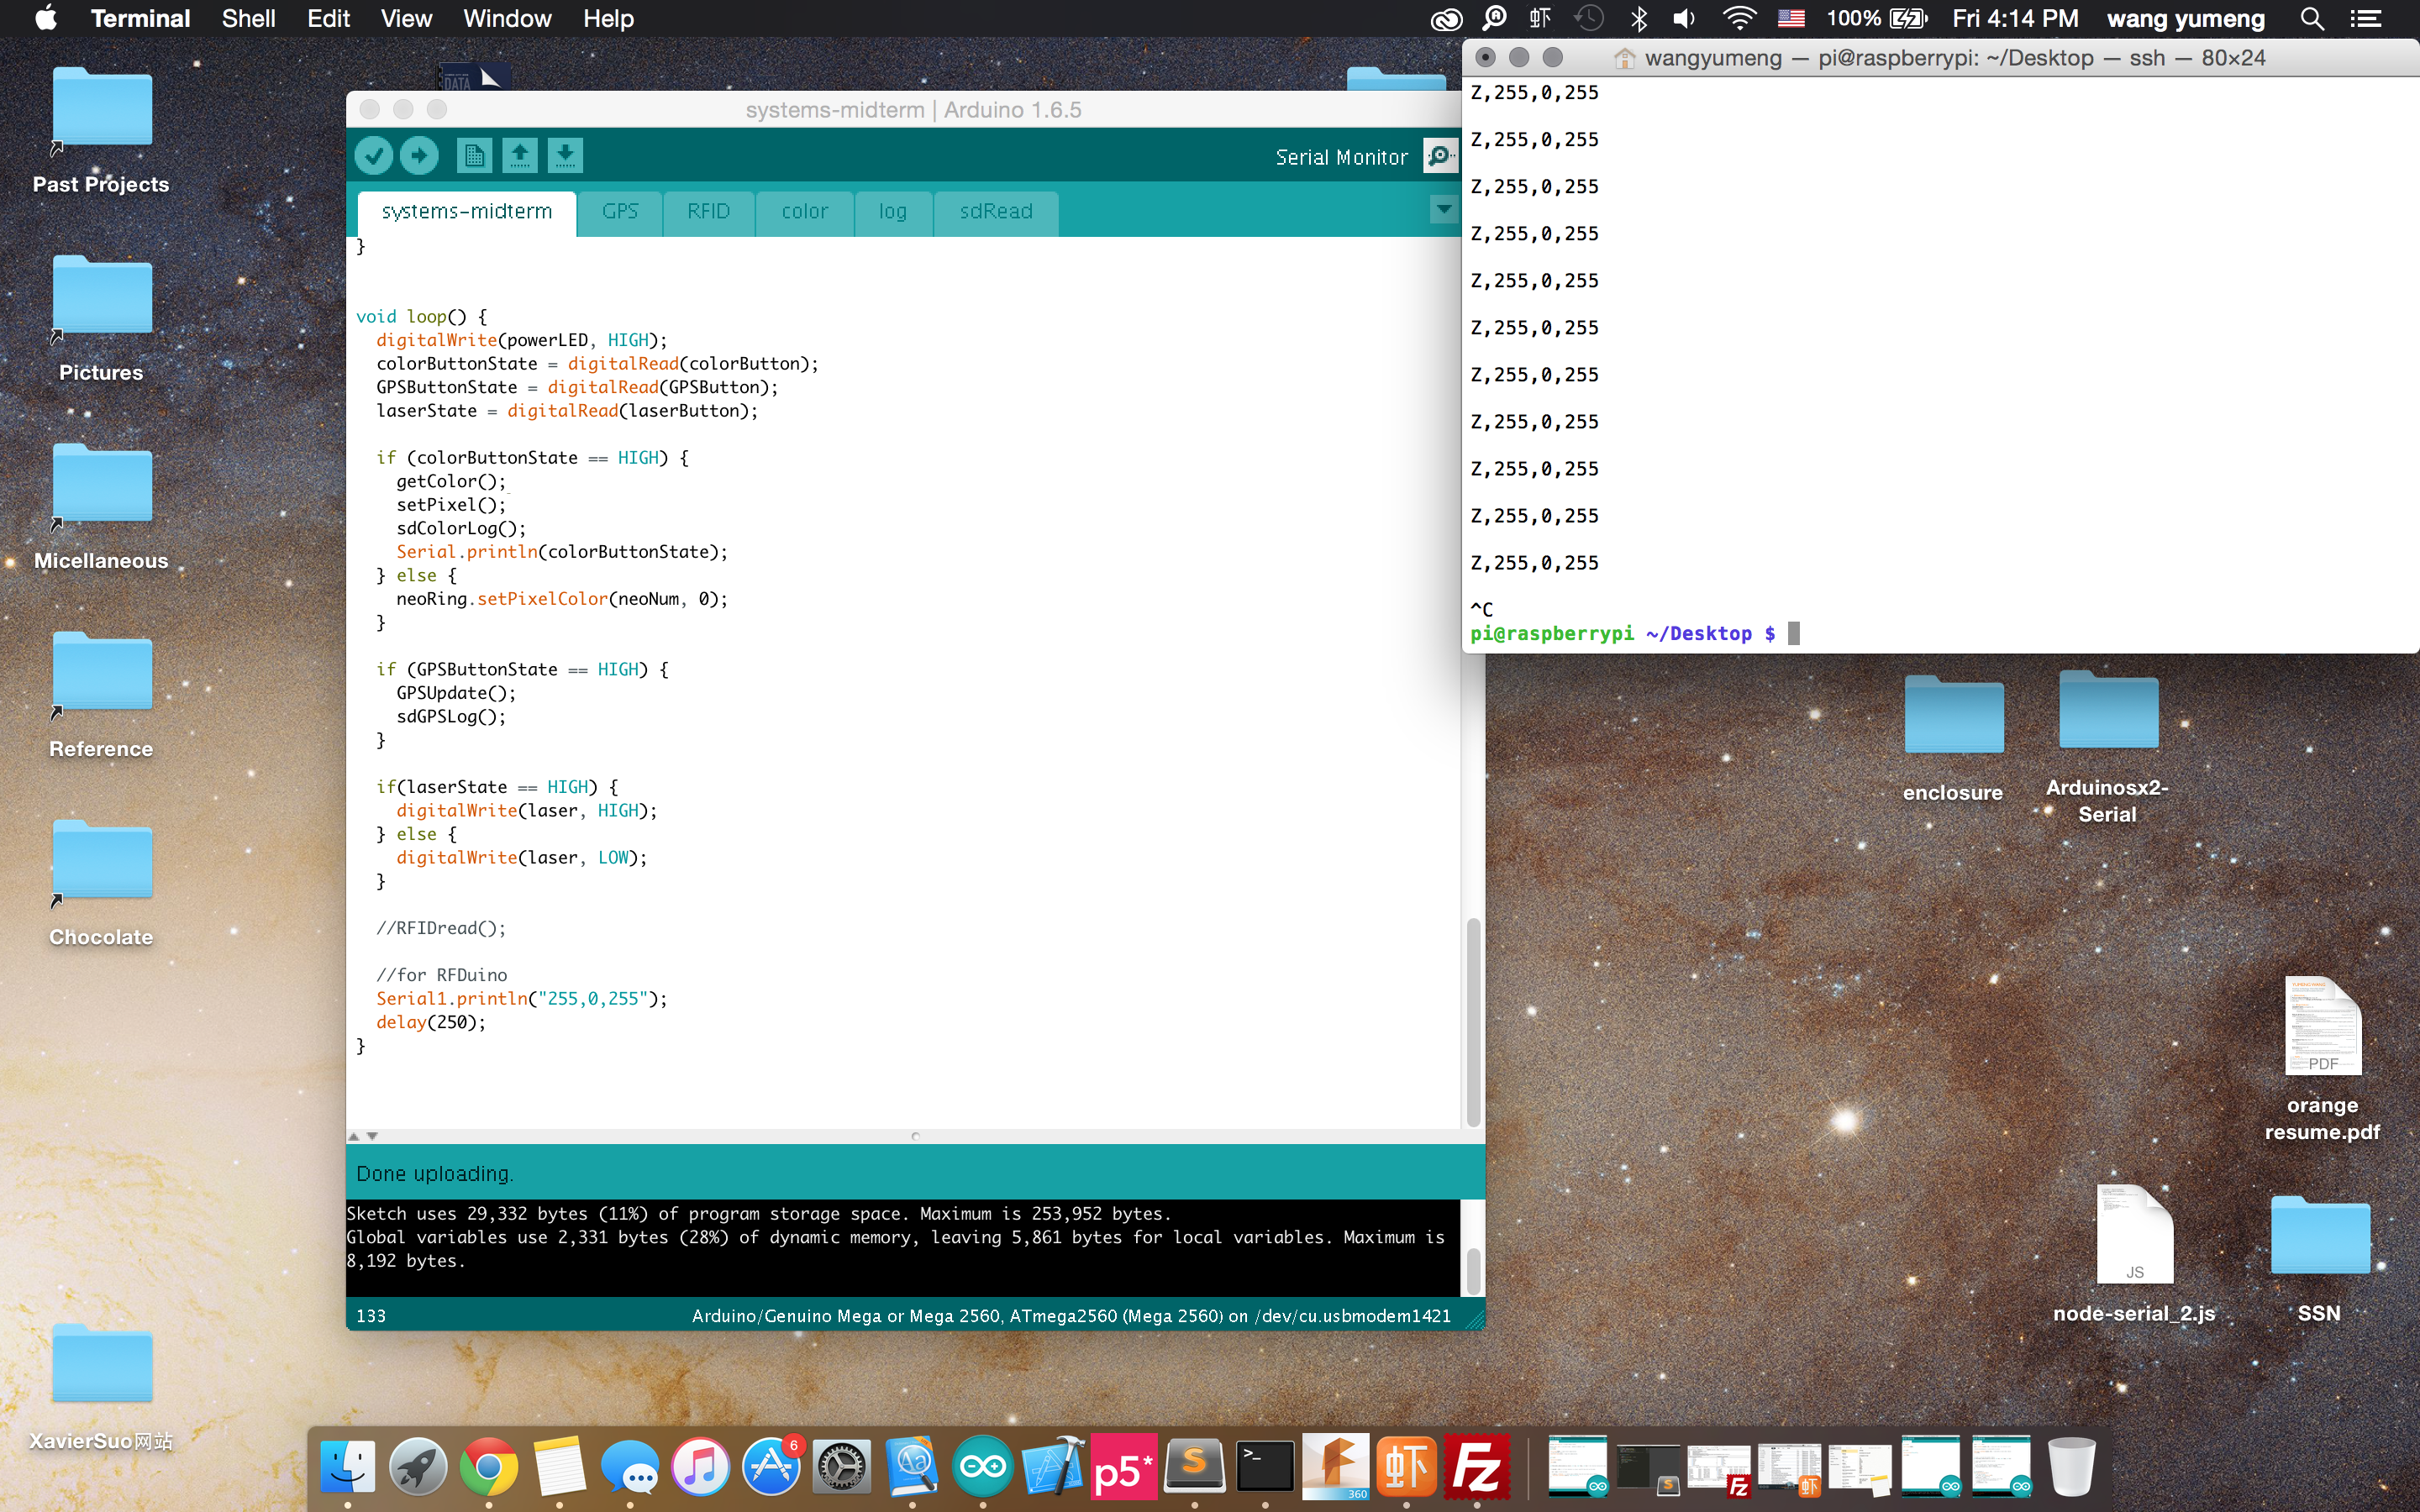
Cursor Toolbox is a system that translates the online experience to real life and uploads it back online. It consists of a toolbox of different forms of physical “cursors” with various functions (for midterm, I made the “pointer cursor” and the red “upload button”). The user is able to record colors, GPS data, and point at object with laser, which respectively correspond to the three functions of the actual cursor on the computer: saving images, saving URLs and navigation. All data are stored temporarily on a micro SD card inside of the cursor. When the user gets home, he/she can put the cursor on the “upload button”, so that the data can be transferred to a web server through RFDuino Bluetooth transmission and serial reading on a Raspberry Pi inside of the button. A P5.js sketch is served on the Pi as the visualization of the recorded data, showing the color and the processed GPS data (the GPS data has not been input into the website in the current phase). Meanwhile, for each time of “uploading”, two colors are randomly selected from the color recording file and pushed into the database on Parse. Ideally, these color data can be utilized in the future as a palette from which the user can pick the color and draw on the screen.
The goal of Cursor Toolbox is to address on the issue that physical interactions are diminished by online activities for various reasons such as convenience and novel lifestyles. This shift from offline to online has tremendous impact on our communications, relationships and social interactions, inspiring the future of communication, social structures and human-machine interface, as well as causing unprecedented problems: apathy of physical contacts, digital abuse, online privacy, etc. Therefore, this project aims to re-emphasize the significance of offline activities and explores its connections back to the digital world. It uses the features of online behaviors as the lens to observe and magnify our offline life, facilitating physical interactions between people. As the bridge between online and offline, the system in this project also develops new possibilities for interactions and behaviors in the built environments.
The devices in this project take forms of identical computer interface icons. Through the explicit representations of the digital navigation tools, which defines and also limits the online experience, these devices investigate how digital/online tools have shaped the ways that we perceive the reality. In addition, the dual nature of the digital icons and their physical counterparts reflect on the idea that various social issues also exist online and offline that relate or contribute to each other. However, until now the functions of the devices focus merely on the actions that engage interactions between people and their environments. In the future, more functions and other forms of cursors will be developed to facilitate social interactions between people or address on other specific social issues.
Demonstration of the usage of the “cursor”, the “upload button”, and the visualization.

Documentation of Making Process:


Here is the final presentation: midterm-finalPresentation
Here is the initial proposal presentation: midterm-proposalpdf
Here is the research for the project: midterm-research
Here is the code on GitHub: midterm-code
* Until now I only have image documentations and short videos. I will edit a demo video for the project and update this post soon.
Team: Caio, Yumeng
Keywords: RFduino (inputs), RFduino – Raspberry Pi, Express Server, Socket.io
How it works:
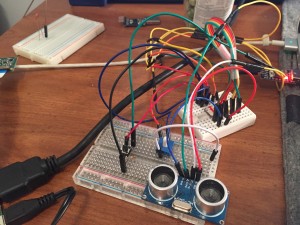
One RFduino (device) is connected to two physical inputs: a button and an ultrasonic distance sensor. The other RFduino (host) is connected to the GPIO on the Raspberry Pi, which works as a web server. There is a folder called “cy” on the Pi’s desktop that contains the files for both server side and client side. When we run app.js, the server is opened. Data are transferred from the server to the client through Socket. When you go to the url http://192.168.1.125:8000/ (or something like this), you can visit our website “Caio and Yumeng’s Confidential Surveillance Site”. On our website, there is a yellow circular button and an orange bar. The yellow button turns to green when the physical button on RFduino is pressed and a picture is taken. The length of the orange bar reflects on the distance data from the ultrasonic distance sensor; the closer an object approaches, the longer the bar will be. Above these two graphical elements, there is an image. Every time when the orange bar reaches its full length, the page will automatically refresh and display the latest picture.
Here is a video demonstration.
Concept:
People like to look for or stare at security cameras in different places such as elevators or grocery stores. I want to make a security camera interaction There will be a display next to a security camera showing the images/videos that it captures. People will be curious to look at the camera and the display to see what is on there. Then, there is a distance sensor next to the camera that detects how close people are approaching the camera. The closer they are (more curious they are), the smaller the size of the displayed images/video will be. So, if someone stands very close to the camera to see what is on the display, the images/video will become very small that the person will not be able to see the content.
Code:
Here is the code on GitHub.
Team: Yumeng, Nico
Making:
We made inputs on one RFduino, and outputs both on Raspberry Pi and another RFduino. However, because we couldn’t get Pi-blaster to work for PWM, we only had an LED as the output on the Pi.
When Yumeng is the host, she has 3 physical outputs on her RFduino – LED on-off, a piezo speaker and a servo/fading LED. Meanwhile, Nico has 2 inputs on her RFduino – a button and a potentiometer. The input data are also printed in the Terminal on the Pi. Here is a video of how it works.
When Nico is the host, she has 3 visual outputs on Processing. Meanwhile, Yumeng has 2 inputs on her RFduino – a button and a flex sensor.
Potential Concept:
For the servo, LED and speaker combination, potentially we can make a dynamic audio system, in which a controller (potentiometers) can move the speakers around with the servo to create stereo sound. The button can control the lights on the speakers so that the whole audio set can be a mini home entertaining device.
Code:
Here is the code on GitHub.
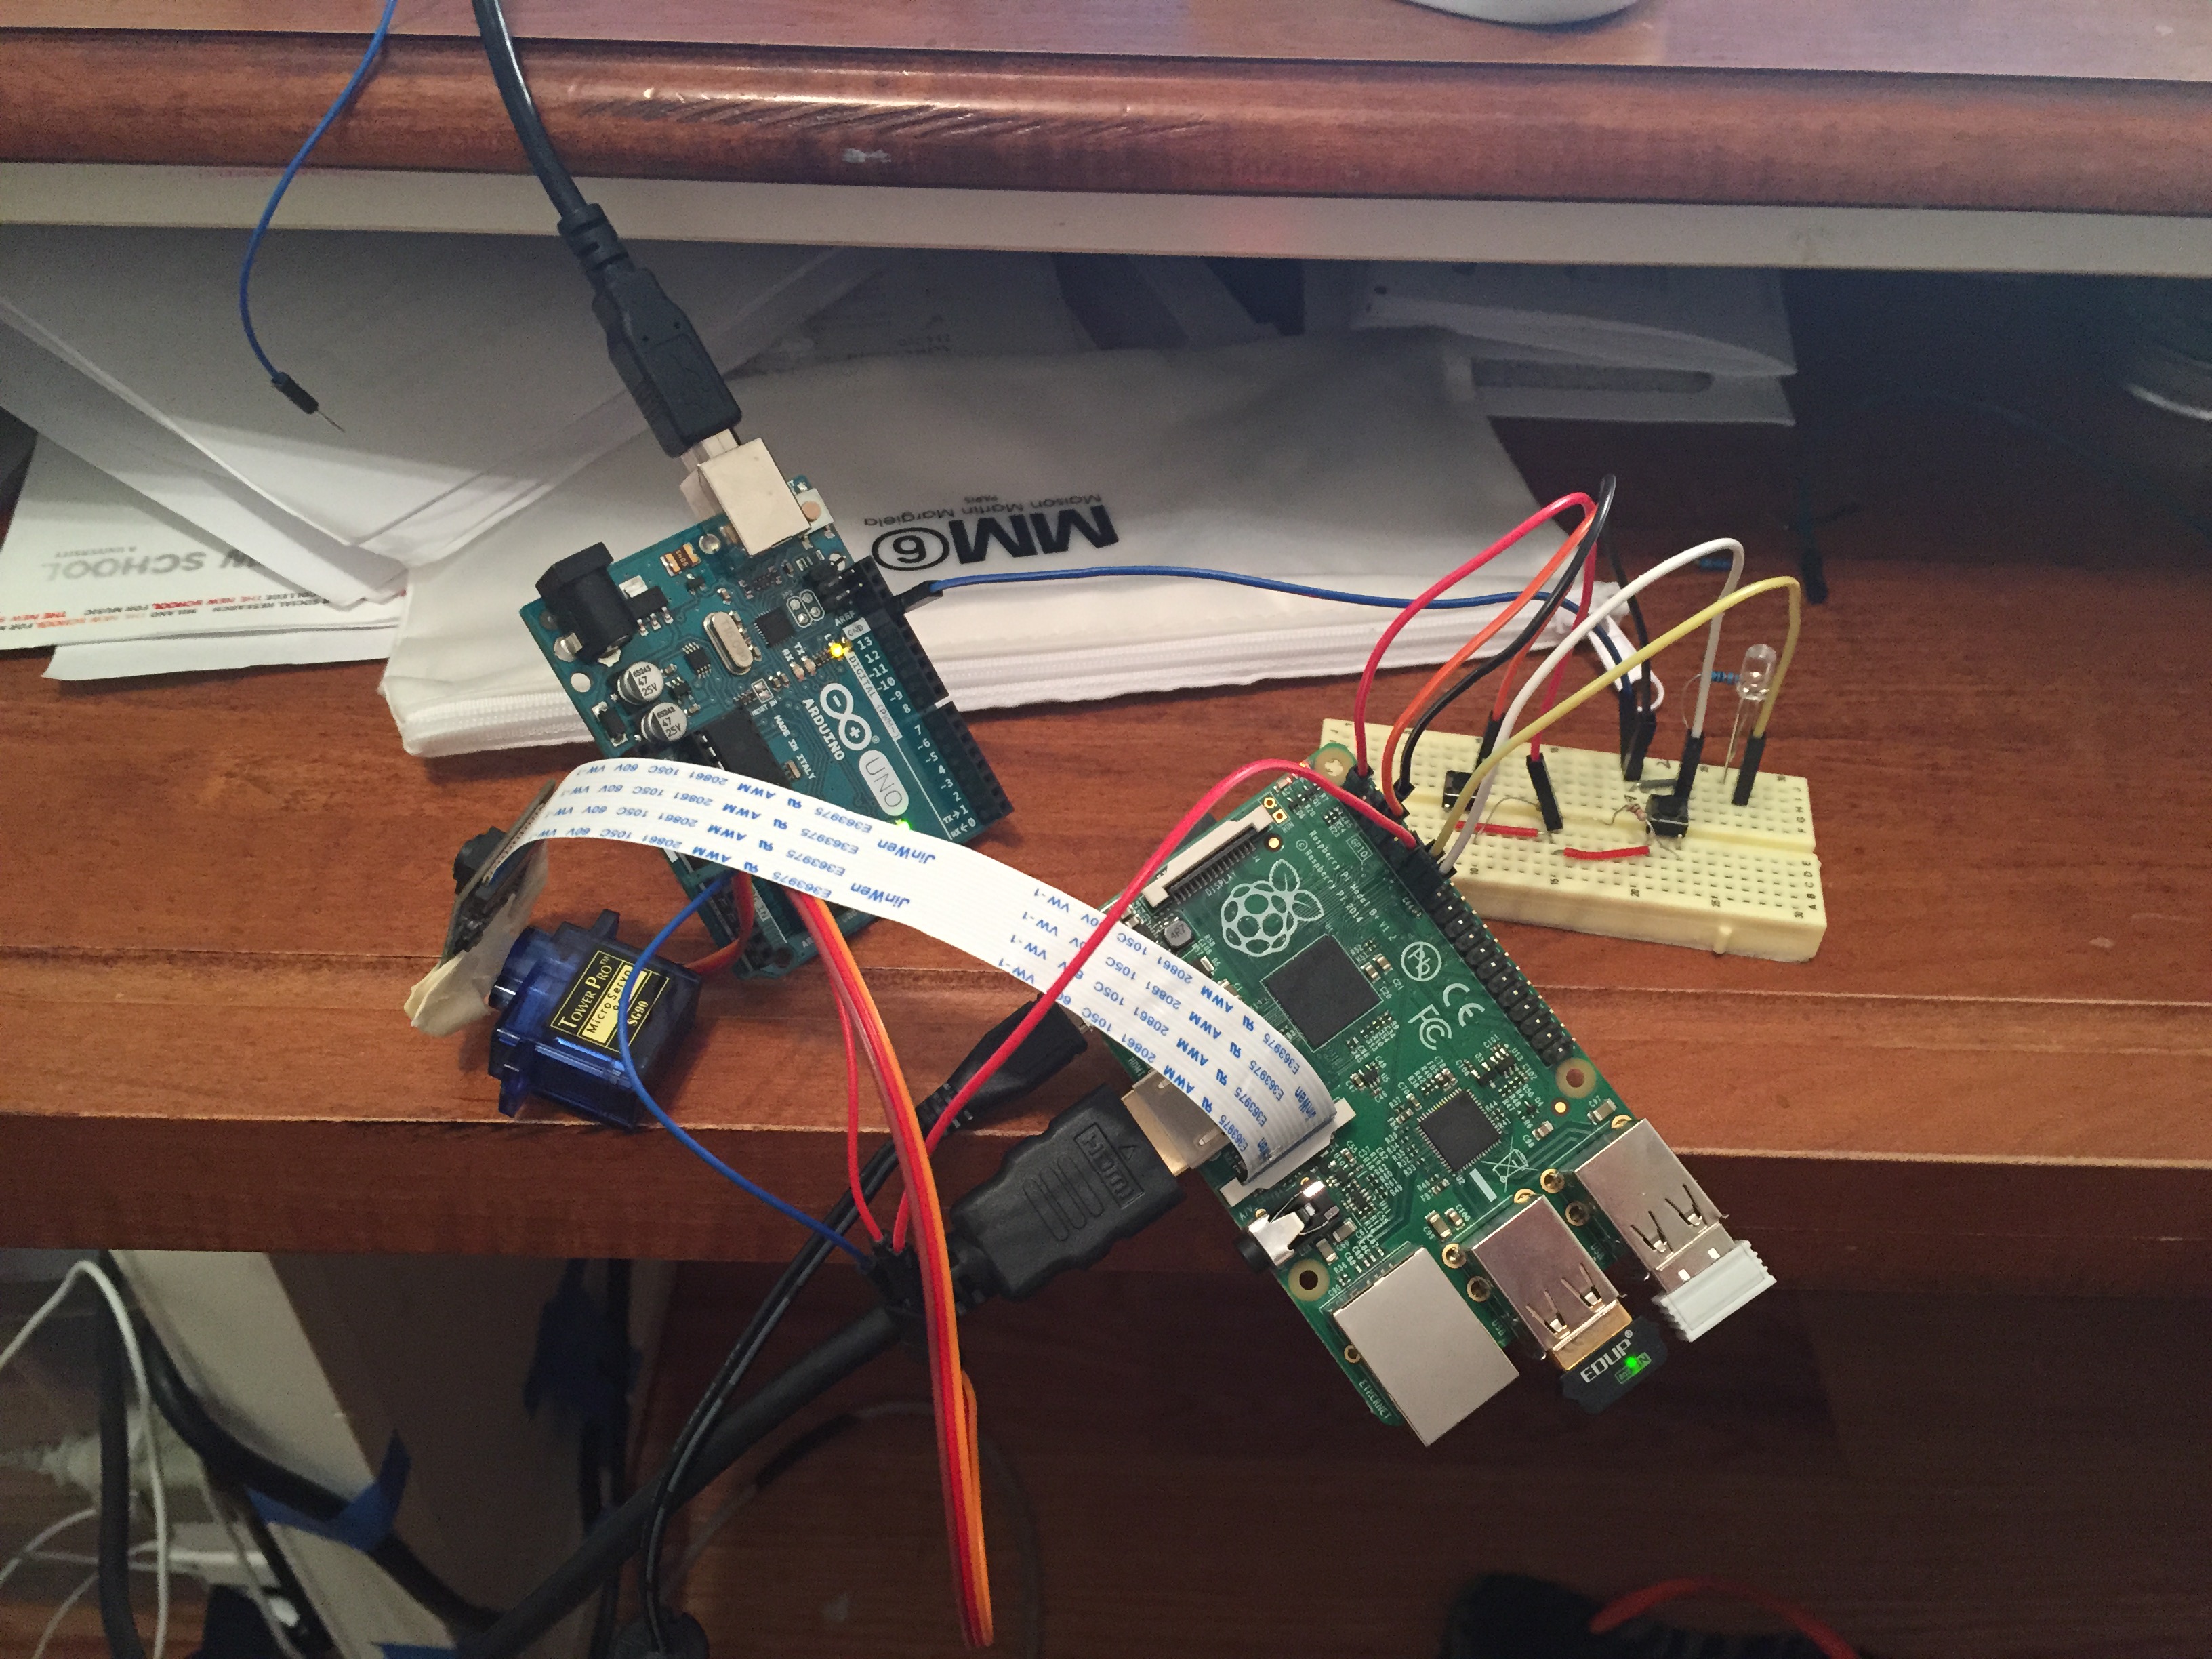
In this assignment, I used two buttons as the inputs, and the pi camera attached to a servo and an led as the outputs. The two NPM that I used are Pi-blaster and Camerapi. When button 1 is pushed, the LED will be turned on and the camera will take a pictures that will be saved to Desktop, or whatever directory that’s indicated in the code. When button 2 is pushed, the servo will turn 180 degrees and the camera will also turn accordingly to take pictures from different angles. However, I think the for-loop in my code in order to turn the servo has problems, which I would like to solve after class tomorrow.
Here’s the github code: https://github.com/yumengwang03/Lab-Systems—Homework/blob/master/npmHW.js
 This video shows how it works and the problems.
Science fictions have been a great source of inspiration for the development of technology in the real world, because they are not restricted by the technological capacity at the moment in order to create concepts or directions for future. We often find out that the technology that has appeared in a sic-fi movie a decade ago, turns out to be ubiquitous in the present time. The most well-known example will be the gesture-based data input devices in Minority Report has entered our life as different interpretations, such as Kinect, Leap Motion, and G-Speak Spatial Operating Environment, interestingly, created by the movie’s technology consultant, user interface designer John Underkoffler. However, the concept of intuitive design was actually proposed much earlier. In the 1980s, Mark Weiser proposed the idea of ubiquitous computing. In his theory, technology devices would start to disappear in our life and the interaction of technology and us will be intuitive.
Another fascinating point in the article is sound as user interface. Indeed, sound has many advantages compared with visual. An obvious example is the trailer of Until The End of World, in which music plays a vital role of rendering emotions and atmosphere. Usually when we think of sound interface, we will think about speech recognition like Siri. However, the potential of sound interface is much beyond actual words. Designers should explore the functions and influences of sound in experimental approaches.