12 HTML5 Multimedia

Week 12
11/19

Multimedia features of HTML5. HTML5 introduces a host of new features, the most visible are sound, video and the canvas element. Activity: We will incorporate these elements into a web page. 8
Activity: In-class final Workshop #2.

Homework

1) For the class: Use audio, video or canvas to sell your final Project. 2) For the final: Create home page for the final. Read chapter 17. Due: The following week. Third Quarter Assessment: Have your Final Worksheet including all 7 steps, photoshop comp and first page ready and uploaded by Wednesday Night. So I can grade them by next Friday.

Materials

Additional materials for this unit can be found by following these links:

Goal

The goal of this unit is to:

  • To incorporate Video, Audio and the Canvas element into your website.

Outcomes

At the end of this unit, students will have:

  • Coded a video for the web and embedded it in a page.
  • Exported audio into all necessary formats and embedded it into a page
  • Set up the canvas element and is able to create basic shapes.
  • Used the illustrator plugin to incorporate vector art into a page.

Step-by-Step

20 Review homework and answer questions.
40 Demo: Canvas
10 Break
40 Demo: Audio & Video
40 Final: Progress Review

Quick Primer on Using Video

Video and canvas add a dimension of multimedia to the web experience that goes well beyond print. This should excite many of you, but it can be daunting at the same time. The language of story telling on video, tools like After Effects, Final Cut Pro and Premier and the production requirements of making the videos are another world altogether.

When it is done right, video gets people’s attention, conveys emotion and personality, and engages engages people in a way that photo and text alone can’t. It can improve the website experience, but it can also cripple it, suck up bandwidth, drive people away, and suck the energy out of what could otherwise be a good website by attracting too much of the attention.

Ask yourself, when you use video:

  • What are the goals for my video strategy?
  • What types of videos will I post?
  • Will I be concepting, shooting, editing and uploading videos?
  • How can I measure success or failure?

That said, Flash integrates well with video. Too bad that Apple threw it a monkey-wrench by not supporting it on its iPhone or iTablets.

The MetaProject exemplifies how flash integrates with video seamlessly working together.

You can, however, use Google’s swiffy to convert flash sites to HTML5, SVG, and javascript.

Problems of keeping video in the background like images. It takes a lot of room, requires a lot of bandwidth and careful planning, and the right video. Random Dance uses video on the splash page, and then uses it throughout the site.

Still, video can be difficult to integrate, so think about that as you work on your final. You need not integrate video or canvas in your final, just show me that you can do it in the homework.

News and External Resources

Subscribe to the following two magazines using (RRS): A list Apart has been a beacon for web development since the web’s earliest days with timely articles, and it still remains one of the best resources out there. Smashing Magazine is another popular web design magazines that you should be reading.

There are a zillion other resources on the web, and you need to plug in to stay up to date. As this especially exciting time shows, the best is yet to come. Plug in and keep abreast of the creative solutions that become standardized practices.

Though the time it has taken each of you to understand HTML and CSS has varied, everyone should be on board by now. The more you code, the better you become.

All of you should be reaching out to the larger web community. If I have been a cheerleader that encourages you to do that, then I can feel confident that you will fish for a lifetime.

Final Assignment Links

Updated links that I expect to be up and live as they will be graded for your final grade.

Example of landing page from several semesters ago.

    Week 2

  1. Website Analysis*

    Week 3

  2. landing page— links to your assignments and a picture next to your name.
  3. HTML markup of Analysis
  4. Worksheet: behind the scenes on creative process for midterm (7 steps)*:

    Week 4

  5. Portfolio exhibiting the CSS selections
  6. HTML Wire Frame from PhotoShop comp

    Week 5

  7. incorporate CSS Layout Strategies in web site

    Week 6

  8. Quiz
  9. Peer Review Notes / Advice

    Week 7

  10. Typography Poster
  11. Finished Midterm: Portfolio

    Week 8

  12. Final Worksheet*

    Week 9

  13. Responsive Redesign of Portfolio

    Week 10

  14. CSS3 Collateral
  15. Class Exercise

    Week 11

  16. CSS3 Animatics
  17. Class Exercise

    Week 12

  18. Final: Modular Navigation

    Week 13

  19. Multimedia Demonstration

    Week 14

  20. Forms
  21. Peer Review Notes / Advice

    Week 15

  22. Final — You have 5 days extra to hand it in before I determine my final grade

Each assignment exhibits a skill. If you have used that skill in building your portfolio, link to that page and explain how it satisfies the homework. For example, for Week 11 CSS Animatics, if you used a hover that fades in your final, point to the page that exhibits that feature and let me know where to look if it is not completely obvious.

The final website sells something. It does not have to be lots of pages, but the quality has to be ready for public scrutiny. It should have many of the topics we covered, like CSS3, Multimedia, PHP, forms, media queries, etc.

Definitions

These are the terms that participants should be familiar with during this unit:

Codec

A codec is a device or computer program capable of encoding and/or decoding a digital data stream or signal. The word codec is a portmanteau of ‘compressor-decompressor’ or, more commonly, ‘coder-decoder’. A codec (the program) should not be confused with a coding or compression format or standard – a format is a document (the standard), a way of storing data, while a codec is a program (an implementation) which can read or write such files. In practice “codec” is sometimes used loosely to refer to formats, however.

A codec encodes a data stream or signal for transmission, storage or encryption, or decodes it for playback or editing. Codecs are used in videoconferencing, streaming media and video editing applications. A video camera’s analog-to-digital converter (ADC) converts its analog signals into digital signals, which are then passed through a video compressor for digital transmission or storage. A receiving device then runs the signal through a video decompressor, then a digital-to-analog converter (DAC) for analog display. The term codec is also used as a generic name for a video conferencing unit.
12 Homework

Homework for the Final

  1. Finish your website.
  2. Test it.

Homework for the Unit

  1. Create a page featuring multimedia, including canvas and video.
  2. Ideally, you are able to incorporate canvas and video in the final, but the final does not have to include multimedia.
  3. A link to the multimedia page has to be on the work-sheet.

11 Canvas

The canvas element was originally developed by Apple for OSX as a way to encourage easy customization of dashboard widgets. It utilized Apple’s HTML rendering engine called webkit to create 2D graphics at around the same time as the WHATWG (Web Hypertext Application Technology Working Group) came together to create what would become HTML5. Apple, of course, played a central role in the creation of HTML5, and the technology was adopted by other the browser vendors.

What Is It?

Canvas is a drawable region that uses Javascript drawing functions to create dynamically generated graphics. This is what other drawing programs do. Illustrator draws vectors using postscript to create pictures, Canvas uses javascript. A difference is that the vectors are always rasterized at screen resolution in canvas, meaning that they are turned into a bitmap.

How To Use the Canvas Element

You first have to create the canvas element, and you do that in the body of the document:

<canvas  id="canvas" height="250" width="300">
	<p>Use a browser that supports the canvas element
</canvas>

The canvas element needs to be initialized in the Javascript, which appears between the <script type="application/javascript"> and </script> tags, and that is usually done in the head of the document:


The actual instructions are written right after the canvas element has been initialized. The following examples show the instructions that draw a square and a circle.

Square

You draw on the canvas by coding the exacting steps the computer requires to draw these shapes. There is only one shape it supports natively, and that is a square. All other shapes have to be drawn path by path. Luckily, there are drawing functions that make it possible to create complex shapes.

If we take a red square as an example, you first specify the fill style and then fill the rectangle based on the given coordinates. Click the draw button and you will see this red square appear in the canvas window. If you change the values, the square will change.

Javascript Code View


var canvas=document.getElementById('theCanvas');
var context=canvas.getContext('2d');

//code for the square
context.fillStyle = "rgb(255,0,0)";
context.fillRect(50, 50, 50, 50);

Use a browser that supports the canvas element


Paths

Paths require a few more steps. You have open and close a path using the following code: beginPath() , and closePath(), though the shape automatically closes when you stroke() or fill() the path. In that case, the closing of the path can be skipped. There are path methods that draw lines, arcs, bezier and quadratic curves.

The following circle has all of its steps annotated, so show exactly how many steps it takes to create a red circle with a white fill that has a shadow, the letter P and a stroke to create a no parking sign. Copy the code and replace the code for the square in the Javascript Code View, click Draw It if you haven’t already done so, and you can play with the code, add to it, subtract, to see how it works. If you get excited, I have included many more definitions below that you can use to draw simple shapes.

context.beginPath(); //Begin drawing path
context.strokeStyle="#f00"; // sets stroke color
context.fillStyle="#fff"; //sets fill color
context.arc(175,120,100,0,Math.PI*2, true); // draws circle
context.lineWidth=40; // sets width of stroke
context.shadowOffsetX="3" // adds shadow offset x
context.shadowOffsetY="3" // adds shadow offset y
context.shadowBlur="7" // adds shadow blur
context.shadowColor="#888"// sets shadow color
context.stroke(); // draws stroked circle

//remove shadow from inside of circle
context.shadowOffsetX="0" // removes offset x
context.shadowOffsetY="0" // removes offset y
context.shadowBlur="0" // removes blur
context.fill(); // draws fill
context.closePath; // closes path

context.beginPath();  // draws P
context.lineWidth=15; // width of line
context.strokeStyle="#000"; // color of stroke
context.fillStyle="#000"; // color of fill
context.font="9em sans-serif"; // size of font
context.strokeText("P",120,190); // text stroke
context.fillText("P",120,190); // text fill
context.closePath; //  but closes path

context.beginPath();   // draws Slash
context.strokeStyle="#f00"; // sets stroke color
context.moveTo(100,50); // begin vector
context.lineTo(240,210); // end vector
context.lineWidth=25; // width of line
context.stroke(); // draw stroke
context.closePath; // not necessary but closes path

Definitions:

You can copy these definitions and paste them into the editor to create a shape. Check out the example shapes to see what definitions are required.

Styles

set the fillStyle
context.fillStyle="color"

set the strokeStyle
context.strokeStyle="color"

line widths
context.lineWidth=number

line join styles
context.lineJoin="style" (bevel, round, miter)

line end styles
context.lineCap="style" (butt, round, square)

Rectangles

draw a rectangle
context.strokeRect(left, top, width, height)

fill a rectangle
context.fillRect(left, top, width, height)

erase a rectangle
context.clearRect(left, top, width, height)

paths

begin a path
context.beginPath

complete a path
context.closePath

move the pen to a location
context.moveTo(horizontal, vertical)

draw a straight line from current pen location to a new location
context.lineTo(horizontal, vertical)

stroke the current path
context.Stroke()

fill the current path
context.fill()

Text

set the font
context.font="bold italic size font-family"

set the alignment
context.textAlign="left right center"

fill some text
context.fillText("string to fill", top, left)

stroke some text
context.strokeText("string to stroke", top, left)

Shadows

shadow color
context.shadowColor="color"

shadow horizontal offset
context.shadowOffsetX=number

shadow vertical offset
context.shadowOffsetY=number

shadow blur
context.shadowBlur=number

taken from Westciv

Simple Shapes

More code examples to paste into the Javascript Code View.

Smily Face

context.beginPath();
context.arc(75,75,50,0,Math.PI*2,true); // Outer circle
context.moveTo(110,75);
context.arc(75,75,35,0,Math.PI,false);  // Mouth (clockwise)
context.moveTo(65,65);
context.arc(60,65,5,0,Math.PI*2,true);  // Left eye
context.moveTo(95,65);
context.arc(90,65,5,0,Math.PI*2,true);  // Right eye
context.stroke();

Caution Sign

context.beginPath();   // Triangle
context.strokeStyle="#000";
context.fillStyle="#ff0";
context.moveTo(70,20);
context.lineTo(137,120);
context.lineTo(3,120);
context.lineTo(70,20);
context.lineWidth=3;
context.stroke();
context.fill();
context.closePath;

context.beginPath();   // !
context.fillStyle="#000";
context.font="5em sans-serif";
context.fillText("!", 58,108);
context.closePath;

Play Time

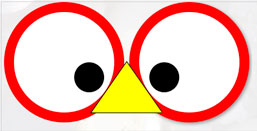
See if you can draw this figure using the shapes similar to the ones already drawn in the demo, or draw your own shapes. You can copy and paste the definitions, just make sure you initiate the object, give it properties, draw it and then create it, and if this seems laborious, be glad you are not a computer, who does nothing but this type of routines.

Better yet, watch someone else create a canvas based on processing, a sister visual programing language developed to teach visually oriented people programming, right before your eyes, using popcorn.

Turn Postscript Into Javascript

Drawing these primitive shapes by hand is really only for the purpose of understanding how canvas works. In its raw form it will never be a drawing tool for design students.

But that can change if someone were to write drawing software that could be translated to the canvas element. This is exactly what Mike Swanson has done. He created an Adobe Illustrator to HTML5 Canvas plugin. [Unfortunately, the plugin has not been updated, and it did not load the last time I tried it with Illustrator CC. Still, this is a good learning opportunity for you to understand how canvas works.]

This is an Illustrator plug-in that transforms Illustrator art into canvas art, allowing you use Illustrator as a front end to draw with, and the plugin will render it into Javascript code equivalent that can be rendered in the canvas element. Check out the Yellowstone Map as an example, and if you go to the website, you will see that the plugin is able to create motion graphics as well. We do not have the ability to install Illustrator plug-ins in the school’s computers, but please try this on your computer, as Illustrator is a very good front end to drawing directly on the canvas. If you follow his tutorial, you can even animate!

Illustrator

So here is an example of Illustrator art I created turned into Javascript. It takes only 5700 lines of code! To put that into perspective, the Illustrator file requires about the same number of lines using postscript to create the picture. Here is a text version of the Illustrator file, and the html source so you can see that there are an equal number of instructions.

Wrap Up

Advanced examples using the canvas element from the web:

Make Your Own Game

Step by step explanation of how to create your own game using javascript and canvas.

11 Audio & Video

HTML5 audio and video provide native playback of both audio and video by the web browsers themselves.

History

Audio and video playback was previously handled through proprietary plug-ins, originally Quicktime, RealPlayer and Microsoft’s Media player, but then Sorenson, who created the CODEC (from COmpression/DECompression) Apple was using for Quicktime, created a similar CODEC for MicroMedia’s Flash, propelling this ubiquitous plugin to become the preferred software for delivering video streaming.

Apple did not like that (it sued Sorenson to try and stop this from happening), as Flash killed Apple’s Quicktime and all the others video players (Real Player and Microsoft Media Player).

Flash became the default delivery system for video on the web. Adobe purchased MicroMedia for 3.5 billion in 2005, and inherited Apple’s wrath. This point should not be lost in the current debate between Flash and HTML5 video, which has been forced by the iPhone not playing Flash.

That battle appears to have been won by Apple. Flash is no longer considered ubiquitous. HTML5 video has taken over from Flash and its use in ads is no longer what it once was. Flash has been implemented on Android, but its performance is spotty, introduces vulnerabilities and eats up precious resources at the time of this writing. Flash is not dead, and its still good at what it does on the desktop, but its future of this ubiquitous proprietary standard has suffered a major hit.

The Quick and Easy Way to Embed Video

You can upload your video to Google’s YouTube or Vimeo, and embed it in your page. The tools to do that are provided by these video sharing sites, and the process is painless enough. Include the code to embed into your web page and these services will take care of displaying your video in the right format.

You can even tell both YouTube and Vimeo to display the video using HTML5 on your own browser, and it will do so seamlessly, and as you can see, you can style it on the fly. The media is my son Taiyo and some footage of the 2nd Ave Subway (under construction).

These sites generate the code that you put in your page, and from Youtube, it looks like this:

<iframe width="560" height="349" src="http://www.youtube.com/embed/LpOOh0fU4fk" frameborder="0" allowfullscreen>
</iframe>

Transforming the Video

It was the case that the transform properties actually transformed the videos from YouTube in real time, but Google has discontinued that, possibly having to do with the ability to finally go full screen.

Embedding your own Video and Audio

There are times when you need to display video and audio from your own server, and not rely on some other service. You can do that yourself, and it is almost as easy as displaying an image. I say almost as easy, because the issue as to what browsers can display which audio or video format requires that we need to create several version of each to satisfy all of the browsers.

Audio

HTML example of an audio with only a mp3 source file and an explanation that is supposed to show up if the browser does not recognize the audio tag:

<audio controls src="http://b.parsons.edu/~dejongo/12-fall/stuff/KillingACountry.mp3" type="audio/mpeg"> The browser you're using does not recognize the HTML5 audio tag. You can download the song here: <a href="http://b.parsons.edu/~dejongo/12-fall/stuff/KillingACountry.mp3">
link</a>.</audio>

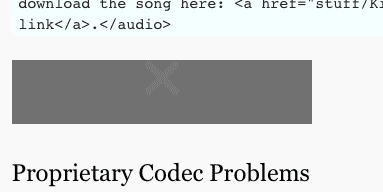
What actually happens in Firefox is that the HTML 5 property is recognized, but the proprietary CODEC is not recognized. This means that you do not get the option to download the music, but see this instead:

what firefox displays when it cannot play a CODEC

Proprietary CODEC Problems

The mp3 audio file format is proprietary. For that reason, not all browsers support mp3 audio files. Only Safari and IE9 play this audio format. Opera or Firefox users are not able to play the mp3 format. Implementing this would require them to pay royalties. They do support the royalty free ogg format, so we need to approach this another way.

The Solution

I need to create an ogg file from the mp3 file, and serve up both files, and the browser will pick whatever one they can play. Since I have an mp3 file, I need to create the ogg or ogv file. Translating the audio file from mp3 to the ogg format can be done using Miro Video Converter, or if you want more control, Handbrake. With Miro Video Converser, drag the file to the conversion window, select Theora from the drop down menu and convert. It will create a theora.ogv file that works just fine in Firefox and Opera.

Putting both sources in the HTML5 tag allows the browser to choose the one that they can play, and the following code works in Firefox.

<audio controls>
You are not able to hear this sound because the browser you are
using is not standards compliant. You can download the song
from this <a href="http://b.parsons.edu/~dejongo/12-fall/stuff/KillingACountry.mp3">link</a>.
<source src="http://b.parsons.edu/~dejongo/12-fall/stuff/KillingACountry.mp3" type="audio/mpeg">
<source src="http://b.parsons.edu/~dejongo/12-fall/stuff/KillingACountry.ogg" type="audio/ogg">
</audio>

CSS Code View

The Video CODEC Problem

Video has the same problems as audio. Some browsers manufacturers pay royalties and can play the H.264 CODEC while others rely on a royalty free CODEC. Just like with audio, Safari and Internet Explorer can display the proprietary formats while Firefox, Opera and Chrome support royalty free formats.

There is movement toward a single open source standard. Google purchased On2 Technologies, the creators of the VP8 video codex, and combined it with Vorbis, an open source audio format, and has been giving it away, meaning that they released the code to the open source community. Google’s WebM Project is still new, and not yet supported by all browsers, but the intention is that WebM replace the proprietary H.264 format that Apple and Microsoft Endorse.

Google has even gotten religious, and stopped supporting the .H264 CODEC in Chrome, claiming it’s only supporting open source software. It hopes to accelerate the adoption of its WebM format.

The industry is entrenched, however, and to become ubiquitous the CODEC has to be supported by all kinds of playback devices, like phones and computer chips, so do not expect major changes any time soon, even if the future belongs to open source.

Microsoft makes a pug-in for Chrome users to play the proprietary CODEC. So there you have it, the messy world of building a brave new future.

Translating Video from H264 to Theora Ogg

What this all means is that you have to translate your video into several different formats if you want to serve it yourself, just like audio, and include source links to each of them. The browser will then play whichever one it is most attracted to.

There are plenty of ways to get the .h64 CODEC, but to translate to ogg requires

I need to create an ogg file from the mp3 file, and serve up both files, and the browser will pick whatever one they can play. Since I have an mp3 file, I need to create the ogg file. Translating the audio file from mp3 to the ogg format can be done using Miro Video Converter, or if you want more control, Handbrake.

Here is example code for inserting video into the browser, using both ogg and H264 CODECs:

<video width=480 height=270 controls>
<source src="http://b.parsons.edu/~dejongo/12-fall/stuff/10_example.ogg" type=video/ogg>
<source src="http://b.parsons.edu/~dejongo/12-fall/stuff/10_example.mp4" type=video/mp4>
Download the example video in
<a href="http://b.parsons.edu/~dejongo/12-fall/stuff/10_example.ogg">oog</a>, or
<a href="http://b.parsons.edu/~dejongo/12-fall/stuff/10_example.MP4">mp4</a> format.
</video> 

CSS Code View

Download this video and transcode it, then upload it and get it to play in Firefox.

This is, of course, only the beginning. An example of what’s coming is the use of javascript to make a much more customized player and the ability to initiate actions that control web content from the movie itself, as in popcorn as demonstrated in this canvas sketch demonstration. The possibilities of HTML5 and open source video are endless and belong to the future.