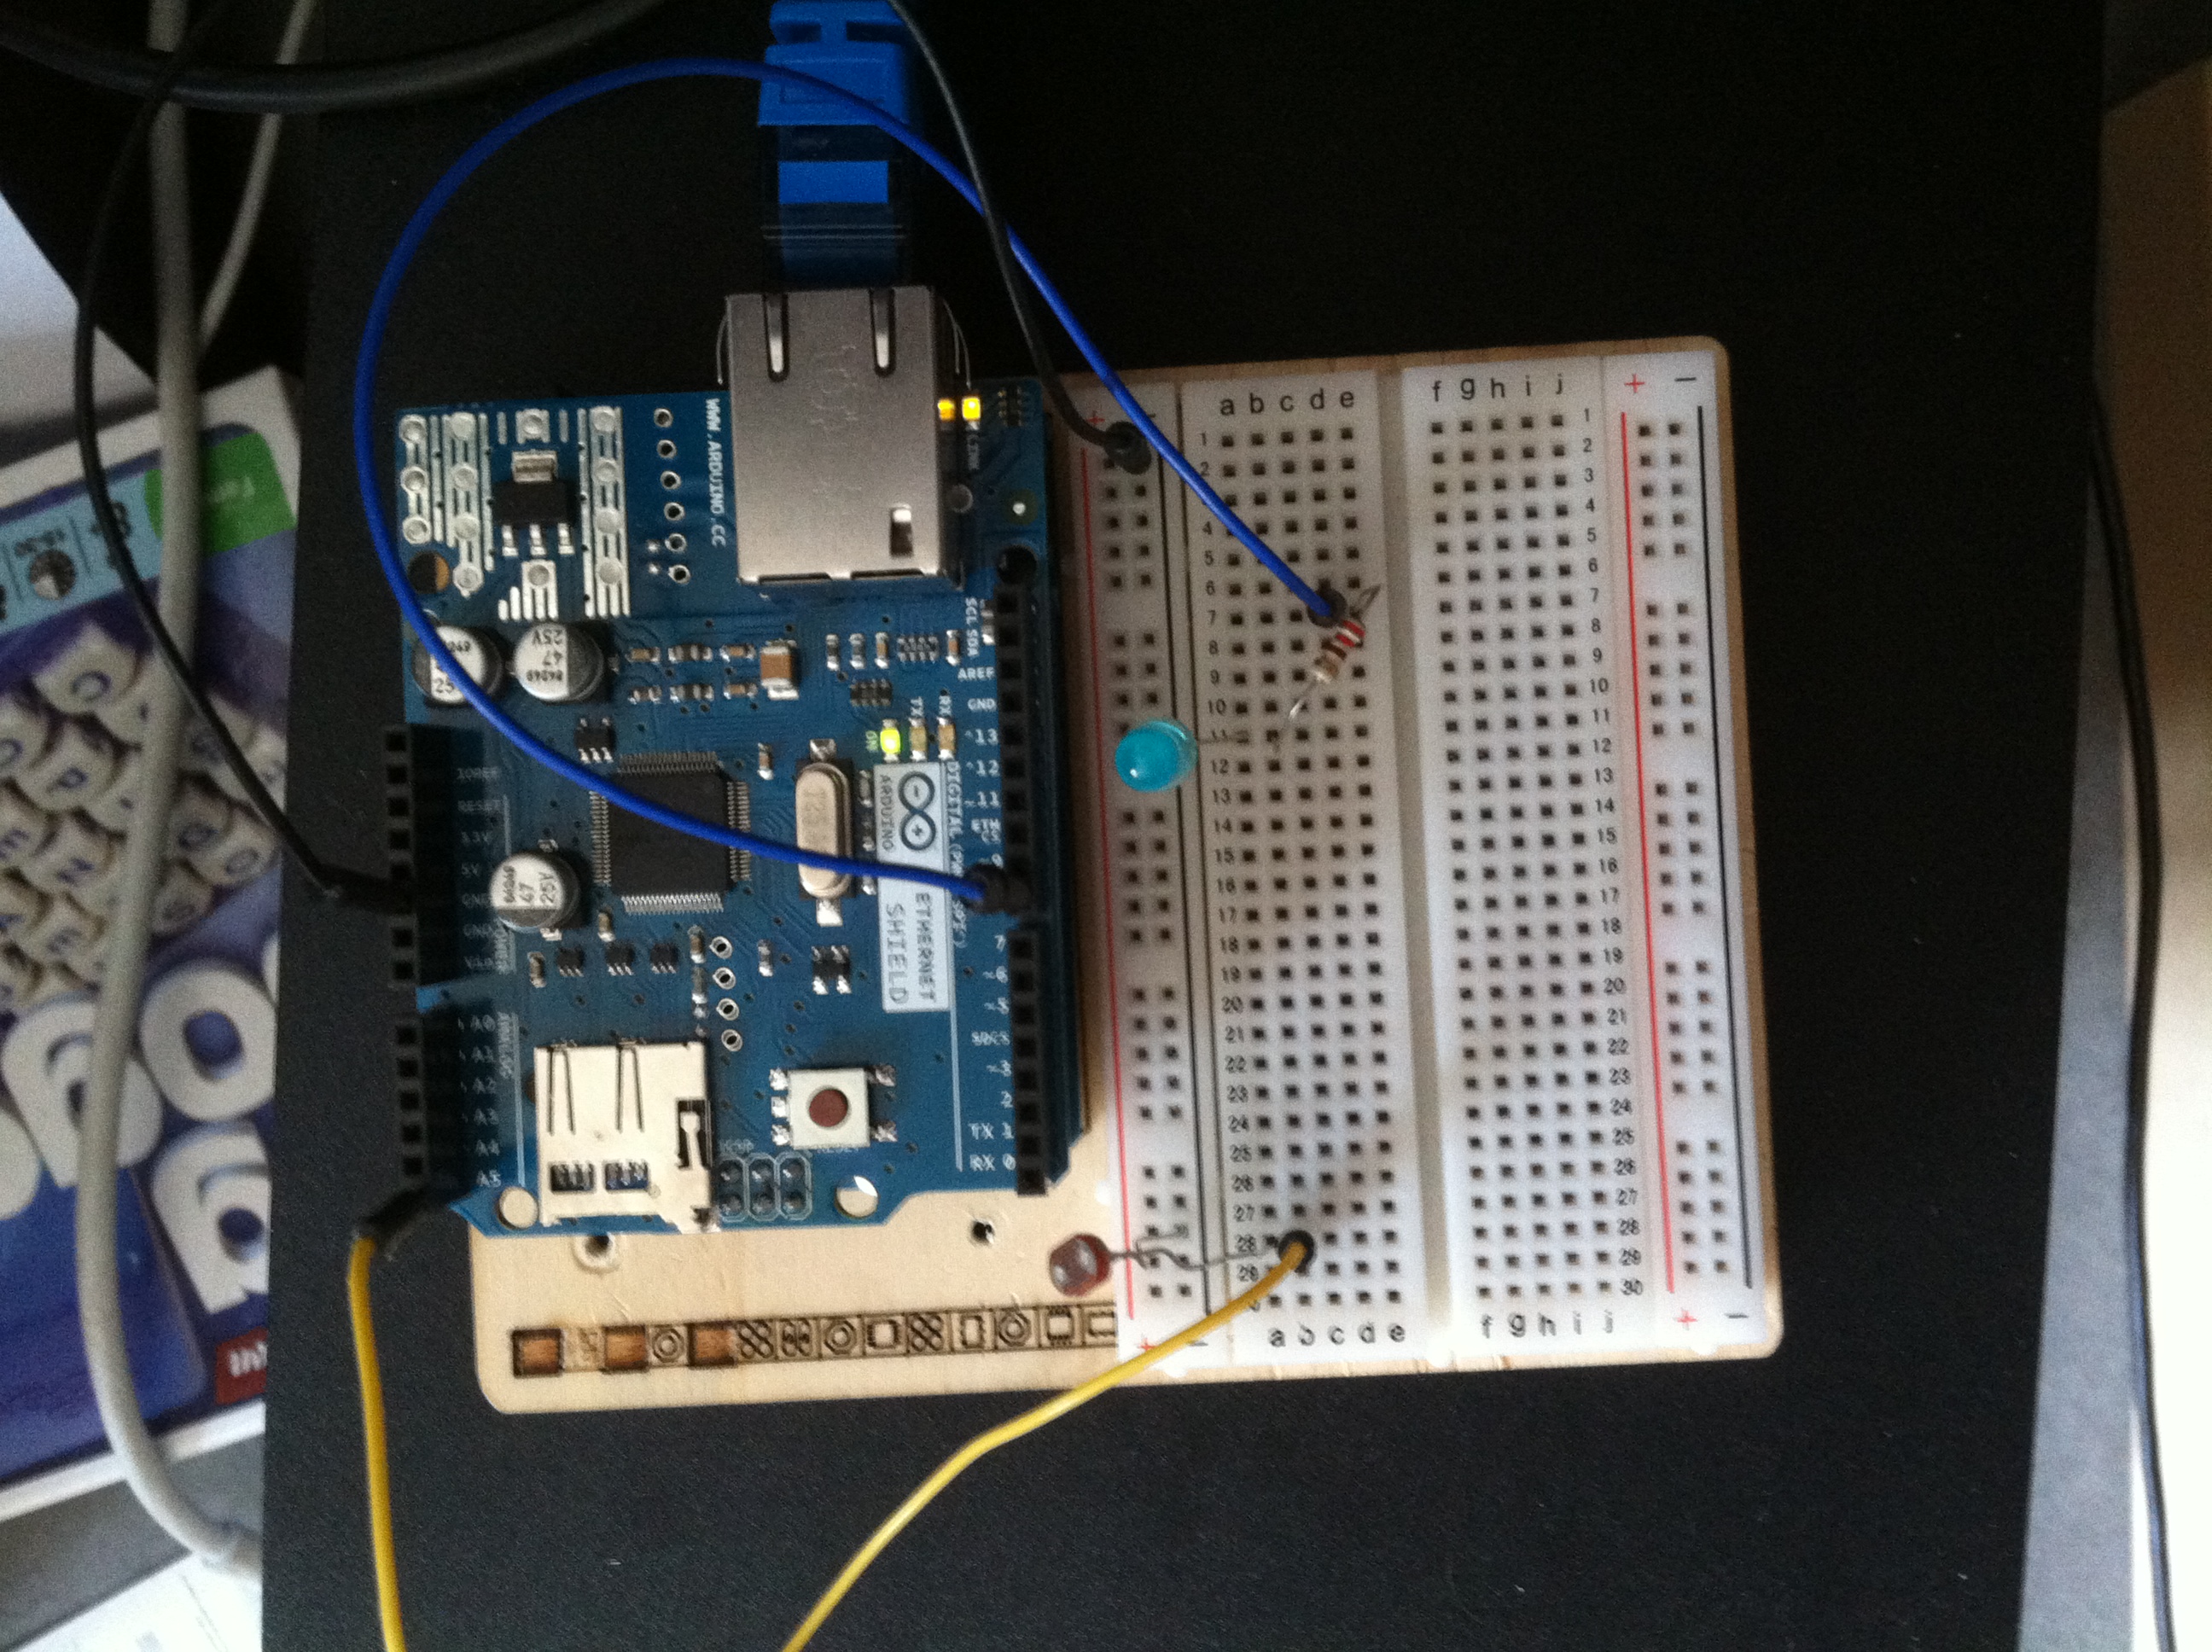
here is the code I am now currently using to create an interactive button that will turn on an LED. I am still unable to get the LED to activate. I am combing through the code to figure out why nothing is happening. Something might be wrong with the logic I have written out.


/*
A combination of sketches.
Sketches include examples from
W.A. Smith, http://startingelectronics.com
Tom Igoe
Arduino ChatServer example sketch by David A. Mellis
————————————————————–*/
#include <SPI.h>
#include <Ethernet.h>
// MAC address from Ethernet shield sticker under board
byte mac[] = { 0x90, 0xA2, 0xDA, 0x0F, 0x2A, 0xFB };
IPAddress ip(10, 1, 217, 139);// IP address, may need to change depending on network. This is found by running the DhcpAddressPrinter example sketch by Tom Igoe.
IPAddress gateway(10,1,217,1);// Added gateway, found in system preferences network panel under router
IPAddress subnet(255,255,255,0); //Added subnet as well – this is usually the same regardless.
EthernetServer server(80); // create a server at port 80, or port 23(default) Port 80 works with HTTP requests
int led = 4; //according to arduino reference material on the ethernet shield, the SPI bus shares pin 4 with the micro SD slot and can only access one at a time.I disabled it just in case by activating pin 4.
String HTTP_req; //this will be searched for led8 in order to turn on or off the led
boolean LED_status = 0; //LED status off by default
int ledPin8 = 8;
//I took this setup code from the DhcpAddressPrinter Arduino example sketch. Use serial monitor to recieve the generated DCHP address.
void setup() {
// Open serial communications and wait for port to open:
Serial.begin(9600);
// this check is only needed on the Leonardo:
while (!Serial) {
; // wait for serial port to connect. Needed for Leonardo only
}
pinMode(ledPin8,OUTPUT);
// start the Ethernet connection:
Serial.println(“Trying to get an IP address using DHCP”);
if (Ethernet.begin(mac) == 0) {
Serial.println(“Failed to configure Ethernet using DHCP”);
// initialize the ethernet device not using DHCP:
Ethernet.begin(mac, ip, gateway, subnet);
}
// print your local IP address:
Serial.print(“My IP address: “);
ip = Ethernet.localIP();
for (byte thisByte = 0; thisByte < 4; thisByte++) {
// print the value of each byte of the IP address:
Serial.print(ip[thisByte], DEC);
Serial.print(“.”);
}
Serial.println();
// start listening for clients
server.begin();
}
/*void setup()
{
pinMode(led,OUTPUT);
Ethernet.begin(mac, ip, gateway, subnet); // initialize Ethernet device
server.begin(); // start to listen for clients
}*/
//This code is taken from a startingelectronics.com tutorial on hosting an html webpage with Arduino.
void loop() {
digitalWrite(led,HIGH); //pin 4 activated to deactivate microSD slot.
EthernetClient client = server.available(); // try to get client
if (client) { // got client?
boolean currentLineIsBlank = true;
while (client.connected()) {
if (client.available()) { // client data available to read
char c = client.read(); // read 1 byte (character) from client
// last line of client request is blank and ends with \n
// respond to client only after last line received
HTTP_req += c; //read client one character at a time
if (c == ‘\n’ && currentLineIsBlank) {
// send a standard http response header
client.println(“HTTP/1.1 200 OK”);
client.println(“Content-Type: text/html”);
client.println(“Connection: close”);
client.println();
// send web page
client.println(“<!DOCTYPE html>”);
client.println(“<html>”);
client.println(“<head>”);
client.println(“<title>Arduino Web Page Test</title>”);
client.println(“</head>”);
client.println(“<body>”);
client.println(“<h1>Who do you pledge your allegience to?</h2>”);
client.println(“<h2>Rebels</h2>”);
//client.println(“<form method=\”get\”>”);
//client.println(“</form>”);
client.println(“<form method = \”get\”>”);
client.println(“<input type = ‘checkbox’ name = ‘led8’ value = ‘8’ onClick = ‘submit();’ checked>led8”);
client.println(“</form>”);
client.println(“</body>”);
client.println(“</html>”);
Serial.print(HTTP_req);
HTTP_req = “”; // finished with request, empty string
break;
}
// every line of text received from the client ends with \r\n
if (c == ‘\n’) {
// last character on line of received text
// starting new line with next character read
currentLineIsBlank = true;
}
else if (c != ‘\r’) {
// a text character was received from client
currentLineIsBlank = false;
}
} // end if (client.available())
} // end while (client.connected())
delay(1); // give the web browser time to receive the data
client.stop(); // close the connection
} // end if (client)
}
//Checks arduino HTTP header for led8 value. If it is in the header, it will turn the LED on. If it is not, the LED will turn off.
// switch LED and send back HTML for LED checkbox
void ProcessCheckbox(EthernetClient cl) {
if (HTTP_req.indexOf(“led8=8”) > -1) { // see if checkbox was clicked
// the checkbox was clicked, toggle the LED
if (LED_status) {
LED_status = 0;
}
else {
LED_status = 1;
}
}
if (LED_status) { // switch LED on
digitalWrite(ledPin8, HIGH);
// checkbox is checked
cl.println(“<input type=\”checkbox\” name=\”led2\” value=\”8\” onclick=\”submit();\” checked>led8″);
}
else { // switch LED off
digitalWrite(ledPin8, LOW);
// checkbox is unchecked
cl.println(“<input type=\”checkbox\” name=\”led2\” value=\”8\” onclick=\”submit();\” >led8″);
}
}