The Arduino Interfaces with Processing to make a simple sound visualizer!

Loading

Made a simple sound visualizer! It reacts primarily to bass. #Processing #Arduino #ChanceTheRapper

View on Instagram

I used a sound impact sensor and a potentiometer to manipulate the processing sketch. Here is the code:

Arduino code is bellow:

int potData = A0;
int sound = 2;
int button = 4;

void setup() {
Serial.begin(57600); //higher baud rate for transfering longer strings of info
pinMode(potData, INPUT);
}

void loop() {
int potVal1 = analogRead(potData);
int soundVal2 = digitalRead(sound);
int buttonVal3 = digitalRead(button);

//concatenation happens bellow
//data format potVal1, soundVal2, buttonVal3 – this will package multiple bits of data
Serial.print(potVal1);
Serial.print(“|”); //adds a character that lets you separate different bits of data.
Serial.print(soundVal2);
Serial.print(“|”);
Serial.println(buttonVal3); //Ends the batch of data
delay(400);

}


Processing code is bellow:

import processing.serial.*;

Serial myPort; // Create object from Serial class
int val; // Data received from the serial port

void setup()
{
size(200, 200);
// I know that the first port in the serial list on my mac
// is always my FTDI adaptor, so I open Serial.list()[0].
// On Windows machines, this generally opens COM1.
// Open whatever port is the one you’re using.
String portName = Serial.list()[0];
myPort = new Serial(this, portName, 9600);
}

void draw()
{
if ( myPort.available() > 0) { // If data is available,
val = myPort.read(); // read it and store it in val
}

}

List of Helpful links on Flue Organ Pipe construction

Bellow are a whole bunch of online resources I have found which helped me understand how flue pipes work and how to build them. Disclosure: There is allot of math involved.


http://en.wikipedia.org/wiki/Organ_flue_pipe_scaling

http://en.wikipedia.org/wiki/Flue_pipe

http://www.sci-experiments.com/organ_pipes/Organ_Pipes.html

http://www.instructables.com/id/Building-Your-Own-Homemade-Flue-Pipe/

http://ssngai-organs.blogspot.com/2011/06/cardboard-flue-pipe-schematic.html

http://www.pykett.org.uk/how_the_flue_pipe_speaks.htm

http://www.lawrencephelps.com/Documents/Articles/Beginner/pipeorgans101.html

http://www.theatreorgans.com/technical/

https://math.dartmouth.edu/archive/m5f11/public_html/proj/Griffith.pdf

DIY PVC organ flue pipe successful!

After reading a lot about how an organ works – which is vastly more complicated than I had originally thought, I decided it was going to be too difficult and too expensive to explore the precise science of organ making myself.

I tried making several variations of organs using cardboard using this youtube tutorial:


all variations were failures. The PVC pipe i made form the instructables video was also a failure. After combing through every search about organ flue pipes, i thought i had exhausted all of my DIY flue pipe resources. But then I stumbled across a 3D printed flue pipe attachment! Making a musical instrument requires years of practice building things from raw material and a fairly in depth understanding of the physics of sound, but 3D printing offers precision. The 3D printer allowed me to continue my project by jumping the hurdle of precision wood working skills.

Thingiverse user Japa posted this creative commons file

Screen Shot 2014-10-05 at 11.39.49 PM

PVC organ flue converter (Japa) / CC BY 3.0
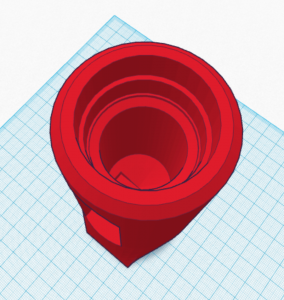
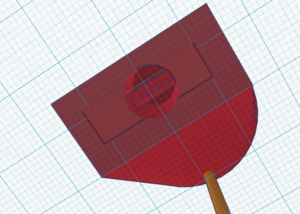
I modified it to fit a 1″ diameter section of PVC piping as well as modified the mouth piece so that a rubber tube can feed air into it.
Screen Shot 2014-10-05 at 11.42.22 PM
Screen Shot 2014-10-05 at 11.42.38 PM
Screen Shot 2014-10-05 at 11.41.54 PM
The build took 3.5 hours to make and worked immediately once I hooked it up to a piece of PVC. The next step will be to test whether or not an  artificial air source will produce a noise.