Uncategorized
Art and Design Final Presentation
Bib presentation
Interfaces
The first reading about the future look of interface design misses a lot. I think future interfaces won’t strictly be visual. I think future interfaces could include a plethora of new communication/feedback methods such as bio integration. Humans have always been dealing with user interface design. Arguably you could trace user interface design back to our primitive cavemen ancestors – the ones who made spears and clubs. The way you are meant to hold a club and swing it, the material on the handle, the weight, and the material are all important variables that must be taken under consideration. User experience is all about improving the users relationship/interaction with an object. How do you go about improving interaction? Experimentation with how you interface with something is important. Do you interface with something via touch or sound? Maybe interaction is triggered through brainwaves such as with MindWave EEG sensor. Perhaps interaction is performed via buttons as with a remote. Or maybe it is through simple touch-based gestured as with an iPad. Perhaps interaction is via haptic feedback, such as with the apple watch and maps. The watch taps/vibrates to indicate turn left or turn right. There are thousands of ways interaction can be created between you and an object/device. How do you choose which interaction makes the most sense to the user? There are a bunch of important factors that need to be taken into consideration. For instance, the context of use. It wouldn’t make sense to add all of the features that an iPhone has into the functionality of an apple watch because a watch is inherently tiny, light weight, and something which is constantly worn around the wrist rather than large, usually rectangular, and meant to fit into a pocket or purse. Some other things that matter: Environment of operation, purpose of object, intended user…
In response to the cyberpunk movie, Strange Days – or at least the trailer, I think they present a great example of how user interfaces can expand beyond the screen. An interface could possibly jack straight into your neural circuitry which could dramatically change the scope of usage.
The point being, user interface design is a diverse subject.
QUADC radiation drawing tool
This is a simple and ephemeral drawing application where every stroke you make on the page is affected by radiation, constantly eating away and degrading any effort to maintain consistency. It is impossible to store memory infinitely in the natural and even the digital world. It is time’s natural order to disassemble and fragment that which has been constructed.

The drawing tool is operated with a triple-axis gyro controller which you use to navigate. Selecting colors is easy! You navigate towards one of the three colors to the left and maintain focus/hover over them until the arange circle has made a full loop. This is put in to prevent accidental color selection. Later features will include more advanced options such as brush patterns, sizes, and drawing effects.
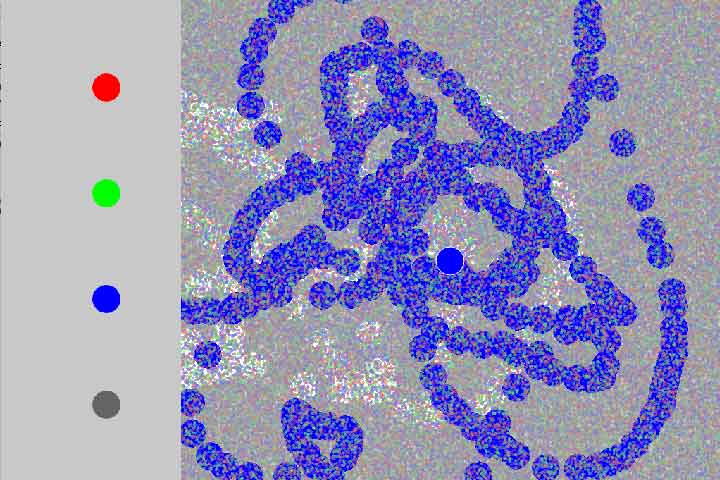
As you move your brush across the art board, it is slowly eaten up by “radiation” similar to how radiation affects electronics and especially film in cameras.
This is a very rough iteration on the finished idea and I expect to work on it further.

Final Project Presentation
K20 Haptic Police Response Hoodie

This project explored a realm which we are constantly surrounded by, but which our senses our oblivious to. Hertzian Space is the space occupied by the EM spectrum. The only portion of the EM spectrum that Humans can currently perceive is the narrow band of visible light. I wanted to create a new way for our body to interpret the EM spectrum which we are surrounded by. I decided to collaborate with the K20 clothing line who recently released their “bad man” hoodie. I wished to modify their original hoodie in response against the growing strength of America’s police forces. I intended to utilize SDR technology, a Raspberry Pi and an Arduino to scan and capture police radio broadcasts and then translate the signal into haptic vibrations. small haptic motors would be imbedded within the straps of the vest along with small LED’s to alert the wearer of nearby police presence. Additional, I wanted to find and implement a way to charge the users phone via the energy emitted from radio towers.
My initial presentation is below:
following is the technical process which followed:
Projcet 1 Studio Environments Presentation
The project has since been postponed due to technical difficulties, but it is very much something I intend to finish.
you can follow updates on my blog.
Project 1: Connecting to the internet
Connecting to the internet with a raspberry pi required some trial and error. In order to connect to the network you need all the right configurations set for the specific network, otherwise it will always fail to connect.
Steps I took to connect:
- Hook up one of the compatible wifi usb sticks with your raspberry pi after you have booted up.
- go to the wifi configuration under preferences in the main menu inside of the Debian GUI.
- go to the manage networks tab and scan for available networks.
- once you have found a network, press add.
- The SSID is the name of the network
- To determine Authentication, Encryption, and EAP method, open up system preferences on your mac, go to network, and find the same network you are attempting to connect to with your raspberry pi, I was connected to “newschool”. It should describe the EAP authentication method next to “Authenticated via …” where it will show one of the many methods. On the raspberry pi, select that EAP method, mine was “PEAP”. For Authentication, you will need to go into advanced settings where it will list the name of the network along with its security. Mine was “WPA2 Enterprise”
- In raspbian network gui, go back to the current status tab and connect. It will take a moment. Once connected it will say complete
- open up a Midori window and type something in!
PIR motion sensor game

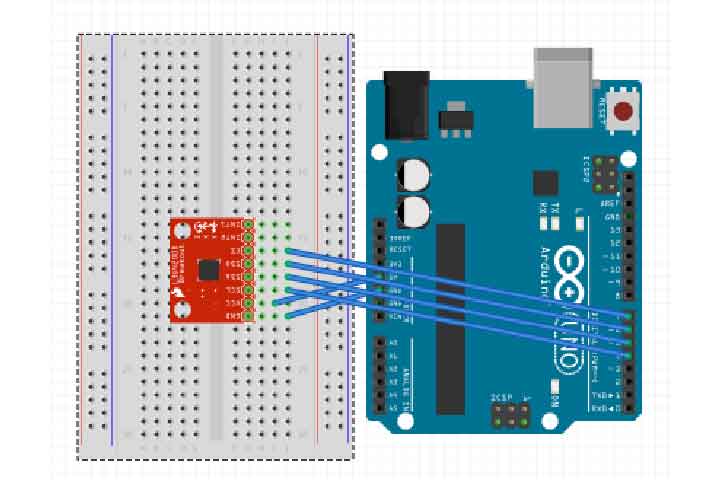
Components list:
Potentiometer x2, Piezo Buzzer x1, Wire, LED x2, Arduino Uno, 220 Ohm resistor x2
The PIR sensor in fritzing is not representative of the sensor we used. The sensor used for this can be found at Adafruit.
How the game works:
The red LED represents the status of the motion sensor, when it is lit, the sensor is armed and ready. The green LED indicates when the sensor has been triggered. One potentiometer controls the “pace” while the other controls “wait” to make the game a little more challenging. The buzzer will tick, and when the buzzer makes the go noise, you have to waive your hand frantically in front of the sensor before you run out of time. If you succeed in triggering the sensor, then it buzzes a satisfying tune. Conversely, if you lose then it triggers a sad tune. The motion sensor waits about 14 seconds before the next cycle of the game starts.
The rearm function has one minor drawback, mostly due to the inconsistencies in the motion sensor, and that the wait time is hardcoded to 14 seconds, even though the wait time could be higher or lower than that.
For all the fun things you can do with the PIR sensor from Adafruit, it has one major drawback. There is a delay, often inconsistent, every time the sensor is triggered. While it can be adjusted sightly, it ultimately comes down to cheap hardware not doing the job right.
here is the code:
const int digitalInPin = 8;
const int armedLedPin = 3;
const int motionLedPin = 2;
int time;
int x = 14; //takes about 14 seconds to rearm sensor
void setup() {
Serial.begin(9600);
pinMode(motionLedPin,OUTPUT);
pinMode(armedLedPin,OUTPUT);
digitalWrite(armedLedPin,HIGH);
}
void loop() {
int motionVal = motionRead(digitalInPin,1000);
Serial.println(motionVal);
if(motionVal > 0) {
digitalWrite(motionLedPin,HIGH);
digitalWrite(armedLedPin,LOW);
} else if (motionVal < 1) { digitalWrite(motionLedPin,LOW); digitalWrite(armedLedPin,HIGH); } Serial.println(time); rearm(); } int motionRead(int pin, int wait) { delay(wait); int sensorRead = digitalRead(pin); return(sensorRead); } void rearm() { time = x; for(int x; x>0; x–) {
delay(1000);
}
}
Organ backpack documentation
My studio sound project:
Concept:
As we were required to experiment with sound in combination with our Arduino, I combined a few interests of mine for inspiration on the final product. I love sci-fi and it seems that there is a common trend in every sci-fi movie for some character to be wearing some sort of complex instrument on their back. I had made a previous attempt at creating a backpack, but out of soft material: tarp. This time I wanted to make something solid and strong. I decided to utilize the laser cutters to construct a wooden encasing for my backpack.
I don’t play any musical instruments, so figuring out how to link my project with sound put me in a very uncomfortable position. Naturally I was inclined to make something incredibly unconventional, something that wouldn’t resemble a formal instrument at all, but instead be something different.
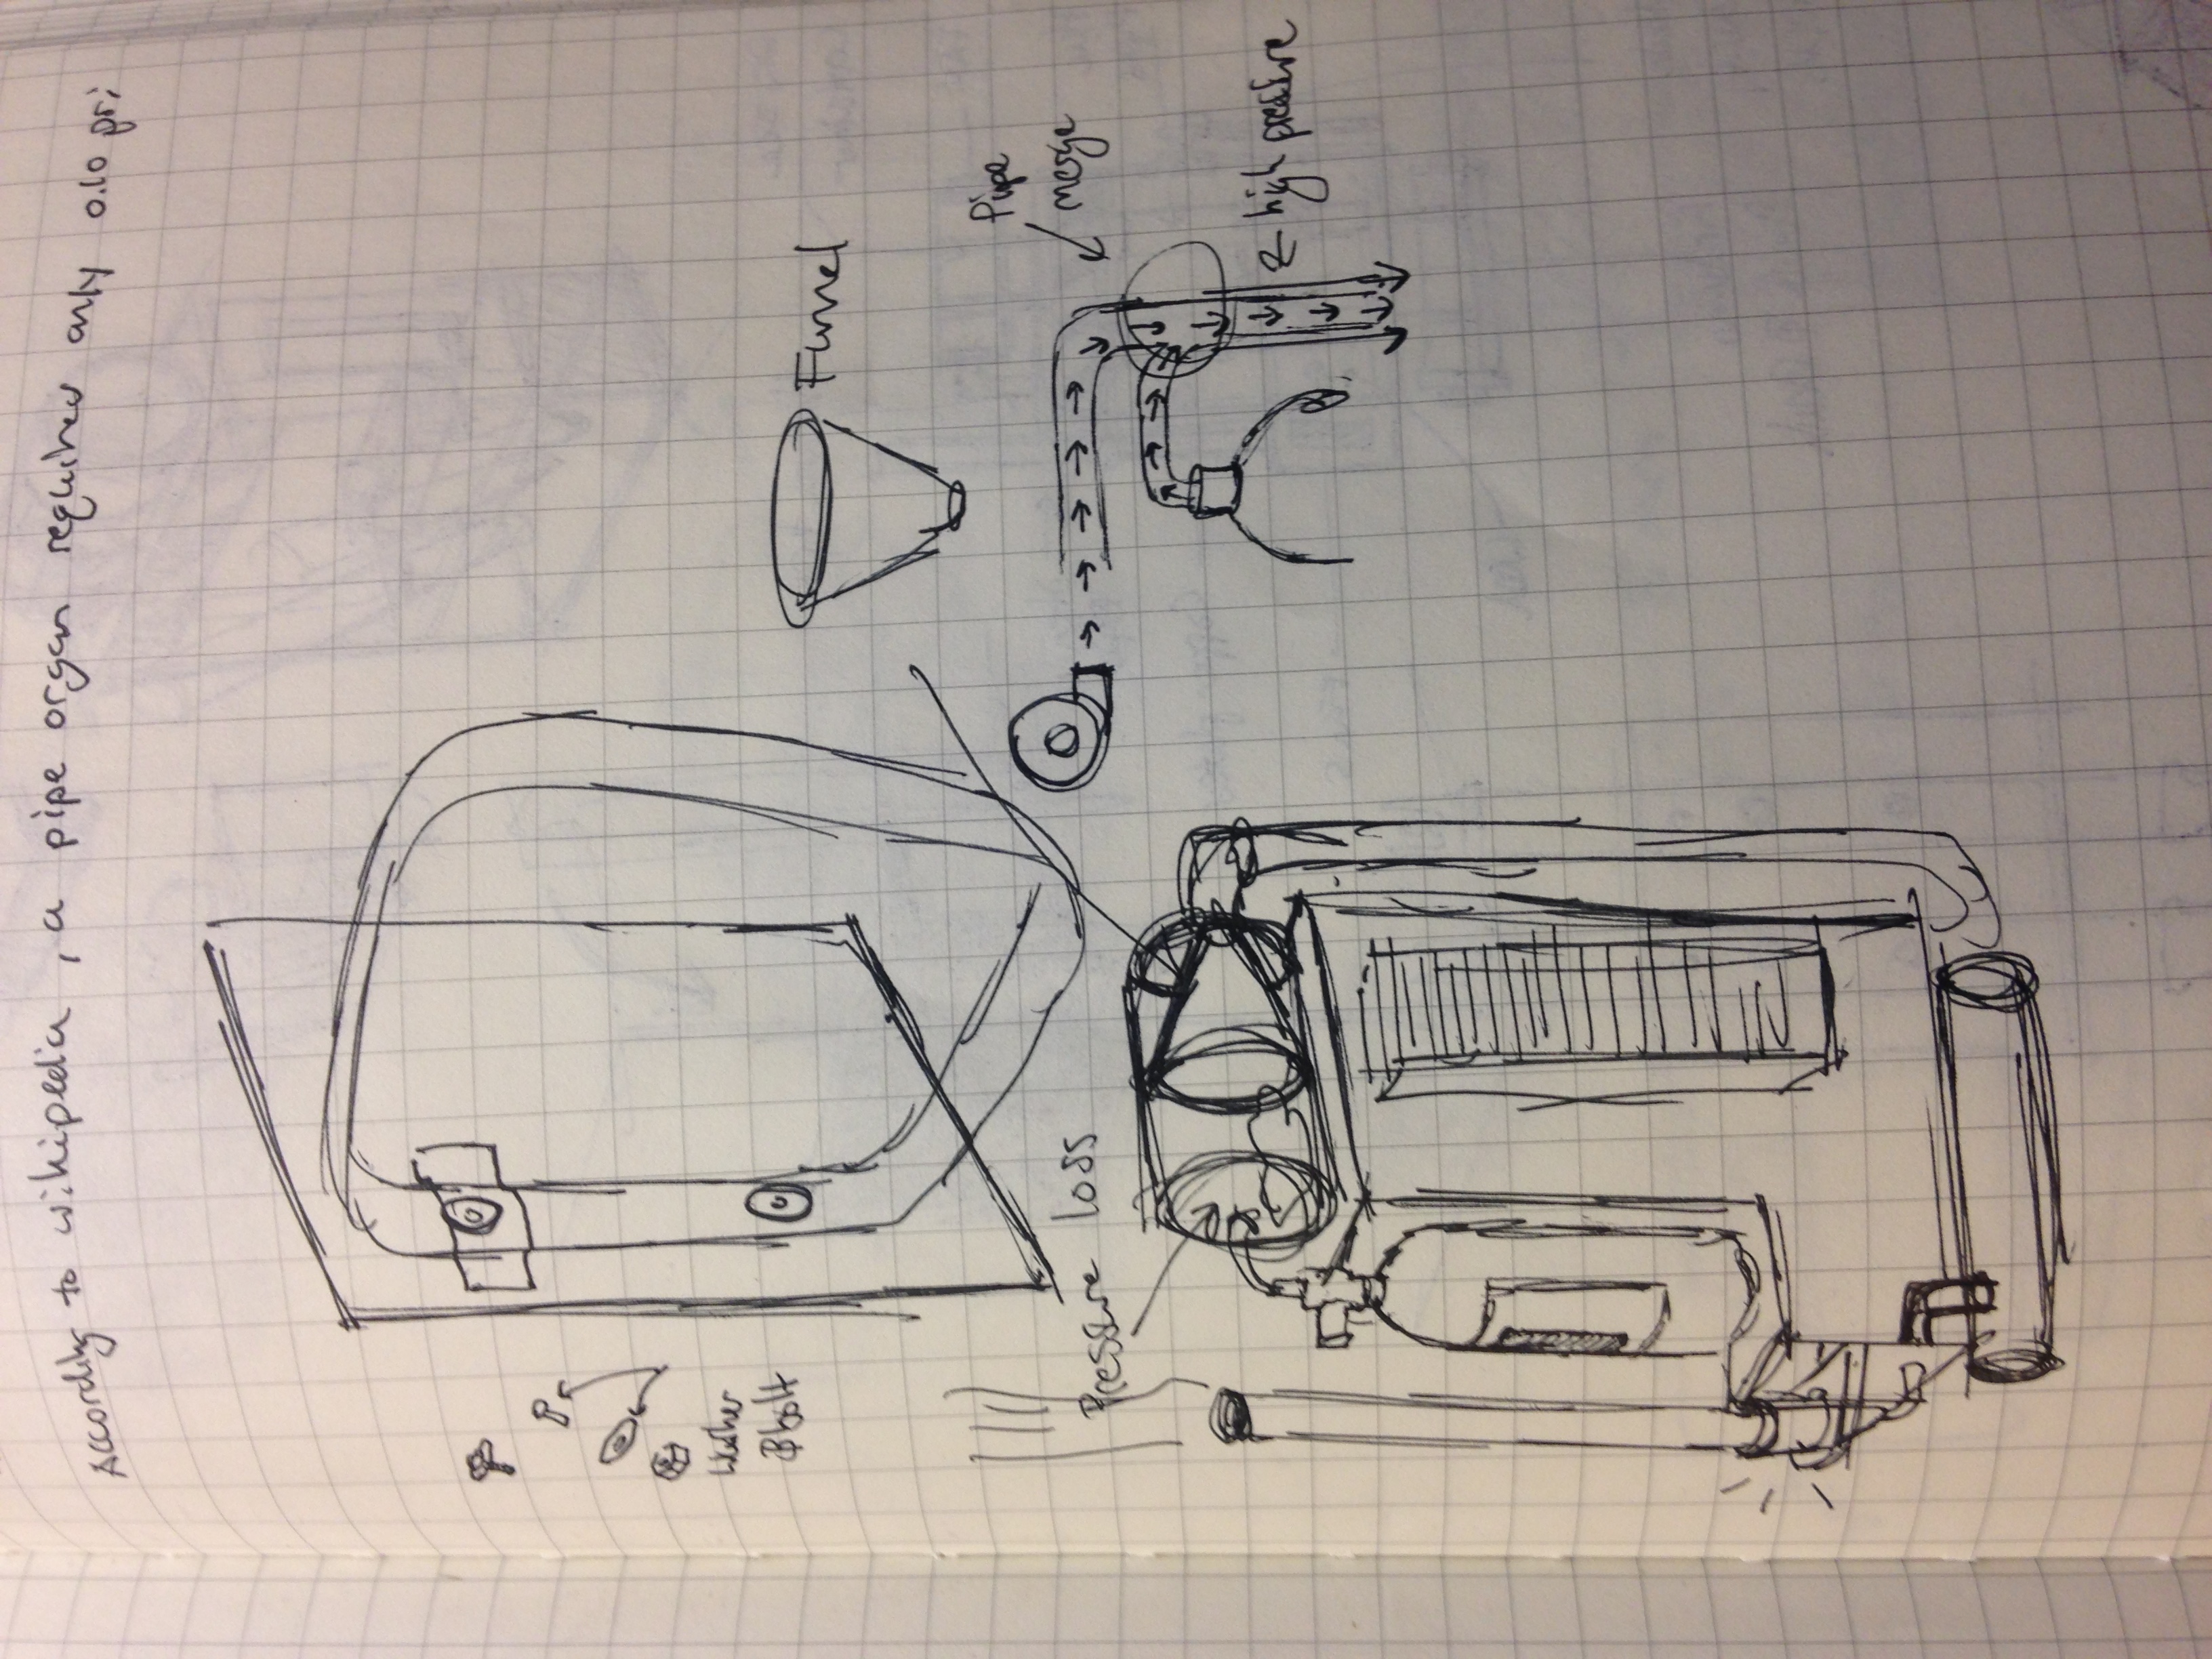
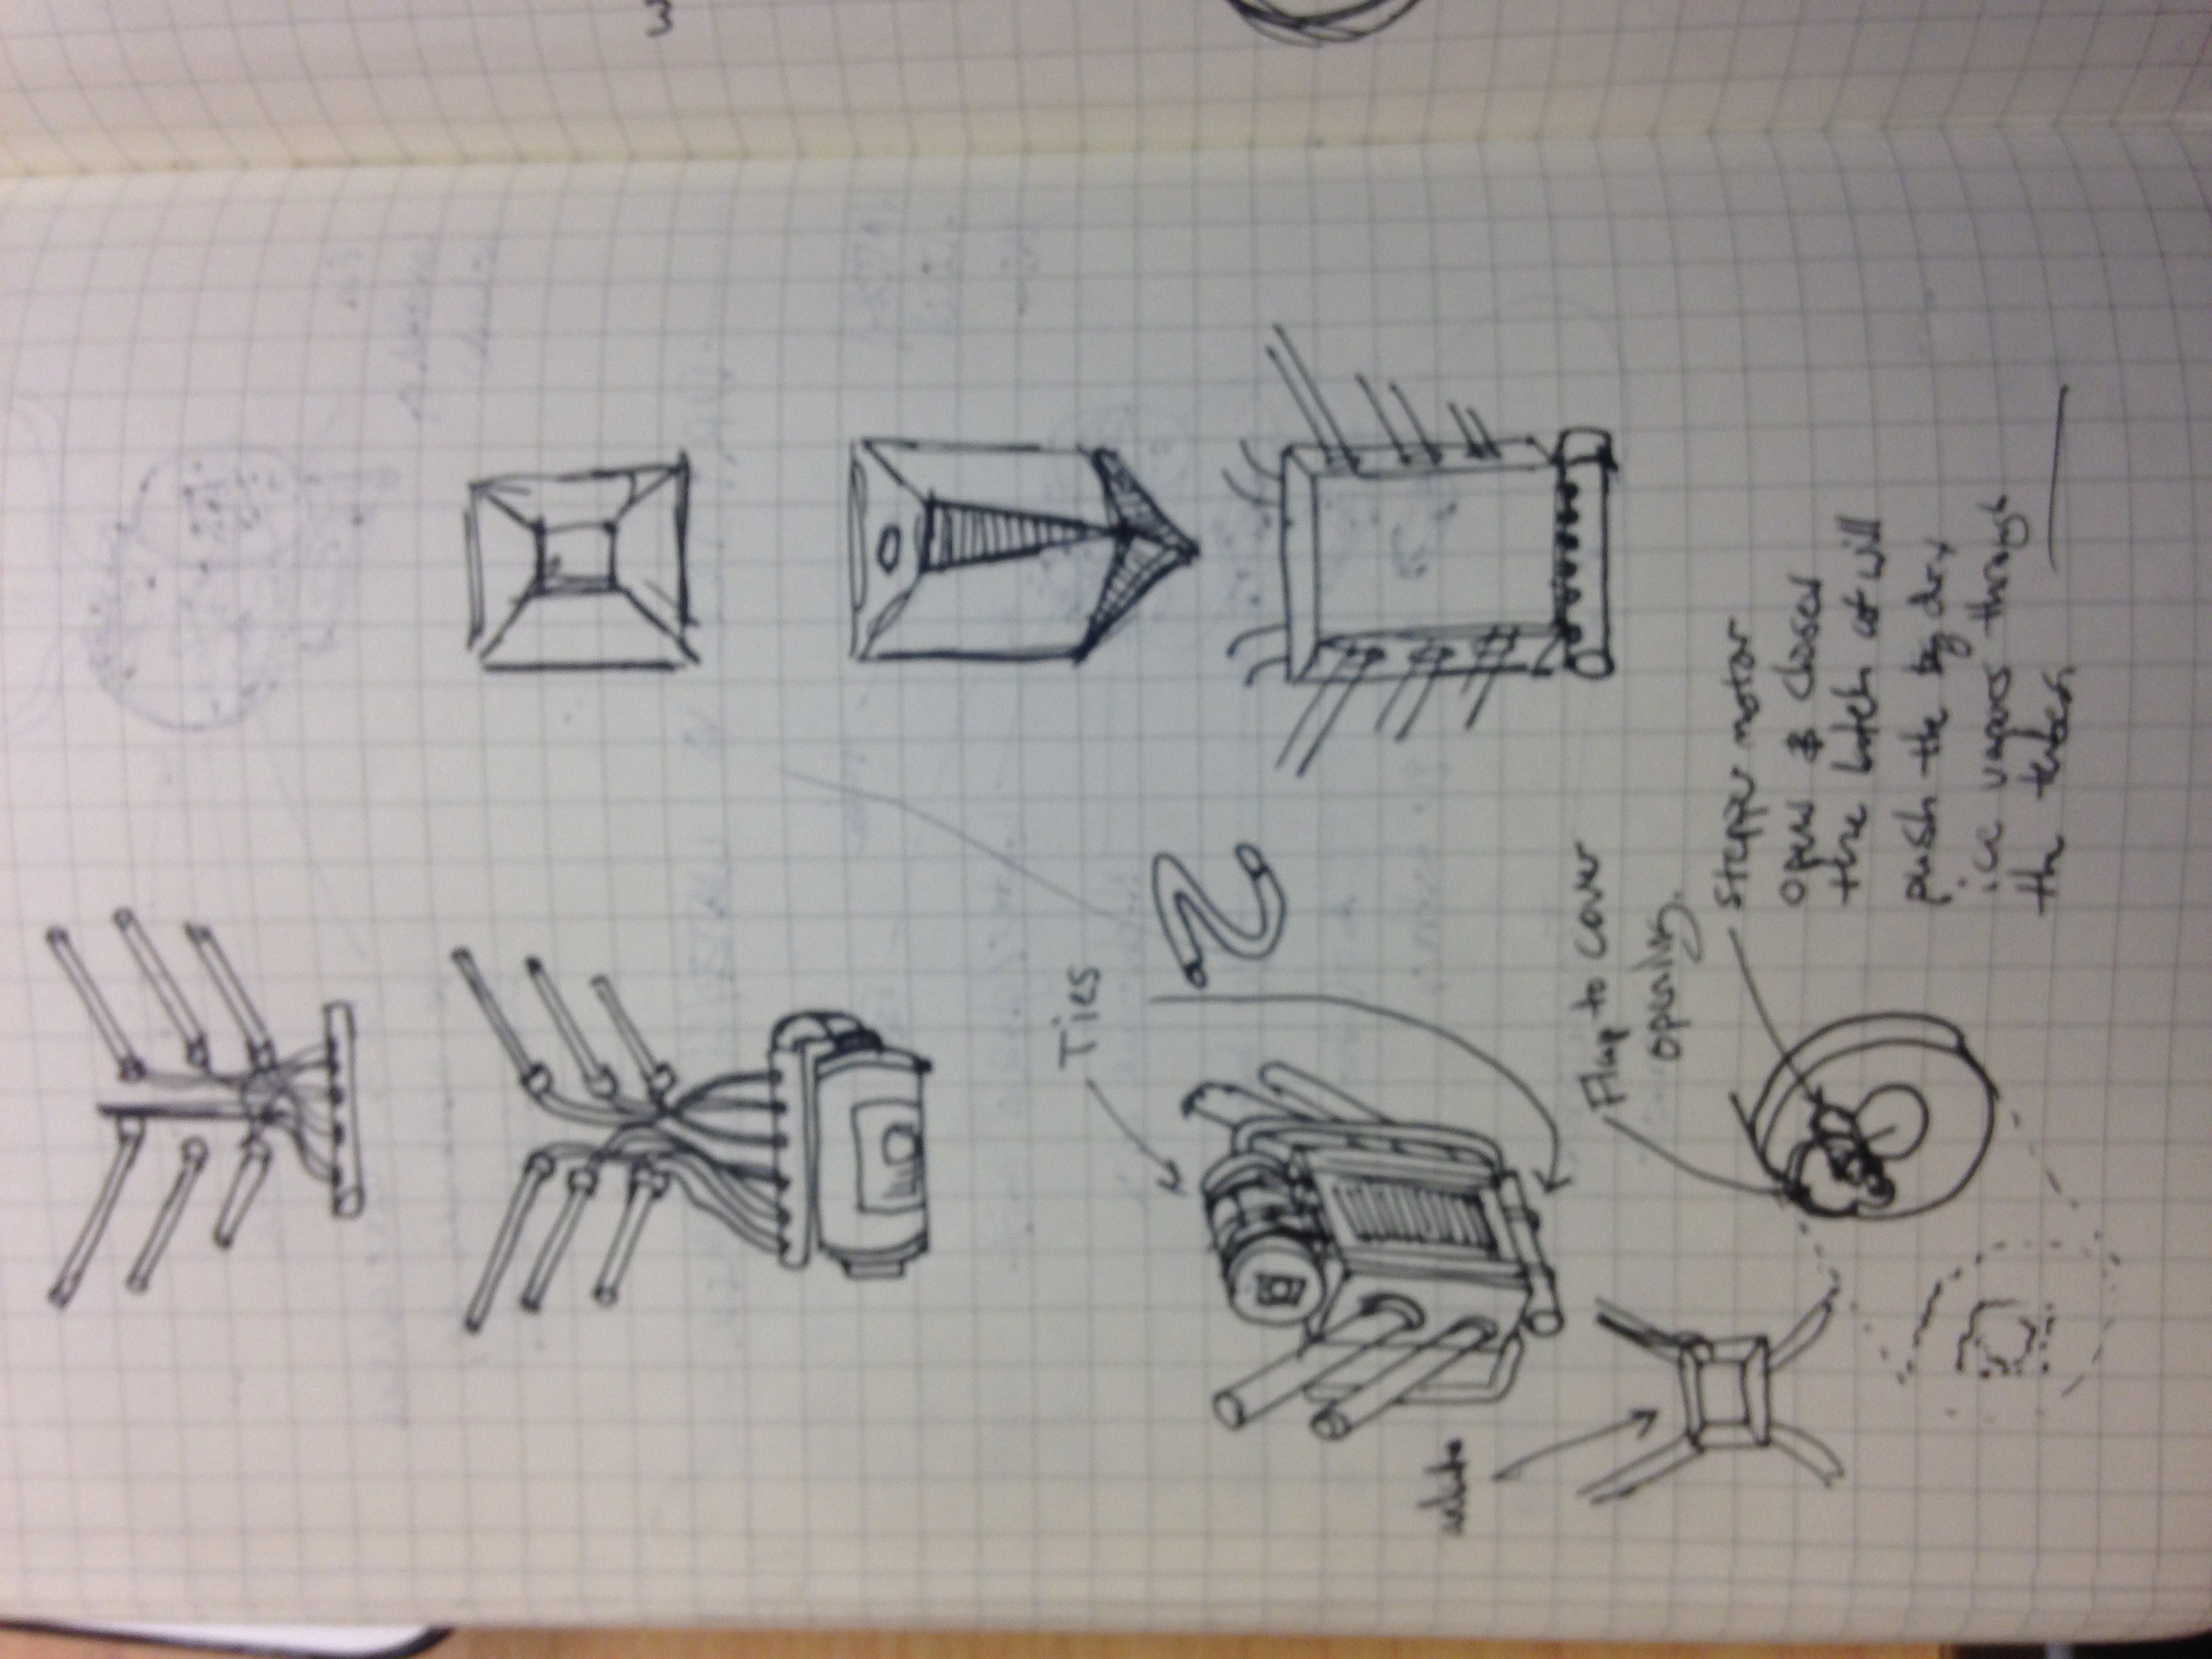
I drew inspiration from a clip I found on the internet as I was looking through photos of burning man when i stumbled across a flame throwing organ! I was immediately drawn to the idea. So I took it up to merge the backpack and the unconventional flame organ into one – though without the flames. That would require more technical knowledge than I currently had time to learn.
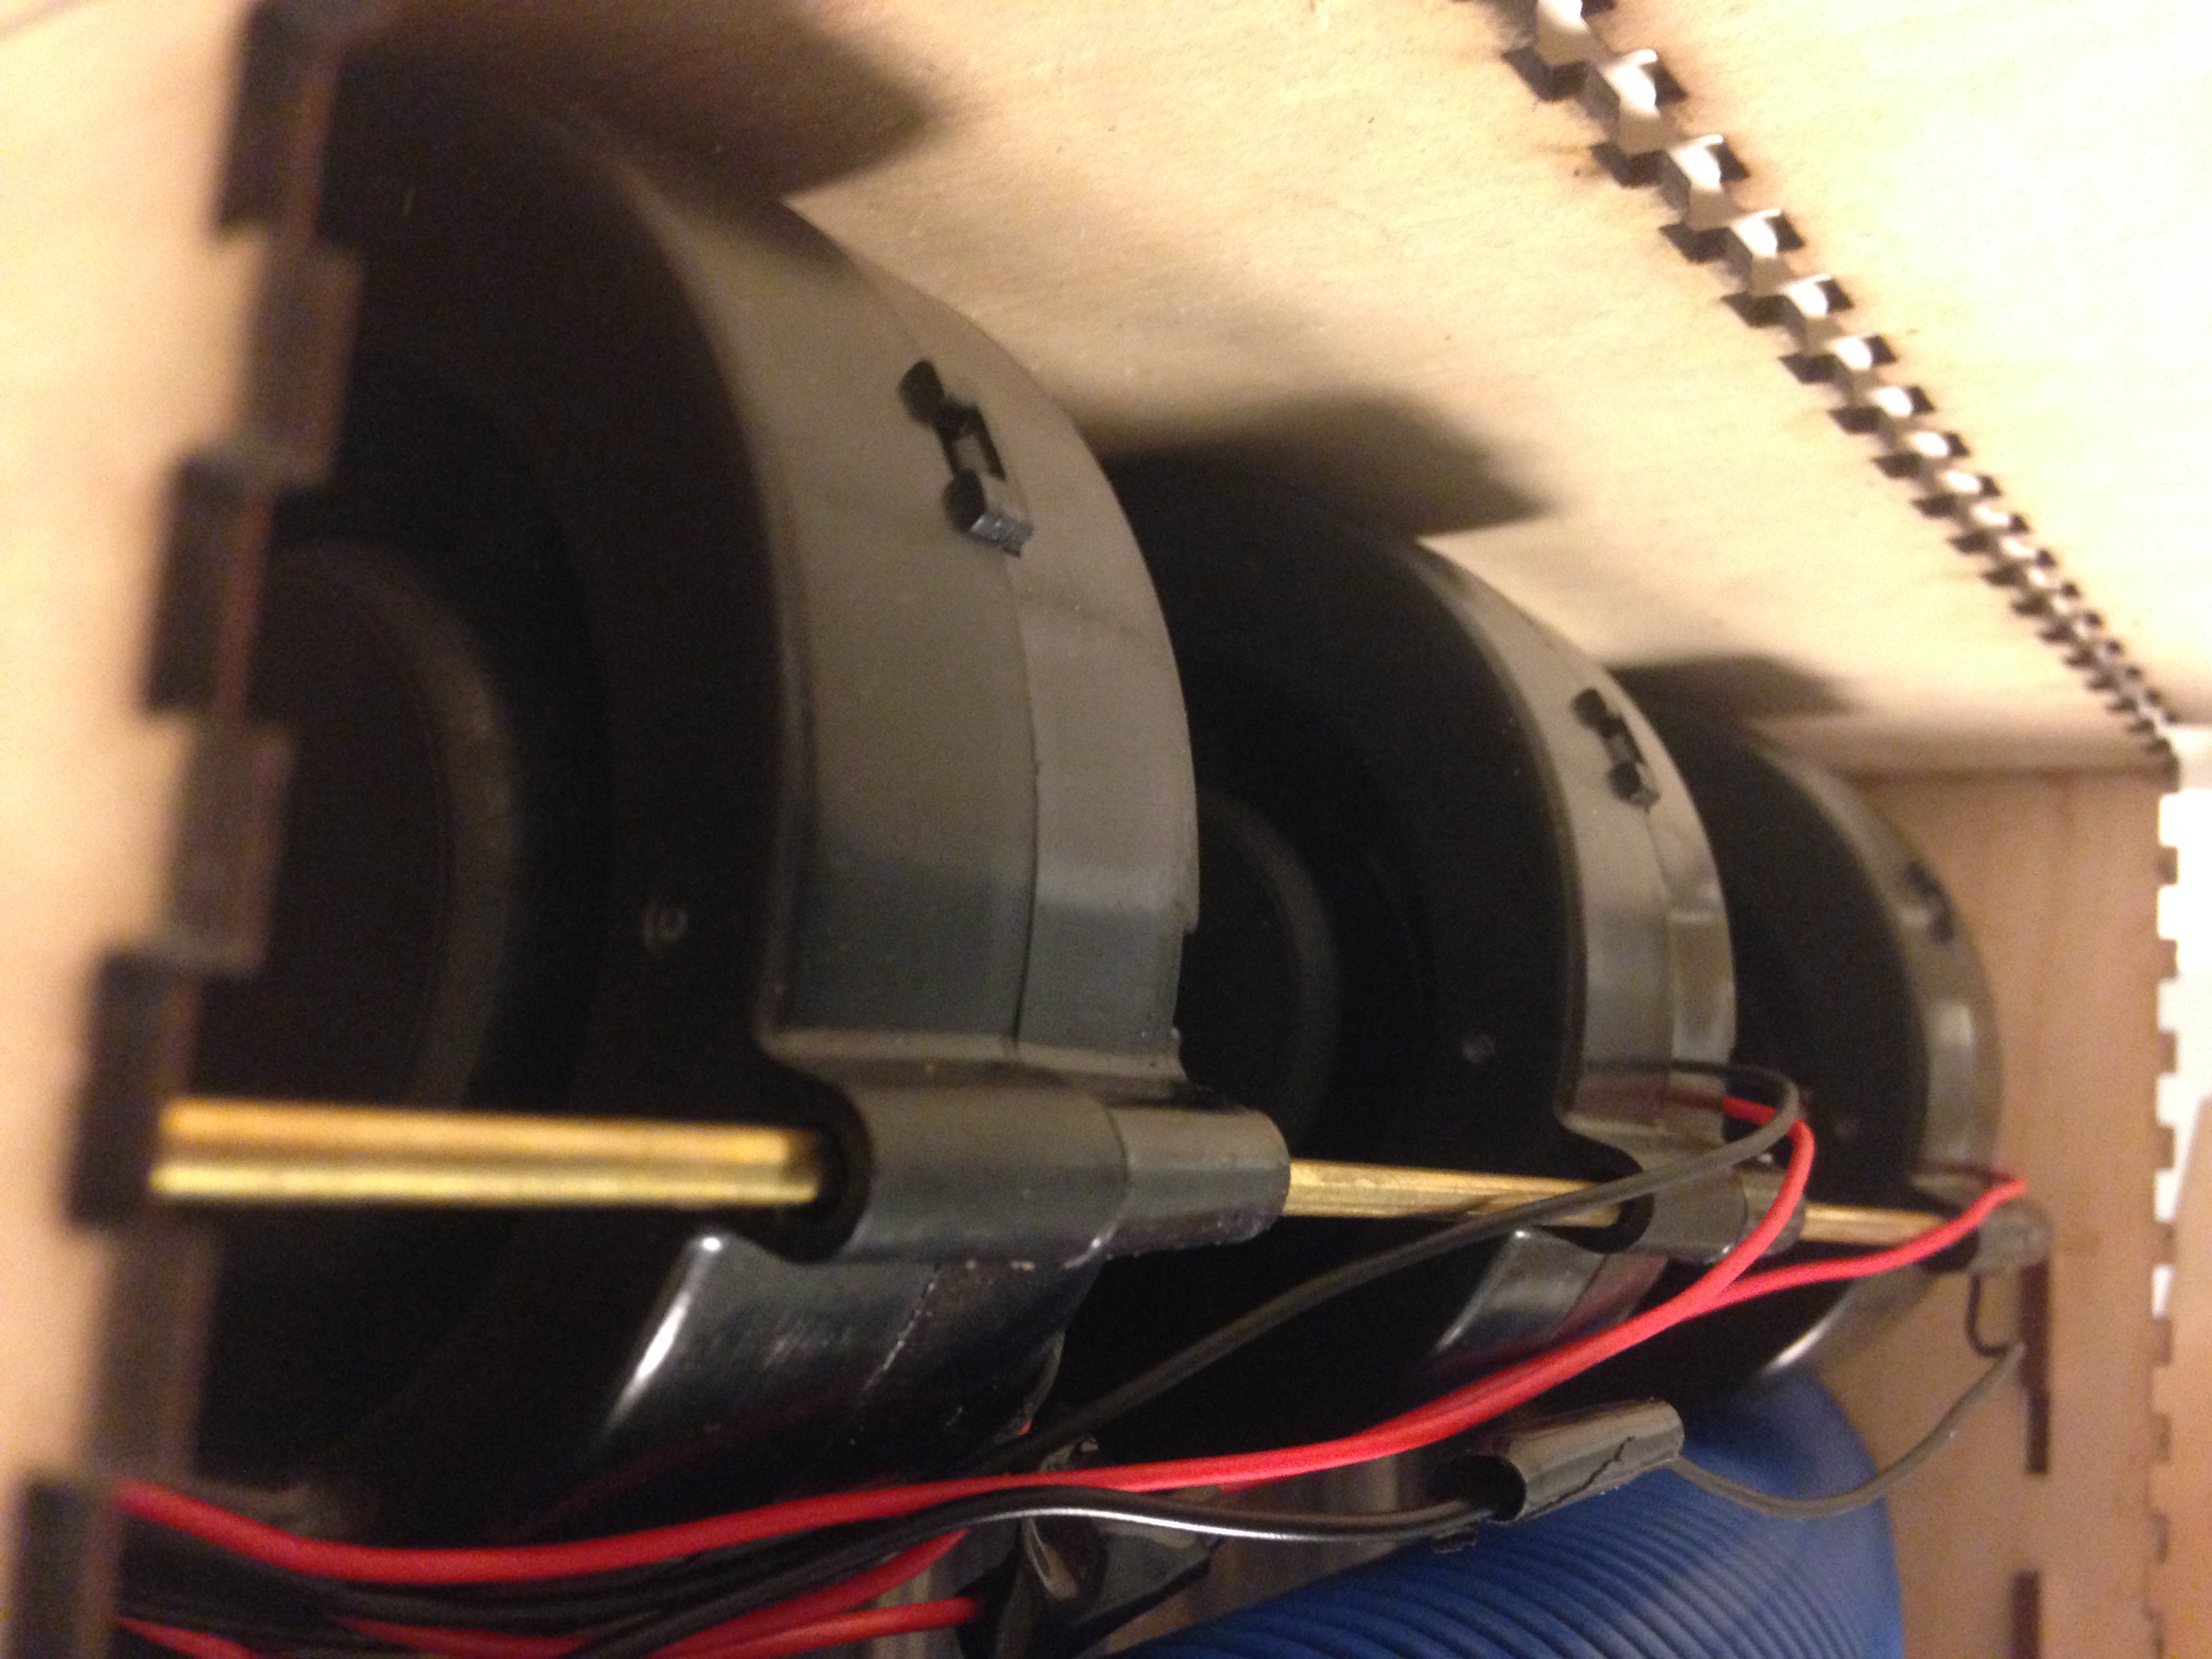
preparation/construction:
All photos taken during the construction process were lost when my iphone 4 was destroyed. If I ever find a way to take the memory from the phone, I will post them here.
However, I do have some documentation on the drawings/notes I made:

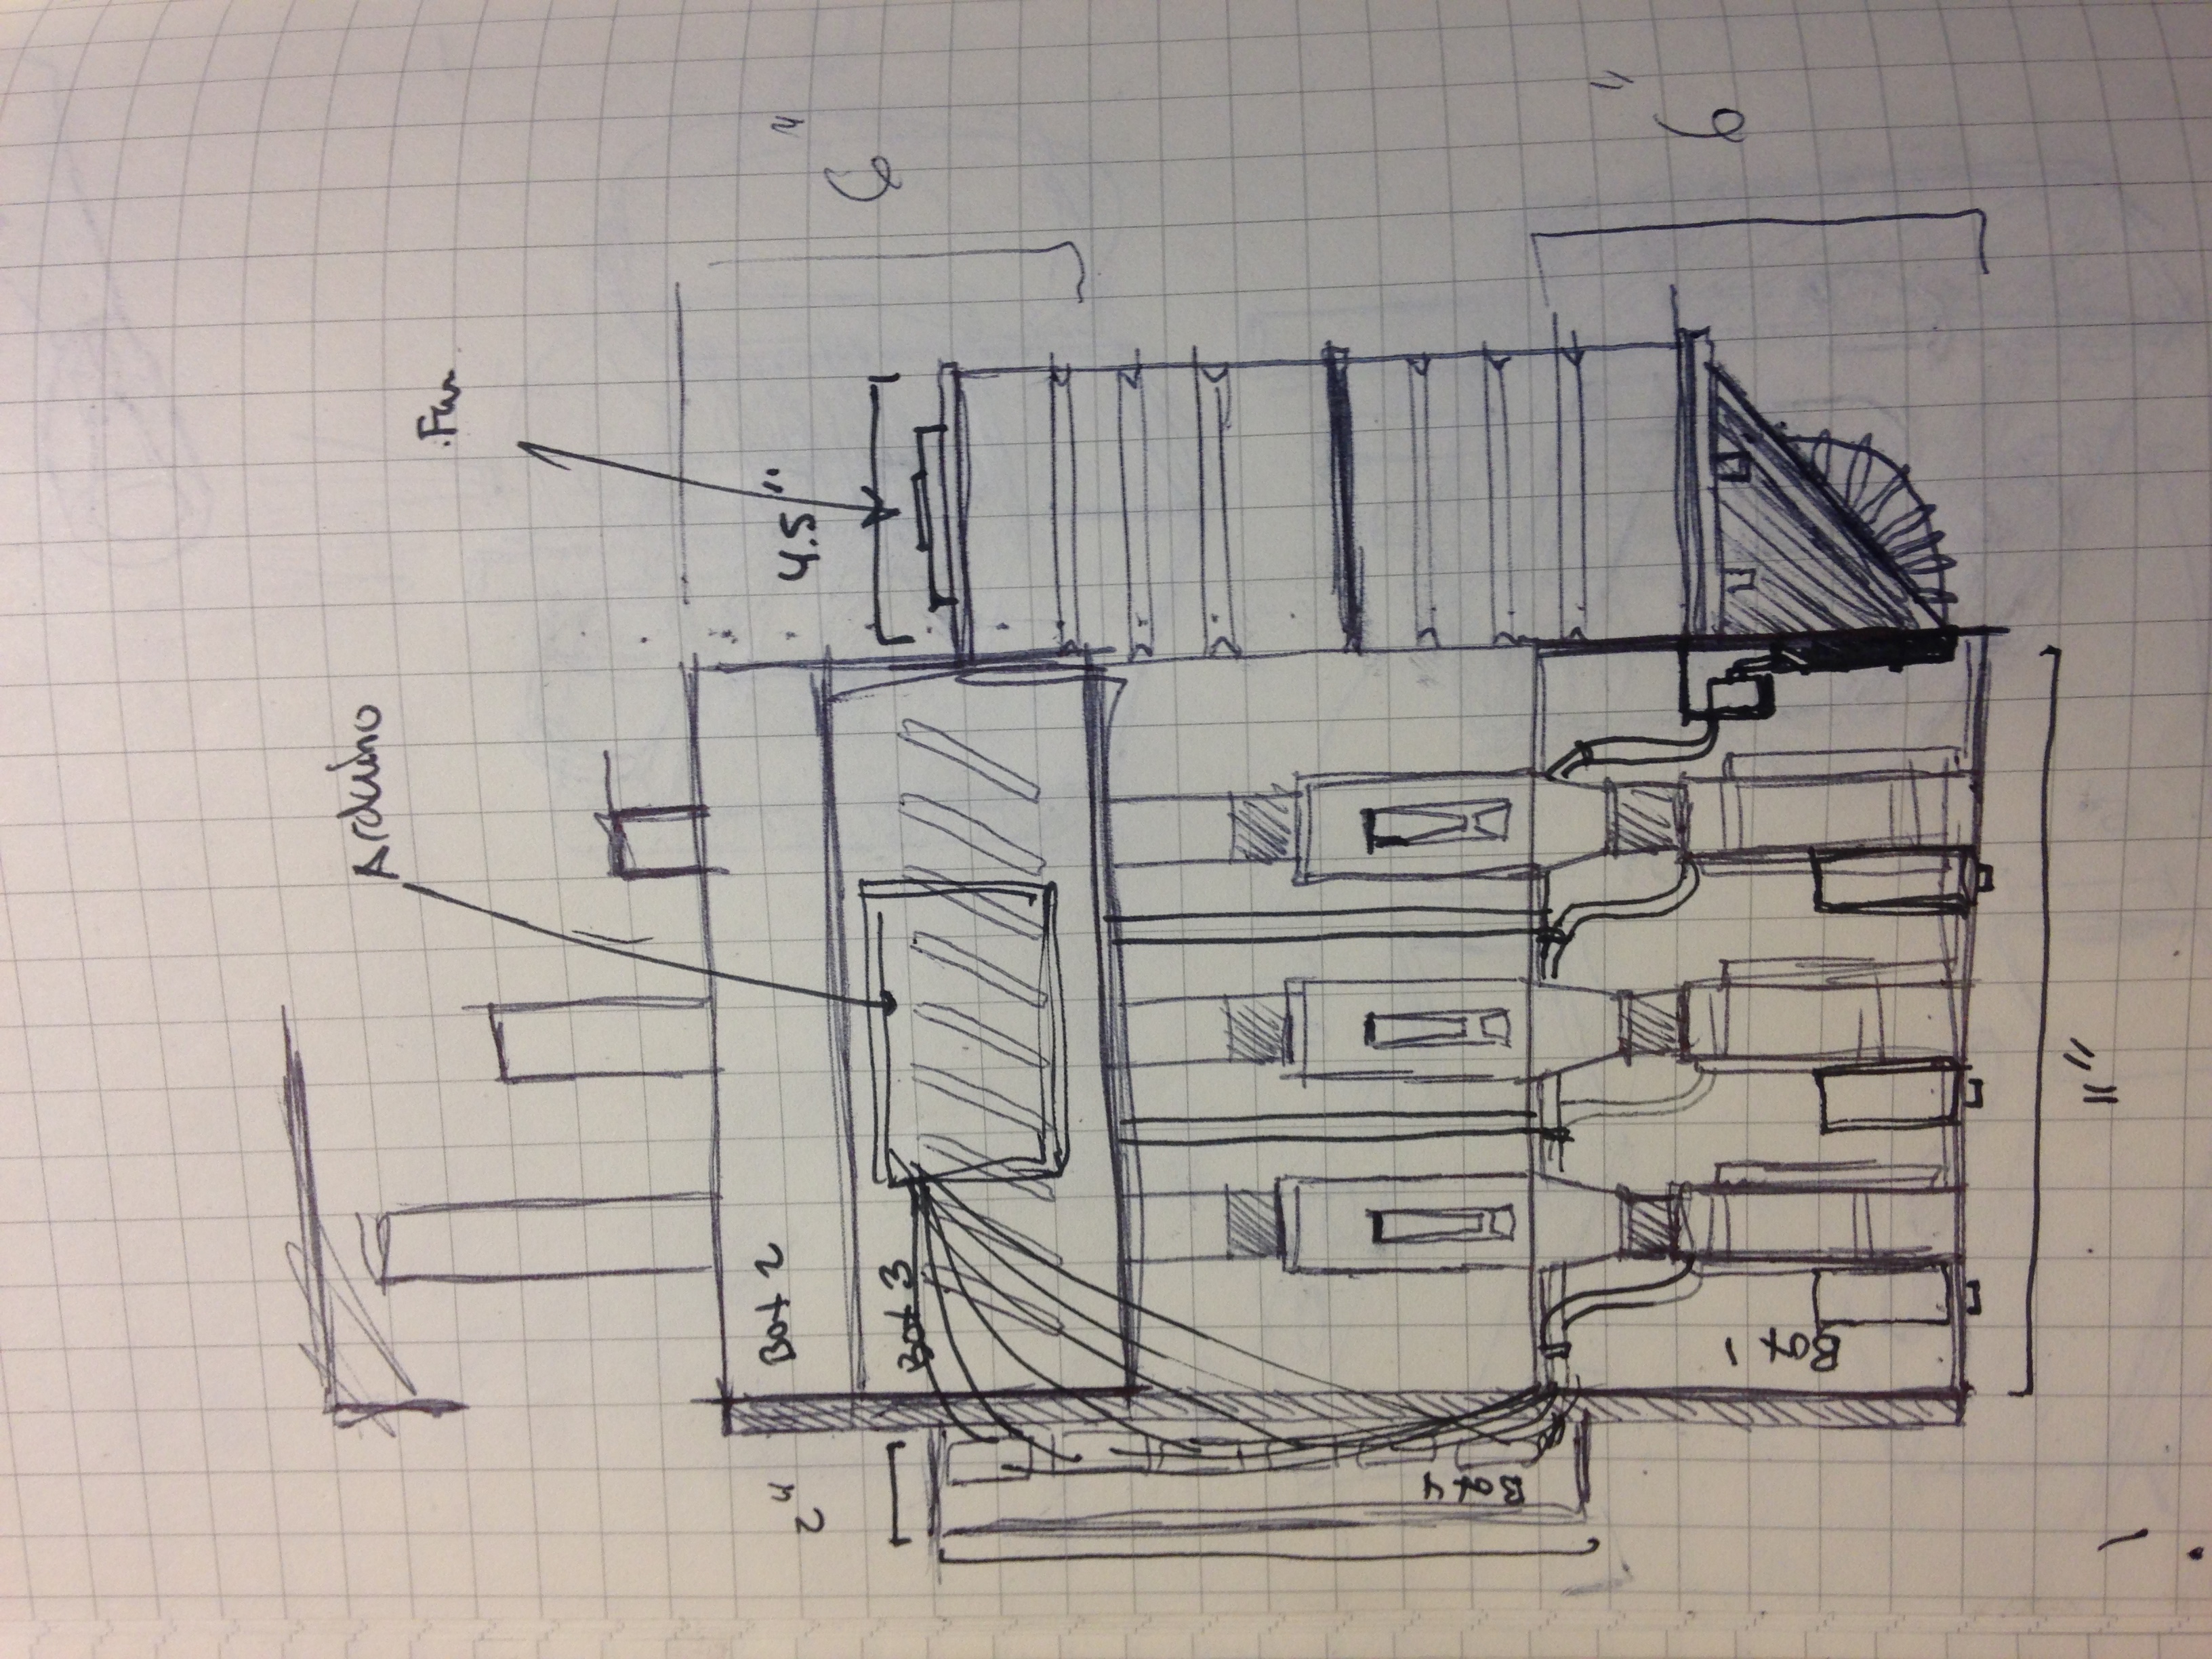


final outcome:

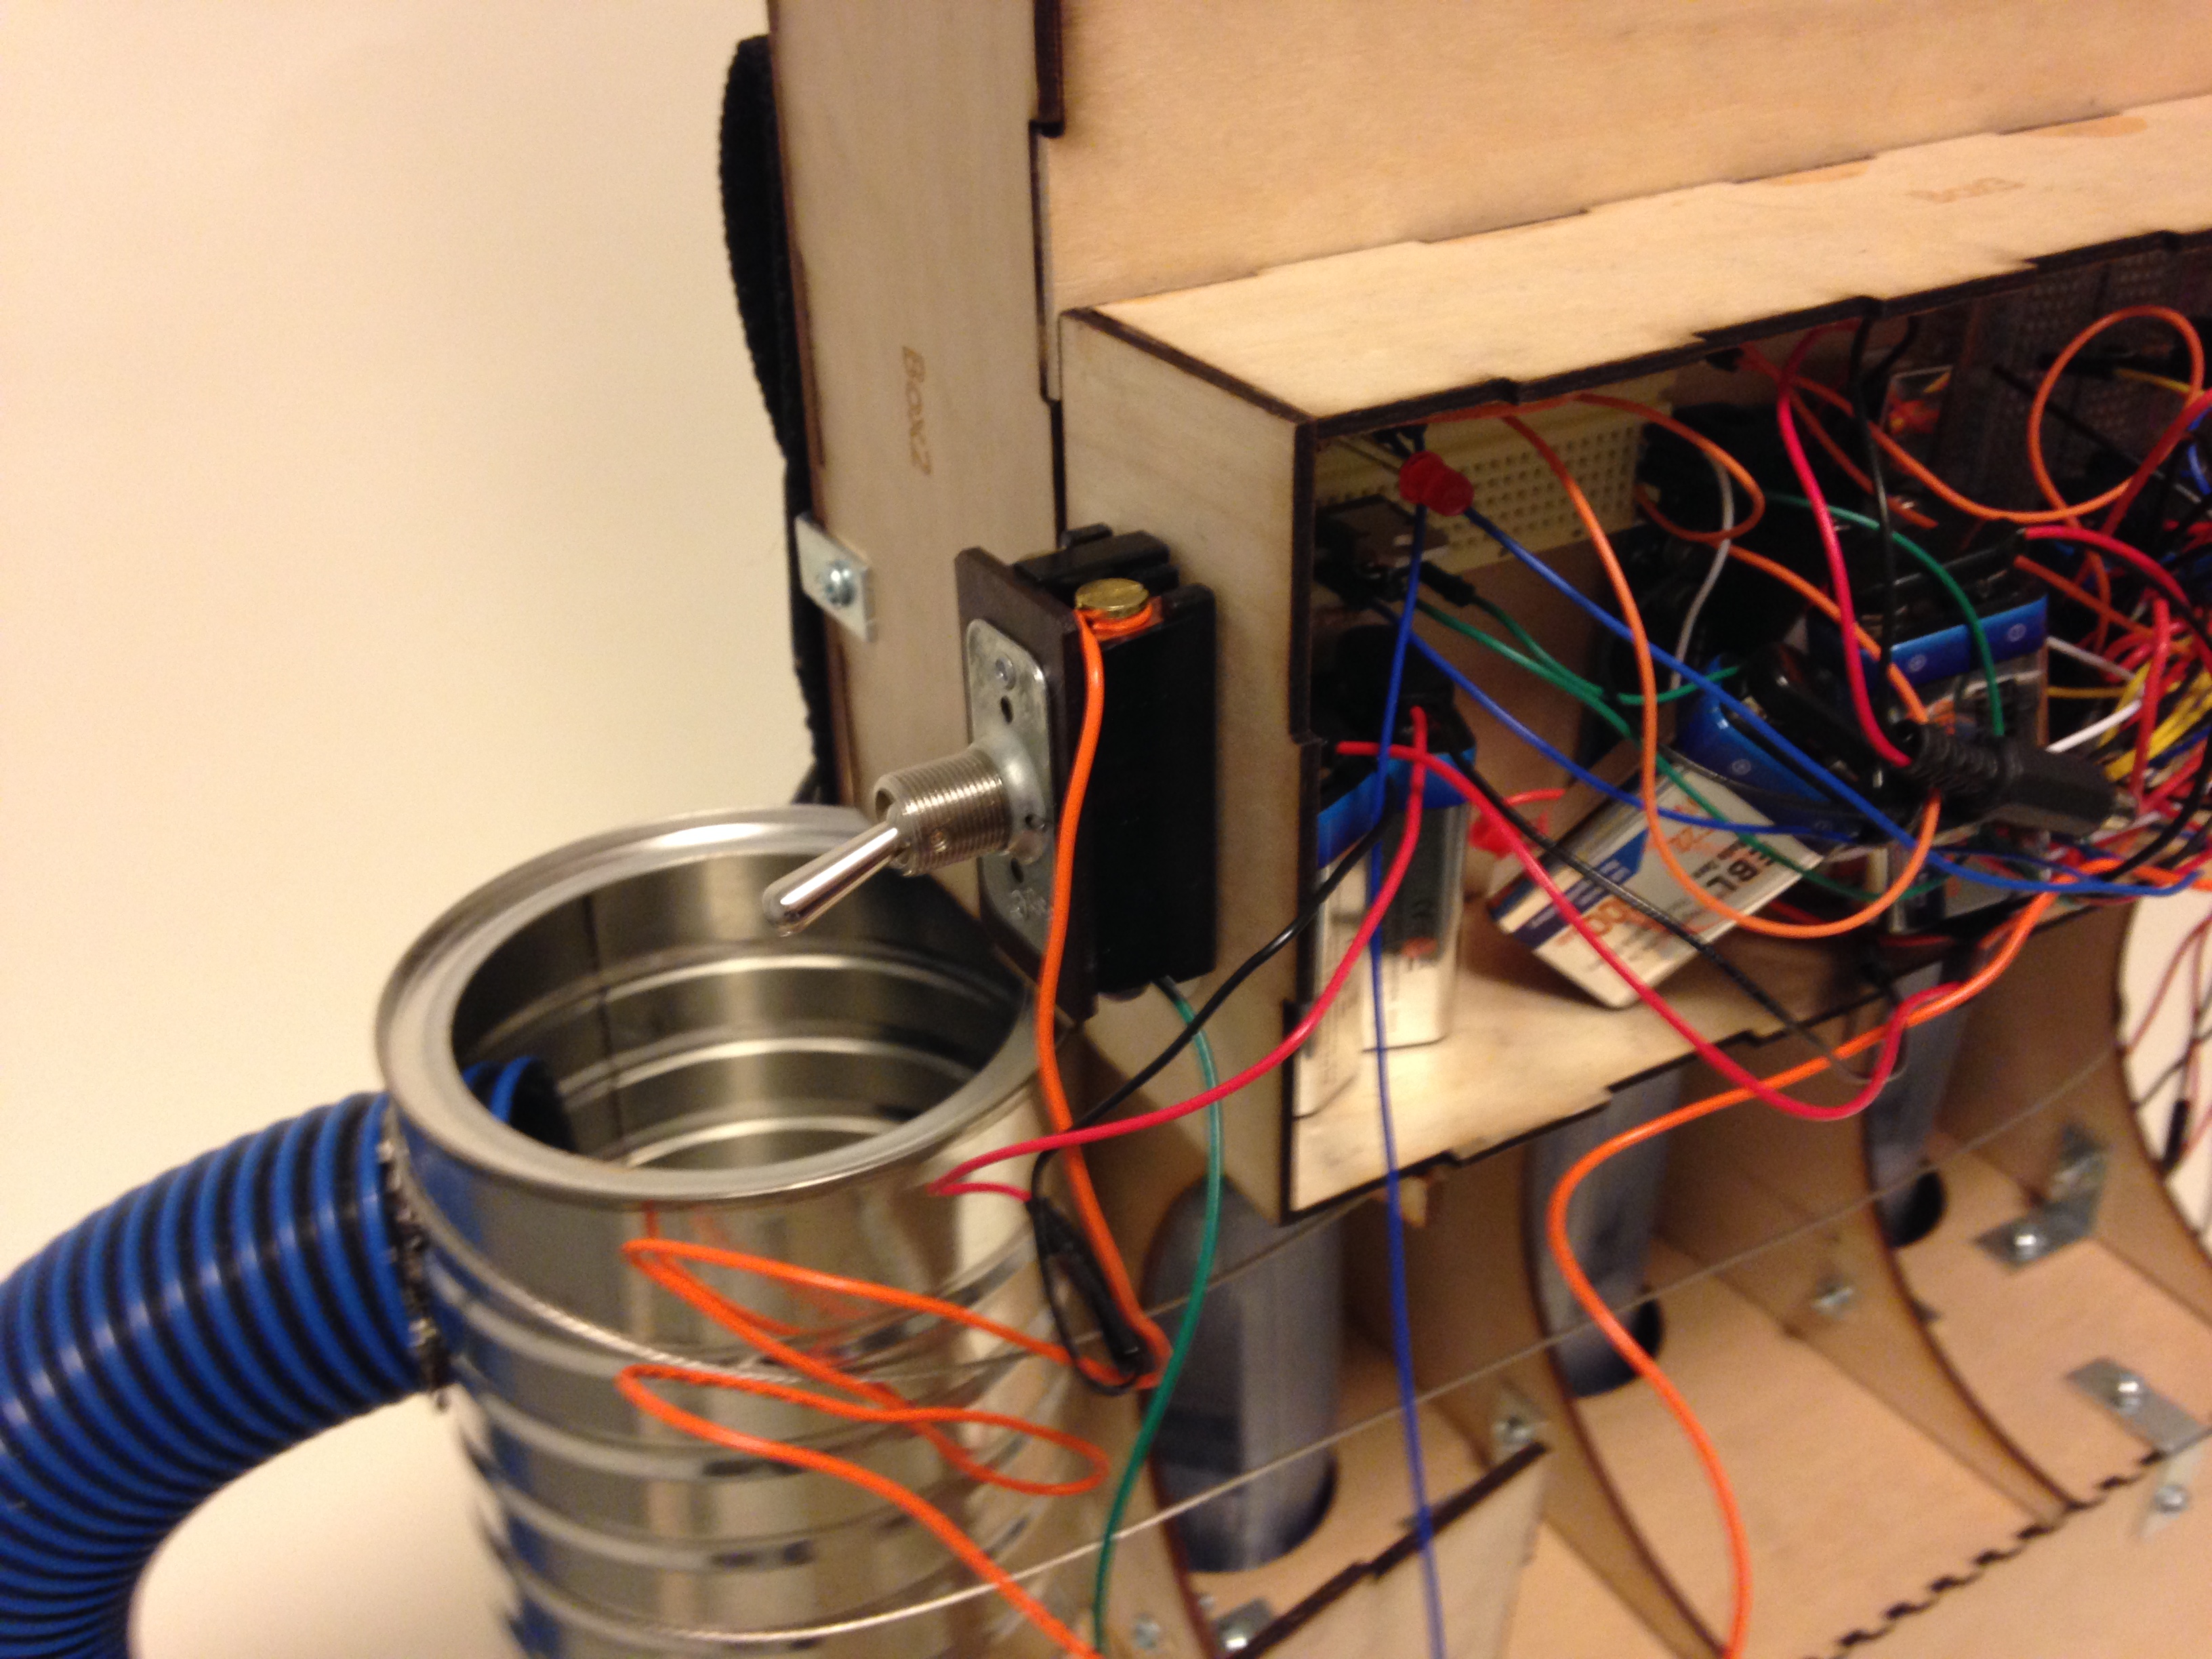
struggles/improvements/reflection:
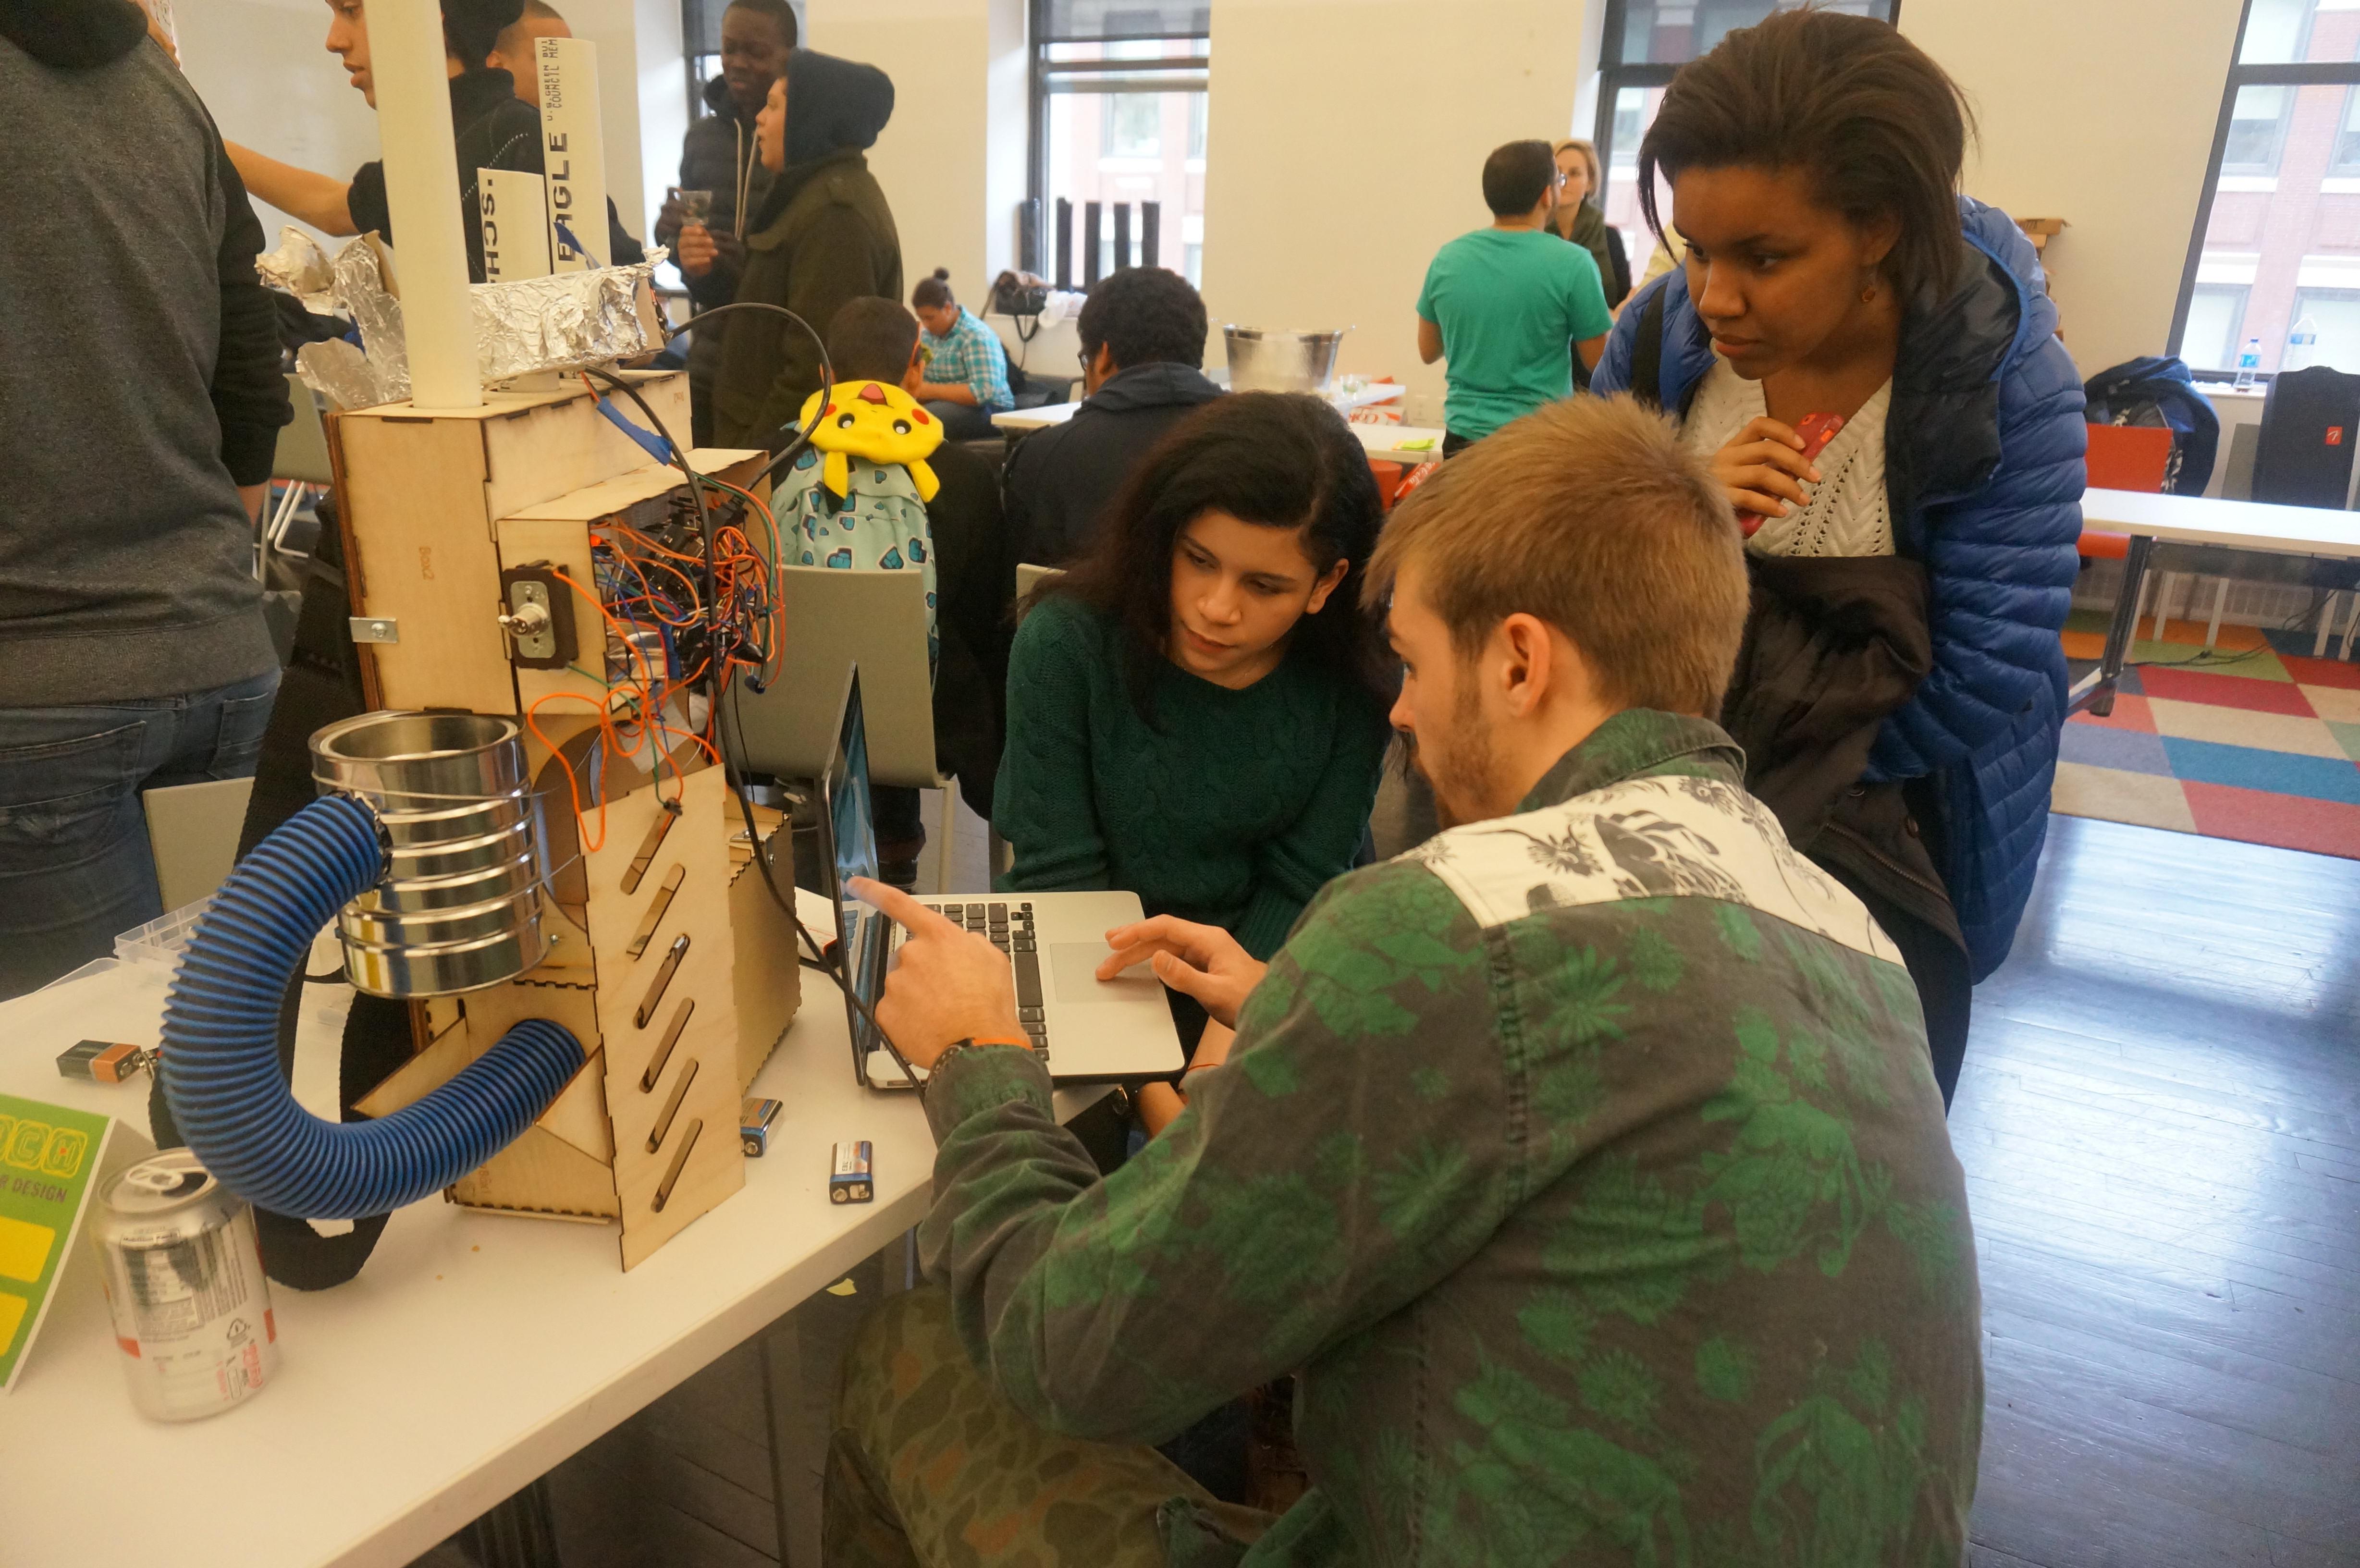
Playtech!
Some photos from the design and technology Play Tech event on D12: