Sonya Sklaroff
Drawing/Imaging:People
Mon/Wed 3:50-6:30pm
2 West 13th Room 701
Figure in Motion Project #3 Step by Step
Starting in Class Monday, September 25
Due Printed Out Wednesday, October 4
The existence of motion is intricately linked to the passing of time. A still image is a frozen moment in time, but if an artist wishes to convey the passage of time, that often means incorporating a sense of motion.
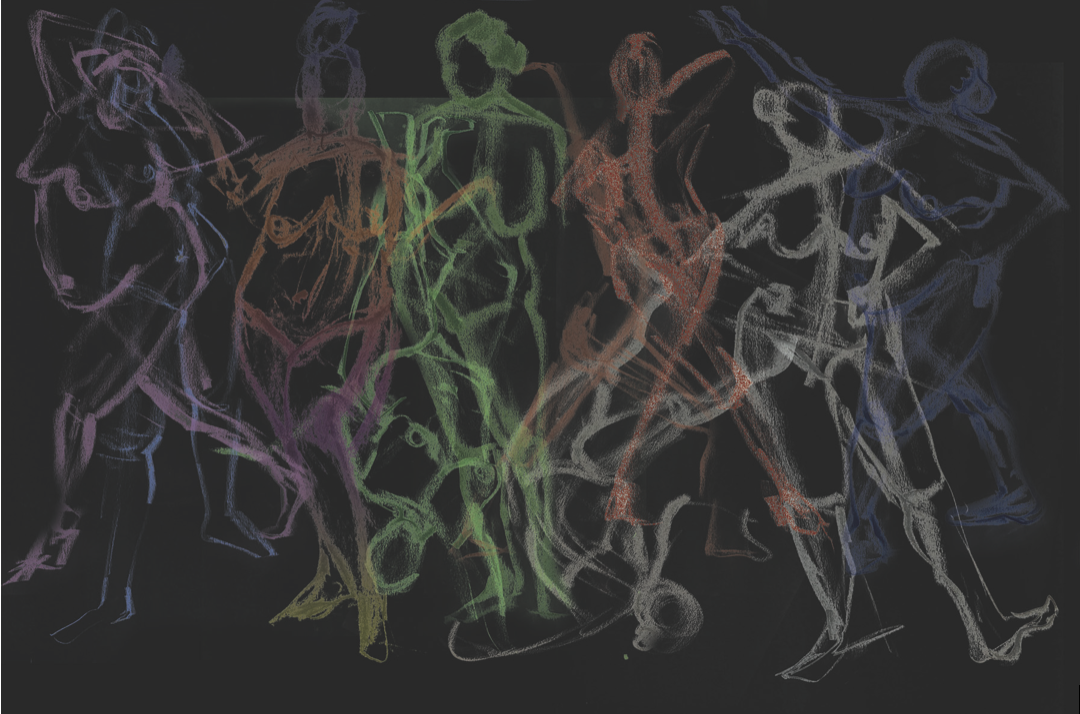
Using the quick studies created in the live ballet class/ in-class gesture drawings and/or blind contour drawings, photograph and import your strongest drawings into Photoshop and use layers to create and manipulate the figure in motion. 15-20 drawings of the figure should be used.
Photoshop Skill Sets: Intro to Photoshop Application, Basic Tools What interface looks like and how to bring in Images, Input/Output, RGB/CMYK, Image Size, how many DPI to print, selection tools (6), Basic Manipulations, scaling/rotating/cut copy paste, Layers: creating duplicating hiding showing. Manipulation of photography, Layer styles, layer masks.
Drawing Skill Sets: Gesture, Blind Contour, Line Quality, Basic structure and anatomy of the figure
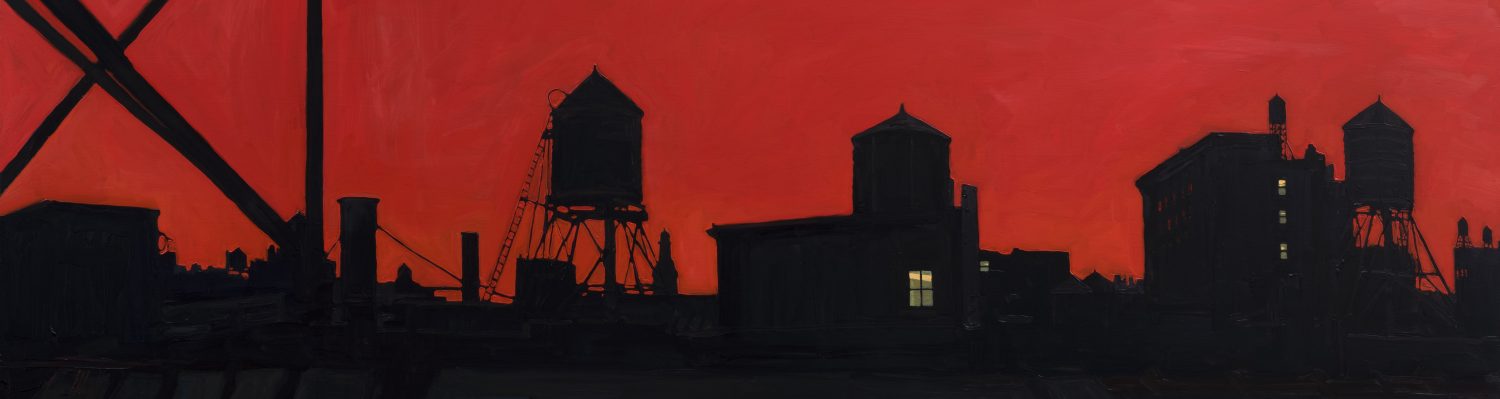
References/Artists to consider: Joan Miro, Edgar Degas, stop-motion photography of Eteinne-Jules Marey, Marc Chagall, Chinese Calligraphy, Julie Mehretu, Lascaux cave paintings, Eadweard Muybridge, Duchamp’s “Nude Descending a Staircase, NO.2”, Umberto Boccioni’s “Unique Forms of Continuity in Space”.
 STEP 1
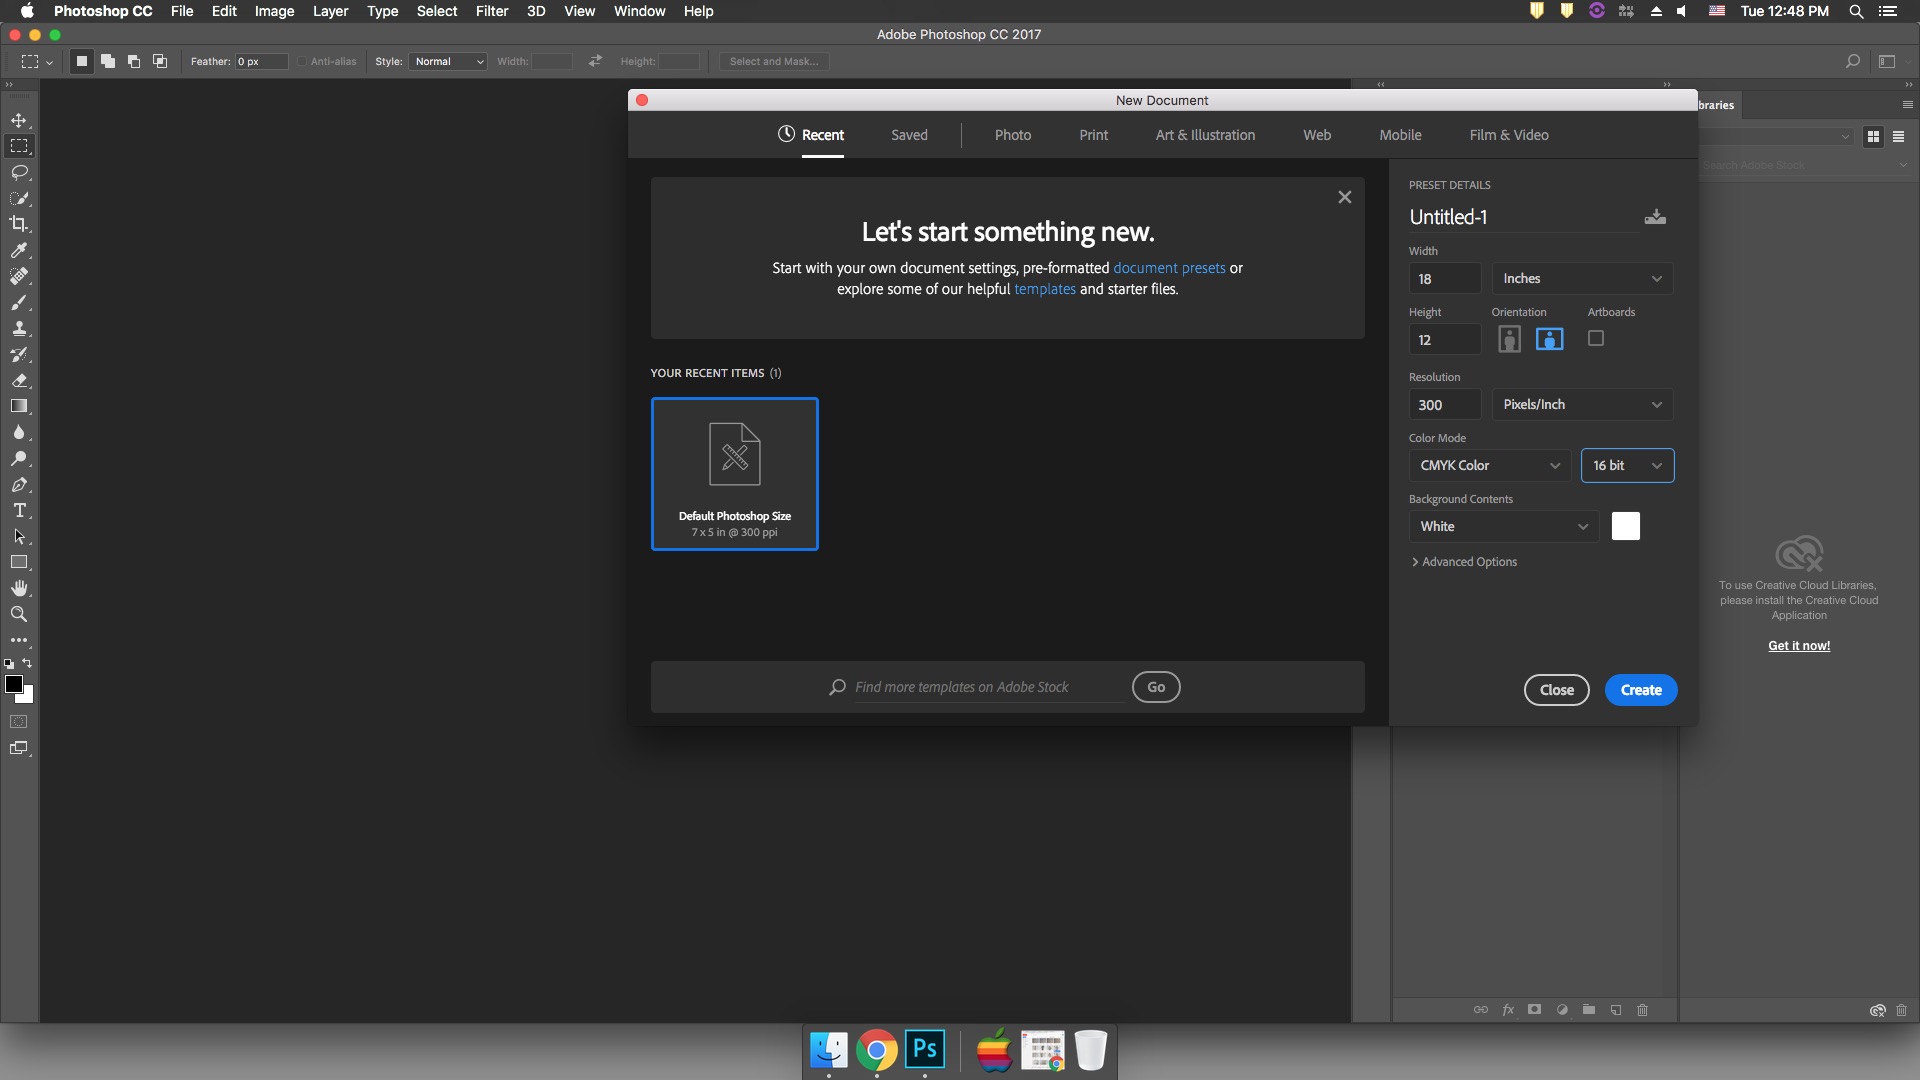
Create a new project, ready for print. Must be larger than 18”w x 12”h, 300 dpi. Make sure the color mode is set to CMYK.
 STEP 2
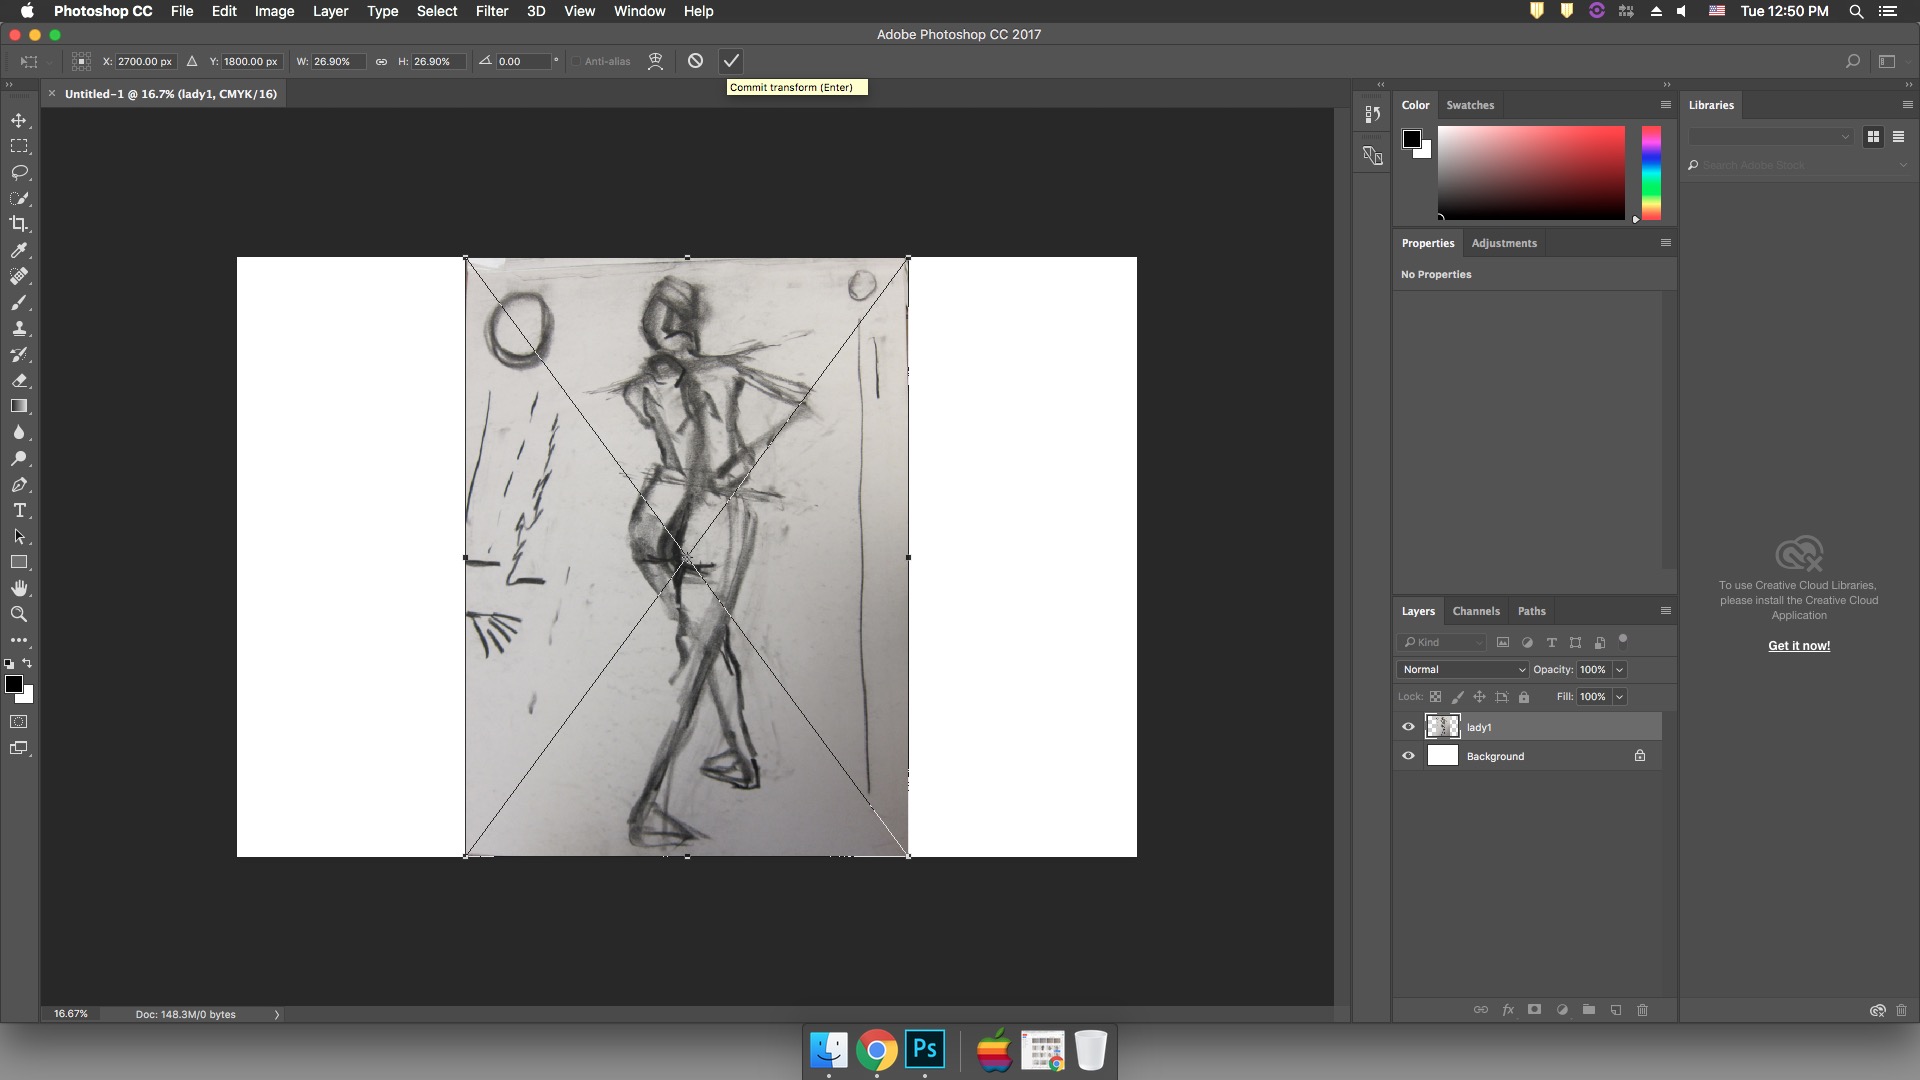
Select between 15-20 figure drawings to bring into the project. They can be gesture, blind contour drawings, or the quick drawings you worked on at the ballet class. When taking photos of the drawings, try and take a photo with very even lighting and high contrast. Drag from the finder to drop them into photoshop. You can do this 1 by 1 or all at once. If you do multiples, you will have to hit the checkmark on the upper menu bar to okay each placement.
 STEP 3
Rasterize every single image by right clicking on the layer and selecting “rasterize”. Then turn off the visibility for every layer except for the one that you are working on.
 STEP 4
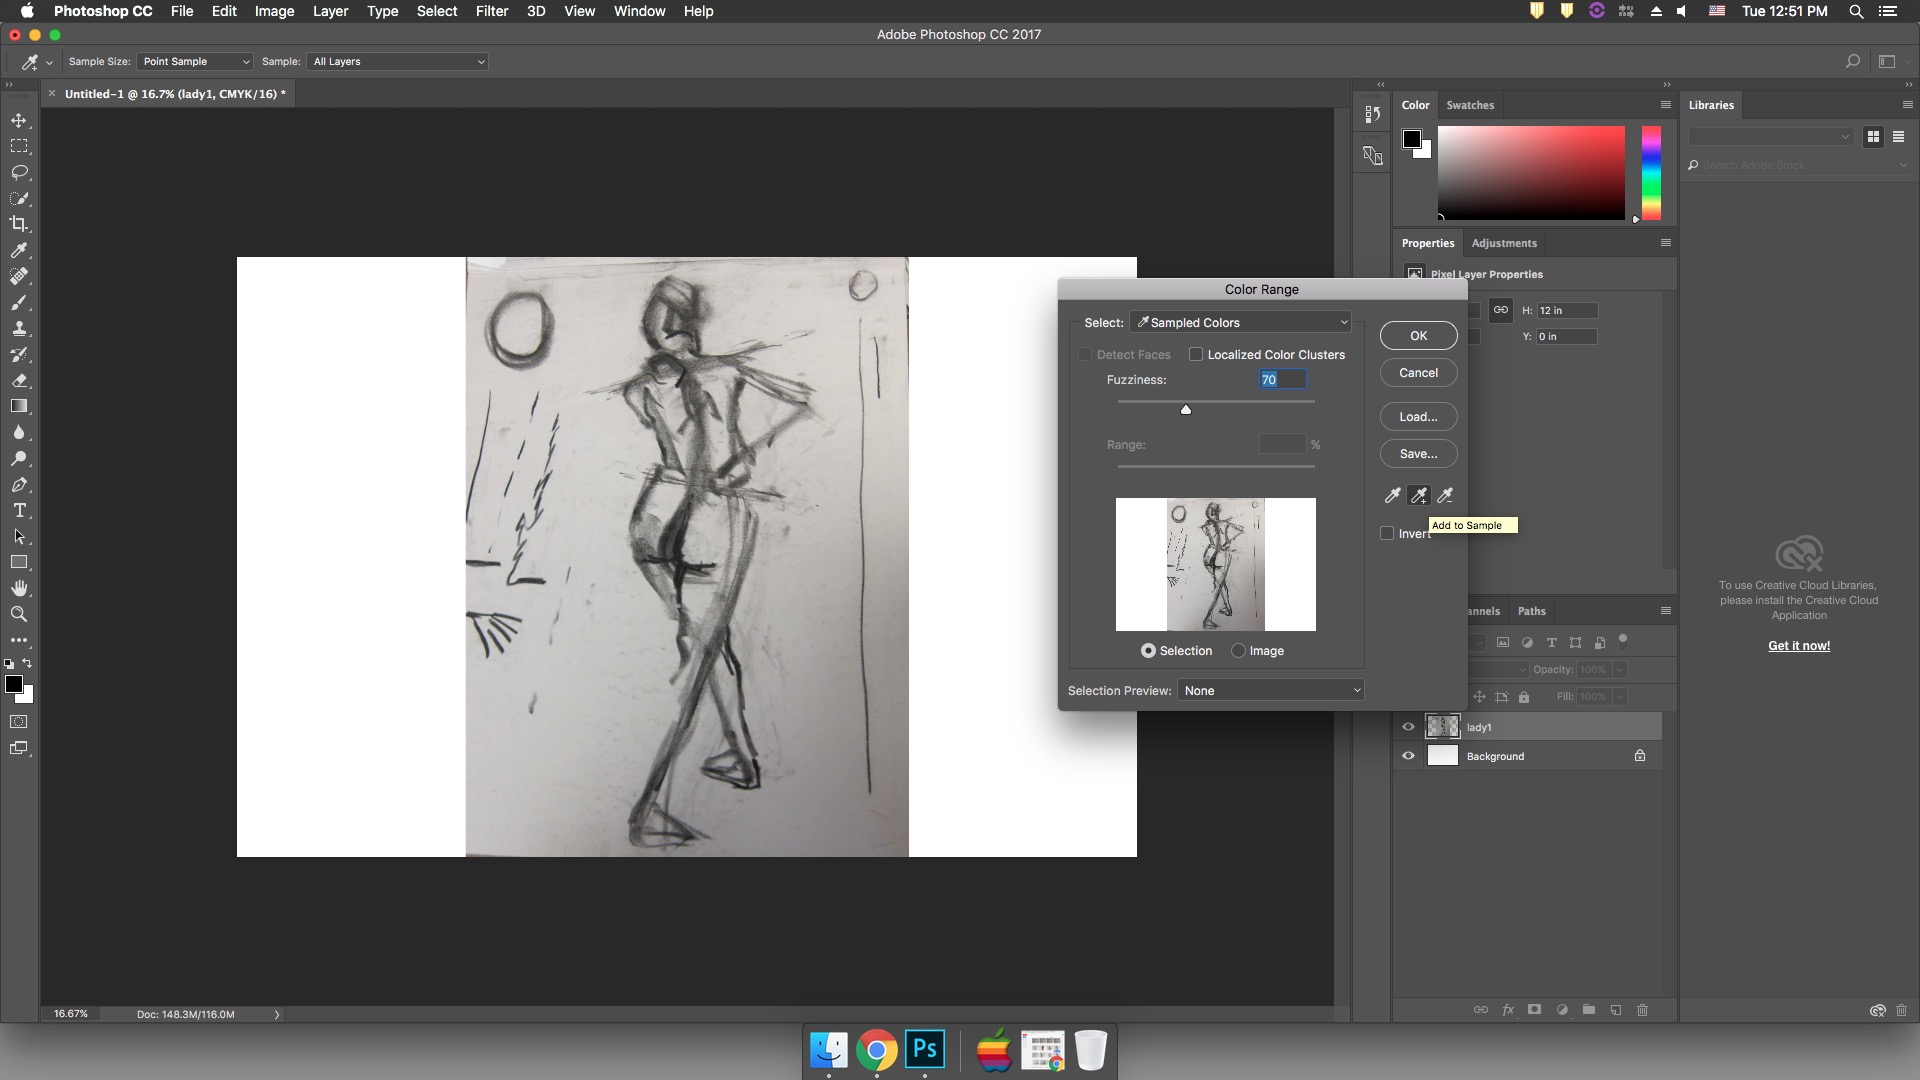
Use the color select tool to select and delete the newsprint, leaving only the charcoal marks. Go to Select -> Color Range. This will open a new window with a black and white version of your piece. Anything that is white is selected. Use the eye dropper with the little plus next to it to select different spots on the newsprint, until everything is white. It should only take 2 – 3 clicks. If it is taking more than 3 clicks, adjust the fuzziness higher. If you are still struggling, your image might be suffering from uneven lighting. Exit the color selection tool and adjust the contrast/brightness from the adjustments menu. Then restart step 4.
 STEP 5
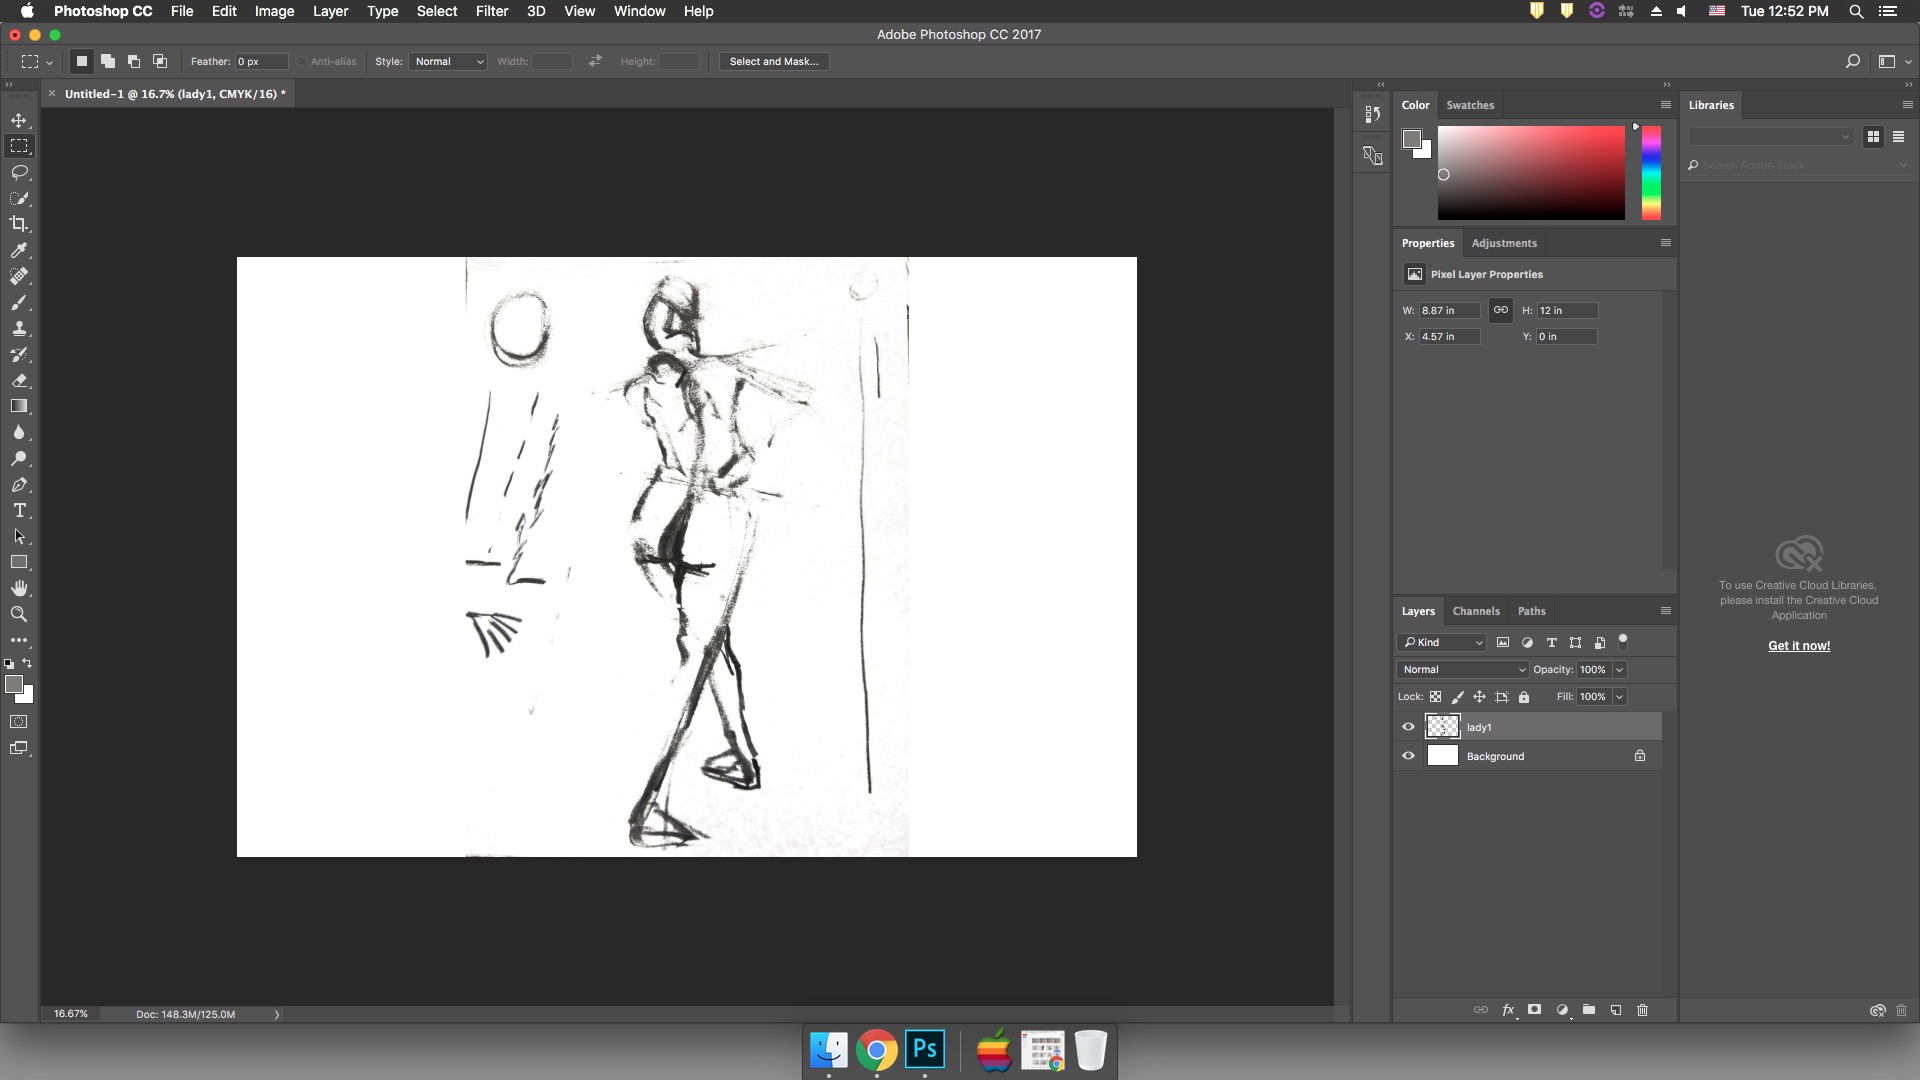
Hit the delete key to delete the selected background, and then deselect by either going to Select-> Deselect or hitting Command+D
 STEP 6
If there are any edges or pieces of newsprint that you missed, you can use the eraser tool to remove them. When using the eraser make sure the brush is set to 0% hardness and is fairly large. If you erase too much, use the undo button, Command+Z and Command+Shift+Z to step back.
 STEP 7
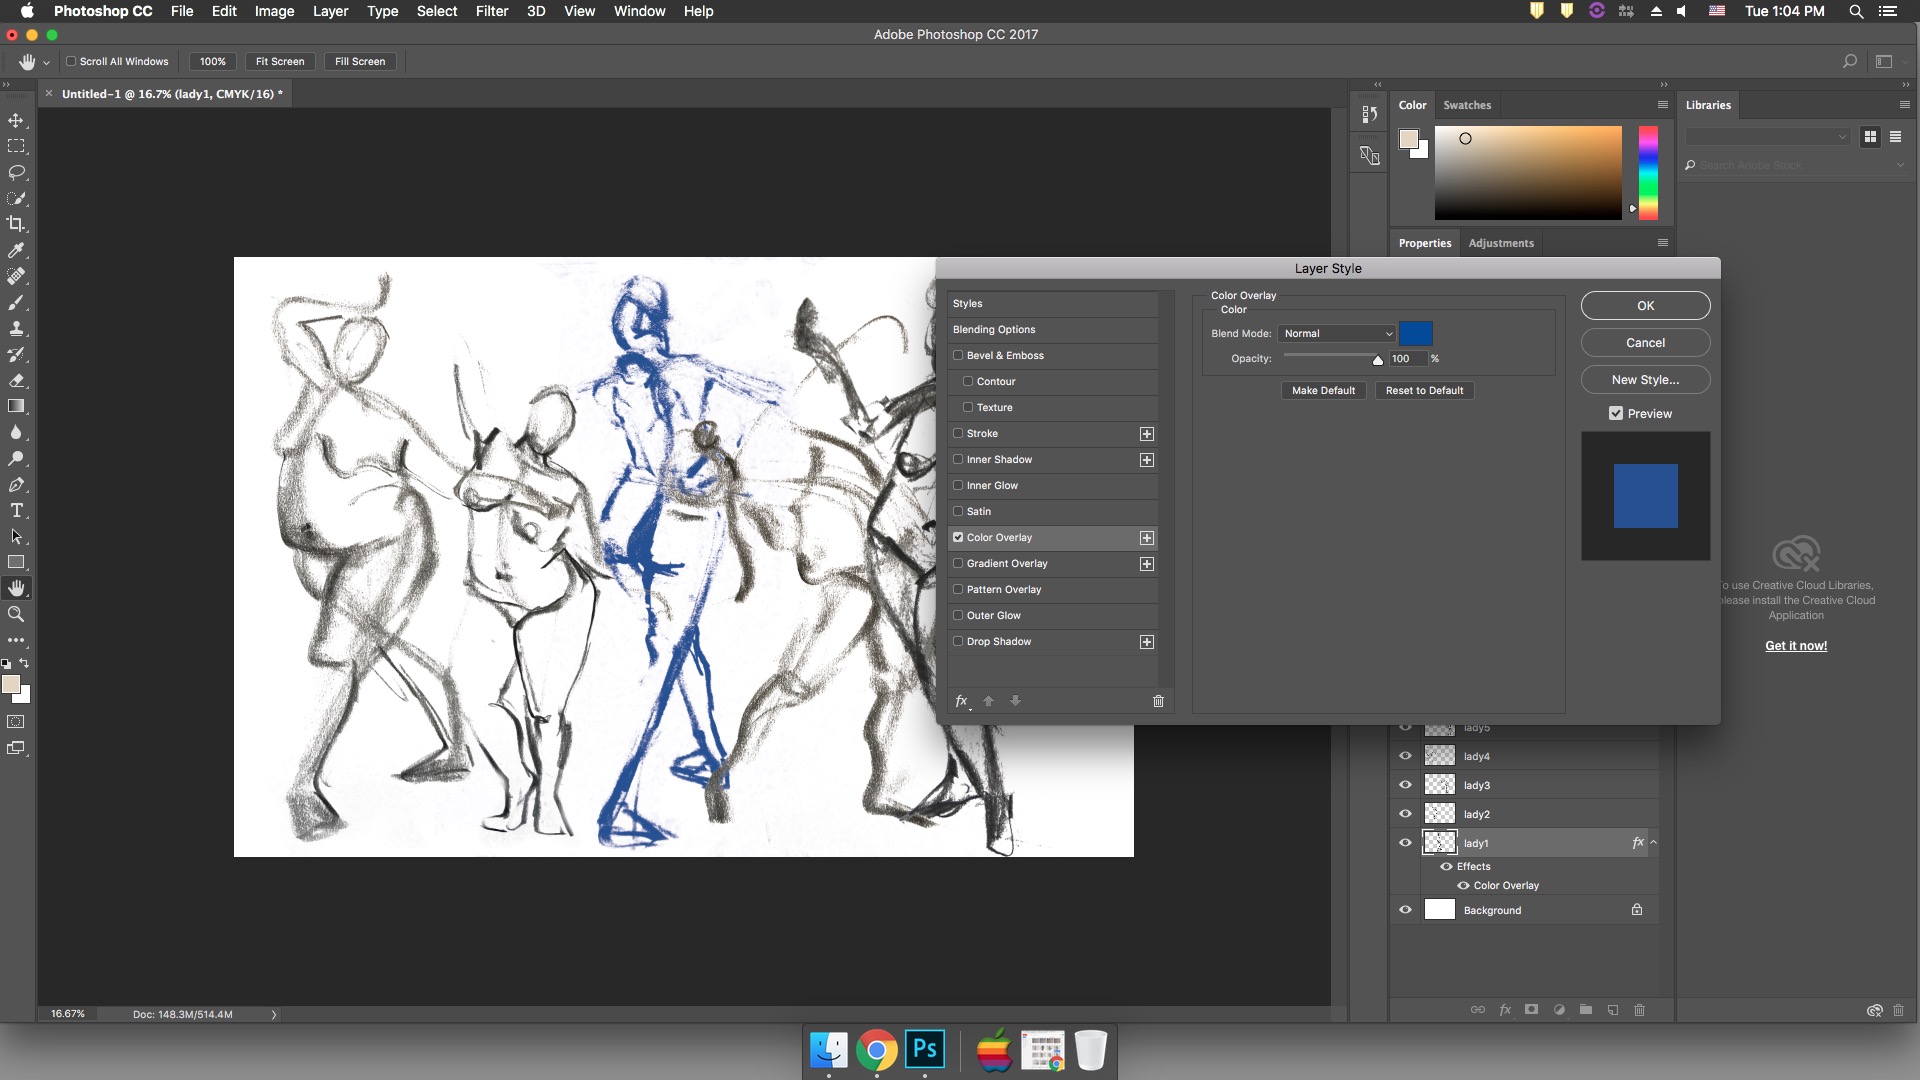
Edit your figures by experimenting with different options. Open up the liquify tool (filter->liquify), use the push, pucker, bloat, twirl tools. I recommend using a large brush with these tools. Use the free transform tool (edit->free transform) to move and resize the figures to create a complex composition. Refer back to the grid project, and the layer styles tool to change the color of your figures.
 STEP 8
Repeat with each figure drawing until complete. I recommend turning off all the non-active layers until you are finished. This will allow you to focus on one layer at a time.
 STEP 9
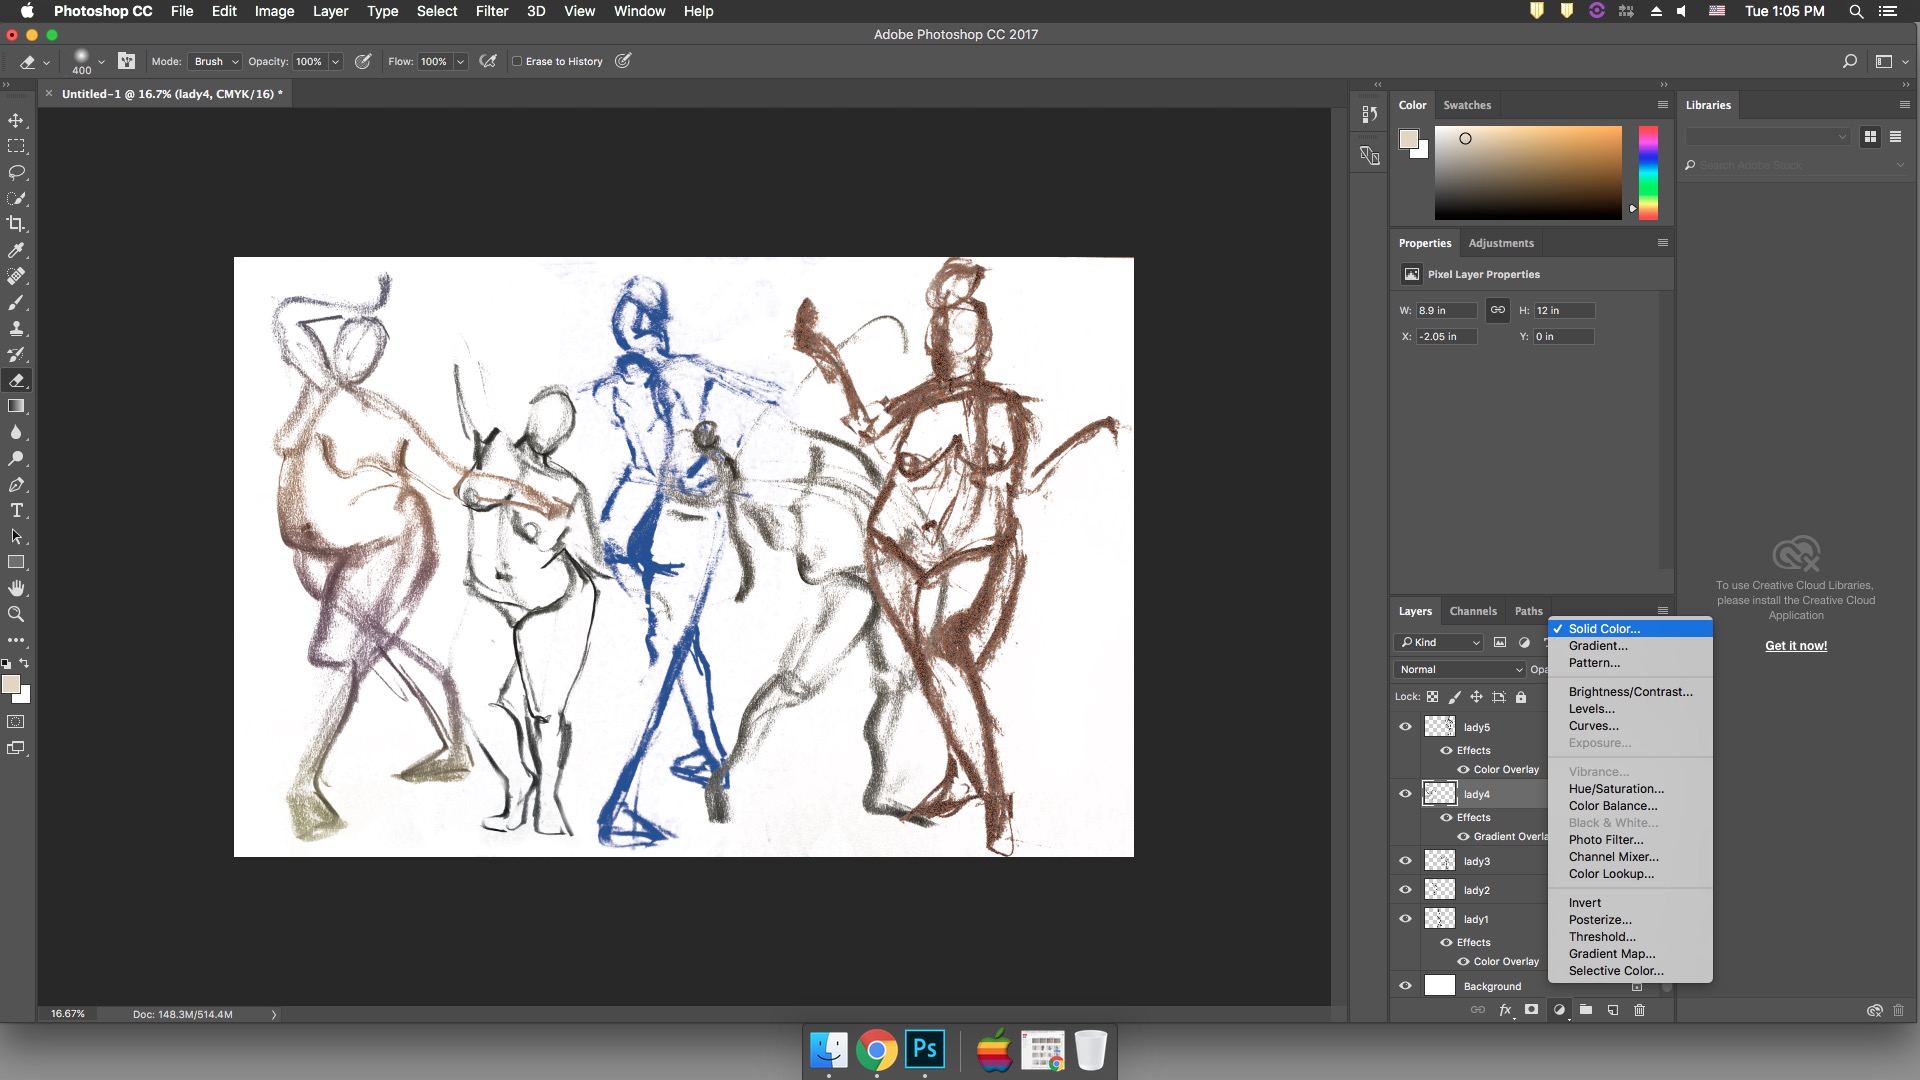
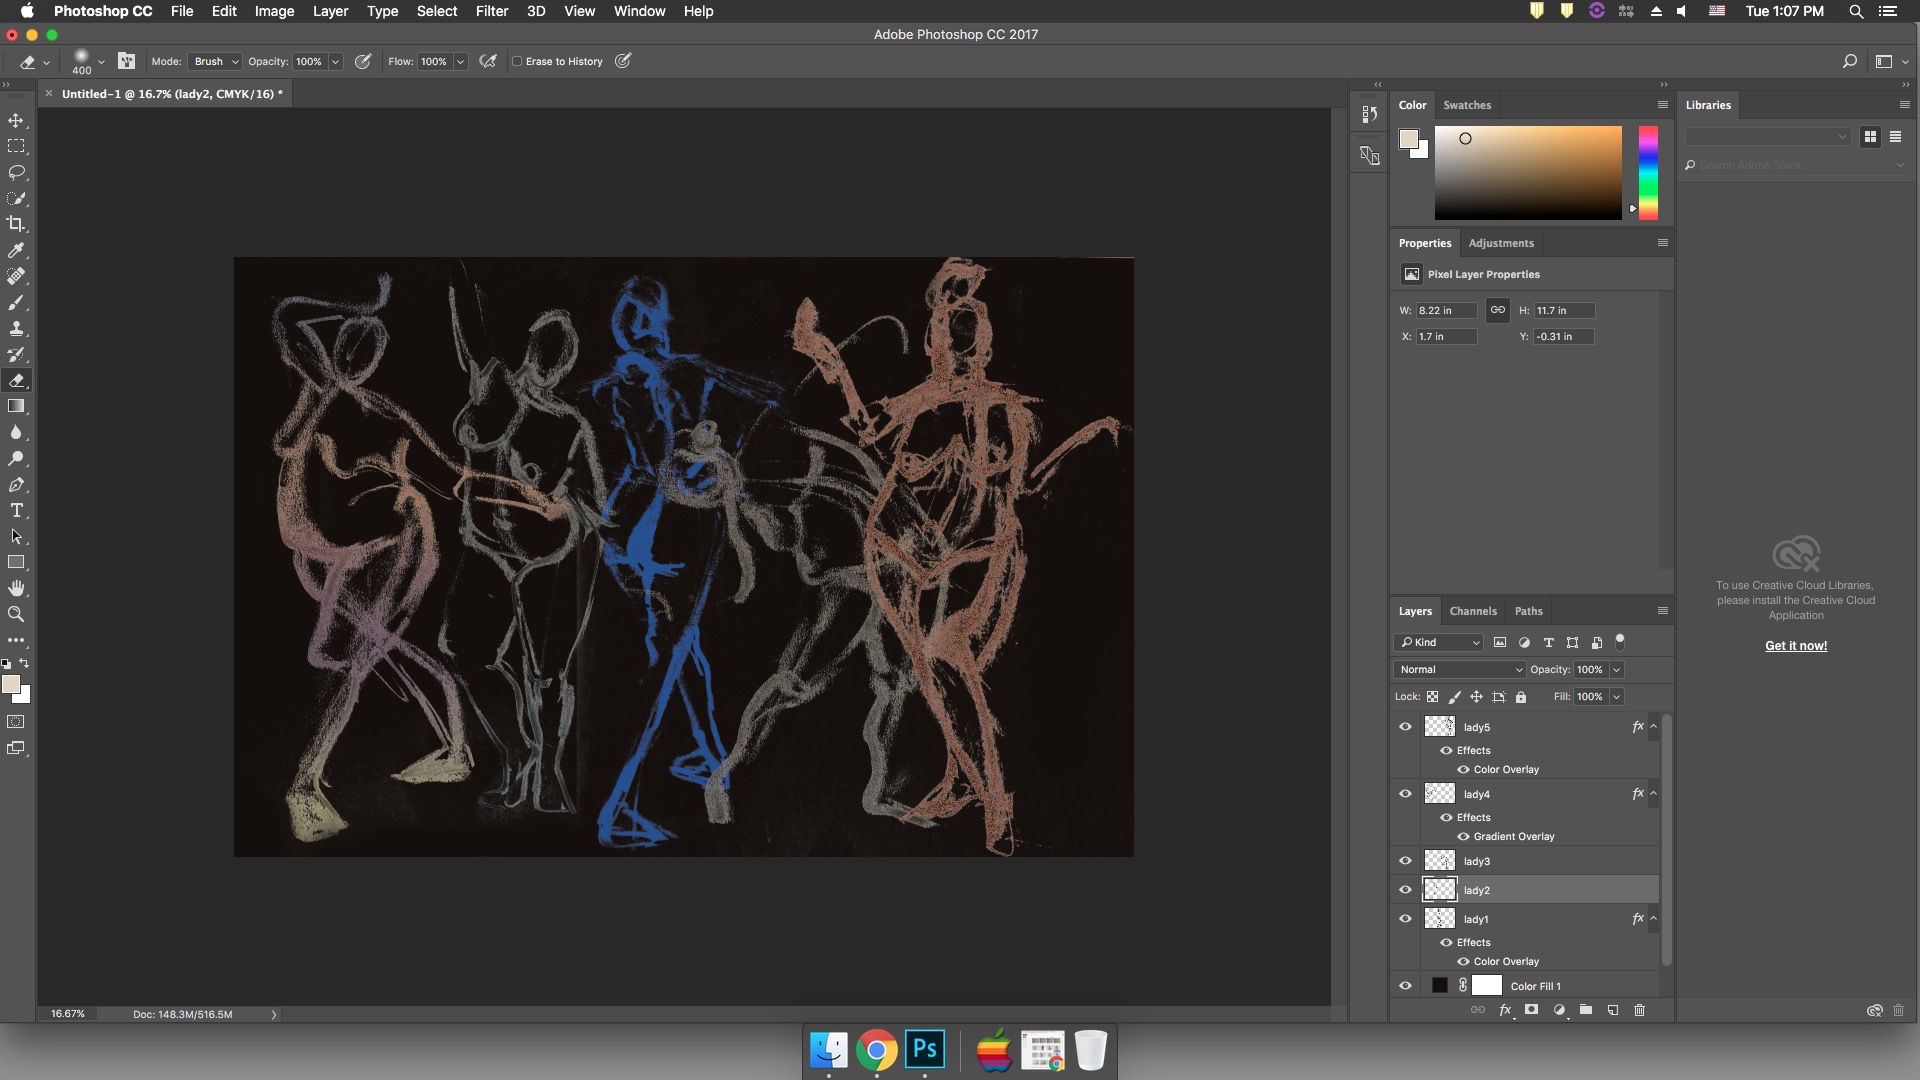 Insert a background color, gradient, or pattern to add depth and contrast to your piece. You can do this by clicking the half-filled circle on the bottom of the layers panel, then selecting the fill you want.