Your images in Illustrator will become complex and intricate but they all start with the simple path. The path in Illustrator is to the pixel in Photoshop. Your image will be composed mainly of paths, and fills.
The path is composed of three main parts, the Path Segments, the Anchor Points, and the Handles. Refer to fig. 1.
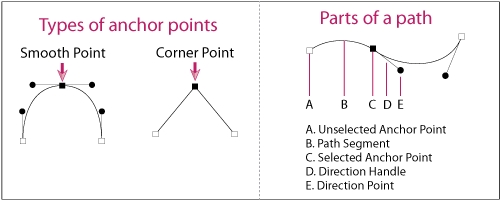
When you use the pen tool you click to create anchor points, which work like connect the dots. Path segments will connect the anchor points. If you click and drag, you will notice that you are pulling out handles. These handles tell the program how curved you want to make the path segment. You can always adjust these later with the direct selection tool.
I highly recommend practicing the pen tool with sites here or here.
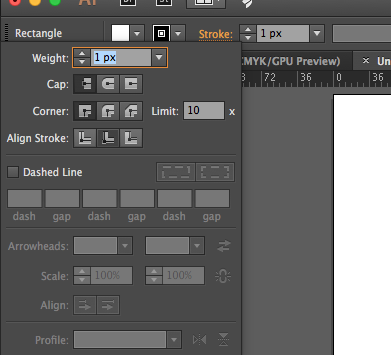
Once you have path, you can define the stroke and the fill. With the stroke selected you can go to the top menu bar and change the color, the thickness, the design, the alignment, and more. To change the color of the fill, select the solid color chip. To change the color of the stroke, select the color chip with the white square in the middle. Play around and see what you like. To open up the menu pictured, just click on the yellow Stroke with the dotted line below it.