PROJECT ONE- Antonia Groh
Sleeve research:


CELINE :
I looked at celines sleeves as I was drawn to a sense of volume within the sleeve. The examples I chose are evident above. I particularly was interested in the last image and the white blouse with a gathered detailing as I felt these were interesting takes on a classic style.


ALEXANDER MCQUEEN
I looked at Mcqueens sleeves as he is known for his incredible pattern cutting as well as originality and detailing. I was particularly drawn to his more voluminous designs as they reminded me of renaissance pirate sleeves. Also I thought his use of different materials yet similar cuts was interesting to observe.


DIOR:
When researching sleeves I was also very in awe of Diors sleeve designs. I again looked more into the use of voluminousity within the sleeve design. I also greatly enjoyed how quite a preponderance of the dior sleevs were rather renaissance similar. Hence I chose to look more into this idea which led me to find these images for inspiration and research.


RENNAISSANCE inspired sleeves research:
Inspired by the sleeves I researched using the designers above I looked more into the shapes mens wear as well had in the age of the rennaissance. This also evidenced some sleeved with folded/pleated detailing which I was very drawn to and interested in


I also further looked into sleeves of the 1860’s especially looking at Sissi empress elisabeth of Austria. The paintings by Franz Xavier Winterhalter evidence rather voluminous sleeves yet they do not feel to overpowering. I enjoyed this design very much and hence chose to include it in my research as it was relevant to the sense of volume I researched from other deaigners and sleeves as well.
MY OWN GARMENTS: (garments I brought in for research)

I chose this Sleeve as it is made from an interesting material – it is very puffy and the cuff is made from stretch so that it hugs the wrist neatly and tightly. This way the rest of the sleeve seems even more voluminous which I was drawn to.

I chose this sleeve as it is off the shoulder which reminded me of the renaissance off the shoulder sleeves as well as sissis sleeve in Winterhalters painting. Also the material is magnificent and so delicate which I felt was interesting to observe in greater detail. Furthermore the way it is attached to the bodice was interesting to me.

This sleeve I chose to observe as it is made from silk yet seems to be a similar pattern to the first voluminous one I mentioned-hence i felt it was interesting to observe how the material changes the “falling ” and movement of the sleeve.

This sleeve I chose to observe as well due to its delicate material and the sensual enigma it provides due to this. Also the lightness of the sleeve due to the chouce of material and puffyness of the tiny sleeve was interesting to observe, as it contrast to the heaviness of the first sleeve. But still conveys a sense of volume and the capturing of the sense of renaissance sleeves.
CREATING STUFFED ARM :
Full Scale:
The First step when creating the stuffed arm was to cut out the pattern in canvas(rather then muselin) as it is more sterdy and hence better for this project. I then continued the process by stitching along the front of the arm (vertically) using red thread, as well as stitching across the arm (horizontally) twice. I also stitched along the lower part of the arm using dark blue thread. I did so using longer stitches so that the thread would be more visible.


I then sewed the needed elbow dart, a circle dart, so that I can continue my process.

In the next step I also used red thread and stitched a line in the center of the piece attaching the arm to a mannequin (on both pieces). Then I assembled the top part of the stuffed arm, by placing both “good sides” onto one another and assembled these, ultimately turning the triangle shape inside out to create the correct piece.

Now I closed the arm by stitching along the side of the arm and then turning it inside out so that the stitching is insite. I then attached the previously prepared triangular shoulder part. (sewing it on top of the arm, about where the shoulder would start) Next I prepared two ovals (one small, one larger) to close the top and bottom of the arm.

First i handstewed the lower (smaller) oval to the bottom of the arm where the wrist would be, then I filled the arm with stuffing (wadding).


Last I closed the top oval (close to the shoulder part) by hand stitching it.
Half Scale:
For the halfscale stuffen arm I repeat the exact same practice and process as for the Full scale stuffed arm.
SLEEVE PRACTICE:
Raglan sleeve:
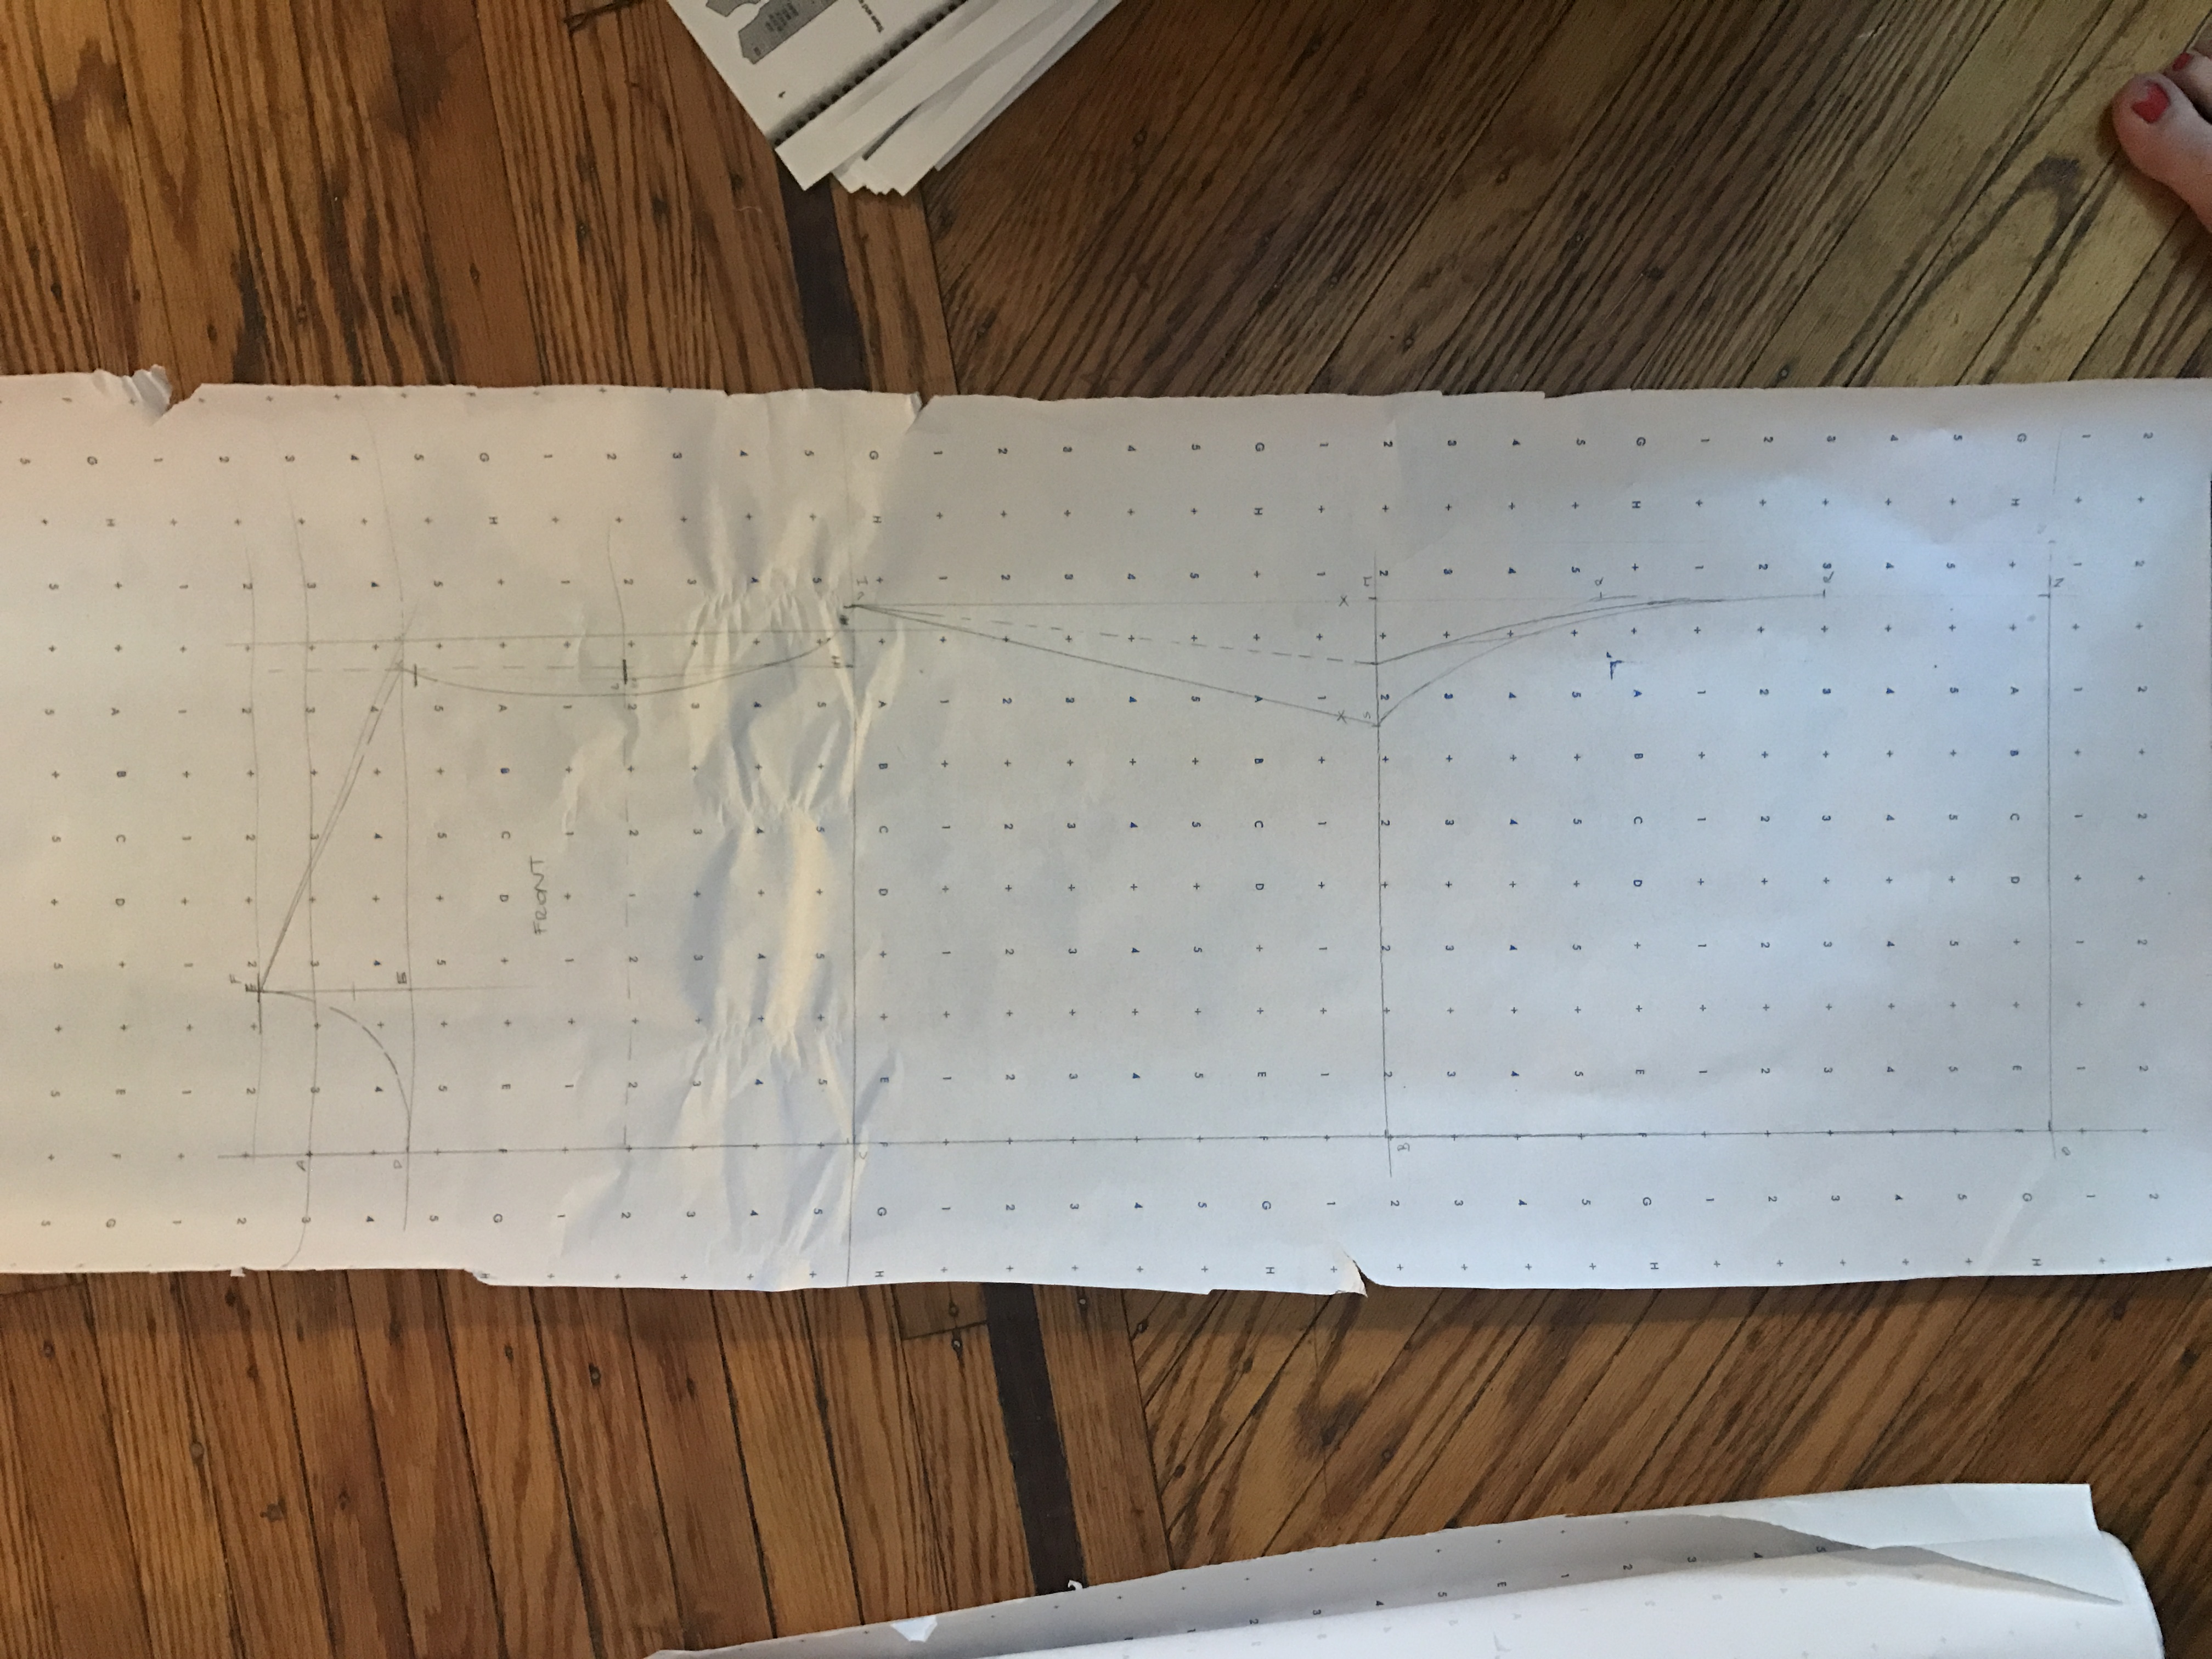
pattern:


For This sleeve I first drafted a pattern using the normal bodice and sleeve,then placing the front and back bodice at the top of the sleeve and measuring the distance between to create the mew measuring of the distances. Then evening put any curves that have been distorten to ensure smooth stitching lines.


So that I would get this pattern:

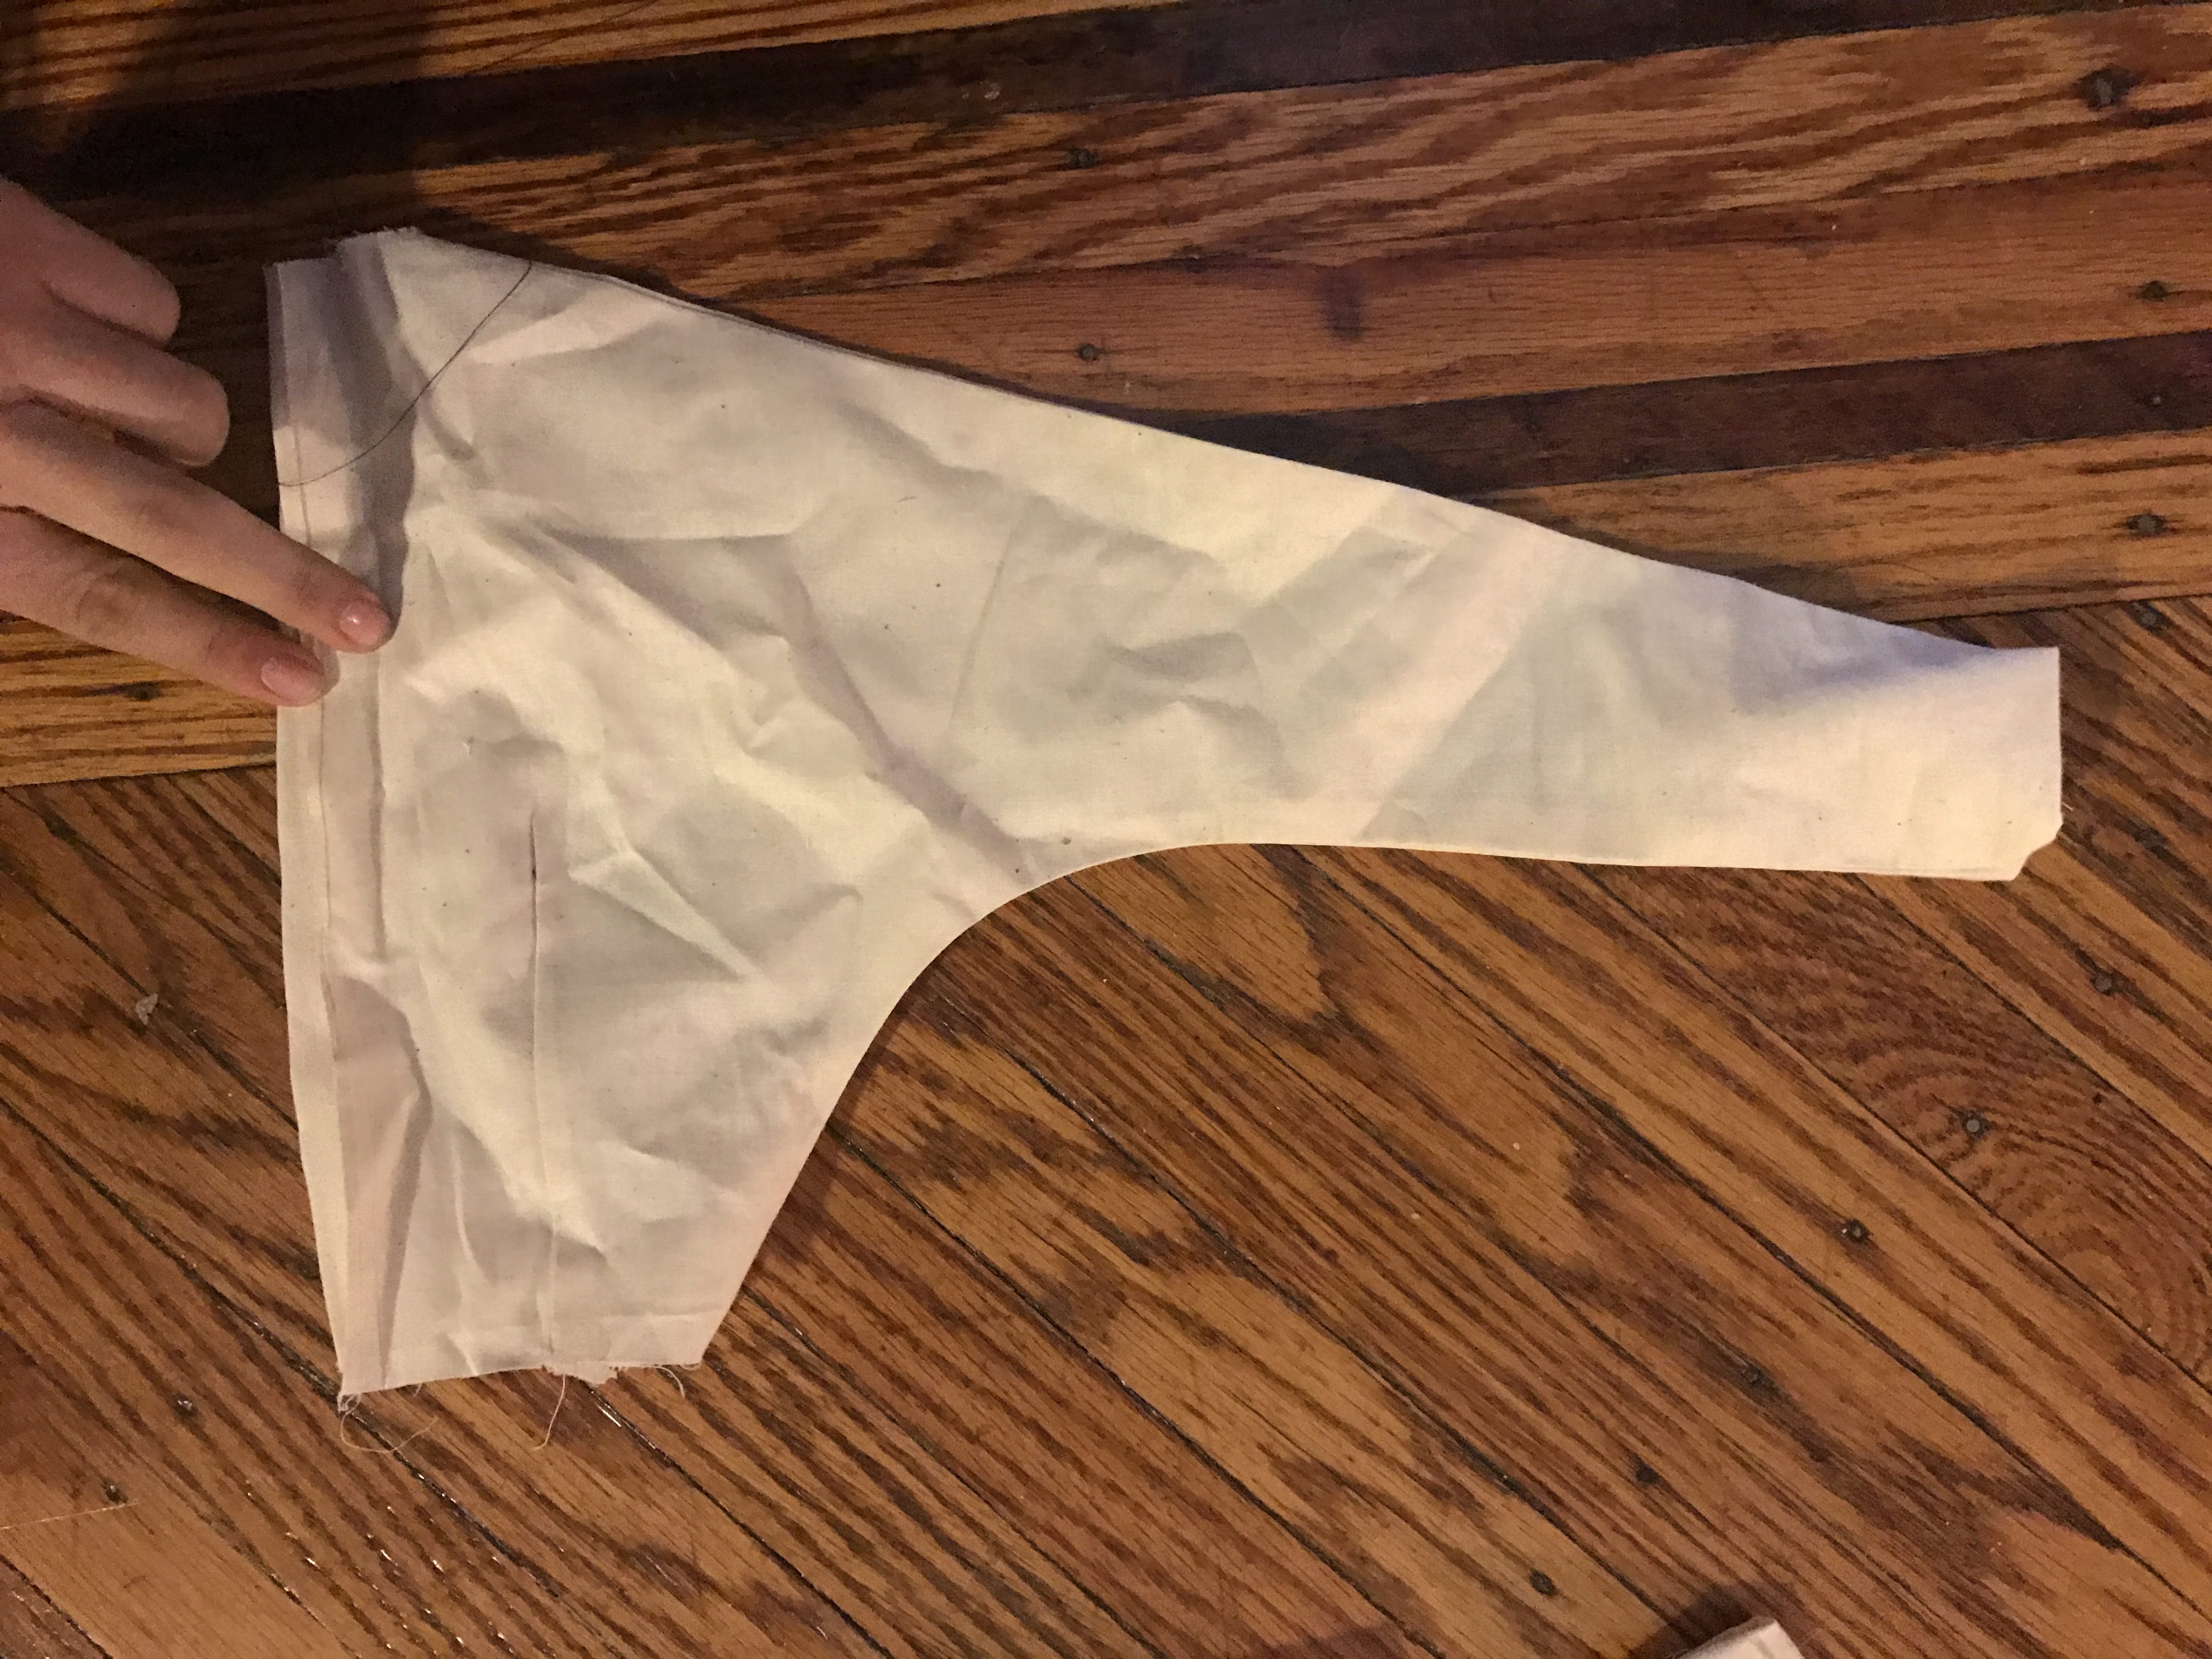
Finished sleeve:


Second sleeve exploring:
basic set in sleeve with fullness:
For this pattern I used the classic bodice pattern and sleeve pattern with a dart at the elbow.
I cut all patterns out of muselin and then started to sew in the darts. After I had done this I closed the sleeve and eased it in at the top. I then assembled the bodice and attached the sleeve to the armhole and finished the piece.


process:


finished sample:


Third sleeve : Kimono Sleeve:
For the Kimono sleeve i drafted the pattern using the classic bodice pattern. Then taking out the dart from the shoulder and adding it to the kimono sleeve (side) . I did this by turning the pattern using the notches as guidence. I then used the patterns to build the draft and ultimately the pattern for the front and back kimono sleeve.


Pattern (Finished:)


Finished sleeve :(Kimono)
To assemble the sleeve I cut out the pattern from muselin. Then sewed the darts. Next placed both “good sides” onto one another and stitched along the sides to create the sleeve. I then turned it inside out so that the right side was outside again.


Process of Project:
(making my own three sleeves/ sleeve exploration experience)
The first step was to come up with ideas of different designs. So I designed a variety of sleeves but then chose to go with these three as I felt they were the most interesting and relevant towards my design


I then started to create the patterns:
sleeve 1:
Sleeve 2:

Sleeve 3:

I then started creating the sleeves.
Sleeve 1:

the first step was to cut out the bodice and create half a bodice for all three sample sleeves and then a full bodice for the main jacket. So I used my fabric scissors to do so and cut out all the individual front and back bodice pieces and sewed them together. However before doing so I sewed the darts etc so that I could create the bodice properly.

Then after having sewed the first few bodices, I continued with the preparation for the sleeves.
first I created the raglan sleeve. However this needed me to create an extra fabric first as I was experimenting with pleates and thereforw pleated an entire section, making my own fabric, which I then curt the pattern out of.

I did this by cutting a lond rectangular piece if fabric which I made aure was wider then the pattern. Then I started to slowly build the pleates by folding the fabric every half and inch and sewing a line. This way slowly but surely the three dimensional fabric was created.


I then placed the pattern onto the fabric and proceeded to create the sleeve.


However as I only wanted the pleating to be on the sleeve, I made aure to cut only part of the pattern using the pleated fabric and the bodice part with smooth single coat muselin.


I then finished sewing the sample together. First finishing the sleeve and then setting it into the bodice. One thing I had to be very careful of is to make sure all the pleates are perfectly alined and matching before I could sew the piece. But I did make them aline which i was pleased with.
NEXT SLEEVE. (sleeve 2)
The next sleeve I wanted to create featured one big fold on the side of it. Then gathering it at the bottom of the sleeve so that the sleeve gains volume and the pelate becomes more opened.
The first step again was to crate the bodice- so I cut out the front and back bodice and then sewed the acordimg darts etc.
I then placed the pattern of the sleeve onto the material and fixed it with pins and cut it out of the muselin. However since the design features a rather deep pleate on the side,I had to make sure that I created clips where necessary so that I knew where to fold the pleates. I then Ironed the pleates so that i Could proceed.

To have the folds ironed is important so that when placing the sleeve into the bodice the placement is acurate. Next I then hand hemmed the upper pleated part of the sleeve so that it would not move when I eased in the sleeve and sewed it together with the bodice.


I then gathered the end of the sleeve and clean finished it after having done so.

NEXT SLEEVE: (sleeve 3)
For The third sleeve exploration deaign I created a sleeve with many pleates. This was a little chalenging as it needed me to take quite a bit of measurements. However I am glad I was chalenged as this gave me a chance to overcome this problem and will be good to know for future reference as I had never done a deaign such as this before in a sleeve format and actually executed it with sewing.
The First step again was to cut out the bodice for the front and the back. Then sewing the darts.

I then, having learned from the previous sleeve exploration, to first place the pattern onto the muselin and clip/mark all the folds (especially the middle and two/each outher sides) so that I would know where to fold the fabric. Before continued I also ironed the edge of the sleeve and clean finished it. (the edge where the hand comes out)


I then did was folding the fabric by following the marks and ironing the pleates carefully. The next step again, as in the sleeve 2, to hand hem the top part of the sleeve so that the pleates would stay put and not move when easing in the sleeve. I had to be particularly careful here as I did not want anything to pull in a strange direction, and wanted the pleates/folds to look neat. After having done so I then eased in the sleeve and attached it to the bodice.

I then proceeded by adding on a detail embeliahment on the top of the sleeve. A row of pleates. I created these by cutting out a long rectangular piece of muselin and ironed and clean finished the sides. I then ironed the pleates and hans hemmed them in place. Then I sewed over the pleates in the center of the pleated piece. Lastly I hand sewed it onto the crown/ top of the sleeve.


FINAL PIECE
design:


for the final jacket and skirt I started my process by deciding which sleeve i want to build upon. I chose sleeve number 3 as I loved the way it opened up due to the shape and pleates.
I felt as if the embellished top of the sleeve took away from the pleates however since I decided to create the sleeve without the top detail for the final
jacket.
I created the bodice, first cutting out the pattern out of the museline, (including nitches etc.) then sewing in the darts. I also clean finiahed the neck part of the bodice using a bias band i cut myself. I did so by drawing a 45degree line across the museline and another one 2 inches away from it. Then ironing the edges on bith sides for a clean finish. The next step was to sew the bias band onto the bodice, clean finishing the edges around the neck, bottom of the bodice and front opening. I also hand sewed closures (only the eyes from hook and eye) onto the front of the jacket bodice so that it would lace up. As I wanted to create an effect similar to the lacing of a corset.

The next step was cutting out the pattern for the sleeve.
I repeated the same process as shown in the documentation of sleeve three, marking all the “folding points” the middle and the outside edges alongside my other notches/clips. Then I ironed and cleanfiniahed the edge of the sleeve. Moreover the next step was to iron the pleates again makimg sure they are neat and all the same.
I then handhemmed the top of the pleates so they would not move and closed the sleeve. Then I eased in the sleeve and put it into the bodice.


The Skirt :
For the skirt the first step was to cut out the pattern out of muselin. Then sewing the darts and ironing them. I then set in a zipper in the back. I first opened the zipper and used pinns to pin it in place then slowly and carefully stitched along side the zipper at 2 eights of an inch. I also again created a bias band with with I clean finished the top and bottom edges if the skirt.


Samples: (embellishments experiments)

For this sample I stitched across the rectangular piece of fabric continuously creating little pleats. Then I pinned them
in place and stitched up and down to create this manifestation of the pleates.

for the sample on the left I pinned my pleates randomly (once giving more space on the right, then left, then again right etc) until the fabric created a “s” wavy shape due to this manipulation of folds/pleates. I also reates a sample of just straigt pleates (next to it)

for this sample I played with shape a little bit and simply stitched a variety of thin rectangles and half circles onto another layer of fabric which i had placed under neath. to create this effect and manipulation of the material.

Here I created another version of my first sample but leaving more space between.