The Story of What Happened – Naturally Dyeing Fabrics

My piece for The Story of What Happens details an experience I had working on a project for the class Sustainable Systems. The assignment was to color fabrics with a natural dye using raw scraps from foods or plants. The experiment elapsed for about a week between gathering materials and actually dyeing the fabric, but it was interesting to see this length of time complied into just a few minutes.

My original idea was to just portray this assignment. As we began learning about the different functions on Adobe Premiere, I wanted to change my idea to scenes about my day-to-day life after learning how to use the multi-cam function. However, I decided to stay just using the footage from the dyeing experiment as it would present a stronger piece.

Being able to connect a few of the scenes was difficult. Because this project spanned over such a long period and I jumped between two locations, I had to figure out a way to still connect these jumping scenes together.

For example, there was two points where I skipped from buying supplies from the farmers’ market at Union square and back to my dorm. In order to connect this together, I rearranged some of the stills I used in the film so that it fit better. I also cut down the length of time I spent a the market so that there wasn’t a big focus on it. The Union Square scenes were also turned into black and white to portray that those scenes came before the scenes in the dorm and that there was a distinct disconnect between the scenes.

I also tried to play around with sound. I thought the music went well with the beginning scene where I was walking, which is why I decided to include it mixed in with the sounds of the street noises. I also decided to include a narrative  to explain the entire process that occurred to make the story clearer.

Another effect the I wanted to play around with was the position of the clips. In the first scene. I  cut the scenes at points that matched the beat of the music. Towards the last scene I created a transparent overlay of one scene on top of another to display two correlating actions happening at once.

The last bit of editing I included was including a title scene. At first I didn’t think about putting it in the film, but in the end it felt appropriate to allow the viewer to know what this video was about as it is a sort of tutorial/process explanation.

The video seemed to simplify the time spent on the project. When viewing the video it, I could still sense the hard work put into dyeing the fabric, but the viewer doesn’t feel the dragging feeling of waiting for the for each part of the experiment to finish. It was interesting to get a sense of how both perspectives felt of actually being there in the moment versus just watching the moment happen.

Natural Dying Process

Purchasing

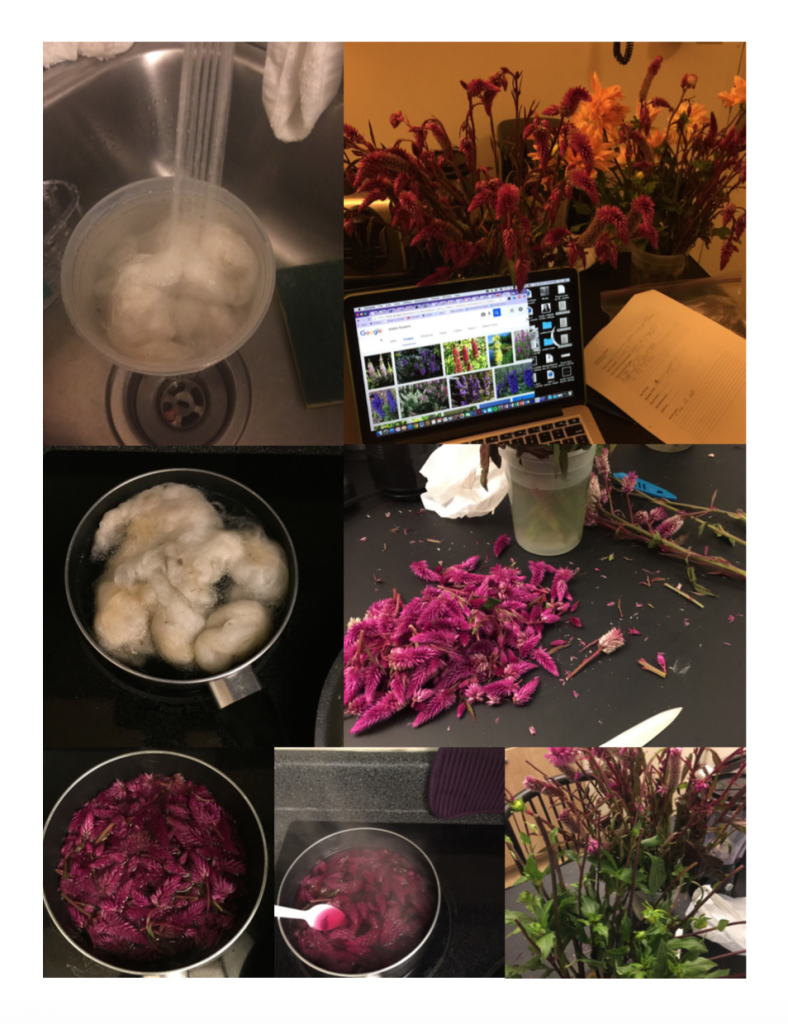
  1. The first part of this process was to purchase the products that would be used to dye the material. I bought Mum Buddy which was a purple flower, chrysanthemum, a more yellow tinted flower, and Concorde grapes. For a small tub of grapes, they cost around $7. Each bouquet of flower cost around $20 each.

Cleaning and Mordanting

  1. Started dying process the day after the materials were bought.
  2. First boiled the cloth material in 4-5 cups of water with Tide for an hour. 4th Heat setting out of 9
  3. Began making mordant: 5 cups of water, 2 tsp of Alum Powder, 2 tsp of Soda Ash, 1 ½ tsp or Tartanic, ½ tsp of soda
  4. Boiled material in mordant for 45 minutes and let cool for 20 minutes

Dying1

  1. Split the material in half and started with the purple dye
  2. Placed 60 stalks of purple flowers in pot with 4-5 cups of water and boiled for about 30 minutes
  3. Added 2 tsp of salt for more vivid color
  4. Cooked material in dye solution for about 1 hour
  5. Poured in plastic container to ferment over night

Dying2

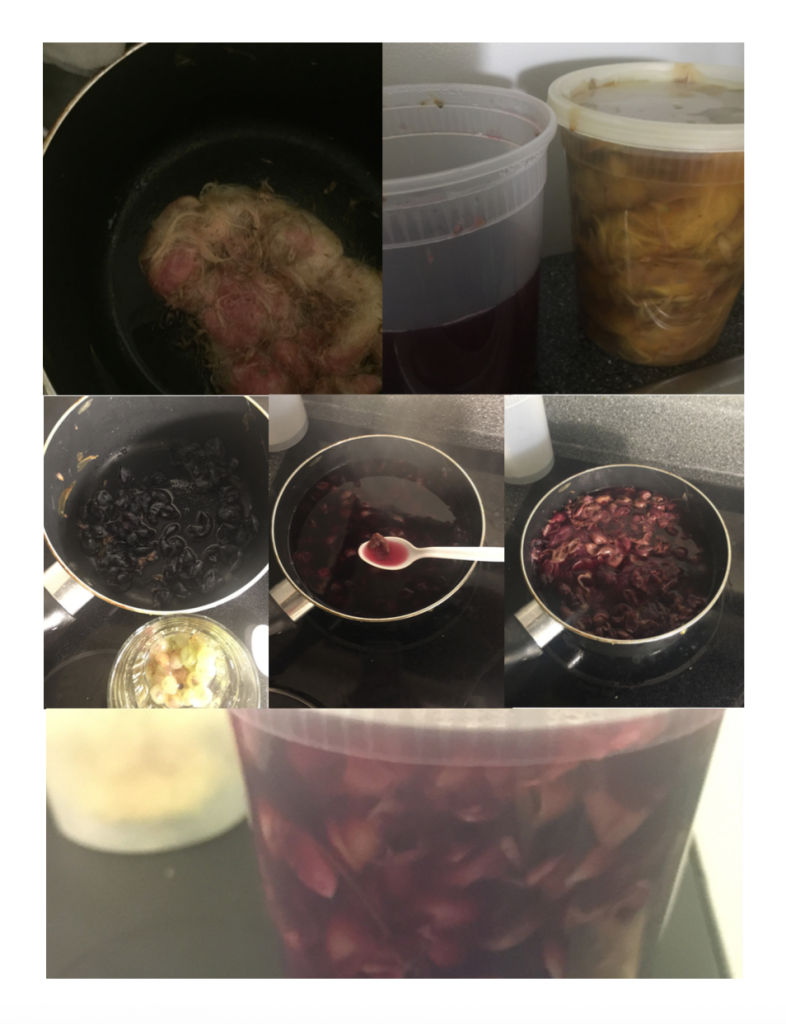
  1. Placed 9 buds and 13 Flowers’ petals in pot and boiled for 30 mins.
  2. Added 2 tsp of salt for more vivid color
  3. Cooked for 1 hour
  4. Poured dying solution and material into container overnight
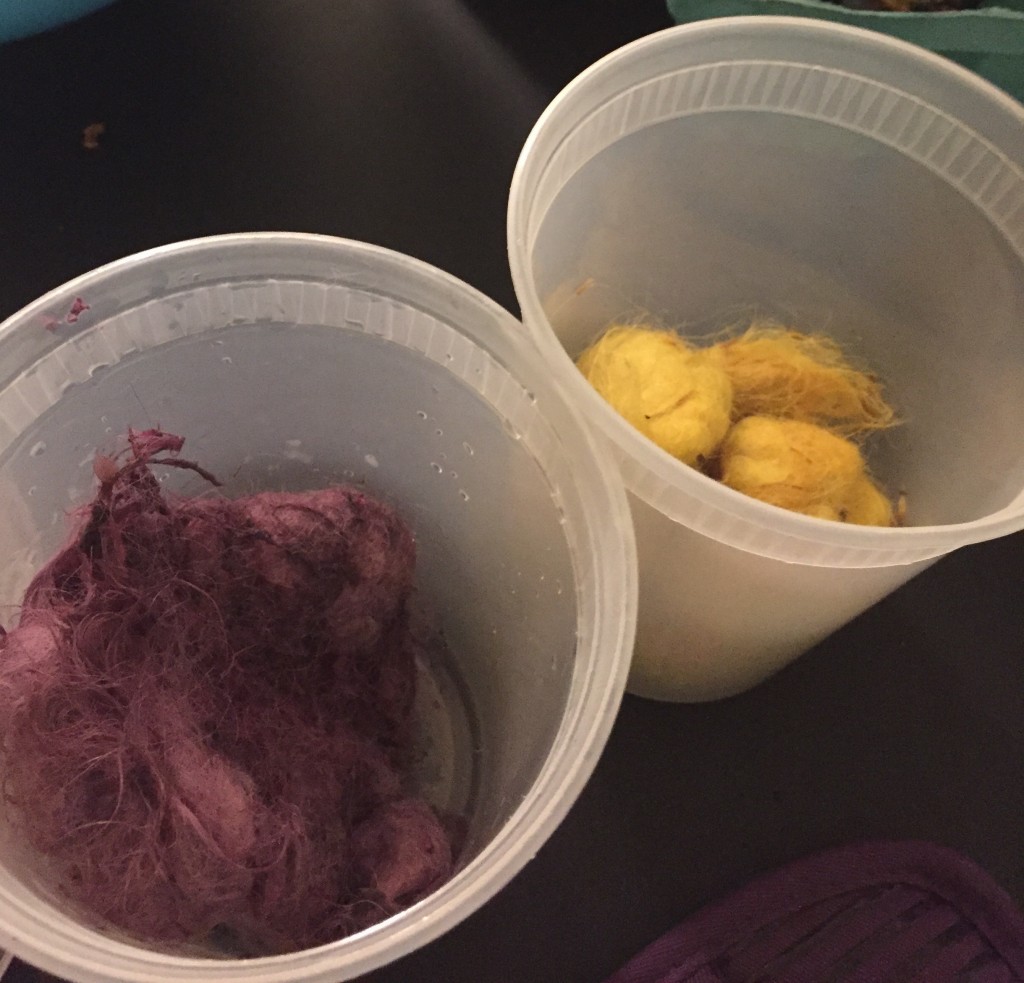
  5. Yellow came out vivid color the next day, so fabric was rinsed and left out to dry over night
  6. Purple did not dye as properly, so decided to red dye with grapes

Dying3

  1. Used 161 grape peels to repeat dying process and fermentation
  2. Added 2 tsp of salt for more vivid color
  3. This material dyed a lot better.

Clean up

  1. Kept plastic tubs to store the fabrics, pot will be kept although not used again to cook anything.
  2. Dye was accidentally dumped down drain instead of kept as a more eco friendly solution for disposal

More on my reflection of the assignment here 

Natural Dyes

FullSizeRender


Screen Shot 2015-10-08 at 10.26.07 PM


Screen Shot 2015-10-08 at 10.26.46 PM


This project turned out to be pretty successful. My partner and I decided to split up the material in  half and dye each piece different shades. One was dyed with a more yellow flower while the other was dyed with a purple flower. The yellow flower came out very vibrant the first round of dying. However, the purple flowers didn’t take as well. It dyed, but it came out a very pale shade of purple. It wasn’t until we put in grape peels that the color really came out.

IMG_0303

We also chose to just add the petals, buds, stalks, and grape peels so that we get rid of any additional colors that may distort the color during the process of dying. The process was very tedious and took a few hours just to apply the mordant and clean the material. The dying solution took less time to prepare. It is easy to understand why not as many people practice this method of dying as there should be.

For next weeks picnic I have chosen to dye an old towel/rag my roommate was planning on throwing in the waste.